
Why Make Your Own Infused Oils?
Homemade infused oils offer numerous advantages over store-bought versions. Crafting your own unique oil blends gives you full control over the ingredients and flavors, allows for creativity and experimentation, and results in fresher, higher quality oils. Understanding the basics of infusing and learning some simple techniques can open up an exciting new culinary dimension.
As we’ll explore throughout this ultimate guide to making infused oils at home, creating your own oils enables you to:
– Carefully select premium ingredients – the exact herbs, spices, garlic, chiles, etc. that appeal to your personal tastes and cooking needs. You can play with different herb and spice combinations, varieties, and ratios to customize the flavor profile.
– Know exactly what’s going into your oil. No mystery ingredients, preservatives, or old, flavorless spices of questionable freshness like you find in some store-bought versions.
– Highlight and accentuate the natural flavors of your ingredients. Proper infusion techniques draw out and concentrate the aromatic essences.
– Produce fresher-tasting oils bursting with flavor nuances. The quicker you use homemade infused oils after crafting them, the better they’ll taste.
– Avoid rancidity or “off” flavors that develop over time with poor storage. You can make smaller batches and use them up more quickly.
– Give personalized homemade gifts for family and friends. Infused oils presented in attractive bottles make wonderful presents for any occasion.
– Potentially save money compared to specialty oils sold in gourmet shops. Once you acquire any necessary equipment, homemade oils only require ingredients.
– Discover a fun, rewarding hobby that sparks your creativity. Experiment with different herb/spice and oil combinations to find your signature flavors.
– Control exactly how strong or mild you want the flavor infusion to be. Customize to your personal tastes.
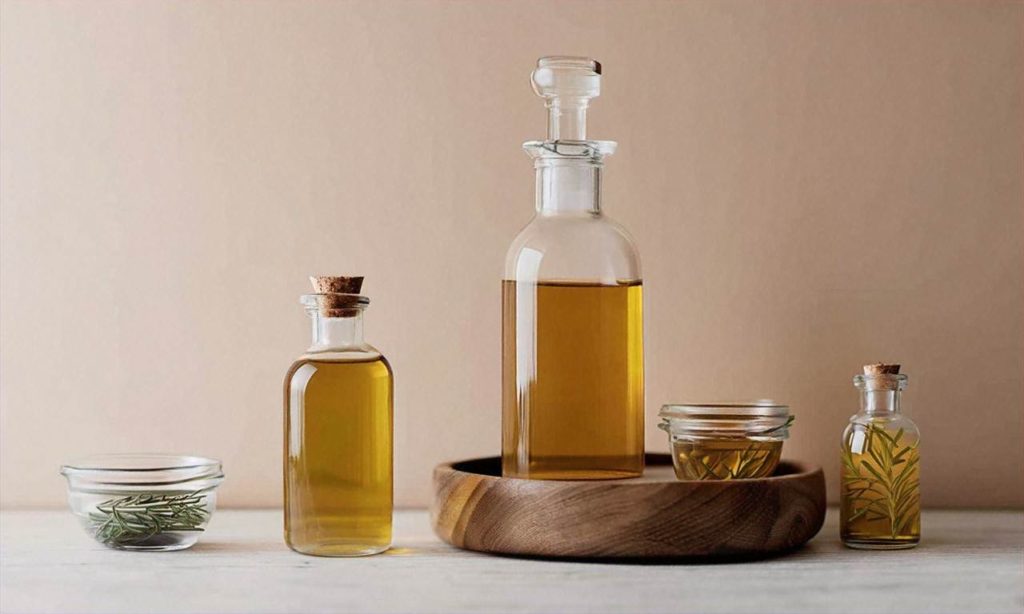
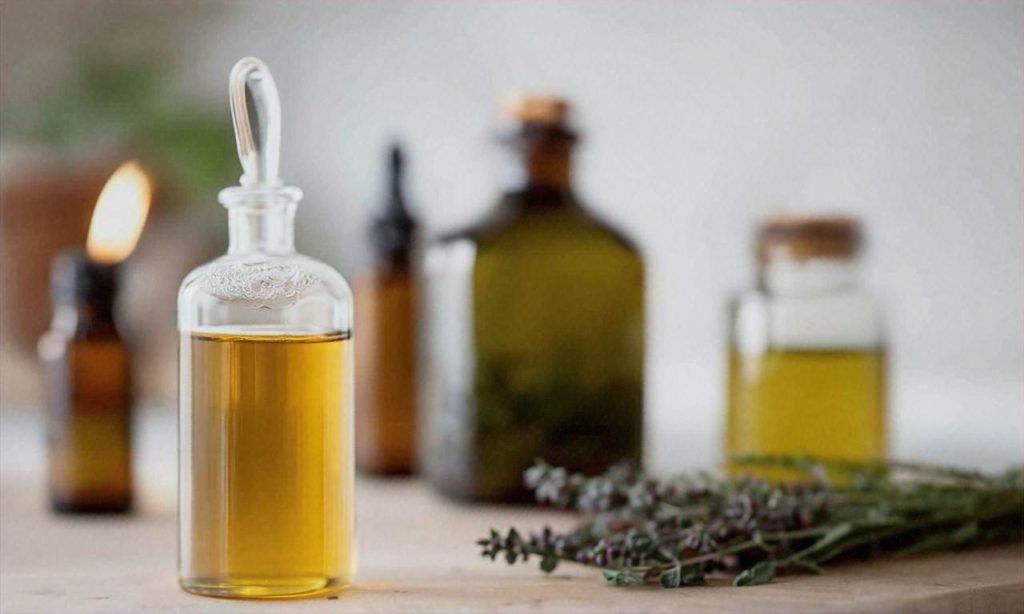
As you’ll see throughout the rest of this guide to making infused oils at home, the basic process involves steeping herbs, spices, garlic, citrus zest, chiles, and other flavoring agents in a carrier oil like olive, avocado, coconut, or nut oils. Over time, the oils absorb and concentrate the essences and aromatics. The result: oils infused with incredible flavors perfect for drizzling, sautéing, dipping bread, dressing salads and pastas, marinating proteins, etc. You’re limited only by your imagination and palate.
While you can certainly purchase pre-made infused oils from the grocery store or specialty shops, they often lack flavor dimension, use lower quality base oils, or contain mystery ingredients you can’t pronounce. Other times they break the bank despite unremarkable taste.
Making your own lets you control the entire process from start to finish. As you’ll discover, infusing oils at home doesn’t require advanced skills or expensive equipment. With a few key tips on selecting quality ingredients, using proper techniques, and storing oils correctly, anyone can craft amazing infusions. We’ll cover all the key information you need throughout this ultimate guide.
The benefits of infusing your own oils rather than buying premade versions include full control over the flavor profile, the ability to incorporate the freshest ingredients, the pride of creating personalized homemade gifts, potential cost savings, and the fun creative outlet. Infusing unique oil blends opens up an exciting culinary dimension where you’re limited only by your imagination. The rest of this guide will equip you with everything you need to know. So read on to begin your infused oil journey!
Choosing Your Oils and Herbs/Spices
When creating your own infused oils at home as part of the ultimate guide to making infused oils at home, one of the most important steps is choosing high-quality ingredients – specifically the base oils and herbs/spices you will use. The ingredients you select will directly impact the flavor and overall quality of your homemade infused oil.
Base Oils
The base oil acts as the lipid solvent for the flavors and nutrients from the herbs and spices. Choosing an oil with stability and a neutral flavor allows the herbal flavors to shine. The most common oils used for infusions are:
Olive Oil – Extra virgin and pure olive oil are both good quality choices. The bold flavor stands up well to pungent herbs like rosemary, oregano, and thyme.
Grapeseed Oil – This affordable, neutral-flavored oil has a high smoke point. It works well for lighter herbs like lavender and lemon verbena. Grapeseed oil is also often used for chili and garlic infusions.
Sunflower Oil – Another neutral-tasting oil that infuses easily. Sunflower oil is commonly used for making truffle, mushroom, and citrus-flavored oils.
Coconut Oil – Imparts a subtle tropical essence. Use refined coconut oil for cooking at higher temperatures. Pair with lemongrass, lime, ginger, or curry.
Avocado Oil – With its buttery flavor, avocado oil makes an excellent base for ancho chile, cilantro, cumin, and smoked paprika infused oils.
Almond Oil – This mildly nutty oil allows the true flavors of basil, sage, and lavender to develop fully during infusion.
Herbs and Spices
Herbs and spices contain essential oils and compounds that infuse into the base oil to create flavor. Dried herbs and spices work best as they are more concentrated and stable than fresh ingredients. Some top options include:
Basil – The sweet flavor of basil shines when infused into olive or almond oil. Use for finishing drizzles, marinades, and pesto.
Oregano – A pungent, zesty herb that infuses beautifully into olive oil along with red pepper flakes for a spicy Greek oil.
Rosemary – An extremely versatile herb for infusions including garlic-rosemary and lemon-rosemary oils. Pairs well with olive, grapeseed or coconut oil.

Thyme – Use dried thyme leaves or stems to make a robust, woodsy infused oil for sautéing mushrooms, chicken, and fall vegetables.
Lavender – For sweet floral flavor, pair dried lavender buds with almond or grapeseed oil. Use the oil for cakes, cookies, and salad dressings.
Citrus Peels – Use the peels from lemons, limes, oranges or grapefruit to make a bright, citrusy infused oil. Grapeseed or olive oil work best as bases.
Chilies – Dried chilies, flakes, or powders can be used to make spicy infused oils. Pair ancho or chipotle with avocado oil and red pepper flakes with olive oil.
Garlic – For bold garlic flavor, infuse peeled cloves into olive or grapeseed oil. Use for aioli, pasta sauce, marinades and bread dipping.
Peppercorns – Whole black peppercorns infuse beautifully into grapeseed or coconut oil for a versatile all-purpose cooking oil with a kick of heat.
Cumin Seeds – Dry roast the seeds first to intensify the earthy flavor before infusing into olive oil. The oil can be used for tacos, chili, roasted vegetables and more.
Experiment with different herb and spice combinations to create your own unique infused oil blends as part of the ultimate guide to making infused oils at home. Keep in mind that the strength of the herb or spice flavor will concentrate over the infusion time so start with less and add more as desired.
Infusion Methods – Stovetop, Oven, Sun
When making your own infused oils at home, you have a few different methods to choose from. The infusion method you select will depend on factors like your available time, patience level, and what equipment you have on hand. The three main techniques for infusing oils are stovetop, oven, and sun infusions.
Stovetop Infusion
A stovetop infusion is the quickest way to make infused oil, usually taking only 5-10 minutes of active cooking time. To infuse oil on the stovetop, start by finely chopping or bruising your herbs, spices, garlic, citrus zest, chili peppers, or other flavoring agents. The more surface area exposed, the better the flavors will infuse. Place the chopped ingredients into a small saucepan and cover completely with oil. Olive, coconut, avocado, grapeseed, and nut oils all work well.
Heat the oil over medium-low heat until bubbles start to form around the edges. Reduce the heat to low and gently simmer for 5-10 minutes, stirring frequently. Monitor the pan closely to prevent burning. You’ll know the infusion is complete when the oil is very fragrant and has taken on the color of the ingredient. Strain out the solids through a fine mesh sieve lined with cheesecloth. Allow the infused oil to fully cool before bottling. Store in an airtight container in the fridge for up to a month.
The stovetop method works well for making quick infused oils using fresh herbs, garlic, citrus, and some spices. Just be careful not to burn the delicate flavors. This also isn’t suitable for harder spices and ingredients like vanilla bean that need longer infusion.
Oven Infusion
The oven method for infusing oils takes a bit more patience but requires very little hands-on effort. It’s perfect for harder spices like cinnamon sticks, vanilla bean, peppercorns, and star anise that need more prolonged heating to fully release their flavors.
Preheat your oven to its lowest possible temperature setting, ideally between 170-200°F. While the oven heats up, combine your chopped or crushed spices, herbs, or other aromatics with oil in an oven-safe dish. Glass baking dishes, mason jars, or ramekins all work well. Make sure your container is big enough to allow the oil to expand as it heats up.
Once the oven reaches temperature, place your uncovered infusion vessel in the oven for 1-4 hours. The longer the infusion time, the more intense the flavor will become. Check it periodically and give it a gentle stir. When the oil is quite fragrant and has taken on the color of your infusion ingredients, remove it from the oven. Allow to fully cool, then strain out the solids. Bottle and store the infused oil in the fridge for up to a month.
An oven infusion is ideal for making deeply flavored oils with spices, citrus peels, dried herbs and chilies, vanilla, and other ingredients that need prolonged heating. Just be sure not to burn the oil with overly high oven temperatures.
Sun Infusion
Harnessing the gentle, consistent heat of the sun is an easy way to make infused oils without turning on your stove or oven. Sun infusions do take quite a bit of patience though, as the oils need 2-6 weeks in a sunny spot to fully extract the flavors. If you have a windowsill that gets lots of direct sunlight, this is your perfect infusion spot!
Making a solar infused oil starts the same way as the other methods – chop or crush your herbs, spices, garlic, citrus zest, or other aromatics to expose more surface area. Place in a clean glass jar and cover completely with oil. Make sure to leave at least 1 inch of headspace to allow for expansion as the oil heats up during the day.
Seal the jar tightly and place it in your sunniest window. Give the jar a gentle shake once a day to distribute the flavors. In about 2 weeks you’ll start to notice the color changing. After 4-6 weeks your solar infused oil will be intensely flavored and ready to strain and bottle. Store in the fridge for up to 6 months.
A long sun infusion works very well for delicate herbs like basil, tarragon, dill, and cilantro which can lose some of their brighter notes from heat infusion. Citrus zest and garlic also shine with a nice slow solar infusion. Just be patient and make sure your jar gets plenty of direct sunlight every day.
Mastering the infusion process is crucial for crafting your own signature infused oils. Once you understand the fundamentals, you can start experimenting with different oils, herbs, spices, lengths of infusion and more. Refer back to this definitive guide on stovetop, oven and solar infusions whenever you need a refresher. Soon you’ll have endless combinations of incredible infused oils to use in all your favorite recipes. For even more tips on infusing oils at home, check out the rest of this ultimate guide series on “The Ultimate Guide to Making Infused Oils at Home”.
Storage Tips for Maximum Freshness
Once you have put in the time and effort to make your own infused oils at home, you will want to store them properly so they stay fresh as long as possible. Proper storage is key for maximizing the shelf life of infused oils and preventing problems like rancidity or mold growth. This section of the Ultimate Guide to Making Infused Oils at Home will provide tips for getting the most out of your homemade infused oil creations.
Start With Quality Ingredients
High quality oils and fresh, dry herbs are essential starting points for homemade infused oils that will store well. Choosing the freshest extra virgin olive oil or avocado oil and vibrant, recently dried herbs free of moisture or debris will set you up for success. Building an infused oil on poor quality or old oil and herbs risks shorter shelf life down the road.
Store in Clean, Dry Containers
The containers you select for storing infused oils should be thoroughly clean and bone dry before filling. Any debris, dust, droplets of water or herb bits lingering in containers can encourage mold growth during storage. Opt for glass containers with tight sealing lids over plastic. Dark bottles help protect oils from light exposure. Make sure containers are large enough to leave ample headspace above the oil, as oxygen can accelerate spoilage.
Refrigerate When Possible
Temperature control is your friend when it comes to maximizing how long your homemade infused oils will stay fresh and flavorful. The fridge preserves infused oils best, slowing oxidation and preventing rancidity or mold growth. If fridge space is limited, at minimum store oils in a cool, dark cupboard away from heat sources like the stove or dishwasher. The one exception is nut oils, which solidify in the fridge – these are best kept in cupboards.
Watch for Cloudiness & Layer Separation
It’s common for homemade infused oils to develop some cloudiness or layer separation during storage – this is caused by the natural separation of flavorful particles, moisture and oil over time. Gently heating and stirring infused oil blends can often reincorporate this separation. However, if you notice extensive water accumulation or foaming, persistent cloudiness or any dark speckles of mold growth, it’s best to discard an infused oil rather than risk getting sick from contamination.
Use Clean Utensils When Removing Oil
Always be sure to use clean, dry utensils each time you open up your stored infused oil bottle to remove some for cooking or baking. Double dipping with dirty spoons or cups introduces water, herb bits and bacteria that will rapidly decrease freshness during storage between uses.
Consider Shorter Duration Infusions
Infusing oils for shorter durations can often yield lighter, more delicately flavored oil blends that keep better compared to longer infusions. Steeping herbs for 1-2 weeks rather than months creates milder oils less likely to deteriorate quickly. You can always make more small batches of short-infused oils to layer flavors over long storage times.
Use Within One Year
While properly stored infused oils can often last up to two years without spoiling, it’s safest to use up any homemade blends within 12 months. Mark the production date on labels and use oils on a rotation system, enjoying the freshest batches early on. If more than a year passes and clear signs of rancidity like unpleasant smells or dark color changes arise, it’s best to let that infused oil go.
Freeze For Even Longer Storage
Freezing infused oils is one storage method that can substantially extend shelf life beyond the one year mark. The very cold temperature prevents moisture accumulation, slows oxidation and inhibits bacteria growth. Thaw frozen infused oils overnight in the fridge before use. Transfer any remaining thawed oil back into the freezer. With this technique, infused oils can last for years while retaining flavor and freshness.
By following these tips for proper storage hygiene, temperature control and best practices on duration, the infused oils handcrafted in your home kitchen can stay vibrant, delicious and mold-free for maximum enjoyment. Don’t let poor storage cut short all your hard infusion work. For more great information, be sure to check out the rest of the Ultimate Guide to Making Infused Oils at Home.
Recipes and Uses for Flavored Oils
Infused oils are extremely versatile ingredients that can be used to add big, bold flavors to all kinds of dishes. The
One of the best things about infused oils is that they can be swapped into recipes calling for regular olive oil or vegetable oil. Using an infused oil instead will instantly amplify the dish’s flavor. For example, try making pesto with basil oil instead of regular olive oil. The end result will have a much more intense, aromatic basil flavor.
Here are some of our favorite ways to use various infused oils:
Lemon Oil: This bright, citrusy oil is delicious drizzled over seafood, used to dress leafy green salads, or even mixed into cake batters and frostings. For an extra lemony punch, use it to make lemon curd or lemon squares.
Garlic Oil: Saute vegetables, eggs, meats, and seafood in garlic oil to give them a nice garlicky flavor without having to chop and cook raw garlic. Garlic oil also makes a mean garlic bread!
Chili Oil: Add a spicy kick to Asian noodle and rice dishes by stir-frying them briefly in chili oil. You can also use it to make spicy mayonnaise for dipping vegetables, chicken wings, or egg rolls.
Herb Oils (Basil, Rosemary, Thyme, etc.): These herby oils are perfect for dressing pastas, flatbreads, bruschetta, and panzanella salads. For roasted vegetables and meats, try brushing or drizzling them with herb oil before and after cooking.
Truffle Oil: Made by infusing oil with real black or white truffles, this ultra-luxe oil should be used sparingly as a finishing touch on pastas, risottos, and mashed potatoes. It also makes gourmet popcorn and french fries!
Walnut Oil: With its subtle, nutty flavor, walnut oil is delicious on winter salads featuring bitter greens, pears, blue cheese, and dried cranberries. It’s also nice drizzled over roasted root vegetables like beets and carrots.
Sesame Oil: This oil adds wonderful nutty, toasty flavor to Asian noodle bowls, stir fries, and salad dressings. It’s also great for making from-scratch Asian sauces and marinades.
In addition to using infused oils for cooking, they make fantastic gifts and pantry staples. Here are some easy recipes for infused oil-based products you can make at home:
– Flavored Vinegars: For bright, tangy herbed vinegars, combine a sprig of your favorite herb with vinegar (white, red wine, rice wine, etc.) in a sterilized bottle. Basil, thyme, rosemary, tarragon, and oregano all infuse beautifully into vinegars.
– Vinaigrettes: Whisk together infused oil, vinegar, mustard, salt, and pepper for an easy homemade salad dressing. Lemon oil and red wine vinegar is a classic combination.
– Compound Butter: Blend infused oil into room-temperature butter along with herbs, lemon zest, roasted garlic, etc. Chill overnight, then slice and serve atop meats, fish, and vegetables.
– Mayonnaise: Slowly whisk infused oil into an egg yolk to make flavored mayo. Garlic oil and lemon oil make stellar aiolis.
– Finishing Oils: Sometimes it’s best to let your infused oil shine with just a simple drizzle over finished dishes. Having a variety of infused finishing oils is a great way to quickly elevate proteins, grains, vegetables, soups and more.
The possibilities are truly endless when cooking and baking with infused oils made from the
Most Popular Oil and Herb Combinations
When exploring homemade infused oils, one of the most exciting parts is choosing which herbs, spices, or other flavorful ingredients to infuse into your oil. The possibilities are endless! However, some classic combinations tend to rise to the top as crowd favorites.
Extra Virgin Olive Oil
Extra virgin olive oil is one of the most versatile and commonly used oils for infusions. Its fruity, grassy flavor pairs beautifully with many herbs and spices. Some of the most popular infusions using extra virgin olive oil include:
– Rosemary Infused Olive Oil: Rosemary’s woodsy, pine-like notes mesh flawlessly with olive oil’s natural flavor. Use for sautéing veggies, roasting potatoes, marinades, etc.
– Basil Infused Olive Oil: The sweet licorice and mint tones of basil sing when infused into olive oil. Perfect for Caprese salads, pastas, dipping bread, and pesto.
– Lemon Infused Olive Oil: Bright citrus flavors give olive oil a summery twist. Use for salad dressings, seafood, chicken, and more.
– Garlic Infused Olive Oil: For those who can’t get enough garlic flavor, this oil packs a savory punch. Ideal for pasta, bread dipping, and Mediterranean dishes.
– Chili Infused Olive Oil: Add some heat to your olive oil by infusing chili peppers. Spice up pizza, eggs, chicken, grains, and vegetables.
Coconut Oil
Coconut oil has grown incredibly popular in recent years due to its high smoke point and sweet, nutty flavor. Some tasty infused coconut oil ideas include:
– Coconut Lime Infused Coconut Oil: A Caribbean-inspired tropical blend, lovely in curries, marinades for shrimp or chicken, and stir fries.
– Ginger Infused Coconut Oil: Ginger’s warming zing melds nicely with coconut. Use in Asian noodles, stir fries, curries.
– Coffee Infused Coconut Oil: For the ultimate morning blend; nice spread on toast or swirled into coffee.
– Vanilla Infused Coconut Oil: A touch of vanilla makes this oil perfect for baking, smoothies, oatmeal, even popcorn!
– Orange Infused Coconut Oil: Bright citrus flavor to enhance seafood, desserts, smoothies, and dressings.
Avocado Oil
Prized for its very high smoke point and mild flavor, avocado oil allows the herbs and spices to take center stage when infused. Top options include:
– Chili Infused Avocado Oil: The oil’s neutral profile lets spicy chili flavors shine. Use for stir frying, eggs, grains, and grilled meats.
– Basil Infused Avocado Oil: Sweet basil notes stand out against the smooth, buttery avocado oil. Toss with fresh summer salads or pasta.
– Lemon-Thyme Infused Avocado Oil: A herbaceous, citrusy infusion for chicken, fish, and seasonal veggies straight from the grill or oven.
– Cilantro-Lime Infused Avocado Oil: Bright, zesty flavors to use in Southwestern style dishes like fajitas, tacos, quesadillas.
– Smoked Paprika Infused Avocado Oil: For incredible depth of flavor in roasted veggies, grilled meats, pan sauces.
Grapeseed Oil
Another fantastic neutral oil for infusions is grapeseed oil. Its high smoke point also allows it to withstand heating. Top grapeseed oil combinations:
– Rosemary Infused Grapeseed Oil: Rosemary’s piney essence stands out against the very subtle grapeseed oil profile. Use for roasted potatoes, meat rubs.
– Thyme Infused Grapeseed Oil: Thyme’s earthy, herbal notes mesh beautifully with this light oil. Enhance chicken, fish, warm vegetable salads.
– Garlic Infused Grapeseed Oil: Maximizes that garlicky punch for enhanced flavor in stir fries, pasta, salad dressings.
– Lemon-Parsley Infused Grapeseed Oil: A fresh, lively infusion for seafood, chicken, seasonal produce straight from the garden.
– Curry Infused Grapeseed Oil: For fans of spice, infuse with your favorite curry blend. Use in curries, stews, roasted cauliflower.
The options for infused oil and herb combinations truly are endless. Have fun playing around with your favorite oils, herbs, spices, citrus, peppers, etc. and find your own winning combinations to enhance your cooking! And don’t forget that infused oils also make wonderful homemade gifts.
The key is to choose high quality oils and ingredients at their peak freshness. This will ensure the best possible flavor in your infused oils. Proper storage methods post-infusion are also vital to maximize shelf life. For more tips on choosing oils and herbs as well as storage recommendations, check out the other sections in this ultimate guide to infused oils.
Troubleshooting Problems with Rancidity or Mold
Even when using best practices, problems can occasionally arise when infusing oils at home. Two of the most common issues are rancidity and mold growth. By understanding what causes these problems and how to prevent them, you can continue crafting delicious infused oils safely.
What Causes Rancidity?
Oil rancidity occurs when fats break down through oxidation. Exposure to heat, light, and oxygen speeds up this process. You may notice rancid oil smells unpleasant or tastes bitter, metallic, or soapy. Consuming rancid oils poses minimal health risks but can cause temporary stomach upset.
Certain oils like olive and coconut oil have higher resistance to rancidity thanks to their fatty acid profile. More delicate oils like almond, walnut, and avocado oil spoil faster. Infusing more perishable oils requires extra care.
Tips to Prevent Rancidity
Follow these best practices when making infused oils to avoid rancidity:
– Start with fresh, high-quality oil. Check expiration dates before buying.
– Limit light exposure by storing oils in dark bottles. Amber bottles offer an attractive presentation while blocking light.
– Refrigerate infused oils after straining to help preserve freshness.
– Use clean, dry utensils and containers to prevent contamination.
– Strain oils quickly once done infusing. Leaving herbs soaking for too long introduces more water and speeds spoilage.
– Consider adding vitamin E oil, available in capsule form. Its antioxidant properties help oils resist rancidity.
– If infusing more delicate oils, plan to use within a 1-2 months. Freezing in ice cube trays lets you thaw small portions as needed.
Signs of Mold Growth
You may notice fuzzy patches or spots in range of colors from white to black. Sometimes oil separates, leaving cloudy blobs. Mold growth nearly always indicates contamination with water or debris during infusion.
While some mold species release harmless mycotoxins, others create dangerous toxins posing health risks if consumed. Never taste or eat moldy infused oil. Properly dispose and start over with fresh ingredients.
Avoiding Mold Growth
Follow strict hygiene practices when infusing oils at home to prevent mold growth:
– Sterilize jars or bottles first by submerging in boiling water 10 minutes. Air dry fully upside down.
– Wash herbs thoroughly and dry completely before adding to oil. Pat off any moisture with clean paper towels.
– Use a dry funnel when straining to prevent herb debris from clinging to container sides.
– Never add water to infusing oils. Even droplets left from washing equipment can introduce mold.
What If My Oil Goes Bad?
If despite your best efforts, an infused oil shows early signs of spoilage:
– Check for visual mold growth or an unpleasant smell. Taste only if oil appears perfect.
– If detected quickly, reheating on the stovetop or in oven may salvage the batch.
– Toss out immediately if mold seen or tastes rancid. Erring on the side of caution protects your health.
With proper handling and storage, most infused oils stay fresh 1-6 months. But if you notice any signs of spoilage, don’t take risks. When in doubt, throw it out! Making a new batch poses no hardship when armed with tips from this ultimate guide to infused oils.
Creative Infused Oil Gift Ideas
Infused oils make thoughtful, useful gifts for any occasion. Not only do they look beautiful, but they provide the recipient with a versatile ingredient to enhance their cooking. With so many possible herb and spice combinations, you can customize an oil to match the recipient’s taste preferences. Get creative with your presentation to take your infused oil gift to the next level.
Pretty Bottles and Labels
Start by choosing an attractive bottle, jar, or cruet to hold your homemade infused oil. Clear glass allows the recipient to view the herb flavors inside. Tint the oil a sunny yellow with turmeric or calendula petals, deep green with basil or oregano, or reddish-orange with chili peppers inside. For a professional look, design and print labels listing the oil and herb flavors. Adhere the labels to your bottles with decorative touches like raffia, ribbon, or fabric.
Themed Gift Baskets
Build an entire gift basket around your infused oil. Choose a theme based on the individual’s interests or lifestyle. For a cook, include additional herbs and spices to complement the oil, along with recipe cards. For a gardener, incorporate packets of the herb seeds used to make the oil. Wellness baskets might contain the oil alongside essential oils, bath salts, or candles. Tailor picnic, pasta night, grilling, or other theme baskets to the recipient’s hobbies.
Oil and Vinegar Duos
Pair your infused oil with a complementary infused vinegar for a dynamic duo. Herb-infused vinegars provide acidity to balance and bring out flavors. Bottle the oil and vinegar together in a divided cruet for easy salad dressing making. Popular combinations include basil oil and balsamic or red wine vinegar, lemon-rosemary oil and white wine vinegar, and chili oil mixed with apple cider vinegar.
Oil Dippers
Give a bread dipper set featuring your infused oil. Submerge baguette slices, pretzel crisps, or pita chips in the oil for an instant appetizer. Or present the oil in a shallow dish alongside crusty bread cubes or crackers for dipping. You can further embellish the gift by including cheeses, olives, roasted nuts or vegetables, and other dip accompaniments.
Oil Dispenser Sets
Dispense your infused oil in style with a pouring spout, pump, or spray top bottle. Integrate the dispenser into a complete set – for instance, an herb grinder, sea salt, pepper mill, and infused oil cruet arranged on a tray. Or bundle small pump bottles of several flavored oils as a collection. Useful additions like salad dressing whisks, vinegar dispensers, or funnel pitcher sets encourage creative usage.
Sauces and Marinades
Boost the flavor of the recipient’s cooking with your homemade infused oil blended into gourmet sauces and marinades. Bottle the oil with spices and herbs like garlic, shallots, mustard and wine for a salad dressing base. Mix the oil with soy sauce, brown sugar, rice vinegar and ginger for a ready-to-use stir fry sauce. Or emulsify the oil into a herb-accented vinaigrette, pesto or chimichurri marinade for meats or vegetables.
Oils for Baking
Bakers will appreciate flavored oils to take their homemade goodies up a notch. Bake gingerbread cookies or carrot cake with cinnamon-orange oil for warmth, lemon loaf with Meyer lemon oil brightness, or olive rosemary oil focaccia for herby depth. Include recipe cards tailored for the specialty oil so the recipient can easily incorporate it into their baking.
Gardening Oils
For the gardener, make a custom oil showcasing herbs and flowers from their garden. Use oregano, rosemary, lavender or other plants they love to nurture. Present the oil in a watering can or rustic planter decorated with gardening gloves, seed packets, garden markers with fun sayings, or other accessories they can use.
Pampering Oils
Promote relaxation with an infused oil designed for self-care. Choose soothing herbs like lavender, chamomile, vanilla and rose petals to infuse in almond, jojoba or coconut carrier oils. Package the oil alongside items like essential oils, bath salts, lotions, loofahs and candles for a rejuvenating spa experience.
Hopefully these ideas sparked some creativity for the infused oil gifts you’ll make. With countless herb and oil combinations possible, you can develop unique flavor profiles suited to anyone’s taste. Thoughtfully packaged and personalized oils show loved ones how much you care.
The Health Benefits of Infused Oils
Infused oils not only add flavor to dishes, but they can also provide various health benefits. The herbs, spices, garlic, citrus, or chili peppers used to infuse the oils contain antioxidants, anti-inflammatory compounds, and other bioactive nutrients that get transferred to the oil during infusion.
Some of the top health benefits associated with common infused oil ingredients include:
Basil – Contains antioxidants like flavonoids that can help protect cells from damage and reduce inflammation. Basil oil may also have antimicrobial effects.
Oregano – Highly antioxidant and has natural plant compounds like thymol and rosmarinic acid that have antiviral, antibacterial, antifungal, and anti-inflammatory effects.
Rosemary – Rosemary infused oil is high in antioxidants like carnosic acid and rosmarinic acid that fight inflammation and potentially protect brain health by preventing cognitive decline.
Garlic – The beneficial sulfur compounds in garlic, like allicin, have antimicrobial, antiviral, and antioxidant effects in the body and may boost heart health.
Lemon/Citrus – Contains inflammation-fighting antioxidants and phytochemicals that support immunity and provide vitamin C. Lemon oil also has an energizing citrus aroma.
Chili Pepper – Capsaicin and other compounds give chili peppers their heat and health perks, including increasing metabolism, reducing blood pressure, easing sinus congestion, and relieving pain through topical use.
Ginger – Gingerol, shogaols, zingerone and other anti-inflammatory compounds give ginger its distinct flavor and make ginger oil a soothing remedy for nausea, digestive issues, pain, and arthritis.
Turmeric – Curcumin is turmeric’s main bioactive ingredient and the source of its vibrant color and many medicinal effects, like fighting inflammation, protecting brain function, and reducing joint arthritis and pain.
In addition to the potent plant compounds in infused oils that provide health benefits, oils like olive oil and avocado oil have healthy fats that benefit the heart and brain on their own. So infusing them amplifies their positive effects.
The way infused oils are used also impacts the health benefits obtained. Using basil infused olive oil as an ingredient in Mediterranean diet recipes provides antioxidant and anti-inflammatory protection. Topical uses allow the skin to absorb active oil ingredients too. Rubbing chili oil on sore muscles can relieve pain. And massaging lavender-infused almond oil provides aromatherapy effects.
Tips for Maximizing Health Benefits

To get the most out of infused oils for health:
– Use high quality, fresh ingredients – older herbs/spices and oils contain fewer active compounds
– Allow enough infusion time for oils to extract key ingredients from herbs/spices/garlic
– Store properly in cool, dark place to preserve integrity of fragile plant compounds
– Consume within recommended timeframe before ingredients degrade
– Use infused oils regularly in recipes, dressings, marinades, and skincare routines
The possibilities with infused oils are endless. And infusing your own oils at home gives you total control over the ingredients and flavors. This allows you to create customized blends that cater to your taste buds and health needs. So explore fun herb and spice combinations that make your meals and self-care routines healthier and more exciting.


No comment yet, add your voice below!