
Intro to Drying Herbs at Home
# Intro to Drying Herbs at Home
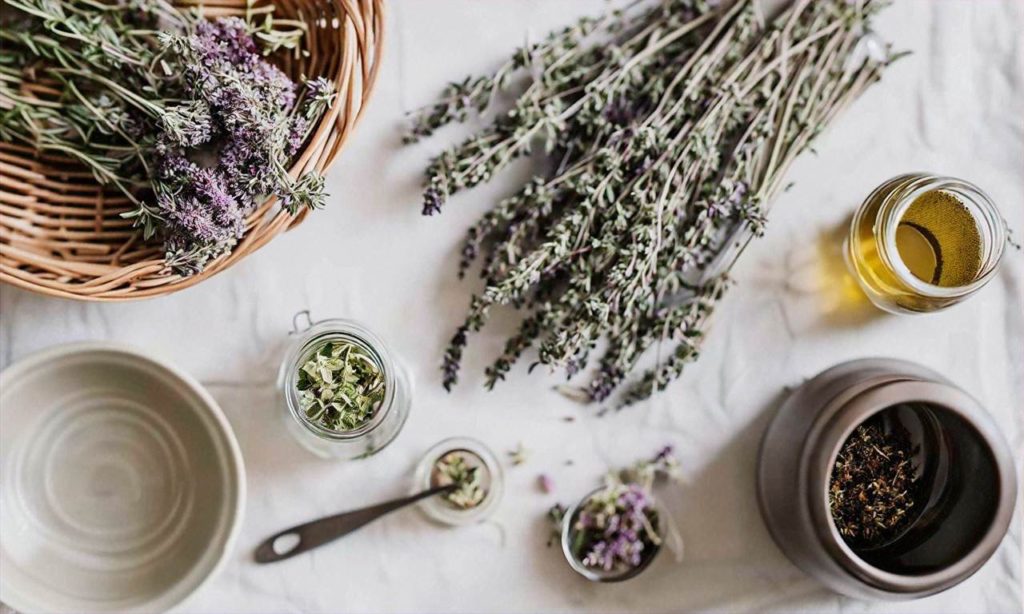
Drying herbs at home is a time-honored tradition that allows you to preserve the bountiful harvest from your garden or local farmers market to enjoy all year long. As interest in home cooking, gardening, and natural living continues to grow, more people are discovering the joys and benefits of drying their own herbs.
## Why Dry Your Own Herbs?
Drying herbs at home enables you to customize your dried herb selection to your taste preferences. You can choose which herbs to grow or buy fresh, then dry only those varieties perfectly suited to how you like to cook. Drying them yourself also ensures maximum flavor and aroma, as herbs begin losing these precious oils soon after being cut or picked. By drying them promptly yourself, you capture far more of their essence than store-bought dried herbs can offer.
You’ll also save money by drying herbs at home, rather than purchasing pre-packaged dried herbs which can be quite expensive in the quantities needed for frequent cooking use. Growing and drying your own allows you to inexpensively dry herbs in bulk.
## Satisfaction from the Seed to Jar Process
For many home cooks, gardeners, and those seeking a more self-sufficient lifestyle, there is great satisfaction that comes from preserving your own food. Drying herbs you have nurtured from seeds or cuttings, through harvest, is rewarding on many levels. The seed-to-jar process enables you to create customized spice blends perfectly matched to your cooking style. You’ll also reduce food waste by fully utilizing herbs at their peak freshness, then storing the excess to enjoy all year long.
## Key Benefits of Drying Herbs at Home
– **Save money** by not having to buy expensive store-bought dried herbs
– **Customize** your herb and spice selection to suit your taste
– **Maximize flavors & aromas** by drying herbs promptly after harvest
– **Reduce waste** by preserving seasonally abundant fresh herbs
– **Satisfaction** of the seed-to-jar process from garden to kitchen
## Getting Set Up for Drying Herbs at Home
While specialized equipment can be used, all you really need to get started drying herbs at home is some simple supplies you likely already have on hand. Herbs can be hung bundled to air dry, set on racks or trays, or for faster drying, a basic electric food dehydrator is very useful. Either way, with good air circulation, fresh herbs, and a little patience as they dry, you’ll have delicious dried herbs to enjoy or give as gifts.
The rest of this article will cover in detail…
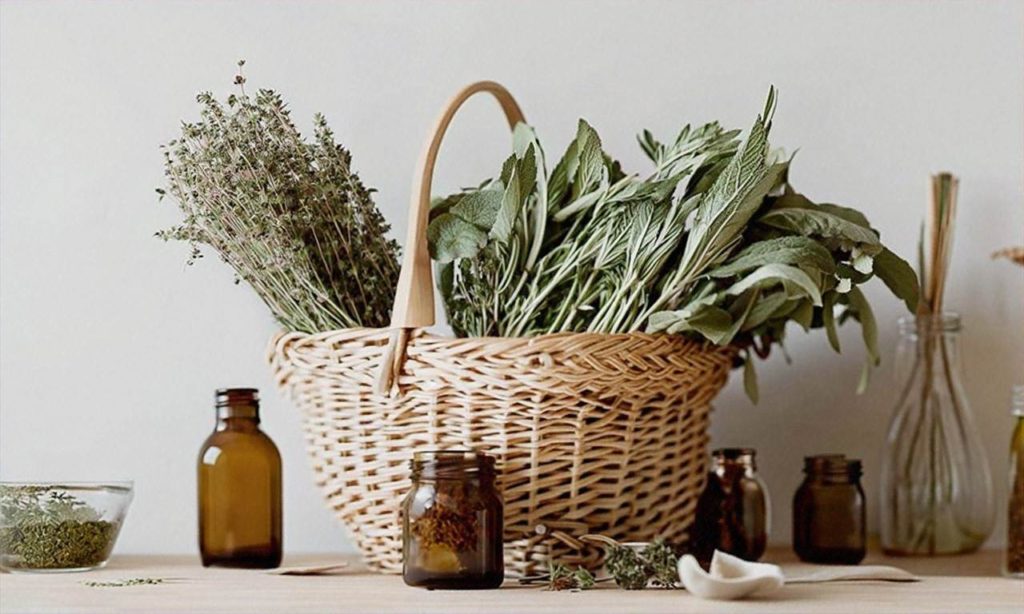
Best Herbs for Drying
When it comes to drying herbs at home, some varieties preserve better than others. The best herbs for drying are those that have high oil content, as the oils help the herbs retain flavor and aroma even when the moisture has been removed. Here are the top herbs to consider drying.
Rosemary
With its woodsy, pine-like fragrance and hints of lemon and mint, rosemary has one of the strongest and most complex flavors of common herbs. Its high oil content allows rosemary to retain its bold flavor profile very well when dried. To dry rosemary, hang small bundles upside down or place leaves on a drying rack. Dried rosemary pairs beautifully with meats, tomatoes, beans, breads, and eggs. Use dried rosemary in spice rubs, herbed salts and sugars, infused vinegars and oils, or in aromatic sachets.
Oregano
A staple of Italian and Mediterranean cuisine, pungent oregano also dries nicely. Oregano has a relatively high oil content, allowing its spicy, aromatic notes to come through when dried. Air drying works best for oregano. Use dried oregano in spice mixes for pizza, pasta, meat, fish, vegetables, salad dressings, and more. Or make flavored oils and vinegars with rehydrated dried oregano.
Thyme
With over a dozen varieties ranging from lemon to caraway, thyme is a wildly versatile culinary herb. Its small leaves and high oil content make thyme an excellent choice for drying. Hang thyme bundles to air dry or use a food dehydrator. Dried thyme maintains its sweet earthiness and bright herbal notes very well. Use it in everything from soups to roasted vegetables to marinades and compound butters.
Sage
Popular in fall dishes, sage has a woodsy, slightly peppery flavor. Its silver green leaves dry easily, retaining good color and flavor. Hang sage bundles to air dry fully before crumbling the crisp dried leaves from the stems. Use dried sage to season rich meats like pork, duck or sausage as well as winter squash dishes, hearty bean dishes, stuffings and dressings. Sage also makes a wonderful tea.
Lavender
Though technically an ornamental, culinary-grade lavender has a sweet, floral quality used to infuse everything from sugar to shortbread cookies. English lavender varieties like Munstead or Hidcote work best. Cut lavender stems when flowers are fully opened and hang small bundles to dry thoroughly. Use dried lavender to make floral sugars, salts, lemonades and scones. Or use in savory rubs for meats and chicken.
Bay Leaves
Bay leaves impart a distinctive, slightly menthol-like note popular in European and Indian cuisine. Fresh bay leaves do not fully release their unique flavor until dried. Air drying bay leaves is simple – just hang branches upside down. Crumble the dried bay leaves before use. Simmer stews, beans or grains with a bay leaf then remove before serving. Or make a bay leaf-infused oil.
Tarragon
Known for its distinct licorice-anise flavor, tarragon’s long slender leaves can be dried easily at home. Simply gather stems, secure with a rubber band, and hang upside down to dry. Dried tarragon makes an interesting addition to herbal vinegar or compound butter. It also pairs nicely with fish, chicken, eggs, tomatoes and carrots. Use sparingly though, as tarragon’s flavor intensifies when dried.
Marjoram & Summer Savory
Close herb cousins marjoram and summer savory have a mild, sweet flavor similar to oregano. Their petite leaves dry quickly either on a rack or hanging in bundles. Dried marjoram and savory are perfect for spice rubs, herbed oils and flavored salts. Use to season eggs, fish, poultry, tomatoes, mushrooms and more. Their mellow flavor allows them to blend nicely with heartier dried herbs.
Mint
Cool and refreshing mint comes in several popular varieties including peppermint and spearmint. Mint’s high oil content helps retain its unmistakable flavor when dried properly. For best results, dry smaller mint leaf bundles hung upside down in a dark, well-ventilated area. Once fully dried, store mint in an airtight container away from light. Use dried mint in tea blends, beverages, desserts, fruit salads and more.
No matter which herbs you choose to dry, the key is making sure stems and leaves dry completely before storage to avoid mold growth. Dried correctly, these aromatic herbs will add flavor to your cooking all year long. Be sure to label all dried herbs with the name and date before storing. Refer to “How to Dry Herbs with Each Method” for more specifics on the best drying technique for each herb variety. With the bounty of summer preserved, you can bring vibrant herbal flavor to soups, stews and slow-cooked dishes throughout the fall and winter.
Drying Methods: Air Drying, Using a Dehydrator, Freezing
When it comes to preserving fresh herbs from the garden or market, drying is one of the easiest and most effective methods. Drying removes the moisture from herbs, allowing them to be stored for months while retaining their aromatic oils and flavors. There are several techniques for drying herbs at home to lock in that just-picked freshness before the bounty of summer fades.
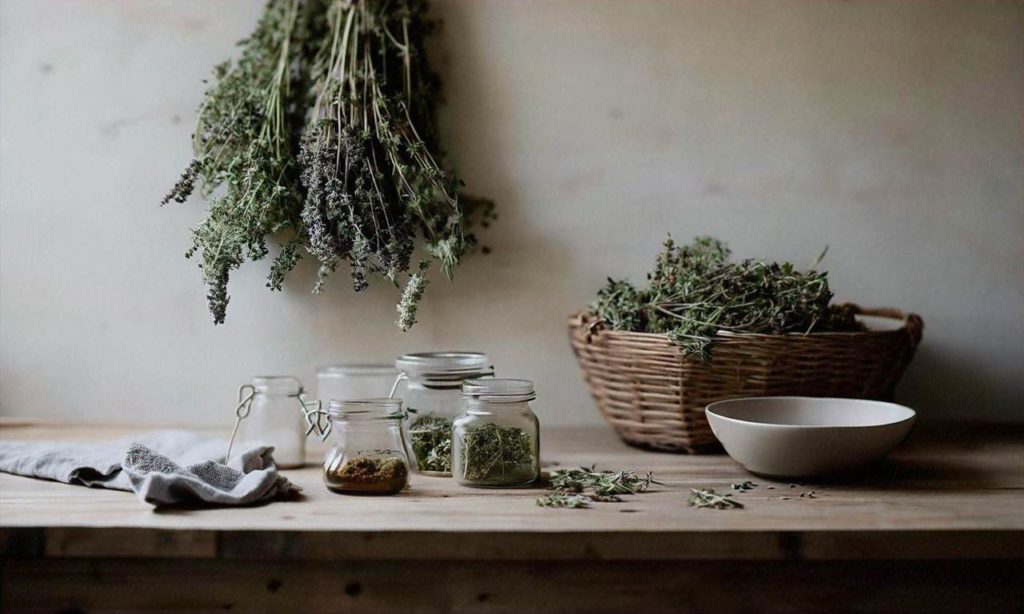
Air Drying Herbs
Air drying takes advantage of natural airflow to slowly remove moisture from fresh herb leaves over the course of several days or weeks. To air dry herbs, gather stems together in small bundles with rubber bands or string and hang them upside down in a warm, dry, dark place with good ventilation. Some good spots include a kitchen, pantry, attic, or shed. The herbs should not be in direct sunlight or exposed to high humidity during the drying process.
Check the herb bundles periodically until the leaves are crispy and crumble easily between your fingers. This drying process can take one to four weeks depending on the moisture content of the herbs, the temperature and airflow of the space, and the herb variety. Delicate herbs like basil, mint, and parsley may dry faster than hardy herbs like rosemary, sage, thyme and oregano.
Once the herbs are crispy dry, you can crumble them off the stems into airtight glass jars or containers. Make sure to label jars with the herb variety and date before storing in a cool, dark place for up to a year. With proper air drying and storage methods, you’ll have access to garden-fresh flavor all year long when making recipes from “Preserving the Bounty: How to Dry and Store Herbs.”
Using a Food Dehydrator
A food dehydrator offers an accelerated way to dry herbs using controlled low heat airflow. Using an electric food dehydrator shortens the typical air drying time to just a few hours and protects delicate herbs from mold, mildew, and dust during the process.
To use a dehydrator, wash and pat dry fresh herb stems to remove dirt or debris. Lay the stems in a single layer on dehydrator trays, making sure not to overpack them. Set the dehydrator between 95°F to 115°F and let it run for two to four hours. Check periodically until the leaves become crispy and crumble easily. Then store the dried herbs in airtight containers as described above.
The major benefit of using a food dehydrator is the fast active drying time compared to passive air drying. Dehydrators also provide more control and predictability over the process. Just be careful not to dry the herbs at too high a temperature, as this can diminish the aromatic essential oils. Refer to your dehydrator manual for specific time and temperature guidelines based on the model.
Freezing Herbs
Freezing is best for soft, leafy herbs like basil, chives, cilantro, dill, mint, and parsley which don’t hold up as well to air drying or dehydrators. To freeze herbs, wash and dry the leaves, then chop them finely or puree in a food processor. Spoon the herbs into ice cube trays and cover with water or oil before freezing overnight.
Once frozen, pop the herb cubes out of the tray and transfer to airtight freezer bags. Squeeze out excess air and label with the variety and date. Frozen herbs will keep for about six months before losing flavor. Their delicate leaves turn mushy when thawed but can be easily incorporated into sauces, soups, pestos, and more. The freezing process better preserves the color and flavor of delicate herbs compared to drying methods.
Get the Most out of Dried Herbs
Now that you know the best practices for air drying, using a food dehydrator, and freezing, you can stock up on herbs to flavor recipes all year long. Refer to “Preserving the Bounty: How to Dry and Store Herbs” for more tips on storing, using, and blending dried herbs. Discover creative ways to use your dried herb bounty and the fascinating history behind herb preservation across cultures and cuisines.
How to Dry Herbs with Each Method
# How to Dry Herbs with Each Method
Drying herbs at home is a great way to preserve the bounty from your garden or local farmers market. Properly dried herbs can retain much of their flavor and aroma for months when stored correctly. There are a few methods for drying herbs at home to best maintain their quality.
## Air Drying
Air drying is the most common method for preserving herbs at home. To air dry herbs, gather clean herb sprigs into small bundles using cotton string or rubber bands. Hang these bundles in a warm, dry, dark place with good airflow. The warmth helps the moisture evaporate while the darkness prevents light from diminishing the flavors and aromas.
Ideal places for air drying herbs at home include a kitchen, pantry, attic or garage. Hang the herb bundles from the ceiling or place them in wire racks. Make sure the herbs are not touching each other or any surfaces. Air flow is crucial so the herbs dry quickly before any mold develops. Check the bundles every few days until the herbs are fully dried. This can take 1-2 weeks depending on the moisture content.
Some good herbs for air drying include:
– Oregano
– Sage
– Thyme
– Rosemary
– Lavender
– Mint
– Lemon Balm
These hardy herbs retain their flavors well when air dried. More delicate herbs like basil, chives and parsley are better preserved through freezing.
## Using a Dehydrator
A food dehydrator offers an accelerated way to dry herbs at home while preserving more of their original quality. Dehydrators use low consistent heat, airflow and timed drying cycles to efficiently remove moisture. Most dehydrators have stackable trays with mesh screens that allow airflow on all sides.
To dry herbs in a dehydrator, place cleaned herb sprigs or leaves in a single layer on the trays. It’s best not to overfill the trays or overlap the herbs too much. Set the temperature between 95-100°F and let the machine run its cycle, usually 6-12 hours. Check periodically and stop when the herbs are crispy. Then promptly store in airtight containers.
Some great herbs for dehydrating include:
– Basil
– Oregano
– Marjoram
– Chives
– Parsley
– Cilantro
The gentle even heat helps retain more essential oils and flavor in these delicate herbs compared to air drying.
## Freezing Herbs
Freezing is a great way to preserve the fresh flavors of more delicate herbs like basil, chives and cilantro. Start with clean fresh herb leaves, chopped if large. Place mounded portions on a baking sheet and put in the freezer until frozen solid. Then promptly transfer to airtight containers or bags. Label with the herb type and freeze for up to 6 months.
The quick freezing process helps lock in the flavors, colors and nutrients better than drying. Frozen herbs are great for adding to soups, stews, sauces and more all year long. Try these herbs frozen:
– Basil
– Chives
– Cilantro
– Parsley
– Dill
– Tarragon
Freezing isn’t ideal for sturdy woody herbs like rosemary, thyme and sage. For best results, air dry these herbs instead.
Follow these simple methods for drying or freezing herbs at home to preserve the bountiful flavors of the growing season. With proper storage, dried and frozen herbs can add their aromatic qualities to all sorts of delicious recipes for months to come.
Storing Dried Herbs Properly
Once you’ve gone to the effort of drying your fresh herb bounty, you’ll want to make sure you store the dried herbs properly so they retain maximum flavor and aroma. Proper storage is key for preserving dried herbs from season to season.
When storing dried herbs, the enemies are light, heat, moisture and air. Protecting your dried herbs from these elements will help them retain volatile oils and prevent loss of flavor, changes in color and texture, and spoilage. Here are some tips for storing dried herbs properly after drying.
Use Opaque, Airtight Containers
You’ll want to store your dried herbs in containers that block light and prevent air and moisture from getting in. Clear glass jars may seem attractive, but light causes herbs to lose color and aroma over time. Instead, use containers made of opaque materials like ceramic, metal or opaque plastic. You can reuse glass jars and containers if they have tight-fitting lids. Mason jars work very well for storing dried herbs. Any container should have an airtight seal. You want to keep as much air out as possible to prevent oxidation. Vacuum sealing bags or canisters are ideal for an airtight environment and for pushing out air before sealing.
Store Herbs in a Cool, Dark Place
In addition to airtight, opaque containers, store dried herbs in a cool, dark place. Warmth and light will speed deterioration of herbs. Store containers in a cupboard, pantry or cabinet away from heat sources like appliances or windows. An ideal storage temperature is between 50°F and 70°F. The refrigerator is usually too humid, but the freezer can be used if herbs are vacuum sealed or stored with desiccants.
Check for Moisture and Mold
No matter how airtight you think your storage method is, it’s wise to check dried herbs periodically for moisture and mold. Condensation can form even in sealed containers when temperatures fluctuate. Look for moisture collecting inside containers or droplets on herbs, which can cause mold. Check for fuzzy mold starting to grow on leaves or stems. Discard any dried herbs that show moisture or mold. They can contaminate the rest of your dried stock.
Use Desiccants
Desiccants are moisture-absorbing substances that can pull existing moisture from containers and herbs. This prevents condensation and moisture from damaging dried herbs in storage. Common desiccants are silica gel packs, dry rice, chalk, sand and salt. They are especially useful if storing herbs in the refrigerator or freezer where excess moisture can collect.
Proper Labelling
Always label dried herb containers with the name and date. Dried herbs tend to look similar, so labels prevent confusion. Date labels let you use older stock first and know when it’s time to discard dried herbs. Track storage times for each type of herb. Heartier herbs like oregano, thyme and rosemary can last 1-2 years or longer. More delicate herbs like basil, parsley, chives and mint last about a year.
Creative Storage Ideas
In addition to traditional containers and humidity-controlled methods, get creative with how you store dried herbs. Decorative glass bottles, wire baskets and magnetic strips for herb jars open up visual storage options. Dried herb wreaths and bouquets make beautiful displays. Shelving units or pull-out vertical herb gardens bring frequently used herbs within easy reach. Match storage style with your kitchen or pantry decor.
With proper opaque, airtight containers stored in cool, dark spaces, checking moisture and mold, using desiccants, labelling and getting creative, you can successfully preserve all your lovingly home-dried herbs. Follow these dried herb storage tips, and you’ll be enjoying the flavorful bounty of your herb garden for months or even years after harvest.
Using Dried Vs. Fresh Herbs in Recipes
When it comes to using herbs in cooking and recipes, most chefs and home cooks have a preference for either fresh or dried herbs. Both come with their own sets of pros and cons, and it largely depends on the specific recipe and what flavors you are trying to achieve. Understanding when to use dried herbs versus fresh herbs can elevate your dishes to new heights.
The key difference between dried and fresh herbs lies in their intensity of flavor. During the drying process, herbs lose moisture but gain potency as their oils become more concentrated. As a general rule of thumb, 1 teaspoon of dried herbs equals 1 tablespoon of fresh. So when substituting, be sure to adjust quantities accordingly. Overdoing it on potent dried herbs can ruin a dish.
Fresh herbs like basil, parsley, cilantro, dill, and mint add a vibrancy and brightness that complements many dishes beautifully. Their grassy, green flavor provides balance against rich, fatty, or acidic components. Fresh herbs are best used raw or added at the end of cooking. Too much heat diminishes their delicate notes.
Meanwhile, heartier dried herbs like oregano, thyme, rosemary stand up well to longer cooking times, allowing their flavors to infuse gradually into braises, stews, soups and more. Their intensity pairs especially well with roasted meats, long-simmered beans or hearty tomato sauces. Just remember that a little goes a long way.
Certain herbs retain their flavor better after drying than others. Oregano, thyme, bay leaves, and rosemary are prime candidates for drying and do well in slow-cooked preparations. On the other hand, more delicate herbs like basil, cilantro, dill, mint and parsley lose some of their nuance when dried. They are best used fresh.
When developing your own recipes, consider whether you want a punch of strong herbal flavor or a brighter, greener taste. This will guide you towards using the dried or fresh version of that particular herb. And never be afraid to experiment! Taste and adjust until you achieve the perfect flavor profile. With practice, balancing and layering herbs will become second nature.
Getting the Most Out of Your Dried Herbs
Dried herbs are a wonderful way to preserve the bounty from your garden or farmers market purchases. Properly stored dried herbs can last for months or even years, allowing you to enjoy their flavor, aroma, and health benefits long after fresh herbs have wilted. This section will provide tips on how to get the maximum flavor, nutrition, and usage out of your dried herbs.
Maximize Flavor
Flavor is the number one reason most people dry herbs at home. To get the most flavor out of dried herbs, it’s important to harvest or purchase herbs at their peak. For home gardeners, pick herbs just before flowering when the essential oil content is highest. Store dried herbs in airtight containers away from light and heat to help preserve the volatile aromatic oils. Over time, dried herbs will lose potency so try to use within one year. Before adding older dried herbs to recipes, rub them between your fingers to release the oils.
When cooking with dried herbs, use about 1/3 of the amount you would use with fresh. Their flavor is highly concentrated. Start with less and add more to taste. The small, dried pieces tend to disperse nicely throughout a dish. However, very old, dried whole herbs may need crushing or crumbling to release more flavor. In slow cooked recipes, add dried herbs early on so they have time to rehydrate and impart their essence. In quick cooking preparations, sprinkle them in at the end.
Get More Nutrition
Drying concentrates the nutrients and health promoting compounds in herbs as the water volume is decreased. The antioxidant, anti-inflammatory, and antimicrobial properties remain intact. Stock your pantry with dried antioxidants like oregano, sage, rosemary, and thyme to boost the nutrition of soups, grains, meats, vegetables and more in daily cooking. The portability, shelf life and nutrition density of dried herbs makes them perfect for backpacking meals and emergency food storage as well.
Creative Uses
Think beyond seasoning and explore other creative ways to use your dried herb bounty. Make fragrant herbal vinegars, oils, butters or salts to add intrigue to cooking and gift giving. Use them in homemade soaps, sachets or potpourri. Brew flavorful sun tea. Craft herbal crafts and wreaths for seasonal decor. Mix dried lavender, rose petals or lemon verbena into baked goods, jam glazes or beverages. The possibilities are endless.
Follow Proper Storage
Getting the most out of your dried herbs depends greatly on proper storage. After drying, allow herbs to equilibrate in moisture content for 1-2 weeks before jarring up. Then store dried herbs in airtight glass jars kept out of direct light. Label jars with the herb name and date to help use older herbs first. Store delicate herbs like basil for up to 6 months. Heartier herbs like oregano and thyme can last 1-2 years stored properly. Refrigeration can help prolong shelf life but is not required.
Check periodically for moisture build up in stored jars. Excess moisture invites mold growth which necessitates discarding herbs. If condensation occurs, the herbs likely were not dried thoroughly enough before storage. Consider investing in a dehydrator which dries herbs faster and more evenly than air drying. Follow the manufacturer’s instructions for best results.
The satisfaction of growing, harvesting, and preserving herbs from garden or market is hard to beat. With proper drying technique and storage, you can enjoy their convenience, nutrition, and flavor for months on end. We hope these tips will help you get the most out of your dried herb bounty this season and beyond.
Creative Ways to Use Dried Herbs
Dried herbs open up a world of flavor possibilities in the kitchen. When herbs are dried properly, they retain much of the aromatic oils and intense flavors that make them so versatile in recipes. With a little creativity, home cooks can transform dishes by artfully incorporating dried herbs.
One creative way to use dried herbs is to make compound butters. These flavorful butters are easy to prepare. Simply allow a stick of butter to soften and mix in 2-3 tablespoons of dried herbs like rosemary, thyme, or oregano along with a clove of minced garlic, lemon zest, or other complementary ingredients. Form the flavored butter into a log, wrap tightly, and chill before slicing off pats to top meats, vegetables, breads, and more. The butter melts over hot foods, releasing a burst of herbal flavor.
Preserving the Bounty: How to Dry and Store Herbs also recommends rehydrating dried herbs to use in place of fresh. To rehydrate, cover the dried herbs with hot water and let sit for 5-10 minutes before draining thoroughly. Rehydrated herbs like basil, cilantro, and parsley can be used to prepare pesto, chimichurri, compound butters, and salad dressings. Their softened texture and revived flavor closely resembles fresh.
Get creative with dried herb blends by mixing your own signature combinations to liven up everyday dishes. Play with herbal flavors like lemon thyme, oregano, and marjoram or make a Moroccan-inspired blend with cumin, coriander, and mint. Use the blends to season meat rubs, sprinkle over vegetables before roasting, or whirl into hummus, tapenades, and salad dressings.
Preserving the Bounty: How to Dry and Store Herbs suggests infusing vinegars and oils with dried herbs to extract vibrant flavor. Popular herb combinations include rosemary, garlic, and red pepper flakes or basil, oregano, and lemon zest. Use the infused vinegars to make herbal salad dressings and marinades or the infused oils for dipping breads. The longer the dried herbs steep, the more intense the infusion.
Finally, one of the most creative ways to use dried herbs is by making herbal teas. Tea blends pair nicely with dried mints, lemon balm, lavender, fennel, rose petals, hibiscus, and more. For best flavor extraction, cover the herbs with boiling water and allow to steep for 5-7 minutes. Sweeten if desired or enhance the tea with a squirt of citrus juice. Sip these aromatic herbal infusions hot or chilled over ice.
Dried herbs offer so many possibilities to craft flavorful foods and beverages at home. With a supply of herbs dried properly and stored correctly, home cooks can get creative blending spices and experimenting with new ways to incorporate intense herbal flavor into everyday meals.
Seasonings and Spice Blends from Dried Herbs
Dried herbs are extremely versatile ingredients that can be used to add flavor to almost any savory dish. One of the best ways to make the most of your home-dried herb bounty is to use them to create customized spice blends and herb seasonings. Blending dried herbs together, or with other dried spices and ingredients, allows you to create unique flavor combinations that put your dried herbs to excellent use.
When creating dried herb spice blends and seasonings, the possibilities are endless. You can opt for simple combinations featuring two or three complementary herbs, or craft complex blends with five or more herbs and spices. The blends can then be used to season everything from meat and fish, to vegetables, grains, and more. Staple herbs to have on hand for blending include rosemary, thyme, oregano, basil, and sage. Consider combining these with ingredients like garlic powder, onion powder, crushed red pepper, lemon zest, and more.
Some herb and spice blend ideas to try:
Herbes de Provence – This traditional French blend combines savory, lavender, basil, thyme, and fennel seed. Delicious with chicken, fish, lamb, and vegetables.
Italian Seasoning – A mix of basil, oregano, rosemary, thyme, garlic powder, and crushed red pepper. Perfect for pasta sauces, pizza, tomatoes, chicken, and more.
Za’atar – A Middle Eastern blend featuring thyme, oregano, marjoram, sesame seeds, and tangy sumac. Great on flatbreads, hummus, lamb, and vegetables.
Fines Herbes – A French blend with subtle onion and garlic flavors. Made with parsley, chives, tarragon, and chervil. Lovely with eggs, chicken, fish, potatoes, and rice.
Pork Rub – For grilled and roasted pork, combine rosemary, thyme, sage, garlic powder, onion powder, paprika, mustard powder, salt, and pepper.
Lemon-Dill Seasoning – Mix lemon zest with dried dilled, parsley, chives, and tarragon. Sprinkle on fish, chicken, potatoes, and vegetables.
Once you’ve created your own signature spice blends, store them in airtight containers out of direct sunlight to preserve freshness. Make sure to label each container with the blend name and ingredients. Over time, the flavor and potency of dried herb blends will start to diminish. For best results, try to use up homemade blends within 3-6 months. You can also make the blends in smaller batches that you can remake fresh when needed.
When cooking with your homemade herb blends and seasonings, add them at the beginning of the cooking process whenever possible. This allows time for the flavors to fully develop and permeate the ingredients. Start with smaller amounts, taste, and add more blend to adjust flavor as desired. Remember that dried herb flavors will concentrate and intensify as dishes cook.
Get creative with how you incorporate your homemade herb blends into recipes. Use them to coat proteins before searing or roasting. Mix them into compound butters, marinades, dressings, and sauces. Sprinkle them over finished dishes. The possibilities are endless!
Creating your own herb spice blends and seasonings is an extremely gratifying way to preserve and make the most of herbs you grew and dried yourself. Experiment, customize flavors to your taste, and soon you’ll have signature blends that enliven and elevate everyday cooking.
The History of Drying Herbs
# The History of Drying Herbs
Herbs have been dried and preserved for thousands of years as a way to make their flavor, nutrients, and medicinal properties last longer. The practice of drying herbs likely originated out of necessity – to store herbs for use during colder months or periods when fresh herbs were not available. However, drying has evolved into an artform and science over the centuries.
Archaeological evidence shows that as early as 1200 BC, ancient Egyptians dried herbs like oregano, mint, sage, and thyme for use in cooking, medicine, religious ceremonies, cosmetics, and more. Clay pottery found in ancient Egyptian tombs contained trace elements of dried herbs and spices.
In ancient Greece and Rome, dried herbs like rosemary, bay leaves, and parsley were commonly traded. These civilizations understood the technique of air-drying herbs in bunches or on trays out in the hot Mediterranean sun. Storing herbs in clay jars was also practiced to retain aroma and flavor.
During the Middle Ages, herbs were grown and dried extensively in monastery gardens across Europe. Monks perfected drying methods and became skilled apothecaries, using dried herbs extensively for medicinal purposes during a time when little other medicine was available.
The spice trade expanded drying and preservation techniques even further as merchants transported herbs longer distances around the globe. Spices like black pepper, cinnamon, cardamom and others from Asia and the Middle East were shipped dried to Europe by land and sea. Later, herbs native to the New World like chili peppers, vanilla, and allspice were dried and exported back to Europe as the exploration age took off.
Of course, no discussion of herb drying history is complete without mentioning the Salem Witch Trials of 1692. Many of the “witches” who were persecuted and executed in Salem grew and dried herbs, which led locals to become suspicious of their practices. This illustrates how in some historical periods, herb craft was seen as mystical and dangerous rather than the useful culinary and medicinal art it truly was.
Today, thanks to centuries of accumulated wisdom, drying techniques allow us to enjoy the preserving the bounty of flavor, nutrients, and unique properties herbs have to offer year round. While modern technology like refrigeration and freezing exist, drying remains popular for intensifying herb flavor as moisture dissipates, ease of storage, sustainability, and retaining medicinal qualities that can degrade from freezing.
Understanding the rich history of drying gives deeper appreciation of herbs’ enduring role in cuisine, health, culture and our lives. When we utilize the power of herbs in everyday cooking or remedies, we stand on the shoulders of herb craftspeople from ancient times and connect to humanity’s long tradition of gathering nature’s bounty.
Regional Dried Herbs in Cuisine
Herbs and spices have been used to flavor and preserve foods for thousands of years. Different regions around the world have their own unique dried herbs that are integral parts of the local cuisine. Understanding the dried herbs used in regional cooking can open up new flavor profiles and dishes to try at home.
The Mediterranean region is well known for its use of oregano, thyme, rosemary, and sage. These hardy herbs grow well in hot, sunny climates and lend themselves perfectly to drying. Dishes like pasta sauces, roasted vegetables, meat rubs, and stuffings are often seasoned with a blend of dried Mediterranean herbs. Going beyond the usual suspects, za’atar is a Middle Eastern spice blend made with thyme, oregano, marjoram, sesame seeds and sumac that is used on everything from breads to meats. Preserving these aromatic herbs by air drying or using a dehydrator allows cooks to enjoy their flavor all year round.
India is the source of many warm, earthy dried herbs and spices like turmeric, cumin, coriander, fenugreek, cinnamon, cardamom, and curry leaves. These are blended into complex masalas and garam masalas to flavor regional specialties. Drying these herbs, spices, and blends concentrates their essences for heightened flavor and aroma. They keep for months when stored properly, allowing Indian cooks globally to recreate authentic dishes.
Provence in France has given us two of the most popular dried herbs – lavender and herbes de Provence. The floral notes of dried lavender have many culinary uses like flavoring sugars, desserts, beverages, vinegars, honey, and more. Herbes de Provence typically contains a mixture of rosemary, thyme, oregano, and savory that perfectly seasons everything from roasts to vegetables when rehydrated or blended into a seasoning salt.
Mexico’s earthy, smoky dried herbs like chipotle chiles, ancho chile powder, Mexican oregano, and epazote are irreplaceable in authentic mole sauces, salsas, beans, soups, and meats. Using dried chiles allows the flavor to be concentrated without too much spiciness. Regional herbs like epazote have antimicrobial properties that aid in preserving foods in hot climates. With creative use of Mexican dried herbs and chiles, home cooks can put together complex layers of flavor.
Understanding the dried herbs used in regional cuisines opens up new dimensions of flavor in the kitchen. Experimenting with za’atar from the Middle East, garam masala from India, herbes de Provence from France or dried chiles from Mexico allows anyone to add authentic touches to their cooking. Though fresh herbs have their place as well, extending the bounty through proper drying techniques preserves the essence of herbs to be used all year long. Whether air dried, dehydrated or frozen, dried herbs impart convenience along with concentrated flavor and aroma. As this article has shown, incorporating regional dried herbs into cuisine is an easy way to add new flavors and complexity while preserving the harvest.


No comment yet, add your voice below!