Beginner’s Guide to Growing Your Own Herb Garden

Beginner’s Guide to Growing Your Own Herb Garden

Choosing the Right Herbs for Your Garden

When embarking on growing your first herb garden, one of the most exciting steps is deciding which herbs to plant. With thousands of herb varieties to choose from, the options can feel overwhelming for a beginner herb gardener. This guide to choosing herbs will walk you through the key considerations to help you select the best herbs for your needs and environment.

First, assess your climate conditions and growing zone. Most culinary herbs thrive in zones 3-9, but some varieties are more cold hardy or heat tolerant than others. Understanding your average temperatures, sunlight, rainfall and growing season will allow you to pick herbs suited to your region. For example, basil requires warmer conditions and would need container growing or transplanting indoors in colder climates.

Next, take stock of the sunlight exposure you can provide. Most herbs require at least 6 hours of direct sunlight daily. If you only have shady spots, focus on shade-loving options like mints, parsley and cilantro. You’ll also want to pay attention to soil drainage and moisture, as herbs like drier soil while others need consistent water.

When first starting out, it’s smart to choose versatile, easy-to-grow herbs that allow for plenty of harvest opportunities to cook with. Some of the best beginner-friendly herbs include:

– Basil – fast-growing with frequent harvests for pesto, tomato dishes and more

– Chives – perennial onion flavor great for eggs, salads and as edible garnish

– Cilantro – quick-growing leaves key for Mexican and Asian cuisines

– Dill – popular pickling herb that readily self-seeds

– Mint – perennial that spreads aggressively, nice for tea, desserts, juleps

– Oregano – aromatic leaves used widely in Italian, Greek dishes

– Rosemary – shrub-like plant with piney flavor for roasts, vegetables, breads

– Sage – savory herb for hearty fall and winter meals

– Thyme – essential ingredient in a bevy of baked goods, meats, soups

When selecting your target herbs, also consider how much you cook with certain flavors and ingredients. For instance, devote more space to parsley and basil if you regularly make Italian food. Focus on cilantro if Mexican is your go-to. Tailor herbs to match your menu.

It’s also smart for beginners to look for herb varieties labeled as disease-resistant to minimize troublesome issues. Compact or dwarf cultivars are also great starter plants, as they take up less space and require less pruning.

Don’t just look at individual herb varieties in isolation. Make sure to research how to effectively combine and rotate herbs in the garden to improve soil health over time. You’ll also want to intersperse flowers and flowering herbs to attract beneficial pollinators.

While it’s tempting to plant every herb that catches your eye, restrain yourself to 3-5 herbs for your first garden. You can always expand and diversify once you feel comfortable caring for your starter plants. When in doubt, you really can’t go wrong with the classics: basil, parsley, cilantro and thyme make an excellent beginner garden!

Following these tips for selecting herbs tailored to your growing conditions, cooking needs and gardening experience will set you up for an abundant first harvest. Soon your kitchen will be overflowing with homegrown herbal flavor.

Preparing the Soil for Planting

Proper soil preparation is a crucial first step when starting an herb garden. Many beginners make the mistake of not giving their soil the attention it needs before planting. However, taking the time upfront to ready your soil will pay off all season long with thriving herbs. This beginner’s guide to growing your own herb garden will walk you through the key things to know when preparing soil for planting.

Assess Your Soil Type

The first step is determining what type of soil you currently have. Soil can generally be classified into three main types – clay, sandy, and loam soils. Clay soils contain small mineral particles that cling together and drain slowly. Sandy soils have larger particles that allow water to drain rapidly but do not retain moisture well. Loam soils are an ideal blend of sand, silt, and clay that provide good drainage while retaining moisture and nutrients.

Most herbs prefer loam soils for optimal growth. However, assessing your native soil will indicate if any amendments need to be added to create better growing conditions. For example, sandy soils may require mixing in compost or coir to improve moisture retention. Meanwhile, clay soils can be loosened up by blending in materials like compost or perlite to prevent compaction.

Add Nutrient-Rich Compost

Whether starting with sandy, clay or loam soil, mixing in 2-4 inches of quality compost or well-rotted manure is highly recommended when preparing soil for an herb garden. The organic matter and nutrients found in compost feeds soil microbes and provides a slow-release food source for herbs as they grow.

Compost also lightens heavy clay soils while helping sandy soils better retain moisture. It’s generally best to spread compost over the planned garden bed and use a spade or fork to turn over and blend together the top 8-12 inches of native soil with the compost. This will provide an enriched planting bed ideal for herbs.

Adjust the Soil pH Level

Testing and adjusting the pH level of your prepared soil bed is also important. Soil pH significantly impacts nutrient availability for plant uptake and growth. Most culinary herbs prefer a neutral to slightly alkaline soil pH between 6.5-7.5. Extremely acidic or alkaline conditions can prevent herbs from accessing certain nutrients or cause toxicity.

Use an inexpensive soil pH testing kit to check if your soil’s pH falls within the optimal herb growing range. If it tests too acidic, dusting lime over the bed and turning it under can raise pH. If too alkaline, mixing sulfur into the top layers can help lower pH. Getting soil pH within the ideal zone supports robust establishment and growth of an herb garden.

Improve Drainage

Herbs need soil that drains well to avoid root rot yet still retains some moisture. Excess standing water or overly dense, compacted soil prevents healthy root systems. If you have heavy clay soil or low-lying areas that collect water, take measures to improve drainage before planting.

Adding raised garden beds on top of poor draining native soil can help. Mixing in materials like sand, small pebbles or perlite creates air pockets that facilitate drainage. Installing French drains, gravel trenches or tile drainage pipes can also divert excess moisture. Preparing soil with proper drainage prevents waterlogged roots and encourages vigorous herb growth.

Allow Beds to Settle Before Planting

After blending in compost and any needed amendments to improve texture, nutrients and pH, allow your prepared soil beds to settle for 1-2 weeks before sowing herb seeds or transplanting seedlings. This gives beneficial microbes and fungi time to stabilize and begin breaking down organic matter. Raking lightly to level the bed also enables you to spot and remove any weeds or debris.

Letting soil settle before planting is an easy way to set your beginner herb garden up for success. The improved texture and nutrient availability supports better seed germination and quicker establishment of transplanted herb plants.

Follow these key steps for preparing soil and your budding green thumb will be rewarded with thriving herbs all season long. Proper planning and preparation creates the ideal foundation. Pair enriched, fertile soil with the joy of nurturing herbs, and your personal garden will soon be overflowing with vibrant plants. So go ahead – prepare, plant and grow your very own herb garden this year!

Deciding Where to Locate Your Herb Garden
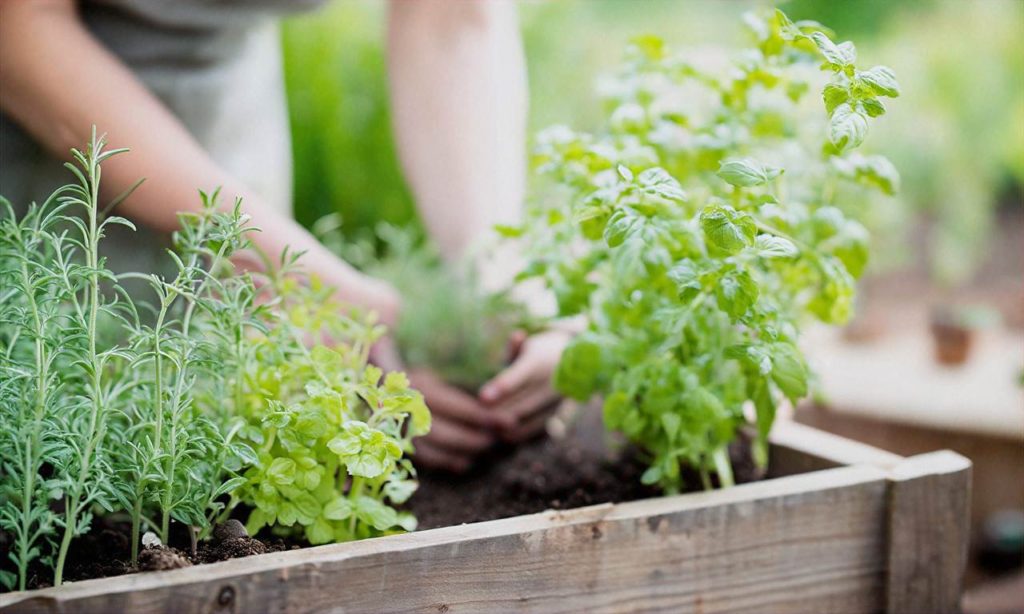
Beginner’s Guide to Growing Your Own Herb Garden

When starting an herb garden for the first time, one of the most important decisions is where to locate it. The location of your herb garden will impact how well your herbs grow and thrive. This beginner’s guide to growing your own herb garden will walk through the key factors to consider when deciding where to put your herb garden.

Sunlight

Most culinary herbs need at least 6 hours of direct sunlight per day. Some herbs, like basil, oregano, and thyme, do best with 8-10 hours of sunlight. When deciding where to locate your herb garden, be sure to pick a sunny spot. Observe the area over the course of a day and make note of any shadows that may limit sunlight access. South-facing areas usually get the most sun.

If you don’t have any spots that get full sun, look for locations that get at least 6 hours of sunlight, especially during the main part of the day. You can also supplement sunlight with grow lights. Proper sunlight is crucial for robust herb growth and good flavor production.

Soil Quality

In addition to sunlight, soil quality plays a big role in how well herbs will grow. Most culinary herbs prefer loose, well-drained soil that is rich in organic matter. Avoid planting herbs in dense clay or soggy soil. Test the drainage of a potential herb garden location by digging a small hole 12 inches deep, filling it with water, and observing how quickly the water drains away. The hole should drain completely within an hour.

You can amend dense soil by mixing in compost or other organic material like peat moss before planting. Feeding your herbs with compost or fertilizer throughout the growing season will help enrich the soil over time. Locate your herb garden where you have or can create optimal growing conditions.

Water Access

Easy access to water is another consideration for siting your herb garden. While most herbs are drought tolerant once established, regular watering is important, especially for seedlings and plants in containers. Having a spigot, hose, or irrigation system nearby will make watering simple.

If easy water access isn’t possible, locate your herb garden closer to your house. You can water with collected rainwater or carry water in a watering can. Mulching around plants also helps retain soil moisture. But proximity to a water source will prevent potential issues and make caring for your herbs much simpler.

Convenience and Aesthetics

When deciding precisely where to put your herb garden, also factor in convenience and aesthetics. Consider locating it near your kitchen door for quick access when cooking. Or place it somewhere visible from inside the house where you can monitor growth. Position the garden so it can be admired and enjoyed as part of your landscape.

If you’ll be growing herbs on a balcony or patio, use attractive containers and place them where their appearance complements your space. The placement of your herb garden is about more than just sunlight and soil. Choose a spot that makes tending to your herbs a pleasure rather than a chore.

With attention to sunlight, soil quality, water access, and aesthetics, you’ll be sure to locate your beginner herb garden in the optimal spot. Proper placement will set your herbs up for success and make maintaining them enjoyable for years to come. Follow this beginner’s guide when deciding where to put your herb garden, and you’ll soon be harvesting delicious homegrown herbs.

Planting and Caring for Herb Seedlings

Once you have prepared the soil and decided on a spot for your herb garden, it’s time to plant your herb seedlings. Caring for the seedlings properly after planting is crucial to get them off to a healthy start. Here is a beginner’s guide to planting and caring for herb seedlings in your home herb garden.

Select Healthy Herb Seedlings

When purchasing or receiving herb seedlings to plant in your garden, inspect them closely to ensure you select only the healthiest ones. Look for seedlings with green leaves and healthy white roots. Avoid any that are brown, wilted, or have black roots as these likely will not thrive after planting.

Water Seedlings Before Planting

Be sure to water your herb seedlings lightly before planting them. Watering them will help the soil adhere to the roots after transplanting them into the ground. However, you don’t want them sopping wet. Aim for moist but not soaked through.

Dig Proper Holes for Transplanting Seedlings

Use a trowel, shovel or garden fork to dig holes in your prepared garden soil based on the size of each herb seedling’s root ball. As a general rule, the holes should be about twice the width and depth of the pot or cells the seedlings are currently growing in. Make sure the holes have loosened soil on the bottom to allow the roots to penetrate downwards more easily.

Carefully Transplant Herb Seedlings

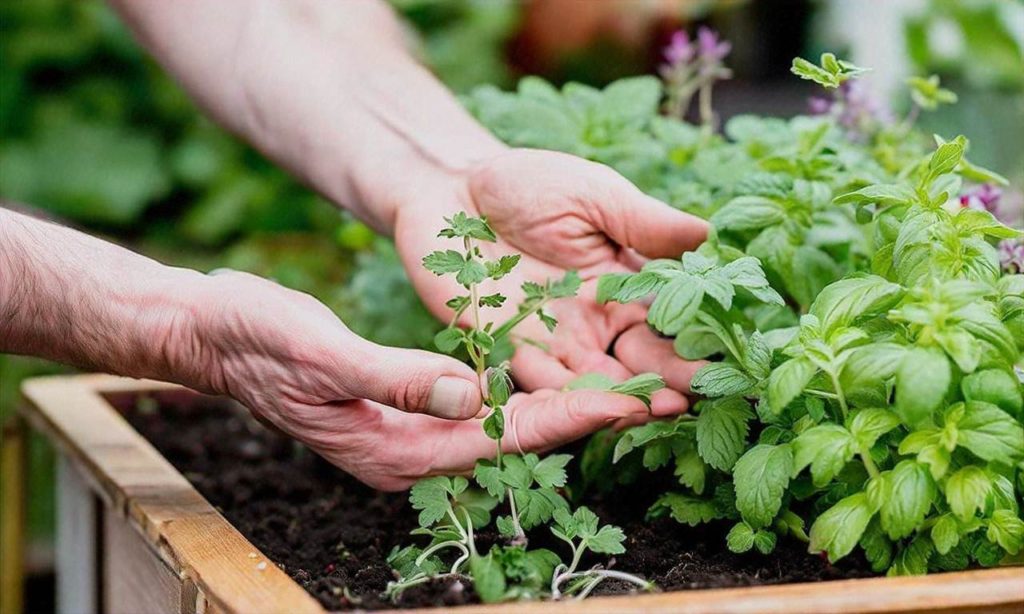
Hold each herb seedling by its leaves, not the stem, and gently place the root ball into the hole you dug. Make sure the plant is positioned at the same level in the ground as it was in its pot. Refill the hole with loose soil, pressing gently around the plant to support it. Space plants according to spacing recommendations for each herb variety.

Water Transplanted Seedlings Well

As soon as your herb seedlings are transplanted into the ground, water them thoroughly. Soak the soil around each seedling to remove any air pockets and help the roots establish contact with surrounding soil. Proper watering right after transplanting prevents shock and promotes faster growth.

Consider Using Row Covers

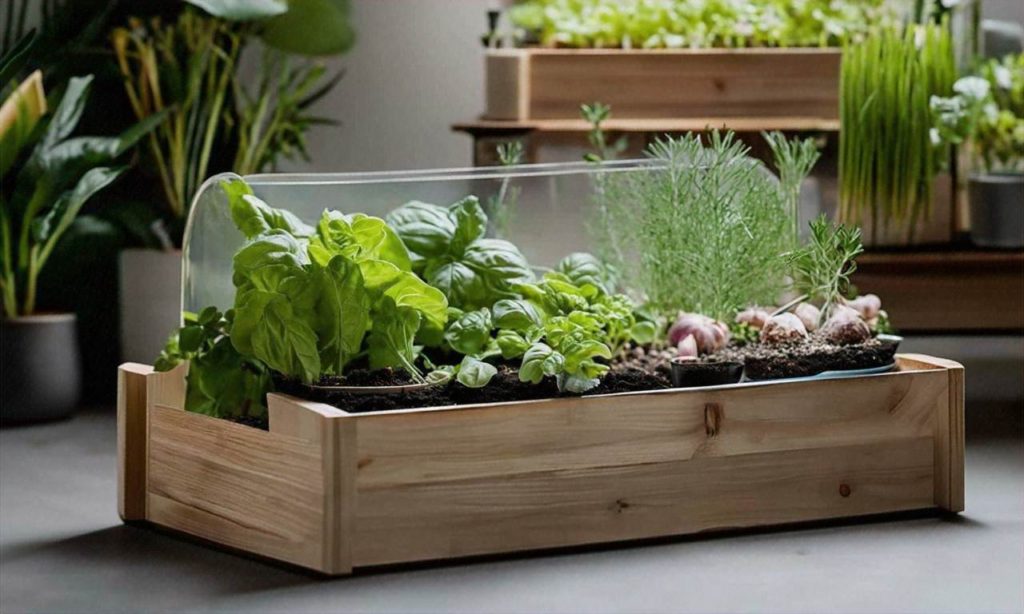
Row covers made from fabric or plastic sheeting can protect tender herb seedlings from harsh weather fluctuations. These covers allow air, light and water through while moderating soil temperature. Row covers prevent battering from wind and rain. They also keep insect pests away.

Provide Adequate Sunlight

Most culinary and medicinal herbs thrive best in full sun, which means at least 6 hours of direct sunlight daily. Be sure to situate your herb garden in a sunny area or the seedlings may stretch and fail to flourish. Proper sunlight is vital for robust herb growth.
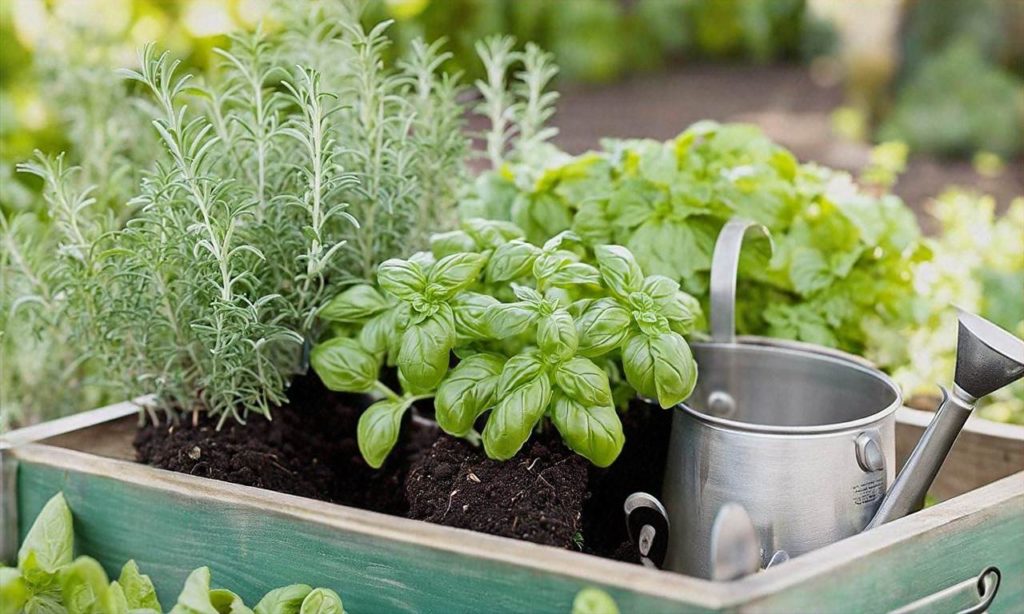
Beginner’s Guide to Growing Your Own Herb Garden

Use Organic Fertilizer if Needed

While compost-enriched soil should provide sufficient nutrients, fast-growing herb seedlings may benefit from supplemental organic fertilizer. Use an all-purpose organic fertilizer, following package instructions for how much and how often to apply it. Fertilizing gives seedlings an extra nutrient boost.
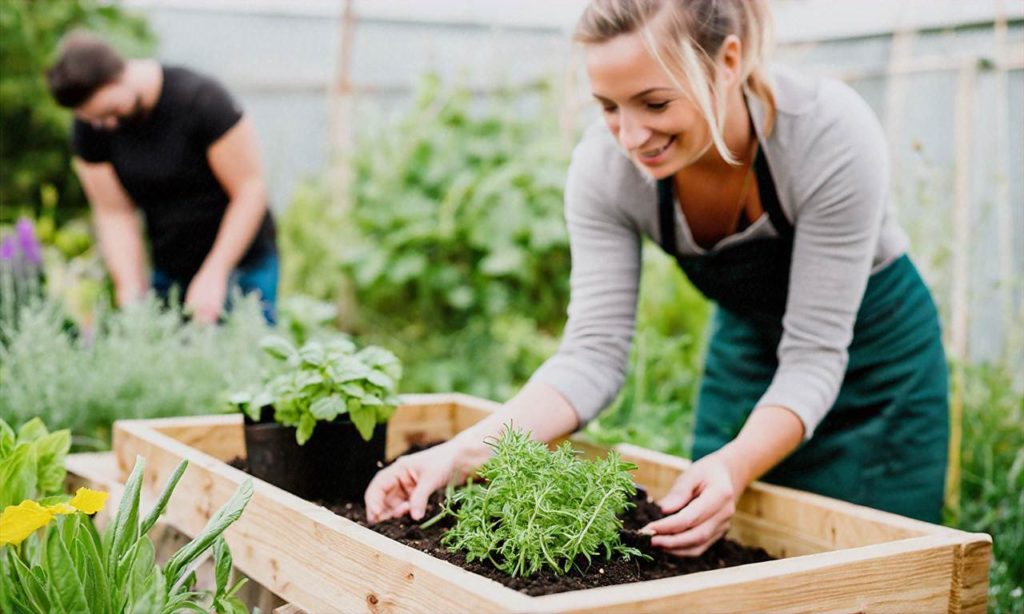
Beginner’s Guide to Growing Your Own Herb Garden

Monitor Soil Moisture

Check the soil moisture around your newly planted herb seedlings daily. Herbs prefer consistently moist but well-drained soil. Allow the soil to slightly dry out between waterings but don’t let it become completely parched. Proper moisture prevents drought stress.

Gently Loosening Soil Helps

If the soil around your newly planted herb seedlings becomes too compacted, gently loosen it with a hand trowel or fork. Be careful not to disturb the roots. This allows better water, air and nutrient penetration into the soil to feed plant roots.

Watch for Insect Pests

Keep a close eye out for insect pests like aphids, snails and caterpillars which may attack tender new growth on herb seedlings. Deal with any pests you spot right away before they get out of control and damage plants. Pick them off by hand or use organic sprays.
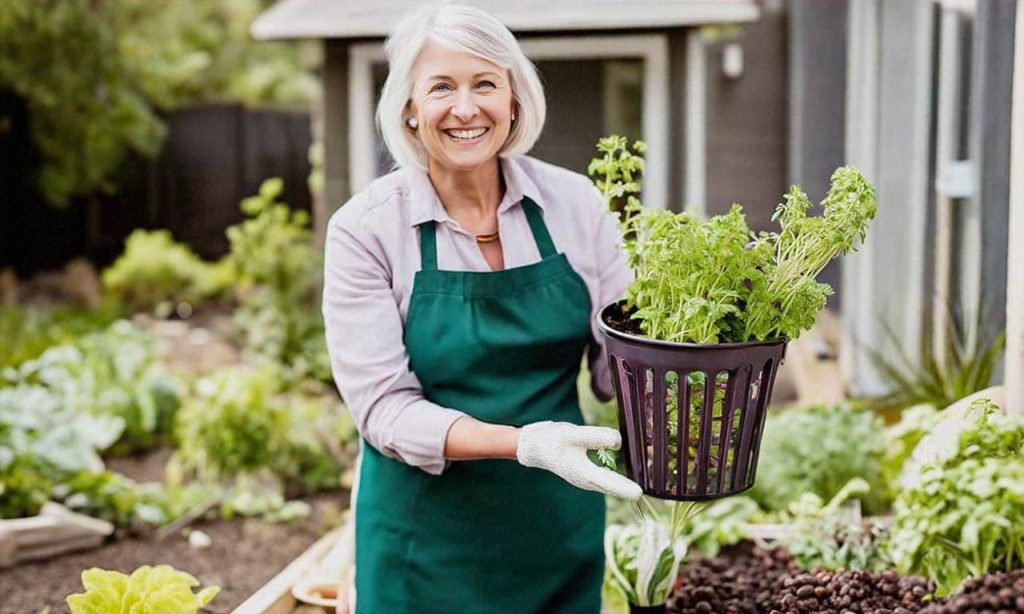
Beginner’s Guide to Growing Your Own Herb Garden

Address Diseases Quickly

Various fungal diseases may sometimes trouble herb seedlings, especially in damp conditions. Prevent diseases by providing good air circulation. Remove and destroy any seedlings with disease symptoms like powdery mildew right away to keep issues from spreading.

Pinch Off Flower Buds

Herb seedlings often develop flower buds as they mature but flowering diverts a plant’s energy from leaf and stem growth. Pinch off any flower buds you notice on seedlings to promote a stronger harvest of leaves to use for culinary purposes later on.

Transplant Seedlings Promptly

If you grow herb seedlings indoors or purchase them already several weeks old, transplant them promptly into the garden. Older seedlings that get root bound in small pots may fail to thrive when planted outside. Transplant them while still young for best success.

Follow this beginner’s guide for properly planting and caring for the herb seedlings in your garden and you will give them the best chance of growing into a vibrant harvest of herbs for your kitchen. Pay close attention to their needs in the first few weeks after transplanting and your effort will pay off all season long.

Ongoing Herb Garden Maintenance

Maintaining your herb garden does not have to be difficult or time-consuming, even for beginners. With some basic care and attention, your herb garden will thrive for years to come. Here are the key things you need to know about keeping your herb garden healthy and productive in the long run.

Watering Your Herbs

One of the most important parts of herb garden maintenance is proper watering. Most culinary herbs prefer drier soil and do not like soggy roots. Aim to water your herbs thoroughly once the top inch or two of soil becomes dry. Check the soil moisture by digging down with your finger. During hot and dry weather, your herbs may need watering every few days. Container gardens also tend to dry out more quickly than in-ground beds.

Set up a regular watering schedule, but adjust as needed based on factors like weather, plant size, and soil type. Overwatering can cause root rot and other problems for herbs. Underwatering will cause wilting, poor growth, and lower yields. Get to know each of your herbs’ preferences. Some, like mint, prefer consistently moist soil, while others, like lavender and rosemary, thrive on less frequent deep watering.

Mulching

Applying 2-3 inches of organic mulch around your herb plants serves multiple purposes. It helps retain soil moisture so you water less often. Mulch also prevents weeds, moderates soil temperature, and as it breaks down it adds nutrients to the soil. Organic mulch materials like wood chips, shredded bark, chopped leaves, or compost are ideal for herb gardens. Replenish the mulch layer as needed each year.

Weeding

It’s important to stay on top of weeds in your herb garden, which compete with your plants for water, nutrients and sunlight. Weed by hand frequently, being careful not to disturb the herb plants’ roots. Adding mulch as discussed above will also significantly cut back on weeds. For more stubborn weeds, use an organic herbicide formulated for edible gardens.

Pruning Herb Plants

Pruning your herbs encourages bushy, compact growth and higher yields. For leafy herbs like basil, mint, sage, etc., pinch or snip off flower buds as they form to promote more leaf production. Remove any damaged or diseased growth as soon as you spot it. Periodically prune back leggy growth and cut back your herbs by one-third to one half to stimulate new growth. Harvest often by cutting sprigs of herbs frequently. At the end of the season, cut woody herbs like rosemary and thyme back more severely. Let your herbs go dormant in winter before a early spring pruning.

Fertilizing

While herbs do not require very nutrient-rich soil, applying organic herb fertilizer or compost 1-2 times per growing season will boost plant health and yields. Use an organic all-purpose fertilizer formulated specifically for edible herb gardens, following package instructions for best results. Alternately, work aged compost or well-rotted manure into the top few inches of soil surrounding your herbs. This will provide a slow-release feeding.

Avoid over-fertilizing your herbs, however, as this can diminish their signature flavors and aromas. Herbs thrive best in soil of average, not excessive, fertility. Test your garden soil periodically and amend as needed based on those results.

Pest and Disease Prevention

Herb gardens are generally less prone to pests and diseases than vegetable gardens. But it still helps to take some preventative measures to keep your plants healthy. These include crop rotation, cleaning up plant debris, removing affected growth immediately, and hosing plants off with water to discourage pests like aphids. Support beneficial insects by avoiding pesticides and planting flowers they like.

Companion planting with aromatic herbs like mint, garlic, basil and onions can also help repel pests. Scout for issues frequently and address them promptly to avoid spreading. Common herb garden pests to look out for are spider mites, aphids, whiteflies and caterpillars. Diseases to prevent include blights, fungal issues and root rot from overwatering. Maintaining vigor through proper care is key to avoiding problems.

Overwintering Tender Herbs

If you live in a climate with cold winters, plan ahead for overwintering any tender perennial herbs like rosemary, sage, thyme, oregano, lemon balm, etc. These plants cannot withstand freezing temperatures and frost. Pot up plants to bring indoors before fall. Prune them back by one-third to reduce stress. Find the sunniest indoor spot possible and continue watering over the winter. Not all herbs require this, but for non-hardy perennials it will allow them to live on for years to come.

By following these basic herb garden maintenance practices, both beginning and seasoned herb gardeners can enjoy an abundant harvest of homegrown herbs. Pay attention to your plants, tend to issues promptly, and avoid both under-and-overcare. With routine care, you will reap flavorful, nutritious herbs for months on end.

Harvesting and Preserving Homegrown Herbs

# Harvesting and Preserving Homegrown Herbs

Growing your own herbs can be very rewarding, but knowing how and when to harvest them is key to getting the most out of your herb garden. This beginner’s guide to harvesting and preserving homegrown herbs will ensure you can enjoy their flavor all year long.

## When to Harvest Herbs

Timing is everything when it comes to harvesting herbs. Here are some tips on identifying peak harvest times:

– Harvest leafy herbs like basil, mint, or parsley when the plant has reached 6-12 inches in height. Pinching off leaves regularly encourages more growth.

– Harvest just before plants flower for the best flavor in cooking herbs like thyme, sage, rosemary, and oregano.

– Let dill and cilantro go to flower and seed before harvesting.

– Harvest chives when they are 6 inches tall. Cut the grass-like leaves off at ground level and they will continue to regrow all season long.

The beginner’s guide to growing your own herb garden recommends checking plants frequently to identify when they are ready for picking. The oil concentration can diminish after plants bolt or flower, so pay attention to timing for best results.

## How to Harvest Herbs

– Use clean, sharp scissors or garden shears when harvesting herbs. Tearing leaves by hand can damage plants. Cut just above leaf nodes where new offshoots will emerge.

– For leafy herbs like basil, mint, cilantro and parsley, cut whole stems rather than just picking a few leaves. This encourages more compact growth.

– Harvest chives, dill and fennel by cutting back the plant, leaving 2-3 inches above soil level. They will regrow for secondary harvests.

– When harvesting oregano, thyme, sage and rosemary, leave some leaves and stems intact for plant health. Just harvest as needed.

Being careful when cutting herbs ensures the plants remain healthy and productive in your beginner herb garden all season long.

## Preserving Your Homegrown Herb Harvest

Enjoying homegrown herbs from your garden year round is easy with proper preservation techniques:

### Drying Herbs

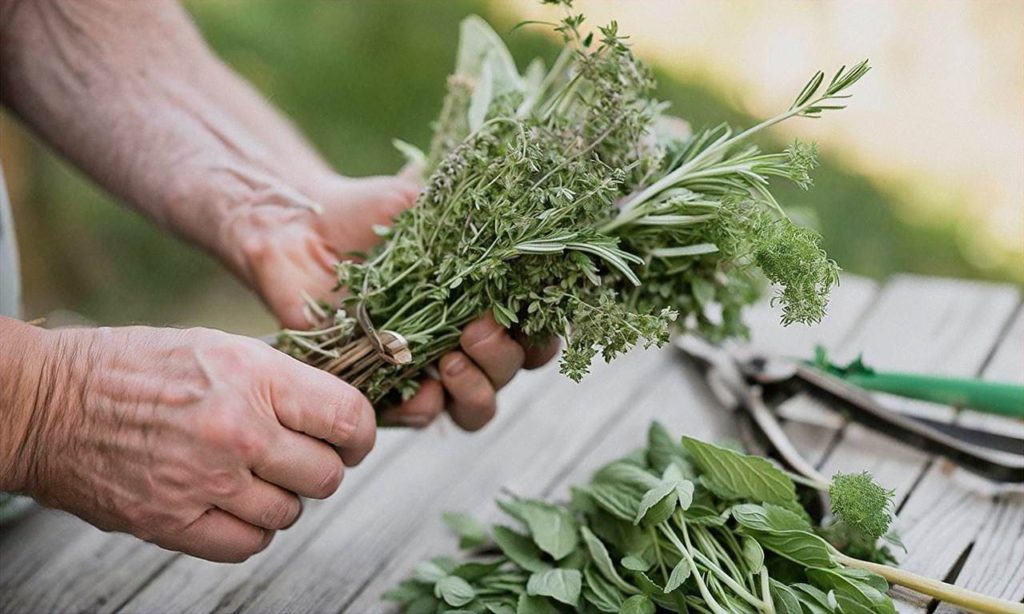
The most common way to preserve herbs for winter is by drying. Simply tie freshly harvested herbs into small bundles with twine or string and hang upside down in a warm, dry, and dark place until crumbly dry. Alternatively, lay single herb layers out on a screen or rack. Once dried, store whole or crumbled into airtight containers and keep in a cool cupboard. Dried herbs retain their potency for up to a year. Great herbs to dry include oregano, thyme, sage and rosemary.

### Freezing Herbs

Chopped leafy herbs like parsley, basil, chives, cilantro and dill can be frozen and stored in airtight containers or freezer bags. Mix herbs with a bit of water or olive oil before freezing into ice cube trays for easy use while cooking. Frozen herbs will keep for about six months. Frozen herb cubes bring fresh flavor to winter soups and stews!

### Herb-Infused Vinegars & Oils

The flavor of homegrown herbs can also be preserved by steeping them in vinegar or oil, then straining out the herbs once infused. Try popular flavor combos like basil-infused balsamic vinegar or rosemary olive oil. Store infused vinegars and oils in airtight bottles in a cool, dark place and use within a year.

With the simple harvesting, drying and freezing methods from this beginner’s guide to growing your own herb garden, you can enjoy the fresh flavors of homegrown herbs all year long!

Troubleshooting Common Herb Garden Issues

Even the most careful herb gardener can run into issues with their plants. Don’t be discouraged if you encounter problems – these troubleshooting tips will help get your herb garden thriving again.

Not Enough Sunlight

Many culinary herbs, like rosemary, thyme, sage, and oregano, require at least 6 hours of direct sunlight per day. Without adequate sunlight, they may become leggy and fail to thrive. If your herb garden isn’t getting enough sun, consider moving it to a brighter spot or supplementing with grow lights. You can also prune leggy herbs to encourage bushier new growth.

Soil Drainage Problems

Herbs hate sitting in waterlogged soil. Poor drainage causes root rot and other fungal diseases. Make sure your herb garden has amended soil with plenty of compost or peat moss to lighten heavy soils. Raised beds also improve drainage. If you have heavy clay soil, consider creating a raised bed with purchased potting mix for your herbs.

Pests Like Aphids and Whiteflies
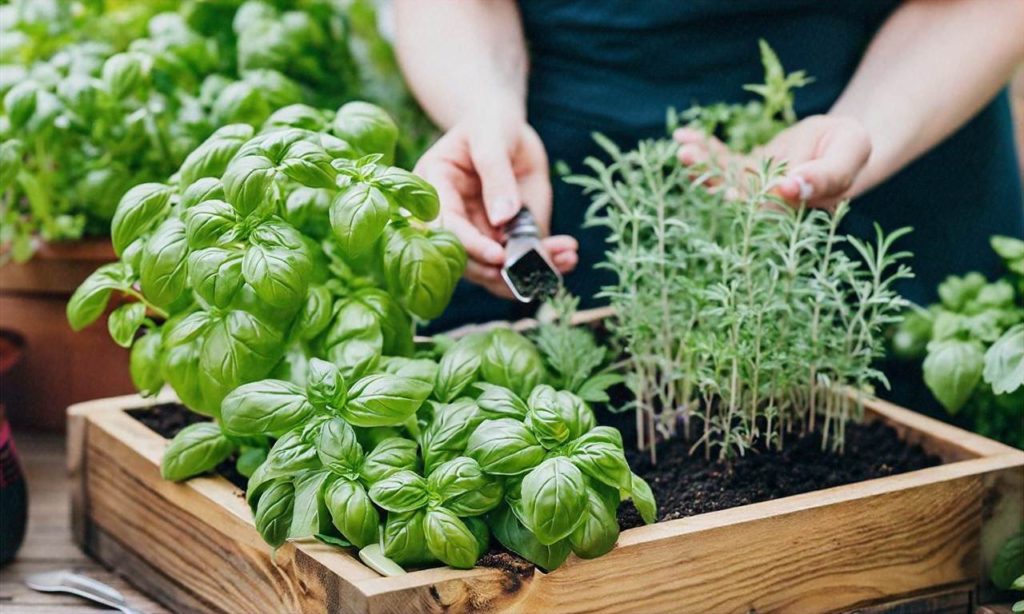
Beginner’s Guide to Growing Your Own Herb Garden

Common herb garden pests include aphids, spider mites, whiteflies, and caterpillars. They damage plants by sucking juices and chewing on leaves and stems. Start by spraying pests off plants with a strong stream of water. For heavier infestations, use insecticidal soap or neem oil. Always follow product instructions carefully.

Animals Nibbling Plants

Rabbits, deer, squirrels, and other critters find herbs tasty. Protect plants with wire mesh fences around your garden. You can also try natural or chemical animal repellent sprays and granules. Be sure they’re safe for edible plants.

Powdery Mildew

Powdery mildew is a common fungal disease of herbs like sage, bee balm, and cilantro. It coats leaves in white fungal spores that spread quickly. Improve air circulation and avoid wetting foliage when watering to reduce powdery mildew. Remove and destroy affected plant parts. As a last resort, use fungicides labeled for edible plants.

Overwatering

It’s easy to overwater container herbs, causing root rot from too much moisture. Let soil dry out between waterings and always pour water directly into the pot, not from the top. Container herbs may need watering daily in summer and only once a week in winter when growth slows.

Underwatering

Just as too much water can damage herbs, so can too little. Drooping, wilting leaves that don’t perk up after watering indicate underwatering. Consistently check soil moisture, especially in summer, and water container herbs when the top inch becomes dry. Use your finger to test moisture levels.

Nutrient Deficiencies

Herbs need proper nutrition to stay healthy. Yellowing leaves and poor growth can signal a nutrient deficiency. Use a balanced liquid fertilizer every 2-4 weeks during the growing season to prevent deficiencies. Too much fertilizer can also damage herb plants, so don’t overdo it!

Diseases from Damp Conditions

Wet foliage and high humidity promote fungal and bacterial diseases of herbs. Space plants appropriately to allow air circulation. Water carefully, keeping moisture off leaves. Remove any diseased foliage immediately and don’t compost it. Allow plants to dry out between waterings.

Cold Weather Damage

Many popular culinary herbs, like basil, sage, cilantro, and lemon balm are very cold sensitive. Temperatures below 45°F can damage or kill them. In cold climates, grow these herbs only during the warm season or bring container plants indoors over winter. Cover herbs outside with row cover fabric if cold snaps occur.

Beginner’s Guide to Growing Your Own Herb Garden: Troubleshooting Common Issues

By properly preparing your herb garden and providing your plants with good growing conditions, you can avoid many common issues. But even experienced herb gardeners run into problems sometimes. Don’t let setbacks discourage you. With a little troubleshooting and TLC, you can get your herb garden thriving again all season long.

For more tips on growing a successful kitchen herb garden, refer back to other sections of this Beginner’s Guide to Growing Your Own Herb Garden series. The journey towards herb gardening success starts with learning!

Top 10 Easiest Herbs for Beginners

When starting your first herb garden, it’s best to begin with herbs that are relatively easy to grow, especially for beginners. Choosing easy-care herbs in the beginning will help ensure gardening success and encourage you to expand your culinary garden over time. Here are 10 of the easiest herb varieties that are great for beginner gardeners.

1. Basil – A warm-weather annual, basil is one of the most popular and easy-to-grow herbs. Its leaves lend bold flavor to many dishes. This quintessential Italian herb thrives in a sunny spot with rich soil and consistent moisture. Pinch back the stem tips to promote bushy basil plants.

2. Chives – As a cold-hardy perennial, chives serve as a tasty garnish and grow well planted from seeds or transplants. Chives sport pretty purple flowers in spring and prefer full sun exposure and well-drained soil. Cut chive leaves close to the ground, and they’ll keep growing all season long.

3. Cilantro – Known for its pungent leaves, cilantro grows quickly from seeds sown directly in the garden after the last spring frost date. This cool-weather annual herb bolts and turns bitter in hot weather but often reseeds itself. Cilantro needs moist, nitrogen-rich soil and partial shade in hot climates.

4. Dill – An annual herb that towers over other plants, dill can be grown from seeds or transplants set out after the danger of frost. Dill enjoys full sun and moist, well-drained soil. Use dill leaves fresh or dried in pickling recipes, salad dressings, fish dishes and more.

5. Mint – Spearmint, peppermint and other mint varieties are perennial herbs known for spreading vigorously. Plant them in containers to control their growth. While mint can tolerate some shade, it thrives best with full sun exposure and consistently moist soil. Use fresh mint leaves in teas, desserts, jellies and more.

6. Oregano – Closely related to marjoram, oregano is a cold-hardy perennial that serves as a flavorful addition to pizza, pasta and many Greek and Italian dishes. This easy-to-grow Mediterranean herb prefers a site with good drainage and at least 6 hours of sunlight. Its leaves can be used fresh or dried.

7. Parsley – Often used as a garnish, parsley is a versatile biennial herb that gives two years of abundant leaves from one planting. Curly and flat-leaf Italian parsley varieties grow well from seeds or transplants set out in early spring once the threat of frost has passed. Site parsley in full sun.

8. Rosemary – An aromatic evergreen shrub, rosemary grows well in containers and thrives with full sun and well-drained soil. You can begin rosemary from plants purchased at garden centers. Use fresh rosemary leaves to flavor roasted meats and vegetables, marinades, breads and more.

9. Sage – Known for its soft gray-green foliage, garden sage is a perennial herb that deserves a permanent place in your kitchen garden. It prefers full sun and dry conditions. Start with transplants set out after the last spring frost. Use fresh sage leaves to flavor poultry, stuffings, pasta and more.

10. Thyme – Offering hints of mint and lemon, common thyme is a tiny-leafed perennial. Both creeping and upright thymes grow well from transplants, cuttings or divisions and do best with full sunlight and average to dry soil. Use fresh sprigs and leaves to flavor meat, fish, vegetable dishes, herbal butters and more. Thyme plays well with others in an herb garden.

When creating your first edible garden, starting with this list of 10 easiest herbs for beginners will set you up for success. As you gain more gardening experience and confidence, you can continue adding more challenging and unusual herbs to expand your homegrown collection. What herb varieties are you most excited to plant in your beginner’s herb garden?

Saving Money by Growing Your Own Herbs

One of the best perks of having your own herb garden is saving money on buying fresh herbs. Store-bought herbs can be very expensive, especially for popular culinary herbs like basil, cilantro, parsley, rosemary, thyme, oregano, chives, mint, and sage. Growing a selection of your favorite herbs at home can save you a lot of money over the course of a year.

According to research, a package of fresh herbs at the grocery store can cost $2-$3 on average. If you cook frequently with herbs like cilantro, parsley, basil, or mint, those costs can really add up. With an herb garden, after the initial small investment in materials and seeds or seedlings, you’ll have an unlimited supply of fresh herbs for free for months on end.

Depending on the size of your beginner’s herb garden and how many different types of herbs you grow, you could save $50, $100 or even a few hundred dollars per year by harvesting your own herbs instead of buying them. That’s money that goes right back into your pocket.

When calculating potential savings from growing your own herbs, be sure to account for how much you typically spend on herbs over the course of a year. Track how often you purchase certain herb varieties and the average cost per package. This will give you a spending baseline that you can then compare to your at-home herb gardening costs.

The main startup costs for a beginner’s herb garden include containers, soil, seeds or starter plants, fertilizer or compost, and gardening tools. However, many of these items are one-time purchases that can be reused year after year, or costs may already be sunk if you have existing gardening supplies.

Seeding herbs from scratch is highly affordable – a packet of 100s of seeds costs just a few dollars. You can also take cuttings or divide existing herb plants to propagate new ones for free. If buying starter plants, young herb seedlings typically range from $3-$5 per plant. Choose the most budget-friendly option for acquiring your first batch of herbs.

When cared for properly, most culinary herbs will continue producing leafy growth for 2+ years, giving you an exceptionally high return on your initial investment. As long as you nurture your herbs and harvest them sustainably, you’ll continue yielding savings season after season.

Beyond the financial savings, growing your own herbs also means you’ll have the freshest, most flavorful herbs possible. Homegrown herbs hold onto more aroma, vitamins, and beneficial plant compounds compared to herbs that have been sitting in grocery store packaging for days or weeks after being harvested.
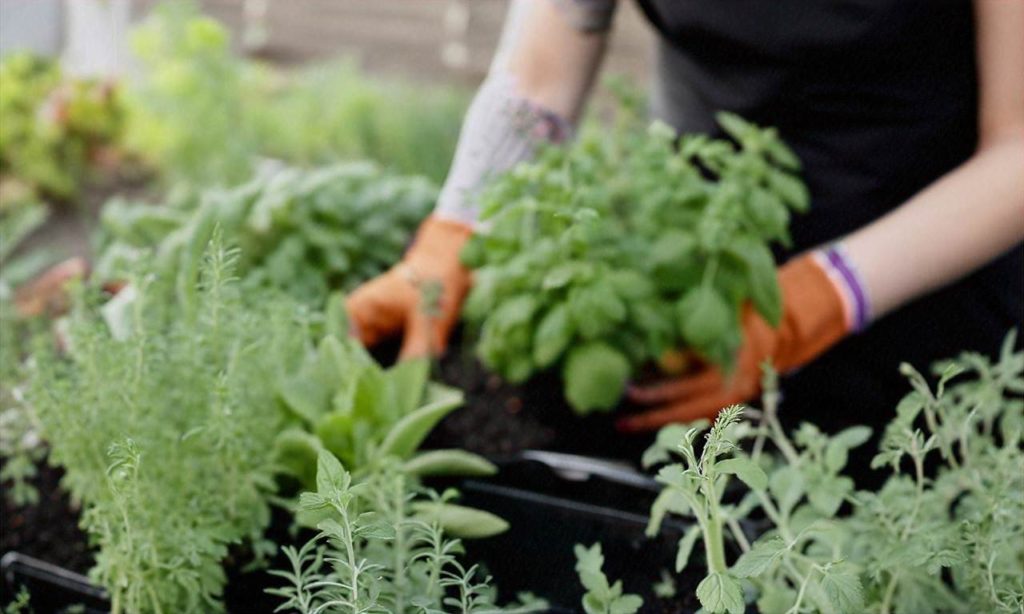
Beginner’s Guide to Growing Your Own Herb Garden

Nothing beats using freshly picked herbs from your backyard to elevate your favorite recipes. Plus you’ll have the satisfaction of knowing you grew them yourself.

When you crunch the numbers, dedicating a corner of your garden to a beginner herb garden, or even a few containers on a patio or windowsill, can lead to noteworthy cost savings in the kitchen. Get creative harvesting and preserving abundant herbs to enjoy their benefits for months after the growing season too.

Over time, the efforts put into planting and maintaining your first herb garden will pay for themselves multiple times over. Growing basic culinary herbs is also one of the most beginner-friendly gardening projects out there.

Equipped with some gardening fundamentals from this beginner’s guide to growing your own herbs, you can start shrinking those grocery bills and putting extra green back in your wallet by establishing an herb garden tailored to your taste, space, and budget.
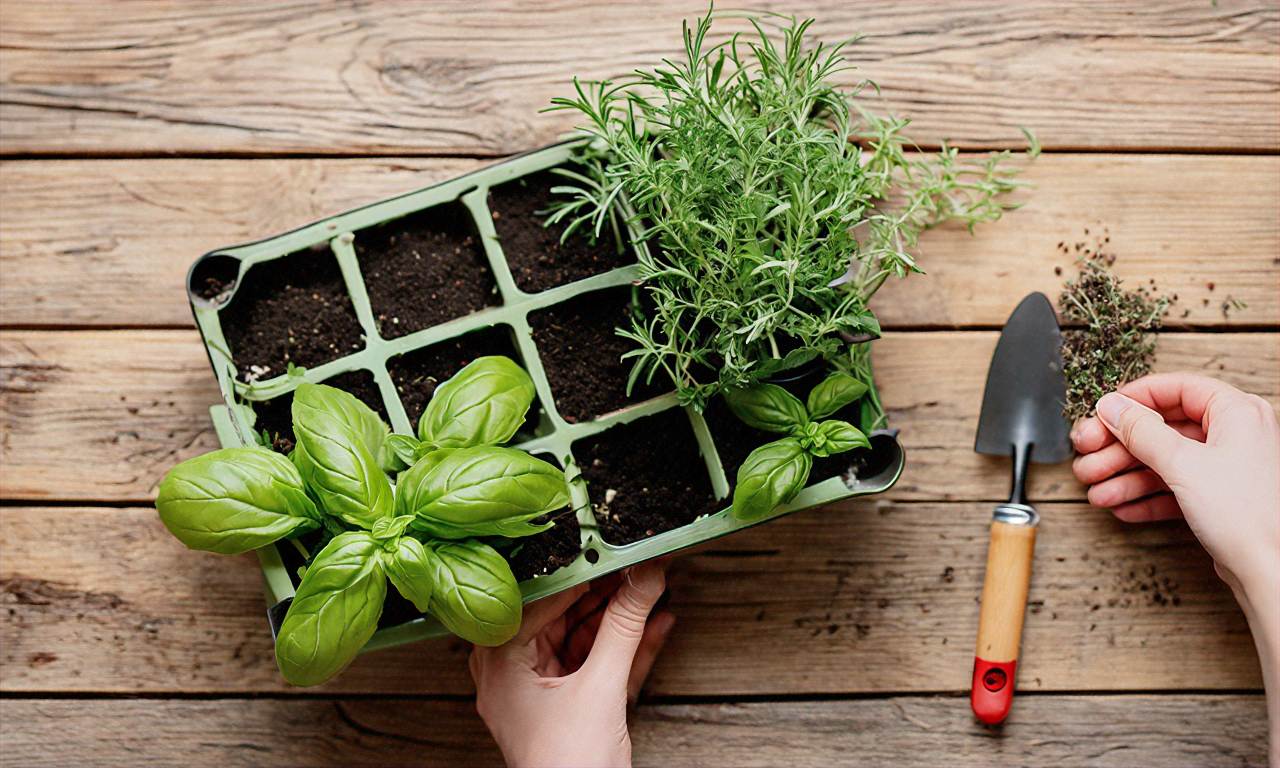
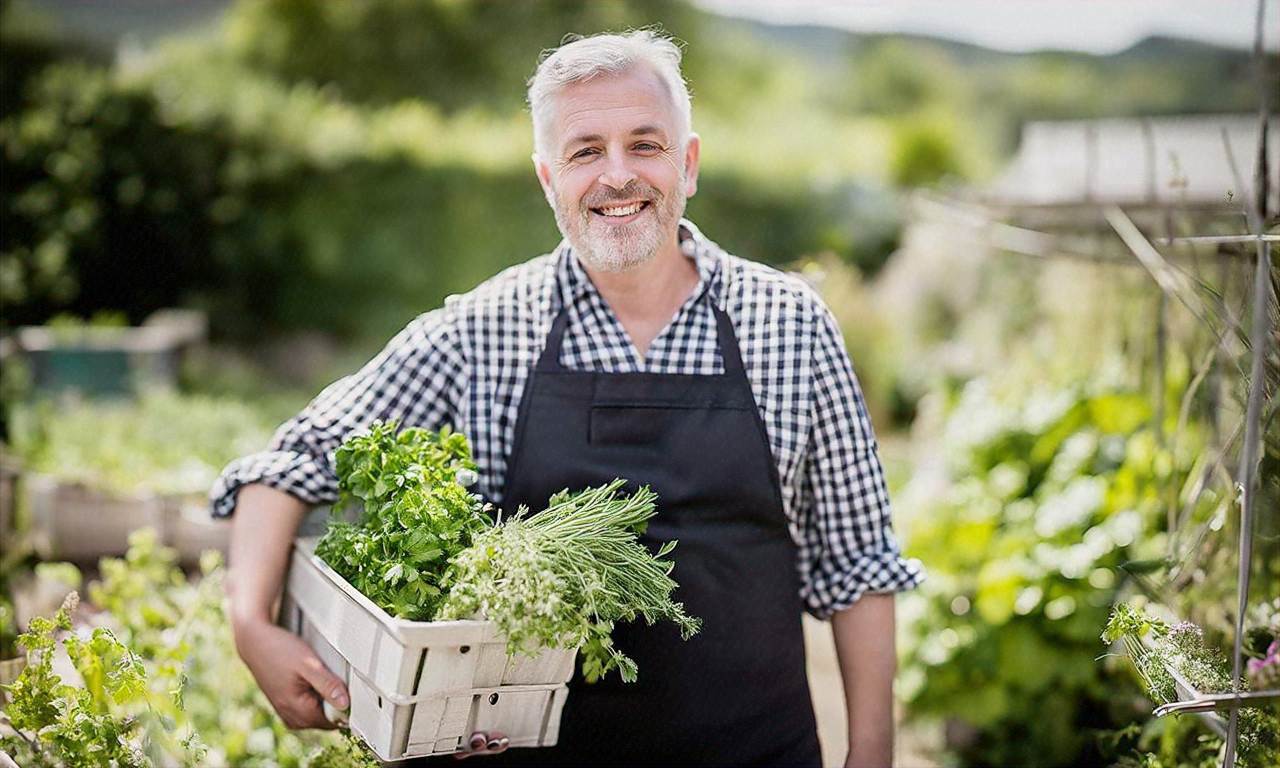
How to Harvest and Store Your Garden Herbs

How to Harvest and Store Your Garden Herbs

When to Harvest Herbs

Here is a draft 847-word article on when to harvest herbs for the section “When to Harvest Herbs”:

Knowing when to harvest herbs from your garden is key to getting the most flavor and preserving the delicate oils in the leaves. The phrase “How to Harvest and Store Your Garden Herbs” encompasses when to cut herbs for optimal freshness and how best to preserve them. This article focuses specifically on “When to Harvest Herbs” from the garden.

The Best Time of Day to Harvest Herbs

Many gardeners believe the optimal time to harvest herbs is in the morning after any dew has evaporated but before the sun gets too hot. The morning hours allow the plant to recover some moisture overnight but the leaves are dry for clean cutting. How to harvest and store your garden herbs requires knowing the prime moment.

Mid-morning sun also helps release the aromatic essential oils, lending more intense flavor. Afternoon heat causes the oils to evaporate and the flavor to diminish. For the freshest, most flavorful cut, harvest herbs like basil, mint, oregano, thyme, sage, and parsley in the morning.

Harvest Based on Flowering Stage

In addition to time of day, the stage of flowering plays a key role in when to harvest herbs. Herbs should generally be cut before the plant flowers for peak flavor, but rules differ among varieties.

Leafy herbs like basil, mint, cilantro, and parsley have the best flavor and aroma before flowering when the leaves are tender. Allowing them to bolt redirects energy into seed production, causing leaves to toughen. For these herbs, harvesting before buds appear ensures tender texture and balanced flavor.

By contrast, flowering herbs like lavender, rosemary, sage, thyme, and dill transition to their full flavor potential once flowering begins. For these woody herbs, harvest sprigs and leaves just as buds form. At this point, essential oils are most concentrated.

Monitor Leaf Growth

The size and quantity of leaves signals the perfect stage for harvesting many herbs. For example, parsley and cilantro taste best and are easiest to clean and de-stem when the leaves are large enough but before going to seed. Pinching off flowers as they form encourages more tender new leaf growth too.

Likewise, chives become tough when the stalks fully elongate. Snipping chives when they reach 6 inches high keeps them mild flavored. How to harvest and store your garden herbs relies on optimal leaf size for flavor.

Base Harvests on Plant Use

Finally, how you plan to use each harvested herb may guide when to cut it. Herbs destined for drying or storage in vinegar, oil, butter, or sugar have different harvest needs than those eaten fresh. Learn when to harvest herbs based on your preservation method.

Herbs for drying or freezing are best harvested early on, before buds or flowers emerge, to capture their essence in each leaf. On the other hand, flower heads and seeds add visual and flavor interest when infusing herbs in oil or vinegar. Allow those plants to mature before cutting.

Understanding each herb’s ideal stage of growth ensures you harvest at the perfect time for use. Matching harvest time to eventual application results in the best flavored and longest-lasting herbs from the garden. Follow these visual cues for knowing when to cut.

Tips for Checking If Herbs Are Ready for Harvest

Regularly inspect herb plants to recognize when leaves reach prime flavor and texture for harvesting. Here are tips on how to know herbs are ready:

– Crush a leaf and sniff to check aroma concentration

– Feel leaf and stem thickness for optimal texture

– Monitor plant height based on herb variety

– Watch for signs of buds, flowers, and seed heads

– Check for large leaves and vigorous new growth

Equipped with this criteria for identifying harvest-ready herbs, you can determine the best moment for cutting fresh herbs or preserving them dried or frozen. Match harvest time to each herb’s peak flavor period.

Summary

When to harvest herbs for maximum flavor, essential oils, and planned use depends on the plant’s growth stage, time of day, and visual quality. Learn the ideal stage of leaf production for each variety and check aroma, texture, size, and flowering cues to know when herbs are ready. Time morning cuts to preserve delicate oils. Harvesting herbs at their prime results in the best flavor and quality no matter how you store them.

How to Know Herbs are Ready for Harvesting

Knowing the right time to harvest herbs from your garden ensures you capture the best flavor and aroma from each plant. Herbs harvested at peak maturity will offer the most intense flavor profiles when dried or preserved for later use.

Watch for these signs to identify when popular culinary herbs like basil, thyme, rosemary, oregano, sage, mint, cilantro, dill, and parsley are optimally ripe and ready for picking:

Basil – Pinch off a leaf and taste it. Harvest basil once the leaves develop their characteristic bold, sweet flavor. The plants should be at least 6 inches tall. Choose leaves before the plant flowers for the best flavor.

Thyme – Thyme is ready to harvest once the plants are 6 inches tall. Pick leaves and top stems when the flowers begin to open. The flavor will be most intense right before thyme blooms.

Rosemary – Harvest rosemary when the bushes reach 1-2 feet tall. Pinch off flavorful needle-like leaves just before the plants start flowering. New growth tends to have the best taste.

Oregano – Harvest oregano once the plant is 4-6 inches tall and has developed its zesty, spicy aroma. For the best flavor, cut whole stems when the plant buds or just before it flowers.

Sage – Pluck sage leaves once the plants grow to 6 inches tall. Harvest before flowering for full flavor. The leaves should be large, fragrant, and tender.

Mint – Harvest mint once the plant is 4-6 inches tall and fills out. For the best flavor, cut stems just before flowering. New growth has superior flavor to larger, older leaves.

Cilantro – Snip cilantro leaves once the plant reaches 3-5 inches tall. Harvest before it bolts or flowers for optimal flavor. Cut leaves as needed, allowing the plant to continue producing.

Dill – Pick dill leaves when the plant hits 6 inches in height. For the best flavor, harvest before the plant flowers and goes to seed. Both the leaves and seeds can be used.

Parsley – Cut parsley once the plant reaches 4-6 inches tall. Harvest by cutting whole stems rather than individual leaves. New growth offers the best flavor.

In addition to size, judge ripeness by examining leaf color and aroma. Herbs at peak harvest time will have vibrant, green leaves and give off a robust, fragrant smell when touched or crushed. Old or overripe herb plants may have yellowing leaves, appear wilted, or put off less fragrance.

The time of day for harvesting also impacts quality. For the highest essential oil concentrations, it’s best to pick herbs in the morning after any dew has evaporated. This helps preserve the aromatic compounds that give each herb its signature scent and taste. Afternoon heat causes some loss of flavorful oils.

With most herbs, repeated harvesting stimulates new growth and more abundant leaf production over the season. As long as you don’t cut more than one-third of a plant’s foliage at once, you can harvest multiple times without damaging plants. Just be sure to stop pruning several weeks before your first expected fall frost so herbs can harden off for winter dormancy.

Follow these visual cues and best practices when harvesting, and your homegrown herbs will deliver the fullest flavors when you dry, freeze, or preserve them for future recipes. Refer back to this guide on how to know herbs are ready for optimal harvest times. Pair with tips on proper tools to use, correct cutting methods, and preferred storage conditions after harvest. Soon you’ll become an expert on harvesting herbs at their flavorful best from your productive garden.

Harvesting Herbs in the Morning vs Evening

When it comes to harvesting herbs from your garden, many home gardeners wonder – should I pick the herbs in the morning or evening? Is there an ideal time of day to harvest that results in superior flavor or extended freshness? This article will examine the pros and cons of morning versus evening harvesting.

How to Harvest and Store Your Garden Herbs

There are good arguments on both sides of this debate. Some experts insist that mid-morning, after the dew has evaporated but before the sun gets too hot, is the perfect herbal harvesting time. Others argue for late afternoon or early evening, when essential oil concentrations peak. Ultimately, the ideal harvest time depends on the specific herb variety and your plans for using or preserving the harvest.

Morning Herb Harvesting

Harvesting herbs in the early morning hours has several potential advantages:

– Avoiding the Heat: For herbs grown in hot summer climates, morning harvest times allow you to pick the herbs before the peak daytime temperatures. This prevents the volatile essential oils in herbs like basil, oregano, and thyme from evaporating away in the midday heat.

– Higher Moisture: Early mornings tend to have higher humidity and moisture levels. For herbs that you plan to use fresh immediately, the higher moisture content can translate to better flavor.

– Clean Cuts: Harvesting in the morning may allow herbs to be cut more cleanly. Some herb gardeners feel that morning harvesting results in less bruising or other damage to the plant.

If you plan to dry or otherwise preserve your herbs, morning harvesting when humidity levels are higher may require additional drying time compared to herbs picked later in the day.

Evening Herb Harvesting

While mornings have their perks, evenings can also be an opportune time for gathering herbs from the garden. Benefits of evening harvesting include:

– Peak Flavor: Many culinary herbs contain the highest essential oil concentrations later in the day. For example, just before flowering, mint may contain over three times more essential oils in the evening compared to the morning. Evening-picked herbs may have superior aromas and flavors.

– Less Chance of Wilting: Harvesting in the cool of the evening helps minimize moisture loss after picking. Herbs like basil bruise and degrade quickly when exposed to heat and sun. Evening harvesting keeps them fresher.

– Avoiding the Bees: Bees and other pollinators tend to be more active during daylight hours and less active in early evenings. For herbs like lavender, rosemary, sage, and thyme that attract bees, evening harvests involve less risk of stings.

If morning moisture or clean cuts are more important for your needs, evenings may not provide ideal conditions. Additionally, evenings tend to have less light which can make it harder to inspect plants and complete harvesting.

Finding the Right Balance

While concentrated oils may peak in the evening, some deterioration can also start taking place after long hot days. And morning moisture aids fresh use but slows the drying process. As with most things, moderation is key.

Many herb gardeners find the ideal harvest times fall somewhere between the temperature extremes of midday and the moisture saturation of early mornings. Mid-morning through late afternoon provides a good compromise.

You can also tailor your harvest times to how you plan to use each herb variety. For example:

– Harvesting basil for pesto in the evening

– Gathering oregano as the morning dew dries for immediate use in salsa

– Picking lavender flowers before the heat of the day for use in sachets

Get to know your herb garden’s daily rhythms and you’ll discover the prime times to gather its botanical bounty. Pay attention to moisture, humidity, bee activity and the needs of each herb variety. With a little trial and error, you’ll find your optimal times for harvesting herbs in the morning versus the evening.

Using Sharp Tools for Clean Cuts

When harvesting herbs from your garden, using clean, sharp tools is extremely important for the health of your plants. Dull blades can crush stems instead of making clean cuts, opening the door for diseases and pests to invade (1). The key is to always have properly sharpened and sanitized tools on hand before beginning the harvesting process.

What Tools Should You Use?

Quality herb snipping scissors, gardening shears, and knives are essential for harvesting herbs. Stainless steel blades resist corrosion and hold an edge longer than cheaper carbon steel options. Bypass pruners make the cleanest cuts on tender new growth, while anvil pruners work better on thicker, woodier stems. Select ergonomic handles that fit your hand size and grip comfort.

It’s wise to dedicate a set of herb harvesting tools solely for use in the garden. This prevents any chemical residues or dirt on garage or kitchen tools from transferring to the herbs. Mark them in a distinguishable way to separate them from other garden tools.

Sharpening Your Herb Harvesting Tools

A common mistake is continuing to use dull blades out of neglect or procrastination (2). But harvesting herbs with a dull tool crushes and shreds delicate leaves and stems instead of slicing them cleanly (3). This causes more stress and injury to the plant, potentially introducing diseases that can spread quickly.

It only takes a few minutes to sharpen your herb snips and knives with a whetstone or electric sharpener before heading out to cut herbs. Notice when your blades seem to tear rather than slice cleanly through stems and make sharpening a habit before each harvest for optimal results (4). Disinfect all tools with rubbing alcohol beforehand as well.

Proper Cutting Technique

When harvesting herbs, use a gentle touch and make cuts at a 45 degree angle (5). This allows the stems to take up the most water and remain viable after cutting. Trim stems just above leaf nodes where new growth emerges, leaving some leaves behind to nourish the plant through photosynthesis.

Harvesting in the early morning or late evening causes less stress or wilting. During the heat of mid-day, the plant’s moisture and nutrient reserves are at their lowest ebb and are not ideal times for trimming (6). Work quickly and get cut herbs into a cool, shaded area right away.

Avoid yanking at tangled stems or stripping off leaves by hand. The oils in aromatic herbs like thyme, sage, and mint can cause dermatitis for those with sensitive skin. There’s also an increased risk of breaking the whole plant. Instead, patiently use properly sharpened herb snips for a clean, quick harvest.

Caring for Harvesting Tools After Use

Once finished trimming herbs, be sure to properly clean harvesting tools of all dirt and debris before storing them away (7). Soak scissors and pruners in a mild bleach solution of one part bleach to nine parts water for 10 minutes. Use an old toothbrush and mild soap to scrub knife blades before drying thoroughly.

At the end of the season, sharpen all blades one final time before lubricating and storing in a dry location over winter. High quality tools cared for properly will last for many productive herb gardening years. The investment of a little time into keeping blades sharp and sanitized is well worth the improved harvest and life span of your herb garden.

How to Dry Herbs for Storage

Here is a draft 892-word article on “How to Dry Herbs for Storage” for your niche culinary site:

Drying or dehydrating fresh herbs is one of the easiest methods for preserving these garden treasures for long-term use. Properly dried herbs can retain much of their flavor, aroma, and color when stored correctly for 6 months to a year. Learning how to dry herbs for storage will allow any gardener to enjoy the fruits of their labor all year round.

The key to successfully drying herbs for storage is to remove moisture slowly and thoroughly before storage. Moisture supports the growth of bacteria and molds which can cause dried herbs to spoil. There are several methods home cooks can use to dry herbs from their gardens or farmers market bounties.

Air Drying Herbs

Air drying is the most common way to dry leafy herbs like basil, mint, sage, thyme and rosemary. To air dry herbs, wash and dry the stems thoroughly, then gather them into small bundles with kitchen string or rubber bands. Use sharp scissors or garden shears to cut the ends of the stems evenly before bundling.

Hang these small bundles of herbs upside down in a warm, dry, dark place with good air circulation. The optimum temperature for air drying is between 70-100 degrees Fahrenheit. Kitchen cupboards, pantry shelves or wire drying racks work perfectly for herb air drying.

The drying process typically takes 1-2 weeks. To test if bundles are fully dried, check that the stems snap crisply when bent and the leaves crumble easily between the fingers. Monitor drying bundles closely for any mold growth and discard affected herbs right away.

Oven & Dehydrator Drying

Using a low temperature oven or an electric food dehydrator are faster ways to thoroughly dry herbs for storage. These methods remove moisture more efficiently while retaining the volatile aromatic essential oils better than air drying or microwave methods.

To oven dry herbs, place clean stems and leaves in a single layer on a baking sheet. Dry at the lowest possible oven temperature, ideally between 95 to 115 degrees Fahrenheit. Conventional ovens typically only go down to 170 degrees Fahrenheit, which will still work to dry herbs effectively.

Herbs dried in a 95 degree Fahrenheit oven will take 4-6 hours, while 115 degree oven drying takes just 2-4 hours. Check the herbs every 30 minutes until completely dried and crisp. Electric food dehydrators specifically designed for drying herbs, fruits, vegetables and meats are another excellent investment for home cooks who grow their own herbs or buy in bulk. Quality dehydrators have adjustable thermostats that allow precise control over the temperature and fan speeds to customize drying.

Proper Storage for Dried Herbs

After herbs are completely dried, they must be stored correctly in airtight containers to retain flavor and prevent spoilage or contamination. Glass jars and reusable silicone bags or plastic containers all work very well for storing dried herbs. Before filling with herbs, be sure containers have been thoroughly cleaned and dried.

For the freshest flavor, use dried herbs within 6 months. Properly stored dried herbs can retain good flavor for up to a year. To check if dried herbs are still good, give them a sniff test. Discard musty or moldy smelling dried herbs. Dried herbs that smell vibrant and true to their fresh versions will liven up all your cooking.

With the simple techniques above for successfully drying herbs at home, any gardener can easily preserve the herb harvest for cooking all year long. Drying herbs with care after the growing season ends makes it possible to enjoy their unique flavors in recipes for many months after harvesting them. Learning how to dry herbs for storage unlocks their flavors and fragrances so we can savor garden herbs no matter the season or weather.

Storing Dried Herbs in Jars or Bags

Once you have dried your fresh garden herbs, proper storage is crucial for preserving the herbs’ flavors and aromas over time. Two convenient methods for storing dried herbs are jars and bags. Each has its own advantages and considerations when it comes to keeping your homegrown herbs tasting their best.

Jars

Glass jars are a classic choice for storing dried herbs. Their airtight seal blocks out excess light and moisture, two factors that can cause herbs to lose potency faster. Look for jars with tight-fitting lids to ensure no air or humidity sneaks inside. Clear glass also allows you to easily see your herb supply so you know when you’re running low.

When storing dried herbs in jars, it’s best to keep the jars out of direct sunlight. You can stash them in a cool, dark kitchen cupboard or drawer. Just open the jars occasionally to allow fresh oxygen to circulate and prevent any moisture buildup. Glass jars can also beautifully display your harvested herbs on the countertop or spice rack. Just bear in mind that light can quicken deterioration.

An optimal jar size for storing dried herbs is around 8 ounces. This allows enough room for the herbs to breathe without too much excess space where air could get trapped. Be sure to label jars with the herb name and date for easy identification.

Bags

Resealable plastic bags also do the trick for storing dried herbs. Opt for thick bags made of durable plastic that won’t easily rip. Freezer bags tend to be extra sturdy. Make sure any bag you select has an airtight seal when closed to block light and moisture.

An advantage of bag storage is being able to press out excess air before sealing. This minimizes the oxygen inside that could cause herbs to lose vibrancy faster. You can manually squeeze bags to remove air or use a straw to suck it out. Just be careful not to crush the dried herbs when compacting the bags.

Since plastic bags are opaque, storing herbs inside cabinets or drawers keeps the contents hidden and protected. Bags take up less space than jars if storage area is limited. They’re also very lightweight and portable for taking herbs on the go. Just like jars, be diligent about properly labeling with names and dates.

No matter which storage vessel you choose, the most important rule is to use your homegrown dried herbs within one year. Stored properly in a cool, dark place, dried herbs can retain excellent flavor and fragrance for up to 12 months. After that, the essential oils that give the herbs their signature taste and smell start to significantly dissipate. So try to use up older herbs first before tapping into a new batch.

With the right storage methods, you can enjoy the fruits of your herb garden labor all year long. Jars and bags both have their convenience perks for preserving your home-dried herbs. The key is shielding the herbs from light, heat, and excess moisture by sealing them in an airtight container kept in a dark space. Then you’ll have delicious, vibrant herbs ready to elevate your recipes no matter the season. Follow these herb storage tips, and your garden harvest will keep on giving.

Freezing Fresh Herbs for Year-Round Use

# Freezing Fresh Herbs for Year-Round Use

How to Harvest and Store Your Garden Herbs

Freezing fresh herbs is an excellent way to preserve the bounty from your garden for use all year long. Having a supply of frozen herbs on hand makes it easy to add fresh herbal flavor to meals, even when your garden is covered in snow.

## Best Herbs for Freezing

Most herbs freeze very well. Herbs with high moisture content, like basil, chives, cilantro, dill, parsley, sage, and mint hold up best. Sturdy, thick-leaved herbs like rosemary, thyme, oregano, lavender and savory also freeze nicely. More delicate herbs like tarragon and chervil don’t retain as much flavor during freezing.

When freezing herbs, it’s best to freeze them soon after harvesting for maximum flavor retention. Freezing them at the peak of freshness locks in the most essential oils and aromatics that give each herb its unique taste and scent.

## Harvesting Herbs for Freezing

The best time to harvest herbs for freezing is in the morning after any dew has dried but before the sun gets too hot. This helps ensure the highest oil concentration. Use a pair of sharp scissors or garden shears to cut the stems rather than pulling or tearing the herbs. Try to keep stem lengths uniform to aid in even freezing.

Rinse the herbs gently under cool water and pat thoroughly dry with paper towels or a salad spinner. It’s important not to freeze herbs when they are wet or moisture will form damaging ice crystals during the freezing process.

## How to Freeze Herb Leaves

The easiest way to freeze leafy herbs like basil, mint, parsley, cilantro or dill is to place measured amounts in ice cube trays. Fill each compartment with roughly one tablespoon of leaves, then cover the tray with plastic wrap and place in the freezer. Once frozen, pop the herb cubes out and transfer to a labeled freezer bag. This makes it easy to toss a pre-measured amount into recipes all year long.

For smaller amounts, chopped herbs can be spread in a single layer on a baking sheet and frozen initially. Then promptly transfer to air-tight freezer bags or containers once fully frozen.

## Freezing Herb Stems

Sturdy herb stems, like those from rosemary, thyme, sage and oregano can also be frozen easily. After harvesting, wash and completely dry herb branches or sprigs. Place them directly into freezer bags, seal and label. To use, simply remove desired amounts from bags and chop, strip or crush leaves as needed.

An alternate method is to chop herbs coarsely before freezing in ice cube trays or bags. This makes it faster to incorporate them into cooking. But take care not chop too far in advance or essential oils will start to dissipate.

## Storing Frozen Herbs

Be sure to label all frozen herbs clearly with the name and date. Well-wrapped herb cubes or bags store best at 0°F or below. Use within 6 to 12 months for best quality.

Always use frozen herbs directly from the freezer. Don’t thaw first or the plant cells will break down and lose flavor. Add them straight to soups, sauces, stews or other recipes for an intense boost of just-harvested taste.

Enjoy convenience and flavor with frozen herbs from your garden all year long!

Tips for Freezing Herb Stems, Leaves and Seeds

When it comes to freezing herbs for long-term storage, it’s important to know that different parts of the herbs freeze better than others. Here are some tips for getting the best results when freezing herb stems, leaves, and seeds.

Herb Stems

– Herb stems don’t always freeze well on their own. They can become limp and lifeless when thawed. It’s best to freeze stems still attached to herb leaves.

– If freezing solo stems, choose woody stemmed herbs like thyme, rosemary, oregano, and sage. Trim off leaves, then wash and dry stems before freezing.

– Another option is to chop stems before freezing. Add them to ice cube trays with a bit of water or oil to use later in cooking.

Herb Leaves

– Delicate herb leaves like basil, mint, and parsley freeze better than tougher woody stemmed leaves.

– Wash and dry herb leaves thoroughly before freezing. Carefully separate any bad leaves.

– Lay leaves in a single layer on a baking sheet and place in the freezer until hard. Transfer to air-tight containers or bags.

– Chopped leaves freeze well too. Add a bit of water or oil to help prevent freezer burn. Ice cube trays work great for chopped herbs.

Herb Seeds

– Freezing is an excellent way to preserve seeds from cilantro, dill and other herbs that produce abundant seeds.

– Allow seed heads to fully mature and dry on the plant before harvesting for freezing.

– Separate the seeds from any excess plant material. Place seeds in a single layer in an airtight container.

– Store frozen herb seeds in a cool, dark place for up to a year. Thaw before planting.

How to Freeze Herbs

No matter which part of the plant you are freezing, the goal is to quickly freeze the plant matter to prevent damage to the cell structure. Here are some standard practices to follow:

– Make sure herbs are clean and completely dry before freezing. Moisture encourages ice crystals to form which damages leaves and seeds.

– Seal herbs in an airtight container or heavy-duty plastic freezer bag, pressing out excess air. This prevents freezer burn which degrades quality over time.

– Label the container with the herb name and date. Use frozen herbs within 6 to 12 months for best flavor.

– Choose containers that are dark in color to prevent light exposure which can also lead to faster deterioration. Glass jars, aluminum cans or foil pouches all work well for storage.

Follow these tips when freezing herb stems, leaves and seeds for best quality and usage. Be sure to harvest herbs at their peak and prep them properly before freezing too. This allows you to enjoy their fresh flavors in recipes all year long.

Oil Infusion as a Storage Method

# Oil Infusion as a Storage Method

Oil infusion is an excellent way to preserve the flavor and aroma of fresh herbs from your garden for use all year long. The oil extraction process allows the essential oils and phytochemicals in herbs to infuse into the carrier oil, creating a flavored herbal oil that can be stored at room temperature for up to a year.

When considering oil infusion as a storage method for your garden herbs, it’s important to follow some best practices. Choosing the right herbs and carrier oils, proper sanitation, and storage are key for creating a shelf-stable product.

## Selecting Herbs for Oil Infusion

More delicate herbs with higher moisture content such as basil, tarragon, chives, parsley and cilantro are great candidates for oil infusion. The oil helps protect the herbs from oxidation while allowing their flavors to permeate the oil. Sturdy herbs with strong flavors like rosemary, thyme, sage, oregano and marjoram also infuse beautifully into oil. Garlic, chili peppers and lemon or orange zest can provide a flavorful kick as well.

When selecting herbs for oil infusion, it’s best to use fresh herbs at their peak of flavor. Harvesting herbs in the morning after the dew has evaporated ensures the best flavor retention. Use clean scissors or garden shears to snip herbs, leaving some stem attached. Gently rinse if needed and pat thoroughly dry before infusion.

## Choosing a Carrier Oil

The most common carrier oils used for herb infusions are extra virgin olive oil and grapeseed oil due to their neutral flavors. Other options include sunflower, safflower or avocado oil. Regardless of oil choice, select high quality, food-grade oils packaged in dark glass bottles. The oil’s freshness and acidity level can impact flavor, so taste test oils before using.

## Proper Sanitation

Like all preserved foods, keeping equipment and ingredients sanitary is crucial when infusing herbs into oil. Be sure to wash herbs thoroughly and allow to dry completely before adding to oil. Sterilize jars or bottles either by running through the dishwasher or submerging in a boiling water bath for 10 minutes. Allow containers to air dry before using. Always use clean utensils when handling ingredients.

## Infusion Methods

There are a few techniques for infusing herbs into oil. The easiest is to loosely fill clean, dry jars with fresh herbs, then cover completely with oil. Other options include blending herbs into oil with an immersion blender or heating oil and herbs very gently on the lowest stovetop setting. Regardless of technique, the key is to not overheat the oil, which can diminish flavors.

Once herbs are infused, let the jar or bottle sit at room temperature away from light for 2 weeks up to a month. Shake gently every few days to distribute flavors. Taste regularly after 2 weeks to monitor flavor development. Strain through cheesecloth when flavor reaches the desired intensity. Avoid leaving herbs in oil for longer than a month to prevent spoilage.

## Storage

For short term storage up to 6 months, decant flavored oil into smaller sterilized bottles or jars, leaving 1⁄2 inch headspace. Seal tightly and store in a cool, dark cupboard. Freezer storage for up to a year is also an option. Leave ample headspace in bottles or jars as oil will expand when frozen. Thaw completely in the refrigerator before using.

When stored properly, herb-infused oils retain maximum flavor for up to a year. Their versatility as cooking ingredients, marinades, dipping oils and gifts make oil infusion an invaluable storage method for garden herbs. Follow best practices for handling and watch for signs of spoilage before use. With some creativity, preserved herbal oils can be enjoyed all year long.

Vinegars and Salts for Flavorful Preserved Herbs

In addition to drying and freezing, two popular methods for preserving herbs from your garden are infusing them into vinegars and mixing them with salts. These techniques keep herbs fresh for months while also infusing them with delicious complementary flavors. Read on for tips on preserving your harvest using vinegars and salts.

Choosing Your Herbs

Most tender leafy herbs like basil, tarragon, chives, parsley, cilantro, dill, and mint hold up well when preserved in vinegar or salt. Heartier herbs like rosemary, thyme, oregano, and sage also shine when infused. Consider which herbs you have in abundance from your garden that would pair nicely with vinegar or salt.

Herb-Infused Vinegars

Infusing fresh herbs, spices, garlic, chili peppers, citrus zest, peppercorns, and other flavorful ingredients transforms an ordinary vinegar into a unique flavor bomb, perfect for seasoning vegetables, salad dressings, marinades, and more.

When infusing vinegars, opt for high-quality ingredients. Use fresh organic herbs at their peak and raw, unfiltered vinegars like apple cider vinegar, white wine vinegar, champagne vinegar, sherry vinegar, or rice wine vinegar. Make sure all equipment, containers, and utensils are extremely clean and sterile to prevent bacteria growth.

To make an herb vinegar infusion, lightly bruise or crush fresh herb leaves and stems to release their essential oils and flavors. Stuff clean glass jars tightly with the herbs, leaving a 1⁄2 inch headspace at the top. Heat the vinegar until just before a simmer and pour over the herbs, making sure they are completely submerged. Top off with more vinegar if needed. Seal the jar tightly and store in a cool, dark place, shaking gently every day. Taste after 2 weeks, though some vinegars take 4-6 weeks to fully infuse. Strain out and compost the spent herbs.

For best flavor, use herb-infused vinegars within 6 months to a year. Always label infused vinegars with the ingredients and date. Refrigerate after opening. Signs that your infused vinegar has gone bad are mold, unpleasant aroma, bubbling or fizzing, or sliminess. As long as the vinegar smells strongly aromatic without off odors, it is likely still safe to consume.

Herb-Infused Salts

Incorporating herbs, citrus zest, spices, dried chilies, garlic, and other flavor boosters into salt is an age-old preservation technique that transforms everyday salt into a powerhouse seasoning. Herb salt mixes make unique gifts, enliven roasted vegetables, perk up grilled meats, and lend intrigue to homemade crackers and baked goods.

As with infused vinegars, start with the best quality ingredients when making herb salts—fresh organic garden herbs, just-harvested sea salt or kosher salt, and spices sourced from a reputable dealer. Make sure equipment is meticulously clean. Glass jars or grinders make attractive storage vessels for infused salts.

Two easy methods exist for infusing salts with herbs. The slower cold method involves layering salt and chopped herbs in a container, allowing flavors to meld over a few weeks. The faster hot method heats salt and herbs in a pan with a bit of oil for a few minutes to quickly release essential oils before blending. Both methods yield delicious results. Customize herb salt blends to highlight ingredients used frequently in your kitchen. Consider combinations like:

Lemon Rosemary—With freshly grated lemon zest

Garlic Parsley—Plus crushed red pepper flakes

Lavender Thyme—With hints of orange zest

Basil Mint—With toasted pine nuts

Store herb salt blends in airtight containers away from light and moisture. Over time, the salt may absorb moisture from the herbs and clump together. Simply break up any clumps as needed. With proper storage methods, herb-infused salts stay fresh and flavorful for at least a year.

The Power of Preserved Herbs

Experimenting with unique herb vinegars and salts provides an outlet for abundantly harvested garden herbs at their peak. Both vinegars and salts act as flavor preservers, extending the life of fresh herbs for months or even years. Preserved herbs also make wonderfully thoughtful edible gifts. For best quality and safety, always use fresh organic herbs, sterilized equipment, and proper storage when infusing vinegars and salts. With an abundance of nature’s flavors preserved through these simple techniques, there is no shortage of ways to enjoy your lovingly grown herbs all year long.

The Shelf Life of Properly Stored Herbs

# The Shelf Life of Properly Stored Herbs

Properly harvested and stored herbs can retain their flavor and aroma for months or even years. Knowing the approximate shelf life of dried and frozen herbs allows you to use your garden bounty year-round in your cooking.

## How Long Do Dried Herbs Last?

Dried herbs that are stored correctly in airtight containers away from heat, light, and moisture can last for up to 2 years. During this time, they will slowly lose flavor and aroma potency.

Whole dried herbs like oregano, thyme, rosemary, and sage tend to retain their flavor better over time compared to delicate herbs like basil, tarragon, chives, and parsley. After 1 year, dried basil will lose most of its flavor while oregano and rosemary will still taste quite potent.

Here are the approximate shelf lives for properly dried and stored herbs:

– Oregano, thyme, rosemary – 2 years

– Sage, marjoram – 1-2 years

– Lavender, lemon verbena – 1-2 years

– Basil, tarragon, chives – 6 months to 1 year

– Parsley, cilantro, dill – 6 months

If stored properly, most dried herbs will still be usable for seasoning and cooking after their peak flavor time, but may require you use more to impart flavor and aroma.

## Maximizing Shelf Life of Dried Herbs

Follow these tips to help your dried herbs retain the maximum flavor and aroma before their inevitable flavor decline:

– Dry herbs quickly in a warm, dark area soon after harvest.

– Store dried herbs in airtight glass jars kept in a cool, dark cupboard away from heat and light.

– Fill storage jars full to minimize air exposure. Vacuum seal if possible.

– Buy dried herbs in smaller quantities to use within 6 months to 1 year for best flavor.

– Label jars with herb name and year harvested for easy identification.

– Crush or grind dried herbs just before use to release oils and flavor compounds trapped inside.

## How Long Do Frozen Herbs Last?

Compared to drying, freezing is an excellent way to extend the shelf life of fresh herb leaves while retaining color and flavor. Properly frozen herbs can keep for about 6 months before deteriorating in quality.

Here are some guidelines for frozen herb storage times:

– Basil, parsley, cilantro – 3 months

– Chives, tarragon, lemon balm – 4 months

– Sage, rosemary, thyme, oregano – 6 months

Frozen herbs tend to lose flavor faster than dried herbs. But their quality is usually superior when used within 6 months compared to year-old dried herbs.

## Tips for Maximizing Frozen Herb Quality

Follow these best practices when freezing garden herbs to lock in flavor and color for as long as possible:

– Harvest herb leaves in early morning.

– Rinse gently and pat dry with towel.

– Lay single layer of leaves on baking sheet and freeze solid.

– Transfer frozen herbs to ziplock bags, removing air.

– Label with name and date frozen for easy ID.

– Use within 6 months for best quality.

Storing your bountiful garden herbs properly ensures you can savor their flavor in recipes all year long. With the proper harvesting, drying, and freezing techniques, you’ll have quality herbs on hand for home cooking for up to 2 years.

Signs that Stored Herbs Have Gone Bad

Knowing when dried or frozen herbs have gone bad is important for both flavor and food safety. Carefully stored herbs can last a year or more, but there are some clear signs that your preserved garden herbs have deteriorated in quality or become unsafe to use. Being able to identify these signs will ensure you use up your herb harvest while it’s still at peak freshness.

Herbs that show signs of mold should be discarded. This includes dried herbs stored in jars or bags as well as frozen herbs. Any fuzzy growths or spots on leaves are an indication that moisture and air have enabled mold to take hold. Do not attempt to salvage unaffected parts of the herb, as the spores may have spread. When storing herbs for preservation, be sure containers have tight seals and check periodically for condensation or moisture buildup.

Dried herbs that have taken on a dull, faded appearance or changed color have likely aged past their prime. The vibrant greens, browns and grays you saw when the herbs first dried indicate the presence of flavorful oils and compounds. As herbs sit for months, these tend to evaporate or break down. A dull or uniform color, especially brown, usually means the herb will impart less flavor. Smell the herb, and if you detect very little aroma, consider replacing it with a fresh batch.

Herbs that have gotten very dry and brittle have often lost some of their essential oils, or their cell walls may have deteriorated. To test for this, rub a small leaf or section between your fingers – it should release fragrant oils and feel slightly soft or leathery. If the herb crumbles instantly into a gritty powder or dust without releasing aroma, it is past its shelf life. These extremely dry herbs will still add some flavor, but lack the nuance and vibrancy of well-preserved ones.

Frozen herbs that show signs of freezer burn – dry, shriveled brown edges or a grayish cast – are still safe to use but will likely have a muted flavor. Trim off the damaged sections of leaves or seeds. Then crush a small portion and smell it, tasting if necessary. If it has maintained good color and aroma elsewhere, use the unaffected portions right away instead of returning it to the freezer.

Soft or slimy herbs have usually gotten too warm during storage and are at risk for bacterial growth. This applies to both frozen and dried herbs. Discard any herbs that feel moist, limp or mushy instead of dry and crisp. Even if mold is not yet visible, the texture indicates organisms are breaking down cell walls and digesting components of the leaves. Do not taste or smell soft herbs, as consuming spoiled bacteria can cause illness.

If your dried herb contains visible webbing, tiny white dots or small worm-like insects, it has likely been infested by pantry moths or herb weevils. Discard the contaminated herbs immediately, checking any remaining stored herbs closely for signs of insects. As prevention, store herbs in airtight containers and use up opened dried herbs within a year.

Noticing one or more of the above signs means it is time to refresh your preserved herb supply. Compost or discard herbs past their prime to avoid wasting the other ingredients you pair them with. Dried herbs more than a year old can be used for light flavor in long-cooked dishes, but will lack vibrancy. Refer to your logs or labels of harvest and storage dates, using up older herbs first. With careful handling, the herbs gathered from this year’s garden can provide intense herbal flavor for many more recipes when you learn the signs of stale, moldy or low-quality preserved herbs.

Cooking with Last Year’s Dried Herbs

Here is a draft part of the article on “Cooking with Last Year’s Dried Herbs” for your niche culinary site exploring recipes, gardening, and the cultural significance of herbs and spices:

How to Harvest and Store Your Garden HerbsHow to Harvest and Store Your Garden Herbs

Cooking with Last Year’s Dried Herbs

If stored properly, most dried herbs can retain excellent flavor for 12 months or longer. However, there will come a time when your supply from previous seasons starts to lose its potency. How can you tell if last year’s dried herbs are still good? Here are some tips for evaluating the quality of stored dried herbs and how to use up any that may be past their prime.

Look

Visually inspect the dried herbs. They should retain a good color without excessive fading or darkening. Whole herbs like thyme and rosemary should not appear broken down or powdery. If stored properly in a cool, dark place, the herbs should look similar to when they were originally dried. Any major color changes, visible mold, or strong musty odors indicate the herbs are too old to enjoy.

Smell

A quick sniff test will tell you a lot about your dried herb’s freshness and suitability for cooking. Most dried herbs will lose some of their more subtle aromatic qualities over time but should still smell true to their essence. If the aroma is extremely faded, musty, or dusty, it’s best not to cook with them.

Taste

If your dried herbs pass the sight and smell tests, do a taste test by nibbling a tiny bit. The flavor should taste vibrant and resemble the taste you’d expect from the fresh versions. Stale dried herbs may taste flat, dusty, bitter or have slight off-flavors. Trust your taste buds – if the herb doesn’t taste right, don’t use it in recipes.

Using Old Dried Herbs

If your dried herbs are still decent but lack their original punch, use them up by making herbal vinegars, compound butters, herb-scented oils, or herbal salts. Their fading flavors will still come through. You can also use weaker dried herbs in simmering dishes like soups, stews, beans or grains where they’ll have time to infuse the dish with gentle herbal essence. Avoid relying on lackluster dried herbs for quick cooking or as a main flavoring.

How to Harvest and Store Your Garden Herbs

When to Toss Old Herbs

If dried herbs have truly gone downhill, it’s best to compost and replace them. Using faded or funky-tasting dried herbs can ruin the flavors of your carefully prepared recipes. Stick to vibrant, aromatic herbs at their peak to get the most out of your dishes. Plan to grow, buy or dry a fresh batch of herbs each season.

Key Takeaways

– Visually inspect dried herbs for good color and texture

– Sniff herbs and taste a small sample to check potency

– Use weaker herbs in slow-simmered dishes rather than quick cooking

– Toss extremely faded or funky-tasting dried herbs

– Grow and dry fresh herbs every season for best flavor

With proper storage methods, most dried herbs can last 12 months or longer before their flavor and aroma start to deteriorate. By evaluating the look, smell and taste of older herbs, you can decide how to best use up this pantry staple. Though faded herbs won’t be delicious enough for front-and-center flavor, they can quietly bolster soups, stews and more before their time is up. Planning ahead to grow, buy or dry a fresh batch of herbs each season is key for savoring vibrant, aromatic flavors in your home cooking.

The Best Companion Plants for Your Herb Garden

The Best Companion Plants for Your Herb Garden

Choose the Right Herbs

for Your Companion Plant Herb Garden

When creating the best companion plant herb garden, the first step is choosing the right herbs to grow. Carefully selecting herbs that will thrive in your climate and space will set your herb garden up for success. Consider sunlight, soil needs, and hardiness zones when deciding which herbs to plant alongside each other.

Selecting the right herbs for your companion plant herb garden starts with understanding your gardening zone and sunlight availability. Most culinary herbs grow best in zones 3-9 and need at least 6 hours of full sunlight per day. Knowing this, gardeners can choose herbs suited for their region. Some great companion herb options for a variety of zones include basil, parsley, cilantro, dill, garlic, and chives.

In addition to sunlight and climate, herb companion plants have preferences for soil drainage, moisture, and pH. Test your garden’s soil to determine which herbs make compatible companions. For example, oregano and lavender grow well in drier, alkaline soils. Meanwhile, cilantro and dill thrive in moist, acidic soils. Amending your garden soil to fit multiple herbs takes extra work. Selecting herbs with similar soil needs eliminates this chore.

Likewise, consider the mature size of your companion plant herb selections. Tall rosemary should not shade sun-loving, low-growing thyme. Be sure to give each herb enough space to grow. Also, factor in water and nutrient needs when planting companion herbs. Group plants with higher or lower water demands together. This way, the companion plants for your herb garden get even moisture and nutrients.

The right companion plant herb garden starts with researching individual herb needs. Compare sun, soil, climate, and size requirements when selecting herbs to plant together. Thoughtful planning allows each herb to thrive alongside its neighbors. With smart companion plant pairings, your herb garden will grow successfully. For specific recommendations on which herbs make the best companion plants in an herb garden, read on.

Companions for Basil

When planting basil, choosing the right companion plants is key to having a thriving and productive herb garden. The best companion plants for basil help repel pests, enhance flavor, and allow you to make the most of your garden space by planting complementary herbs together.

What to Plant with Basil

Sweet basil is one of the most popular culinary herbs, but it can be susceptible to pests like aphids and Japanese beetles. Luckily, there are lots of great companion plant options to help protect your basil. Some of the top companion plant choices for basil include:

– Tomatoes – Tomato plants and basil have a very symbiotic relationship. Basil helps enhance the flavor of tomatoes and repels pests like aphids, mosquitoes, and flies. Meanwhile, tomato plants help shade basil in hot summer weather.

– Oregano – Like basil, oregano is a staple herb in many pasta sauce, pizza, etc. recipes. When planted together, basil and oregano can deter aphids. Oregano also helps repel cabbage moths.

– Petunias – Petunias add bright pops of color to an herb garden while also repelling aphids, leafhoppers, beetles, and more. The bright flowers also attract beneficial pollinators.

– Marigolds – Marigolds have strong insect repellent properties and their roots emit a substance that kills nematodes in surrounding soil. This makes them a great protective border for basil.

– Peppers – Bell peppers and basil make perfect companions, enhancing the flavor of each other. Plus, peppers help shade basil plants once they grow larger.

– Chives – As fellow herbs, chives and basil simply belong together. Chives help deter aphids, one of the most common basil pests.

Optimal Growing Conditions for Basil Companion Plants

When planting basil with companion plants, make sure to choose varieties with similar sunlight, water and spacing needs. This will ensure all plants thrive. Here are some optimal growing tips:

– Sunlight – Most herbs, including basil, oregano, etc. need at least 6 hours of full sunlight per day. Choose companion plants accordingly.

– Water – Basil likes consistently moist (but not soggy) soil. Water companion plants 1-2 times a week depending on climate.

– Space – Give basil plants 12-15 inches of space all around. Allow tomatoes 18+ inches between plants.

By understanding the ideal conditions for basil and potential companion plants, you can design a garden that allows them to thrive side-by-side. This will lead to better harvests for both your basil and other herbs.

Creative Ways to Use Basil Companion Plants

One of the best parts of planting companion herbs like basil is finding fun new ways to use them together. Here are some suggestions:

– Make pesto with basil, oregano, garlic and olive oil. Toss with pasta or use as a sandwich condiment or dip.

– Create a fresh tomato basil salad with sliced tomatoes, mozzarella, basil leaves, balsamic vinegar and olive oil.

– Mix basil and tomatoes into omelets, frittatas or scrambles for a flavorful breakfast.

– Blend basil, tomatoes, peppers and onions into gazpacho soup. Garnish with fresh basil.

– Grill peppers and onions. Toss with basil, olive oil and balsamic for a simple side dish.

The possibilities are endless when you have multiple fresh companion herbs right outside your door. Get creative with recipes!

When designing your herb garden, be sure to include some great companion plants for your basil. By planting basil with tomatoes, oregano, petunias, marigolds, peppers or chives you can enhance flavors while keeping pests at bay. With optimal sunlight, water and spacing your basil will thrive alongside other herbs. And you’ll love finding tasty new recipe ideas with your homegrown companion plants.

Companions for Parsley

When planting your herb garden, it’s important to choose companion plants for parsley that will help it thrive. Parsley is a versatile culinary herb that is popular for its bright, fresh flavor. The best companion plants for parsley are those that enhance growth and deter pests.

Some great companion options for parsley include:

Tomatoes

Tomatoes make excellent parsley companion plants. Parsley helps tomatoes grow stronger by attracting predatory insects that prey on tomato pests. The parsley also masks the scent of the tomatoes, making it harder for pests to find them. In return, tomatoes shade parsley in the hot summer months, protecting it from excess sun exposure.

Asparagus

Asparagus makes a mutually beneficial parsley companion. Asparagus has ferny foliage that provides shade for parsley. The parsley repels the asparagus beetle, protecting the asparagus spears. Planting parsley and asparagus together results in a bountiful harvest for both vegetables.

Chives

Chives are pretty, edible herbs that do well planted near parsley. Their allium scent confuses pests and deters them from the parsley. The chives also provide living mulch and help retain soil moisture. Like parsley, chives need consistent watering, so they have similar growing needs.

Peppers

Peppers, especially hot varieties, make ideal parsley companion plants in an edible garden. The peppers’ spicy scent masks the parsley, protecting it from pests like carrot flies and cabbage worms. Parsley also enhances the flavor of peppers when planted nearby. Choose bell peppers, chili peppers, or hot peppers to plant with your parsley.

Carrots

Carrot flies dislike the smell of parsley’s foliage. Planting carrots and parsley together will deter the flies and protect your carrot crop. The lacy parsley leaves also provide shade for young carrot seedlings. Both parsley and carrots grow well in loamy, well-drained soil with consistent moisture.

Beans

Nitrogen-fixing beans enrich the soil with nutrients that benefit parsley. Bush beans and pole beans planted near parsley will improve your herb harvest. The beans also provide structural support for the parsley plants once they reach maturity. Certain beans can be trellised alongside parsley.

Lettuce

Parsley and lettuce are classic salad ingredients that do well planted together. The dill in parsley deters aphids, slugs, and other pests that may attack lettuce. Parsley’s shallow roots don’t compete much with lettuce for space and nutrients. Choose heat-tolerant lettuce varieties to grow alongside parsley through the summer.

Radishes

Parsley helps repel the flea beetles that can damage radish crops. It also may boost production of the pungent compounds that give radishes their signature flavor. Radishes have shallow roots, so they won’t compete with parsley below ground. Plant quick-growing radishes from seed two to four weeks before slower-growing parsley.

When planting companion plants for parsley in your herb garden, remember to provide all the herbs with well-drained, nutrient-rich soil and consistent moisture. Group them together densely to maximize the pest-repelling benefits. With the right companion plants, your parsley will stay healthy and abundant all season long.

Companions for Rosemary

When choosing companion plants for rosemary, it’s important to consider the best companion plants for your herb garden that will thrive alongside this aromatic herb. Rosemary thrives in hot, dry conditions and doesn’t require rich soil. Choosing plants with similar needs is key for happy and healthy rosemary companions.

The Best Companion Plants for Your Herb Garden

Some great companion plant options for rosemary include:

Sage

Like rosemary, sage prefers drier conditions and average to poor soil. These Mediterranean herbs enjoy the same growing conditions, making them excellent companion plants for your herb garden. Planting sage near rosemary can also deter some common insect pests.

Lavender

Another herb that hails from Mediterranean regions, lavender does well with hot and dry growing conditions. Plant lavender near rosemary for beautiful contrasting colors and textures. Plus, lavender’s aromatic qualities can help repel deer and rabbits from your herb garden.

Thyme

Thyme makes a good companion for rosemary as their growing needs and preferences are very similar. Thyme enjoys hot sun exposure and dry conditions. Planting thyme near rosemary can help maximize space in your herb growing area.

Nasturtium

Adding nasturtium as a companion plant with rosemary offers multiple benefits. Nasturtiums deter aphids and other pests, helping to protect rosemary. Their trailing nature also makes a beautiful edging plant around rosemary. As an added bonus, nasturtium flowers and leaves are edible, adding pops of color to salads or as garnish.

Garlic and Chives

Onions, garlic, and chives make great companions for most herbs, including rosemary. These plants help deter pests like aphids, mites, and beetles through their pungent aromas. They require similar soil drainage and sunlight conditions, making them ideal rosemary partners.

When planting companion plants with rosemary, make sure to space them appropriately to allow air circulation and prevent overcrowding. For bushy herbs like rosemary, sage, and lavender, space plants 2-3 feet apart. For lower growing thyme and nasturtiums, allow 1-1 1/2 feet between plants.

Be sure to use organic fertilizers when enriching your herb garden soil, as rosemary prefers poor soil and excess nutrients can damage or kill the plants. Aged compost or manure works well. Water rosemary only when the soil is partly dry, as wet soil can lead to root rot. The best companion plants for your herb garden containing rosemary are those that thrive in hot, dry conditions and require minimal watering and feeding once established.

When designing your herb garden, consider incorporating rosemary’s preferred companion plants – like sage, thyme, lavender and chives – for optimal growth and pest protection. Referring frequently to the key points on the best companion plants for your herb garden when planning will set your rosemary and its neighboring herbs up for success.

Companions for Thyme

Thyme is a versatile culinary and ornamental herb that deserves a spot in any herb garden. When planted with the right companion plants, thyme grows especially well and helps neighboring plants thrive too. Read on to learn the best companion plants for thyme.

Choose Companion Plants That Deter Pests

Since thyme is susceptible to pests like spider mites, planting insect-repelling companions nearby can provide natural pest protection. Sage, garlic, onions, leeks, chives, and chamomile help repel many of the insects and mites that may bother thyme. Interplanting thyme with these pungent herbs creates an environment that confuses and deters pests.

Additionally, planting flowers like daisies, marigolds, and nasturtiums nearby can help control pests. These cheerful blossoms attract beneficial insects that prey on harmful garden pests. Positioning these flowers throughout the herb garden creates mini habitats for insects that keep pests away from vulnerable herbs like thyme.

Select Companions That Enhance Growth

Some plants have synergistic effects, actually boosting the growth and flavor of their neighbors. Oregano, marjoram, cilantro, and parsley are known to improve both the health and essential oil production when planted near thyme.

Additionally, lettuce and brassicas like cabbage, broccoli and Brussels sprouts thrive next to thyme. These vegetables appreciate the moisture retention and nutrient benefits of growing beside fragrant, herb companions.

Choose Companions with Complementary Needs

To help your thyme and companion plants easily coexist, choose companion species with similar sunlight and water requirements. Since thyme thrives in well-drained soil and at least six hours of sun, excellent companion choices include other drought-tolerant Mediterranean herbs like rosemary, sage, and oregano. Culinary favorites like parsley, chives, garlic, and onions also flourish alongside thyme without competing for resources.

Additionally, many ornamental flowers perfectly complement thyme’s growing conditions. Daisies, lavender, geraniums, yarrow, and nasturtiums are great choices that provide pest protection, attract pollinators, and enhance the beauty of the herb garden when planted as thyme companions.

Mind the Mint

While mint’s pest repelling qualities seem like a good match for thyme, avoid planting it together. Mint is highly invasive and can quickly overtake the garden, crowding out less aggressive plants like thyme. For this reason, it is best to plant mint by itself in containers or sections clearly separated from other herbs.

The Best Companion Plants for Your Herb Garden

Get Creative with Companion Planting

When designing your herb garden companions, feel free to get creative with pairings! Observe how your plants grow together over time and adjust placements as needed each season. Discovering successful new plant allies through first-hand observation is one of the great joys of gardening.

No matter which herbs and flowers you choose, providing good soil, sunlight, and water for both thyme and its companion plants is key. Well cared for plants will be happy, healthy, and ready to reap for kitchen and garden. Follow these companion planting tips and your thyme will thrive beautifully this season!

Companions for Cilantro

When planting your herb garden, carefully choosing companion plants for cilantro can help the herb thrive. The best companion plants for your cilantro will enhance flavor, deter pests, and increase yields. This guide to companion planting for cilantro covers ideal plant pairings, spacing, and care for happy, healthy herbs.

What to Plant with Cilantro

Cilantro, also known as coriander, grows well when paired with certain vegetables, herbs, and flowers. Consider planting cilantro with:

Beans

Planting pole beans, bush beans, or soybeans near cilantro can provide needed shade for the lower-growing herb. The beans also stabilize cilantro plants and climbing vines don’t compete for nutrients. In return, cilantro may improve bean growth and flavor.

Sweet Alyssum

Sweet alyssum is a fragrant annual that deters aphids, a common cilantro pest. Its small white flowers also attract beneficial insects for natural pest control. Plus, alyssum is easy to grow from seed.

Dill

Dill and cilantro make excellent companions, enhancing the flavor of both herbs. Tall dill provides needed shade and its flowers attract beneficial predatory wasps and flies.

Chamomile

The pretty, daisy-like flowers of chamomile shelter small cilantro seedlings. Chamomile also deters flying pests and improves essential oil production and flavor in cilantro.

Peppers

Most varieties of sweet or hot peppers thrive when planted near cilantro. Peppers benefit from the shade of cilantro’s flat leaves, improving fruit set.

Tomatoes

Tomatoes and cilantro are complementary garden companions. As a nutrient accumulator, cilantro may boost tomato growth and flavor by increasing terpene content.

Carrots

Plant carrots close to cilantro for mutual pest protection. Carrots mask the scent of cilantro to carrot flies. Cilantro also deters the leaf blight that affects carrots.

Onions and Garlic

Onions and garlic make great cilantro companion plants, masking the scent of the herb from pests. Plus, onion family plants deter aphids and carrot root flies.

Marigolds

Marigolds are one of the best companion plants for cilantro. Their pungent scent deters aphids, whiteflies, slugs, and other cilantro pests. Marigolds also attract beneficial insects.

Nasturtium

With its bright edible flowers, nasturtium is an attractive cilantro companion. It deters aphids and other pests while attracting pollinators. Trailing varieties also provide needed shade.

Spacing Cilantro Companion Plants

When planting cilantro companions like dill and peppers, allow 8-12 inches between plants. For bush beans, marigolds, and other small companions, leave 4-6 inches. Quick-growing nasturtiums and sweet alyssum only need 2-3 inches. This proper spacing prevents overcrowding and allows air circulation. It also reduces pest and disease problems.

Caring for Cilantro Companion Plants

Grouping complementary herbs, flowers, and vegetables together makes caring for your cilantro companions easy. Here are some organic care tips:

Water cilantro and its companions regularly with an inch of water per week. Provide more during hot, dry periods.

Feed every 2-3 weeks with a balanced organic fertilizer to fuel plant growth.

Mulch around plants to suppress weeds, retain moisture, and keep roots cool.

Check frequently for pests like aphids, snails, or whiteflies. Remove by hand or use organic insecticidal soap.

The Best Companion Plants for Your Herb Garden

Pinch off flowers to prolong leaf production in cilantro and its companions.

Harvest cilantro often by cutting stems about one inch above the soil. Frequent cutting encourages regrowth.

The Best Companion Plants for Cilantro

By interplanting cilantro with beneficial friends like dill, marigolds, and bush beans, you can fill your garden with bountiful herbs and vegetables. Companion planting not only results in better growth, but enhances the flavor of cilantro and deters common pests. With the right companion plants, your cilantro will thrive!

Companions for Mint

Mint is a versatile herb that can be used in desserts, beverages, savory dishes, and more. But did you know that planting mint next to certain other plants in your herb garden can benefit both the mint and its companions?

Choosing the best companion plants for mint will enhance the growth and flavor of your mint, while also helping to maximize the space, nutrients, and beneficial qualities of your overall herb garden.

Some excellent companion plant options for mint include:

Companion Plants to Enhance Mint Growth

Many gardeners find that pairing mint with nitrogen-fixing plants leads to better mint growth and flavor. Nitrogen-fixers like beans, peas, and clover can boost the available nitrogen around mint roots. Good nitrogen-fixing companion plants for mint include:

– Bush beans

– Pole beans

– Peas

– White clover

– Alfalfa

These plants have a symbiotic relationship with soil bacteria that convert atmospheric nitrogen into a usable form that plants can absorb through their roots. Having them nearby gives your mint an extra nitrogen boost.

Companion Plants to Deter Mint Invasiveness

Mint spreads aggressively through underground rhizomes and can quickly take over an herb garden if left unchecked. Interplanting mint with certain aggressive plants can help curb mint’s spreading habits. Useful companion plants to limit mint invasiveness include:

– Lemon balm

– Chives

– Garlic chives

– Onions

– Shallots

These bulbs and herbs will compete with mint for space and nutrients, keeping its growth more contained. The onion family, in particular, seems quite effective at stunting mint’s spread.

Companion Plants to Enhance Flavor

Some plants form especially tasty flavor combinations when planted near mint. Choosing the right companions can bring out the best in both your mint and other herbs. Delicious companion plant flavors for mint include:

– Chocolate mint + Strawberries: These two plants complement each other perfectly in desserts and summer drinks when grown side-by-side.

The Best Companion Plants for Your Herb Garden

– Spearmint + Peas and beans: Spearmint’s bright flavor pairs beautifully with fresh peas and green beans. Plant them together for easy seasonings.

– Peppermint + Chamomile: The clean flavors of peppermint and chamomile tea combine into a soothing, fragrant cup when the plants grow alongside each other.

– Apple mint + Thyme: Apple mint’s fruity notes mesh well with thyme’s woodsy taste. Use them together when cooking fruit dishes.

– Orange mint + Citrus trees: The dynamic citrus flavors of orange mint and lemons, limes, or oranges make these great companion plants.

Companion Plants to Repel Pests

Some plants naturally deter certain insect pests, which can benefit more vulnerable herbs like mint. Useful insect-repelling companion plants for mint include:

– Marigolds: These bright flowers repel aphids, squash bugs, nematodes and other garden pests.

– Garlic and chives: The allium scent of these plants drives away aphids and carrot flies.

– Petunias: These pretty flowers help repel a range of pests like asparagus beetles, leafhoppers and tomato worms.

Interplanting mint with these companions allows the mint to grow pest-free and remain healthy all season long.

Tips for Planting Mint Companions

When pairing mint with companion plants in your herb garden, keep these tips in mind:

– Give mint plenty of room by situating companion plants at least 12 inches away from mint. This prevents the mint’s vigorous roots from taking over.

– Plant mint and its companions in separate containers or raised garden beds to restrict mint’s spread. Sink containers in the soil to allow plant roots to intermingle.

– Water mint regularly to prevent it from invading other plants’ space in search of moisture. Mint prefers consistently damp (but not soggy) soil.

– Remove mint flowers before they set seed, as seeds can lead to unwanted mint sprouts around the garden. Clip flowers regularly.

– Prune back mint often to direct energy to the leaves rather than outward spread. Don’t compost pruned mint material, as it may re-root.

With the right companion plants, your mint will thrive beautifully alongside other herbs in your garden!

Companions for Dill

When choosing companion plants for dill in your herb garden, consider pairing it with plants that can benefit from its strong scent, deter pests, or provide shade and support. Some great options include:

Lettuce and Other Leafy Greens

Leafy greens like lettuce, kale, spinach, and Swiss chard make excellent companions for dill. As shallow-rooted plants, they don’t compete much for nutrients. Dill provides shade that helps keep soil moist for the more delicate greens. The dill’s strong scent also helps mask the greens, protecting them from pests like aphids and cabbage loopers. For best results, interplant dill seeds throughout your lettuce and greens beds.

Cucumbers

Cucumbers and dill are a match made in heaven. As vining plants, cucumbers benefit from the vertical structure dill’s ferny foliage provides. Twine the cucumber vines through dill plants to save space and support their growth. Dill flowers also attract pollinators like bees to cucumber blossoms, improving fruit set. The cucumber’s sprawling shade cools dill roots as well. For maximum cucumber yield with your companion dill, sow dill seeds every 1-2 feet along the edges of cucumber mounds or rows.

Onions and Chives

Onions, chives, and other alliums make great companions for dill in an herb garden. With their shallow root systems, alliums don’t compete much for soil nutrients and moisture. Alliums’ strong scents also help mask and protect more delicate dill from pests. Interplant dill throughout allium beds for these benefits. Just be sure to space allium bulbs 8-12 inches away from dill so their roots have enough room.

Asparagus

Asparagus benefits from having dill as a companion in several ways. Ferny dill foliage helps shelter emerging asparagus spears in spring, protecting them from snapping in wind or getting damaged. Dill’s flowers also attract beneficial predatory wasps that eat asparagus beetle larvae. Over time, the long dill taproot helps break up and aerate soil, benefitting asparagus roots. For best results, scatter dill seeds along the asparagus bed edges and between rows.

Carrots

Carrots and dill make great garden companions as well. As long-rooted plants, they occupy different soil zones and don’t compete much for space or nutrients. Carrots enjoy the shade and moisture retention dill’s ferny foliage provides. Dill’s strong scent also helps mask carrots from pests like carrot flies. For maximum benefits, sow dill seeds 1-2 feet apart along the edges of carrot rows or interspersed throughout the beds.

Best Practices for Planting Dill

When incorporating dill as a companion plant in your herb garden, keep these best practices in mind:

– Sow dill seeds directly in the garden 2-3 weeks before your last expected frost date. Dill doesn’t transplant well.

– Space dill plants 8-12 inches apart in rows or beds to allow room for growth. They can reach 3-5 feet tall when mature.

– Place taller dill plants towards the back or middle of garden beds so they don’t shade other plants too much.

– Grow several successive crops of quick-growing dill to provide flowers for beneficial insects through the whole growing season.

– Cut dill often for culinary use to encourage more branching. More branches equal more flowers to support companion plants.

– Allow some dill plants to go to seed at season’s end. Then sprinkle these seeds throughout garden beds in fall to sprout more companion dill the following spring.

When planted with care and proper spacing as a companion, dill is invaluable for deterring pests, attracting pollinators, retaining moisture, and supporting growth for many vegetables, herbs, and flowers in an organic garden. The ideal companions take advantage of dill’s unique offering while giving something back in return. With mindful design, dill’s companionship in the garden can help every plant thrive.

Companions for Sage

When choosing companion plants for sage in your herb garden, it’s important to pick varieties that will help each other thrive. The right companion plants can attract beneficial insects, repel pests, improve flavor, and allow you to make the most of your garden space. This article on the best companion plants for your herb garden will explore some of the top options for pairing with sage.

The Best Companion Plants for Your Herb Garden

Sage is an extremely versatile culinary herb that has been grown for centuries for its savory, slightly peppery flavor and aroma. Its silver-green leaves can be used fresh or dried in a wide variety of dishes, especially foods like pork, beans, and stuffing. In addition to being delicious, sage also has a long history of medicinal uses.

When planting sage, choose a spot with well-drained soil and plenty of sunlight. Sage thrives in hot, dry conditions. Good companion plants for sage will share similar needs for sunlight and soil drainage.

Some of the best companion plant matches for sage include:

Rosemary

Like sage, rosemary prefers hot, dry spots in the garden. These two Mediterranean herbs enjoy the same growing conditions, making them ideal companions. Planting them side by side can help improve the flavor of both herbs. Rosemary’s flowers also attract beneficial insects that will help keep pests away from sage.

The Best Companion Plants for Your Herb Garden

Beans

Beans and sage make great companion plants in the garden. Beans help add nitrogen to the soil through a natural process called nitrogen fixation, which benefits sage and many other plants growing nearby. Sage is also thought to repel some bean beetles and other potentially harmful insects, helping to protect the bean plants.

Cabbages & Brassicas

The cabbage family can be prone to insect pests like cabbage moths and aphids. Fortunately, sage planted near brassicas like cabbage, broccoli and Brussels sprouts can help deter many of these unwanted insects. Sage brings insect-repelling qualities, while the cabbage family offers the soil nutrient benefits.

Carrots

Planting carrots near sage may help mask the scent of the carrot plants, preventing carrot flies from detecting and laying eggs on them. The carrots also have lush foliage that provides shade for sage roots. This pairing helps camouflage and protect both vegetables.

Tomatoes

As with many other herbs, sage can have a beneficial relationship with tomatoes. Sage repels insects and potentially harmful fungi, while tomatoes planted in close proximity improve the essential oil content and flavor of the sage. This makes sage even more aromatic and delicious to use in recipes.

Peppers

There are mixed reports on the companion abilities of sage and peppers. Some gardeners have found that sage helps peppers grow better, produce higher yields and have a sweeter flavor. Others note that sage stunts pepper growth. More research is needed, but these two plants may be worth trying together depending on your climate and soil.

In addition to pairing well with multiple vegetable plants, sage also grows well near other herbs like parsley, chamomile, lavender and chives. Each combination of herbs offers its own benefits in terms of insect protection, nutrient needs and flavor.

When planting your sage companion plants, make sure to leave 12-18 inches between young sage seedlings and other plants. You can plant seeds or starter plants for companion plants at the same time as your sage. As the plants grow and fill out through the season, they will create a beautiful and productive herb garden that takes advantage of their symbiotic relationships.

No matter which companions you choose, providing sage and its neighbor plants with proper growing conditions is key. Make sure your herb garden receives at least 6 hours of sunlight daily and has soil that drains well after watering and rain. Space plants far enough apart to allow air circulation between them. Water when the top few inches become dry, and fertilize lightly with compost or organic fertilizers a couple times per growing season.

With some thoughtfully selected sage companion plants and proper care, you’ll have a thriving herb garden that yields delicious, home-grown flavor all season long. The aromatic sage combined with its compatible companion plants can create a beautiful, bountiful and sustainable garden space.

Companions for Chives

Chives are a versatile herb that can be used to flavor anything from eggs and potatoes to salads, soups, and fish. Their mild onion-garlic flavor also makes them a tasty garnish. When planting chives in your herb garden, consider companion planting to help your chives – and their neighbors – thrive. The best companion plants for chives can help maximize your herb harvest through beneficial relationships.

Choose Companion Plants That Deter Pests

Certain plants make good companions for chives because they help deter insect pests and diseases. For example, planting chives near carrots can help mask the scent of carrot flies, reducing pest damage. Other plants like parsley, sage, rosemary, and thyme may also help repel potentially harmful insects. The aromatic qualities of these herbs mask the scent of chives and other plants, making it harder for pests to find their intended hosts.

You can also interplant chives with vegetables like tomatoes, peppers, and asparagus. The sulfur compounds in chives may fend off pests like aphids, spider mites, Japanese beetles, and cabbage worms. Planting the right companion plants is an organic way to protect your chives and other herbs from insects and diseases.

Consider Companion Plants That Enhance Growth

In addition to pest-fighting properties, some plants can improve the growth and quality of nearby vegetation. For example, planting chives near plants like strawberries may enhance their development and flavor. The flowers of chives also attract beneficial pollinating insects like bees, supporting fruit formation. Other plants that grow well with chives include beets, Brassicas, carrots, leeks, spinach, and bush beans. Think about your chive companions’ growth periods to make the most of companion planting. You want to maximize cooperation, not competition, for nutrients, water, light and pollinators.

Aim for Companion Planting Diversity

Planting chives with a diverse mix of herbs, flowers, and vegetables can strengthen your garden ecosystem as a whole. Companion planting guides often recommend popular herbs like parsley, cilantro, dill, basil and oregano as beneficial partners for chives. But don’t neglect ornamental flowers! Pairing chives with attractive blooms like marigolds, cosmos, zinnias, or nasturtiums can be mutually beneficial while also creating a beautiful pot or garden bed.

A diverse companion planting scheme can also improve soil structure and nutrient availability over time. The roots of various plants work on different soil layers. And as plant materials decompose, this organic matter enriches the earth. It’s nature’s way of nourishing itself! For the most robust garden possible, plant chives alongside a wide variety of herbs, flowers and vegetables. Monitor what grows well together in your climate and conditions, and adjust future companion plantings accordingly.

Companion Planting Tips and Tricks

To make the most of companion gardening with chives, keep these tips in mind:

– When planting seeds or starter plants for your chive companions, check expected mature size to avoid overcrowding. Leave enough room for growth.

– Pay attention to sun requirements for each plant species. Choose site locations and positioning within beds accordingly.

– Amend soil with aged compost or organic fertilizer prior to planting any seeds or transplants. This gives all plants the best start possible.

– Use trellising, stakes, cages and garden arches as needed to support climbing companions like beans, cucumbers and peas.

– Apply mulch around plants to regulate soil temperature and moisture while suppressing weeds. Recommended mulches include wood chips, leaf mold and grass clippings.

– Group plants with similar water needs in the same bed or section of your garden to simplify irrigation.

– When harvesting chives, cut no more than one third of the grassy leaves at a time. This allows the plant to continue growing strongly.

The best companion plants for chives are those that enhance flavor and growth for the entire garden through symbiotic relationships. With some thoughtful pairing guided by companion gardening principles, your chives and their “friends” will thrive beautifully!

Companions for Lavender

When choosing companion plants for lavender in your herb garden, consider aromatics, colors, height, and flowering time. Lavender’s divine fragrance combines beautifully with other herbs and flowers. Not only does it repel pests, but lavender also attracts bees, butterflies, and hummingbirds. Plant lavender near entryways or paths so you brush against it and release its lovely scent.

Lavender grows 1-3 feet tall and 1-2 feet wide. It thrives in sunny spots with well-drained soil. Space lavender plants 1-3 feet apart depending on variety. Trim lavender in early spring to promote bushy, compact growth. Prune again after flowering to prevent plants from becoming woody. Mulch lavender in cold climates to protect roots from winter damage.

Excellent companion plants for lavender include:

Roses

Pair lavender with roses in a formal knot garden or casual cottage garden. Interplant lavender and roses in mixed borders. Lavender repels aphids and other pests that bother roses. Both plants attract pollinators and bloom at the same time for a beautiful summer display.

Sages

The silver foliage and spiky purple flowers of lavender complement bushy green garden sages like Berggarten, Purple, and Tricolor. Culinary sage also combines well with lavender. Sages thrive in hot, sunny spots with well-drained soil like lavender. Plus sages repel cabbage moths.

Thyme

Upright lavender plants highlight the spreading nature of lemon, orange, caraway and creeping thymes. Both herbs thrive in hot sunny areas with sandy soil. Thyme masks the open base of lavender plants while attracting bees. For best results, plant mounding French lavenders with low-growing thyme varieties.

Chamomile

The daisy-like flowers of Roman chamomile brighten shady spots under tall lavender varieties. Both herbs thrive in average to poor soil. Not only is chamomile a living mulch and ground cover for lavender, but it also improves flavor and essential oil quality.

Marigolds

Marigolds deter asparagus beetles, nematodes, tomato hornworms, aphids, squash bugs, and whiteflies. Their bright orange, yellow, or red blossoms beautify borders planted with purple lavender. Choose compact French or signet marigolds for edging lavender. Scatter tall African marigolds behind lavender plants. Both marigolds and lavender thrive in full sun and well-drained soil.

Zinnias

Butterflies, bees, and hummingbirds flock to bright zinnias and fragrant lavender flowers. These colorful annuals bloom continuously from early summer until fall frost. Low-growing varieties make excellent edging plants for lavender. Taller zinnias combine nicely with lavender in cottage gardens, borders, and containers. Zinnias tolerate heat, drought, and poor soils.

Sunflowers

Cheery sunflower flowers provide vertical contrast to horizontal lavender bushes. Miniature sunflowers like ‘Elf’ work well as edging plants. Medium-sized varieties such as ‘Moulin Rouge’ make excellent backdrop plants. Pair spreading lavenders with towering mammoth sunflowers. Sunflowers improve soil by accumulating nutrients from deep in the ground. They also attract pollinators.

When designing your herb garden, remember to include fragrant, colorful companion plants for your lavender. Not only will these plants help lavender grow better, but they’ll also attract pollinators while repelling common garden pests. For the highest quality essential oils, always plant English lavender varieties together in full sun locations with sandy, alkaline soil. Avoid fertilizing lavender since this reduces oil production. Water young lavender plants to establish deep roots, then water minimally for hardest growth. Trust The Best Companion Plants for Your Herb Garden to help you grow abundant lavender for culinary and craft uses in your garden.

Companions for Garlic

Garlic is a versatile culinary herb that adds flavor to many savory dishes. But did you know that when planted near certain other plants, garlic can also help improve their growth? Choosing the right companion plants for garlic can be beneficial for your whole herb garden.

Garlic is known to deter pests, including aphids, Japanese beetles, and spider mites. It also repels rabbits and deer. Planting garlic next to plants susceptible to these pests, especially leafy greens like lettuce, kale, spinach, and chard, can help protect them. The strong scent of garlic masks the scent trails that pests use to find host plants. Research also shows that garlic may induce pest confusion or have antibiotic effects on nearby plants.

Some of the best companion plant options to grow near garlic include:

Tomatoes – Garlic is an excellent companion for tomatoes. The pungent odor of garlic helps repel red spider mites, aphids, Japanese beetles, and other pests that can damage tomato plants. Garlic may also help prevent late blight in tomatoes. Choose indeterminate tomato varieties, which continue growing taller throughout the season, to allow enough space for both plants.

Peppers – Planting peppers next to garlic can deter aphids, spider mites, thrips, cabbage worms, squash bugs, and flea beetles. The two plants may also enhance each other’s growth and flavor. Select peppers that don’t spread too wide to avoid crowding the garlic.

Lettuce and Leafy Greens – The antibiotic effects and pest-repelling abilities of garlic make it an ideal companion to protect lettuce, kale, chard, spinach, and other leafy greens prone to pests. These quick-growing greens also won’t compete for nutrients with slower-growing garlic plants.

Chamomile – With its daisy-like flowers and soothing fragrance, chamomile makes a beautiful and beneficial companion for garlic. Chamomile attracts hoverflies and other predatory insects that prey on aphids, protecting nearby garlic plants. It’s also thought to enhance essential oil production.

Onions – Closely related to garlic, onions make great companions as they have complementary growth habits and help repel some of the same pests like aphids, slugs, and cabbage worms. Planting green onions around garlic can also help mark where garlic bulbs are located.

When planting garlic next to other herbs and vegetables, be sure to space the plants properly to avoid overcrowding as they grow. Most companion plants should be spaced at least 8-12 inches away from garlic plants. Taller tomato varieties may need more room. Water and fertilize garlic and its companion plants as needed for your soil type, adjusting for the needs of each plant.

Growing garlic alongside helpful companion plants allows you to protect and enhance your herb garden naturally. By repelling pests, attracting beneficial insects, and potentially boosting essential oil production, companion plants create an environment where garlic and other herbs can truly thrive. As you plan and care for your herb garden, consider adding one or more of these beneficial companions next to your garlic this season.

Companions for Oregano

Oregano is a very popular culinary herb that is easy to grow and has many companion planting options. When planting oregano in your herb garden, consider pairing it with plants that enhance its growth and flavor. Some of the best companion plants for oregano include:

Tomatoes

Tomatoes make great companions for oregano in the garden. Oregano helps repel some common tomato pests like hornworms and aphids. The oregano also seems to improve the flavor of neighboring tomato plants. Plant oregano around the edges of your tomato beds or intersperse the herbs between the vegetable plants.

Beans

Beans and oregano form strong symbiotic relationships. Bean plants help feed nutrients like nitrogen to the soil that oregano needs. In return, the oregano repels bean beetles. Bush beans, pole beans, and soybeans all make good companions for oregano.

Cabbage Family Plants

Members of the cabbage family like broccoli, Brussels sprouts, cabbage, cauliflower, collards, kale, and kohlrabi grow well with oregano. These vegetables tend to be heavy feeders that deplete soil nutrients, but oregano’s shallow roots help bring nutrients to the surface for the cabbage relatives. The oregano also masks the strong scent of cabbage plants that can attract pests.

Grapes

Grapes and oregano make excellent companion plants in the garden. Grapevines provide ground cover and structural support for oregano plants. Meanwhile, oregano helps repel insects that damage grapevines. The herbs’ flowers also attract beneficial pollinators to the area that can aid with grape production.

Asparagus

Asparagus plants have extensive root systems that bring nutrients to the soil’s surface. These nutrients benefit neighboring oregano plants. Plus, asparagus grows early in spring while oregano grows later into summer. Their different growing seasons allow efficient use of garden space when interplanted.

Peppers

Peppers and oregano form a helpful partnership in the herb garden. Oregano repels aphids, spider mites and other pests that can damage pepper plants. The peppers can provide shade for oregano if planted on the sunny side of the herb. Sweet bell peppers, hot chile peppers and paprika peppers all companion plant well with oregano.

When planting oregano in your herb garden, be sure to leave plenty of room between plants. Oregano can spread aggressively. Space oregano plants 12-18 inches apart depending on the variety. You can also plant oregano in containers near other herbs and vegetables. Containers help restrict spread while still allowing companion relationships.

The best companion plants for oregano help repel common garden pests, attract beneficial insects, enhance flavor, provide shade or structural support, and efficiently use garden space. Smart companion planting allows oregano and other herbs to thrive. Consider pairing your oregano with tomatoes, beans, cabbage family plants, grapes, asparagus or peppers to create an abundant herb garden. Experiment with oregano companion planting to find combinations that work best for your gardening conditions and tastes.

Spacing and Planting Your Herbs

When planning your herb garden, it’s important to consider the spacing and planting of your herbs. Proper spacing will ensure your herbs have enough room to grow and thrive. Planning out spacing ahead of time also allows you to maximize the productivity of your space.

Determine Spacing Needs

The first step for spacing and planting your companion herbs is determining the mature size of each herb variety you want to grow. While seed packets and plant tags give general spacing guidelines, every herb grows differently depending on your climate, soil, and sunlight conditions. Research the ultimate height and width of your herb varieties to understand their growth potential. Tall, bushy herbs like sage need more space than low-growing thyme. Trailing herbs like oregano spread out horizontally and require wider spacing between plants.

Additionally, check if your herbs have shallow or deep roots. Shallow-rooted plants like chives, parsley and basil can be planted closer together. Deep-rooted rosemary and lavender need more soil depth and should be spaced further apart. Understanding your herbs’ growth habits will inform proper spacing in your herb garden.

Space Dense Herb Plantings

When planting companion herbs together, lean towards wider spacing to avoid overcrowding. Congested plants compete for resources like sunlight, soil nutrition and water. With adequate space, herbs access better air circulation and light penetration for stronger, healthier growth.

For example, combine low-growing thyme as a fragrant, beneficial groundcover with taller sages. Space the sages 18-24 inches apart to prevent crowding once the plants mature. Use the vacant space in between for lower-growing thyme, leaving 6 inches between thyme plants.

Interplant quick-growing cilantro and slow-growing parsley in the same garden bed, spacing the cilantro seeds 4-6 inches apart. Once the cilantro bolts after one growing season, the parsley will continue producing in the vacant space.

Match Planting Times

When interplanting herbs, match their planting schedules in the growing season. Cool-weather herbs like parsley, cilantro and dill thrive in spring and fall. Plant these herbs together 4-6 weeks before your region’s last spring frost date when cooler temperatures suit them.

Warm-season basil, rosemary, oregano and sage grow vigorously in summer’s heat. Sow seeds or transplant starter plants of these herbs together after the danger of frost when soil has warmed. Staggering planting times ensures herbs share space effectively at compatible growth stages.

Right-Size Containers

Container gardening allows flexibility in spacing herbs together. But potting herbs too densely stunts plants competing in confined root space. Use container widths as a spacing guide, allowing approximately as much soil volume as a plant’s mature width.

For example, plant a 10-inch wide rosemary bush in a 10-12 inch wide container. Surround with 4-6 inch wide creeping thyme and sage, spaced proportionally in their smaller pots. This creates a visually pleasing herb arrangement with proper spacing.

Match water and sunlight needs for container companion plants. If combining Mediterranean herbs like lavender and oregano with thirstier cilantro, provide extra water to accommodate.

Ongoing Maintenance

Continue monitoring spacing needs as herb plants mature. Thin overcrowded plants and divide large perennial clumps like mint and chives over time. Transplant and give away extras to friends!

Proper spacing and planting techniques help herb gardens and containers thrive while making the most of planting areas. Do research on herb growth habits, choose suitable plant partners and right-size containers. Maintain ideal spacing over time for success growing companion herbs!

Watering and Fertilizing Your Companion Herbs

Proper watering and fertilizing is crucial for keeping your companion herbs happy and healthy. When caring for multiple herbs together in one garden bed, it’s important to understand each herb’s individual needs as well as best practices for watering and fertilizing companion plantings.

How Much to Water Herb Companion Plantings

When watering companion herbs, aim to provide around 1-1.5 inches of water per week, either through rainfall or manual watering. Keep the following watering tips in mind:

– Check soil moisture before watering. Stick your finger 1-2 inches into the soil to feel if it is dry; water when the top few inches become dry. Be sure not to overwater.

– Water early in the day to allow foliage to dry out. Wet foliage overnight can encourage fungal or mildew growth.

– Consider installing drip irrigation or soaker hoses to easily water multiple herbs at their bases. This prevents fungus issues from water sitting on leaves.

– During periods of drought or intense summer heat, increase watering frequency. Monitor plants closely for any wilting or dryness.

– After periods of heavy rain, reduce watering to allow soil to dry out.

– Container gardens often need more frequent watering than in-ground beds. Check soil moisture daily and water containers whenever the top few inches become dry.

Best Fertilizers for Companion Herb Gardens

While most herbs thrive in nutrient-poor soil, occasional fertilizing can give your plants an extra boost. When it comes to feeding companion herbs, opt for a balanced organic fertilizer or compost tea a couple times per growing season.

Here are some fertilizer options to consider:

– Compost or compost tea. Compost introduces beneficial microbes and slowly releases a variety of essential nutrients. Brew compost into an herb tea for quick nutrient absorption.

– Fish emulsion. This organic fertilizer adds a quick boost of nitrogen and micronutrients.

– Seaweed extracts. Made from marine algae, these provide a wide array of minerals and growth enhancers.

– Worm castings. The end-product of worm composting, castings are rich in nutrients and great for container gardens.

– Granular organic fertilizer. Look for a formula close to 5-5-5 for balanced nutrition. Only use at half strength when fertilizing herbs.

– Manure teas. Steep aged manure in water to create a gentle, nutrient-rich fertilizer.

When to Fertilize Your Companion Herbs

Time applications carefully when fertilizing multiple herbs sharing space:

– Early spring, when plants are young and preparing for rapid growth

– Mid-summer, to fuel plants through their active growing season

– Late fall, to help herbs store nutrients over winter

Avoid heavy fertilizer applications during temperature extremes in peak summer and winter. Only apply at half strength to prevent nutrient burn.

Watch Plant Cues

Pay attention to how your companion herbs look to determine if they require any amendments. Signs a plant could use more nutrients include stunted growth, yellowing leaves, or poor flowering and fruit production compared to prior years. Fast-growing herbs like basil and cilantro may need more frequent feeding than woody perennials like rosemary or lavender.

Proper water, fertilizer, and attentive care will keep your kitchen herb garden and companion plantings happy and healthy for years to come. Follow these tips to help your herbs and friends thrive.

Maximize Your Space: Tips for Urban Herb Gardening

Maximize Your Space: Tips for Urban Herb Gardening

Choose the Right Herbs for Small Spaces

When gardening space is limited, it’s important to choose compact herb varieties that will thrive in small spaces. The key is selecting herbs that grow vertically rather than spreading out. Here are some of the best herbs for small-space gardening.

Basil is one of the most popular culinary herbs and many compact basil varieties are perfectly suited for container gardening. Try dwarf basil cultivars like ‘Spicy Globe’ or ‘Boxwood’ that grow in a neat, rounded shape. The tall columnar ‘Colossal’ basil is also a great vertical grower. When planting basil, use containers at least 6 inches wide and remember that basil likes full sun.

Chives are another excellent choice for urban herb gardens. Their grassy leaves provide great flavor for recipes while their vertical growth habit makes them a space-efficient option. Chives also give attractive purple flowers in late spring. Grow chives in containers at least 4 inches wide.

Oregano is a Mediterranean herb that thrives with minimal care. Dwarf oregano like ‘Compactum’ works beautifully in small spaces, while golden oregano offers pretty foliage for containers. Give oregano a pot at least 6-8 inches wide in a sunny spot.

Thyme is one of the most versatile cooking herbs. Its tiny leaves pack a punch and thyme does not need much space to grow. Upright varieties like ‘Hi-Ho Silver’ are particularly good for small gardens, growing up to 6 inches tall. Lemon thyme and creeping thyme are other thyme types suited for compact herb gardening.

Rosemary has a reputation for being difficult to grow indoors, but the right rosemary varieties can do quite well in pots. Choose miniature rosemary cultivars like ‘Blue Boy’ or ‘Blue Spire’ that max out under 2 feet tall. Give rosemary at least an 8-inch container and several hours of sun daily.

Sage is another herb that offers compact varieties for small gardens. Look for dwarf garden sage or the narrow ‘Berggarten’ sage. The colorful tricolor sage shows off variegated foliage in containers. Give sage an 8 to 10-inch pot and place in full sun.

When planning an urban herb garden, keep in mind that many popular culinary herbs naturally grow as small, contained plants even without dwarf cultivars. Options like mint, parsley, cilantro, dill, and marjoram can all thrive in modest spaces.

No matter which herbs you choose, the containers themselves also play an important role when gardening in compact areas. Prioritize vertical height over width to allow more plants in narrow spaces. Hang wall planters and rail planters to take advantage of vertical real estate without occupying floorspace. Stacked pots, multilevel pot stands, and tiered planters also efficiently utilize vertical growing space both indoors and out.

Urban herb gardening offers great rewards, even for gardeners short on square footage. By focusing on vertical growers and compact varieties suited to life in containers and small pots, you can enjoy a vibrant, productive indoor or outdoor herb garden no matter your space constraints.

Use Vertical Space with Wall-Mounted or Hanging Gardens

Using vertical space is key for urban herb gardening where horizontal space is limited. Wall-mounted and hanging herb gardens are great options to maximize your usable gardening area.

When choosing herbs for vertical gardens, opt for more compact varieties that will thrive in shallow pots and limited soil. Good choices include thyme, oregano, sage, rosemary, chives, parsley, basil, and mint. Consider the sun exposure the wall or hanging garden will receive and choose herbs accordingly.

Wall-mounted herb gardens can transform any blank vertical surface into a productive garden. Simple wooden frames filled with soil work well, or you can get creative and use repurposed household items like crates, ladders, plastic gutters, or even a bookcase turned on its side. Make sure structures are securely fastened and the containers have drainage holes before planting.

For inside mounting, self-watering felt planters are excellent choices requiring less maintenance. Outside, regular hand watering works fine. Feed wall-mounted herbs with liquid fertilizer or slow-release granules a few times per season. Prune woody herbs like rosemary to keep them from outgrowing their space.

Hanging gardens instantly add visual interest and greenery even in the smallest outdoor area. Use breathable fabric planters or plastic nursery pots with drainage holes inserted into decorative baskets. Hanging pots dry out quicker than in-ground plants, so check soil moisture daily and water when the top inch becomes dry.

Situate hanging herb gardens in locations with at least 6 hours of sunlight per day. Protection from wind helps prevent soil from drying out too rapidly. For convenience, mount hangers on pulley systems allowing you to lower pots for easy watering and maintenance.

Those with outdoor vertical space may consider building a freestanding A-frame herb garden. This involves securing two tall boards together at the top and mounting planted containers or shelves along the angled sides. Place the A-frame herb garden against a sunny wall or fence.

Follow basic herb gardening care like pruning, fertilizing, and pest management even when growing vertically. Changing weather can impact watering needs. Reduce watering in cool weather and increase in hot, dry periods. Transition indoor wall gardens outdoors after any danger of frost when weather warms up in spring.

Get creative with vertical space both inside and out when Maximizing Your Space for Urban Herb Gardening. Wall mounts and hanging gardens keep productive plants out of the way while making herbs easily accessible for harvest. Choosing compact herb varieties suited to container growing helps ensure success. With a little effort, any empty vertical surface can be turned into a thriving, beautiful herb garden.

Container Gardening Tips for Herbs

Growing herbs in containers is a great way to maximize limited space when herb gardening. Carefully choosing the right containers and soil, along with proper watering and fertilization allows you to create a thriving urban herb garden. Follow these container gardening tips to get the most out of your small space herb garden.

Select Appropriate Planters

When selecting planters for an urban herb garden, consider material, drainage, and size. Terracotta, plastic, wood, and ceramic planters all work well for herbs. Ensure containers have drainage holes to prevent soggy soil. Match container size to the herb’s expected mature size, allowing at least 12 inches depth and diameter for roots to grow. Larger planters hold more soil and retain moisture better than small containers.

Use a Quality Potting Mix

A loose, nutrient-rich potting mix designed for container gardening allows herbs to thrive with proper drainage and aeration. Pre-mixed organic soil labeled for herbs or vegetables contains compost to retain moisture and release nutrients over time. You can create your own mix by combining potting soil with compost or vermiculite. Adding perlite creates air pockets for improved drainage.

Fertilize Herbs Properly

While herbs grow well in average soil, fertilizer gives an extra boost. Use a balanced liquid fertilizer diluted to half-strength every two weeks during the growing season. Slow-release pellet fertilizers provide a steady supply of nutrients by gradually breaking down over time. They can be added at planting time and will last 3-4 months. Be careful not to over-fertilize herbs, as excess nutrients can diminish their flavor.

Water Herbs Thoroughly and Consistently

Inconsistent watering causes problems for container herbs. Check soil moisture daily, watering when the top inch becomes dry. Water thoroughly until excess drips from the bottom, ensuring the whole root zone is hydrated. Drought-stressed plants are more prone to pests and diseases. Group containers together to simplify watering efforts. Add mulch on top of soil to retain moisture longer.

Maximize Sun Exposure

Most herbs need at least 6 hours of direct sunlight daily for robust growth. Turn containers periodically so all sides get evenly exposed. Moving planters around by day helps capture sunlight in different areas. Supplement with grow lights if natural light is inadequate. South-facing windowsills offer the most sunlight exposure for indoor herb gardens.

Protect Herbs from Temperature Extremes

While most herbs thrive during the warm growing season, temperature extremes can damage plants. Hot midday sun can scorch and wilt leaves. Move containers to a shady spot or add a shade cloth canopy during the hottest parts of the day. Cold snaps can also injure plants. Cover tender herbs or move containers into a covered area like a porch or garage if frost is expected.

Prune Herbs to Promote Growth

Pruning herbs regularly prevents them from becoming leggy and encourages dense, bushy growth. Pinching off flower buds before they bloom also directs the plant’s energy towards leaf and stem production rather than seeds. Pruning also keeps plants tidy and shaped. Generally prune away dead or damaged growth at any time. For woody herbs like rosemary, prune annually in spring.

Maximize Space by Interplanting

Efficiently use container space by interplanting different herb species in the same planters. Select herbs with different forms and heights to occupy various zones. For example, plant dill in the center of a planter surrounded by low-growing thyme along the edges. Interplanting also allows you to reap the benefits of companion planting, where certain herbs grow better beside specific partners.

By following these key tips for container herb gardening, you can grow a productive indoor or outdoor herb garden even in a small space, maximizing flavor and enjoyment from your urban oasis.

Best Soil Mixes and Fertilizers for Container Herbs

When growing herbs in containers, using the right potting soil mix is key to getting the best flavor and highest yields from your plants. The ideal soil mix for container herbs should be loose, well-drained, and nutrient-rich. It’s best to avoid regular garden soil, as this can become compressed over time in pots and retain too much moisture. Here are some of the best potting mixes for container herb gardens:

Peat or Coconut Coir-Based Mixes

A good basic herb potting mix contains ingredients like peat moss or coconut coir to help retain some moisture, along with perlite or vermiculite to keep the soil loose and aerated. Many commercial organic potting soils contain these ingredients and work very well for a range of culinary herbs like thyme, rosemary, oregano, sage, and more. Look for mixes specially formulated for herbs and vegetables.

Soilless Potting Mixes

Soilless mixes contain no actual soil, just lightweight base ingredients like peat, coconut coir or bark fines blended with perlite or vermiculite. They provide an ultralight and fast-draining medium perfect for container herbs prone to rotting like lavender, oregano, and thyme. You’ll need to fertilize more with soilless mixes.

Custom Herb & Vegetable Mixes

Maximize Your Space: Tips for Urban Herb Gardening

Consider mixing your own custom soil blend for herbs in containers. An ideal do-it-yourself mix contains equal parts potting soil or compost, perlite or vermiculite, and coconut coir or peat moss. You can tweak mixes for better drainage or moisture retention depending on the needs of your specific herbs.

When choosing pre-made or custom soil blends, make sure they are organic and do not contain synthetic slow-release fertilizers. It’s best to use organic slow-release amendments or your own liquid feeding schedule.

Organic Slow-Release Amendments

Mixing some organic slow-release granular fertilizer into your potting soil provides a gentle, steady feeding over the course of a season. Excellent all-purpose organic amendments for container herbs include alfalfa meal, kelp meal, fish meal, and crushed eggshells. Espoma makes some great organic fertilizers for containers too.

Liquid Organic Fertilizers

In addition to slow-release amendments, you should supplement container herbs with regular doses of a gentle liquid organic fertilizer, like fish emulsion or seaweed extract. This will provide an added nutrient boost to plants in confined pots where nutrients can become depleted over time.

Container herbs tend to need more frequent feedings with smaller amounts of fertilizer compared to in-ground plants. Follow label instructions, but a good general rule is to feed container herbs with liquid fertilizer every 2-4 weeks during the active growing season.

The Right Soil pH

Most culinary herbs grow best in neutral to slightly alkaline soil with a pH around 6.5-7.0. Lavender, rosemary, thyme and oregano prefer their soil on the alkaline side, between pH 7-8. Test your potting mix and amend pH if needed with lime (to raise) or elemental sulfur (to lower).

Proper soil preparation is the first step to success when gardening herbs in containers. Follow these tips on choosing the best potting mixes and fertilizers, and your container herbs will thrive and fill your kitchen with flavor. Don’t forget to also use smart space-saving techniques like vertical gardens and companion planting to maximize harvests from your urban herb container garden.

Maximize Sunlight with Strategic Placement

When growing herbs in limited space, making the most of available sunlight is crucial for healthy, productive plants. Strategically placing your containers or vertical gardens can optimize light exposure.

South-Facing Placement

For outdoor gardens, a sunny south-facing spot is ideal. In the northern hemisphere, south-facing spaces receive the most direct sunlight throughout the day. Position herb planters along a southern wall or railing to maximize exposure. If space allows, leave sufficient room between the wall and planters to allow light to reach plants from multiple angles.

For indoor herb gardens, placing containers on a bright, south-facing windowsill is best. Supplement with artificial plant lights as needed. Consider installing a greenhouse window to allow more direct sunlight into urban apartments.

Light Requirements by Herb

When designing a compact herb garden, consider each herb’s specific light needs. Basil, oregano, parsley, rosemary, sage and thyme require at least 6 hours of full sun daily. Cilantro, dill and mint tolerate partial shade, needing only 4 hours of direct sunlight. Choosing shade-tolerant varieties will provide more flexibility when selecting garden placement.

Moveable Containers

One benefit of gardening in containers is the ability to move plants to “chase the sun.” Adjust container placement based on changing sunlight patterns, moving them to the brightest available location as day length shifts with the seasons. Adding wheels to planter boxes makes it easy to frequently reposition mobile gardens.

Supplemental Lighting

For urban gardeners truly limited on space, supplemental grow lights can boost productivity. LED plant lights that provide full-spectrum illumination are available in compact form factors that take up minimal room. Mount LED panels above wall-mounted herb gardens or vertical hydroponic systems to maximize light exposure. Use adjustable lights to customize intensity and direction.

Adequate Sunlight Prevents Issues

Insufficient sunlight leads to common problems for indoor herbs and urban gardens, like leggy, weak growth and susceptibility to fungus and molds. Maximizing natural light exposure through strategic placement wards off these issues. It also provides the light intensity herbs need for robust photosynthesis and the production of essential oils that give them their signature flavors and aromas.

In urban environments, it sometimes takes creativity and adaptive solutions to overcome challenges like limited space and lack of direct sunlight. But a well-designed compact herb garden tailored to natural light conditions can thrive with the right placement and supplemental lighting. Follow these sunlight maximization tips for your indoor, vertical or container herb planting efforts. Be sure to also provide adequate water, drainage and nutrients to allow your herbs to flourish within confined gardening spaces.

Watering and Maintenance Tips for Container Herbs

Proper watering and maintenance are crucial for keeping container herbs healthy in limited urban spaces. Here are some key tips to maximize your space by keeping herbs thriving in pots or window boxes.

Monitor Soil Moisture

Check the soil moisture of container herbs daily by touching the surface with your finger. The soil should be lightly moist but not soaked or dusty dry. Herbs in small containers will need more frequent watering than in larger pots. Mint, oregano, chives and parsley require consistent moisture, while rosemary, thyme and sage are more drought-tolerant. Adjust watering frequency and volume based on each herb’s needs.

Water Early, Water Deep

Water container herbs early in the day so the moisture has time to soak into the soil and foliage before hot sun causes excess evaporation. When watering, add enough liquid slowly until it drains from the container’s bottom drainage holes. This encourages roots to grow downwards searching for water. Shallow watering leads to short, inefficient root structures. Deep weekly soakings are better than frequent shallow waterings for container herbs.

Self-Watering Containers

Self-watering containers are excellent watering aids for urban gardeners who travel or forget to water routinely. Fill the water reservoir of self-watering pots once a week and the plant wicks up moisture as needed. Self-watering systems prevent drought stress if you can’t water one day. This is extremely useful for maximizing small spaces when you can’t check container plants daily.

Add Organic Matter

Mixing compost, worm castings or organic vegetable scraps into potting soil provides nutrients for herbs and retains moisture so you water less frequently. Amend soil with organic matter at least once per year, or whenever repotting. Worm castings in particular enhance container plant health and growth in limited spaces.

Mulch to Retain Moisture

Spread an even layer of shredded leaves, grass clippings, straw or other organic mulch material on the soil surface around container herbs. Mulching mimics the insulating effects of dense plantings in garden beds. The mulch prevents soil moisture loss through evaporation and regulates soil temperature. It gradually breaks down and adds beneficial humus too.

Group Together

Place container plants close together in a tight arrangement, clustering pots according to watering need. As plants grow, their leaves create a microclimate of higher humidity and cooler air temperatures within the grouping. This allows urban gardeners to maximize limited patio or balcony space while aiding the growth of healthy, productive herbs.

Trim Back Growth

Pinch off or cut back leggy growth on herb plants to encourage bushier habits, heavier leaf production and discourage flowering. Trimming forces plants to branch out rather than upward. This creates fuller, shorter plants that yield more herbs for cooking within restricted vertical real estate. Target basil, lemon balm, oregano and mints for regular tip pruning.

Clean Up Fallen Debris

Routinely remove faded flowers, dropped leaves and stems from container herb plantings to prevent disease issues in damp conditions. Keeping urban patio containers tidy also looks better and allows you to spot signs of pests or nutrient deficiencies faster. Sweeping up debris can reduce the need for pesticides too. Spot clean between plants with a small hand broom and dustpan.

Watch for Pests

Inspect container herbs often for common pests like aphids, spider mites, fungus gnats and mealybugs. These attack stressed plants in confined quarters. Avoid chemical pesticides which also kill beneficials. Wash insects off with a strong spray of water, or use insecticidal soap or horticultural oil. Remove badly infested leaves or whole plants to prevent spreading.

Rotate Container Position

Maximize Your Space: Tips for Urban Herb Gardening

Rotate pots and window boxes with herbs to a different space in the outdoor landscape or along a windowsill every 2-3 weeks. Moving them into and out of full sun/part shade exposure keeps growth even and prevents one side from getting disproportionate sunlight. Rotating containers also disrupts the lifecycle of any pests.

The restricted space of urban balconies, patios and living spaces requires some unique maintenance to keep container herbs growing their best. But don’t let small square footage deter your inner gardener. With these key watering, soil health and general care tips, you can maximize productivity from your container herbs this season.

Overwintering Herbs Indoors

If you’ve invested time and effort into an outdoor herb garden, you don’t have to say goodbye to your precious plants when the weather turns cold. Many culinary herbs can be overwintered indoors to provide a year-round harvest. Overwintering extends the productive life of herb plants and saves you from having to purchase new starters every spring. With some simple preparation and care tactics, you can continue maximizing your indoor space by keeping herbs thriving through the winter.

Maximize Your Space: Tips for Urban Herb Gardening

Getting a Jump Start with Cuttings

The key to successfully overwintering herbs is to act before the first frost hits. Ideally, you’ll want to take cuttings from established outdoor plants around late summer/early fall, before growth slows down. Mint, oregano, thyme, rosemary, sage, and lavender are particularly good herb varieties for overwintering via cuttings.

Here’s a quick step-by-step for the cutting method:

– Select a vigorous stem from the outdoor herb plant and cut off the top few inches. Be sure at least two sets of leaves remain.

– Remove the lower leaves and place the cutting in a glass of water.

– Change the water daily and watch for root development.

– Once roots are a few inches long, plant the cutting in a container filled with high-quality potting mix.

– Place in a sunny indoor location and water when the top inch of soil is dry.

This method essentially propagates new indoor herb plants well ahead of winter. Getting a head start on root development will help the transplants better withstand the stress of overwintering.

Potting Up Plants for Indoor Care

If herb plants are already growing in containers, the transplanting process is even easier. Follow these tips for getting potted outdoor herbs ready for overwintering:

– Water plants thoroughly a few days before bringing indoors. This will leach excess fertilizer salts from the soil.

– Prune back stems by one-third to one-half. This reduces water loss and encourages more compact growth.

– Check undersides of leaves and spray with horticultural oil or insecticidal soap if pests are detected.

– Repot in fresh potting mix, if needed. This gives roots room to grow through winter.

Maximize Your Space: Tips for Urban Herb Gardening

– Place transplants in a sunny indoor location near a window. South or west exposure is ideal.

– Introduce plants slowly to prevent shock from temperature extremes.

Providing Optimal Indoor Growing Conditions

Herbs grown outdoors get accustomed to seasonal fluctuations in sunlight, temperatures, humidity and other factors. For the healthiest overwintered herb garden possible, try to mimic outdoor growing conditions as much as possible. Here are some key elements to focus on:

Sunlight

Supplement natural light with 14-16 hours per day of artificial lighting. LED grow lights work beautifully for overwintering herbs.

Temperature & Humidity

Maintain daytime temperatures around 65-70° F and 45-55° F at night. Boost humidity levels around plants with pebble trays.

Maximize Your Space: Tips for Urban Herb Gardening

Water & Fertilizer

Maximize Your Space: Tips for Urban Herb Gardening

Let soil dry out slightly between waterings and feed monthly with balanced liquid fertilizer mixed at 1/4 strength.

Air Circulation & Pruning

Use small fans to prevent disease and prune any dead or damaged growth.

With the right growing conditions in place, overwintered herbs will continue growing indoors through the winter. Just be sure to monitor plants closely and make adjustments as needed.

Maximizing Space for Overwintering Herbs

Finding sufficient space for an indoor herb garden amid cramped winter quarters can definitely be a challenge. But herb plants are highly adaptable and several effective solutions exist for successfully overwintering herbs, even in tight indoor environments.

Here are some space-saving tips for keeping herbs thriving indoors through winter:

– Utilize a sunny, unused windowsill to display a few small herb pots.

– Install wire wall-mounted shelves in front of a bright window for supporting multiple pots.

– Create a mini greenhouse for herbs by enclosing a wire shelf unit with plastic sheeting.

– Use artificial lights to grow herbs in a basement or other room without windows.

– Grow microgreens and herbs hydroponically for maximum space efficiency.

Overwintering herbs definitely requires some strategic planning, extra effort and diligent care. But the payoff is homegrown herbs all winter long to take your culinary creations to the next flavor level.

Maximize Your Space: Tips for Urban Herb Gardening

Companion Planting for Efficient Use of Space

When space is limited, companion planting allows you to maximize yields and grow herbs that thrive together in close quarters. Careful planning of compatible neighboring plants helps deter pests, attract beneficial insects, and ensure your herbs have the nutrients and conditions they need to flourish.

What is Companion Planting?

Companion planting refers to the practice of strategically grouping complementary plants together in a garden bed or container. Certain herbs, when grown side-by-side, can benefit each other by deterring common pests, enhancing flavor, improving growth, or helping neighboring plants uptake nutrients more efficiently. Maximizing your urban herb garden means selecting herb companions that have symbiotic relationships.

Companion Planting Benefits

Smart companion planting provides many benefits for small-space herb gardens:

– Pest control – Grouping pest-deterring herbs near more vulnerable plants helps naturally protect against insects and diseases. For example, planting thyme near cabbage helps deter cabbage moths.

– Enhanced flavor – Some herbs impart subtle flavor changes in neighboring plants, like planting basil near tomatoes to amplify sweetness.

– Improved growth – Beneficial root excretions and nutrient availability from certain neighbor plants can bolster the growth of other herbs. For example, chamomile thrives when planted near slower-growing herbs like sage or oregano.

– Efficient use of space – Filling every bit of available space with symbiotic plant pairings results in higher yields. You can plant quick-growing herbs like cilantro in between slower-growing perennial herbs.

– Pollination – Grouping flowering herbs like borage together can help attract beneficial pollinators to your whole garden.

Best Herb Companion Plantings

Some classic herb companion pairings perfectly suited for small urban gardens include:

– Basil & tomatoes – Enhances flavor and growth in both plants. Deters pests like aphids and mosquitoes.

– Chives & carrots – Chives help deter carrot flies and boost carrot growth.

– Cilantro & lettuces – Cilantro bolsters lettuce growth while lettuces provide shade for lower-lying cilantro.

– Dill & cucumbers – Dill attracts predatory wasps that protect cucumber plants from pests. Both plants benefit from abundant pollination.

– Oregano & cabbage – Oregano deters cabbage moths, while cabbage provides ground cover retaining soil moisture for oregano.

– Thyme & broccoli – Thyme drives away cabbage worms, a common broccoli pest.

Mix and Match Herbs for Efficient Planting

When space is extremely limited, get creative by intermixing quick-growing annual herbs among slower-growing perennial herbs. For example, plant a thyme or rosemary bush alongside smaller pots of basil, cilantro and dill that can be rotated seasonally. You can refresh pots with new seedlings while mature herbs remain in place.

Consider height pairing tall vertical herbs like dill and fennel with low-spreading herbs like thyme to utilize both vertical and horizontal space. Just ensure taller plants don’t block sunlight from shorter herbs.

Also evaluate paired herbs based on their watering needs, sunlight requirements and ripening rates to avoid one herb’s growth inhibiting its neighbor. But don’t overthink it too much – most herbs are agreeable companions!

DIY Vertical Herb Tower

One fun way to maximize every inch is creating your own vertical “herb tower” using recycled materials. This allows you to grow different companion herbs in stacked pots with minimal horizontal space required.

See our “DIY Vertical Herb Garden Ideas” section for step-by-step instructions to build a 5-gallon bucket herb tower perfect for porches, patios or tiny yards. Mix and match companion herbs like parsley, basil and chives in each bucket opening. Place taller central towers beside lower satellite towers to utilize all available vertical space as your herbs grow.

Get Creative with Companions

When planning a small-space herb garden, mimic natural plant ecosystems by growing herbs in symbiotic partnerships. Clever companion planting allows you to boost flavors, deter pests, improve pollination and protect herbs naturally – while maximizing productivity from every square inch!

For more tips on great herb companions, essential gardening techniques for urban spaces, and creative DIY herb garden ideas, keep reading our series “Maximize Your Space: Tips for Urban Herb Gardening”.

Regrow Kitchen Scraps for Free Herbs

Rather than throwing away herb scraps and stems, you can actually regrow them to enjoy a continuous harvest of free herbs, right in your kitchen. Regrowing herbs from scraps is an easy way to maximize your space for urban herb gardening.

The best herb scraps to regrow include basil, mint, oregano, thyme, sage, rosemary, cilantro, and parsley. With just a small start from leftover stems or roots, you can grow these herbs for free.

Getting Started Regrowing Herb Scraps

Before you begin, make sure you select healthy herb stems or roots as your starter plants. Avoid any brown, mushy, or slimy pieces, as these likely will not regrow. The best pieces to select are stems with multiple leaf nodes or healthy roots attached.

You will also need containers, soil, and water. Small jars or pots work well for regrowing herb scraps. Be sure the containers have drainage holes. A good multipurpose potting mix will provide the nutrients your regrown herb scraps need. And of course, water is essential.

How to Regrow Basil from Cuttings

Maximize Your Space: Tips for Urban Herb Gardening

The easiest herb to regrow from scraps is basil. Simply place a basil stem with several leaf nodes into a jar of water. Leave the top leaves above water and change the water every few days. New roots will begin emerging in just a few days and you can transplant your regrown basil start into soil after about 2 weeks.

Alternatively, you can place basil cuttings directly into soil. The stems will begin generating new roots and grow into full basil plants you can continually harvest.

Regrowing Mint from Cuttings or Stems

Mint is a versatile herb perfect for regrowing, as it propagates easily. Place mint cuttings or stems in water or directly into potting mix and new roots will begin to grow quickly. To regrow mint in water, suspend stems so the lower half sits in water. Transfer your regrown mint plantlets into soil once a dense root system develops.

When regrowing mint in soil, bury stems just deep enough so the top leaves are exposed. As your mint grows, transplant regrown mint plants into separate containers to prevent mint from spreading where unwanted.

How to Regrow Oregano from Stem Cuttings

With its pungent, zesty flavor, homegrown oregano adds flavorful punch to many dishes. To regrow oregano from scraps, trim 3-4 inches off the bottom of a healthy oregano stem. Remove the lower leaves and plant the stem in sterile potting mix.

Keep the soil consistently moist and new roots and leaves will begin growing within 1-2 weeks. Once established, cut back your regrown oregano to encourage bushy growth. Use leaves as needed and this regrown oregano will continue producing more flavorful foliage you can enjoy harvesting.

Regrow Cilantro from Roots and Cuttings

Cilantro is another herb that regrows readily from scraps. To regrow cilantro from roots, place washed root ends in a shallow container of water. New leaves will begin to sprout within a week. When the regrown root cuttings have a well-developed set of new leaves, plant them in potting mix, water well and place in a sunny window.

You can also regrow cilantro from the cut off bottoms of bunches. Simply place the rooted end in a jar of water, changing the water every few days. Transplant into soil when new top growth is 4-6 inches tall. Your regrown cilantro is now ready for harvesting.

Regrow Thyme from Cuttings

The woody stems of thyme make it an ideal herb for regrowing. Take 2-4 inch cuttings from the tips of thyme stems that have new growth. Remove the lower leaves and place into sterile seed starting mix. Water lightly and cover with plastic to maintain humidity while they develop roots.

Within 2-3 weeks, you’ll have new regrown thyme starters to transplant. This method propagates new thyme plants efficiently while maximizing your existing thyme.

Regrow Sage from Seed

With its soft gray green foliage, garden sage imparts a distinctive flavor and aroma perfect for regrowing from scraps. To regrow sage, allow a few sage flowers to remain on the plant as they finish flowering. Seed pods will begin swelling as seeds develop inside.

Collect the dry seed pods when they turn brown, then break them open to gather the small black sage seeds. Sow seeds about 1⁄4 inch deep in sterile potting soil. Cover lightly with plastic until sprouts emerge. Transplant seedlings when they are few inches tall. Nurture your regrown sage plant through its first winter indoors. The following spring it will be ready for outdoor planting.

Regrow Ginger from Rhizomes

Ginger is a tropical plant, so regrowing it indoors from scraps allows you to enjoy fresh ginger year-round. Select plump ginger rhizomes from mature gingerroot, ideally with visible “eyes” or growth buds. Break ginger pieces off so each piece has 1-2 growth buds.

Soak pieces in water overnight before planting to hydrate them. Bury ginger rhizomes just beneath the soil with growth buds facing up. Keep soil evenly moist and provide plenty of light. New ginger shoots will emerge in just a few weeks.

DIY Kitchen Scraps Herb Garden

If you enjoy regrowing herbs from scraps, consider making your own DIY vertical kitchen scraps garden for an ongoing supply of homegrown herbs.

Simply mount a wooden pallet or wire panels on a sunny wall or fence. Use jars attached with zip ties or screws to create your vertical herb garden. Label your jars by herb type and fill partway with potting mix. Insert herb cuttings or roots, keep them watered, and watch your kitchen scraps transform into a living herb garden.

Regrowing herbs from kitchen scraps is an easy way to maximize space while enjoying an abundance of garden-fresh herbs. With a little time and effort, you can create your own indoor herb garden using clippings and cuttings that otherwise would have been discarded.

DIY Vertical Herb Garden Ideas

If you’re tight on space but want to grow herbs at home, consider creating a vertical herb garden! Vertical gardens allow you to maximize your precious little square footage by using the vertical dimension. With a bit of creativity and DIY spirit, you can craft customized vertical herb gardens to beautify your home and provide a bountiful harvest of herbs.

Wall-Mounted Herb Garden

One of the easiest vertical herb garden projects is a simple wall-mounted design. All it requires is a wooden pallet or a framed structure affixed to any vertical surface. Screw in galvanized steel hooks across the width of the pallet. Then, hang lightweight plastic or terracotta pots filled with potting mix and herbs plants of your choice from the hooks. For proper growth, place the wall-mounted herb garden in a spot that receives at least 6 hours of direct sunlight daily.

Repurposed Ladder Herb Garden

Give an old wooden ladder new life by transforming it into a vertical herb garden! Secure the ladder horizontally onto a sunny wall. Drill holes into each rung and insert galvanized steel hooks. Hang small to medium herb pots on the hooks, spacing them out evenly for proper airflow and light penetration to the plants. You can also affix wooden crates or mesh pockets onto the ladder rungs to hold potted herbs or to use as planting beds.

Hanging Shoe Organizer

Another clever vertical gardening idea for herbs is to use hanging shoe organizers. Canvas shoe organizers with multiple pockets are perfect for holding small herb pots. Hang one or more in a bright, sunny spot and simply tuck herb plants in pots into each pocket. The pockets support the pots and allow excellent drainage and airflow around the roots.

Rain Gutters Into Planters

Here’s an innovative way to recycle old rain gutters – transform them into vertical herb planters! Cut the rain gutters to desired lengths. Screw in galvanized steel hooks across the back for mounting. You can either hang small plastic herb pots from the hooks or create planting beds directly inside the gutters using drainage materials and potting soil. Mount your rain gutter herb planters on sunny walls or fences.

Plastic Bottles or Tubes

Reuse and recycle plastic bottles, tubes, and pipes by converting them into vertical herb gardens. Cut holes that are slightly smaller than the diameter of herb seedlings’ root balls along the bottles. Insert seedlings directly into the holes, spacing them out evenly to allow light and air circulation all around. Fill bottles with good potting mix. Water from the top opening of the bottles. Hang them along fences or balcony railings in optimal sun.

PVC Pipes

For another easy vertical garden, simply use PVC pipes! Cut varying lengths of 4-inch diameter PVC pipes. Drill drainage holes along the base. Cap off the bottom of the pipes and create plant holes along the sides. Fill pipes partway with potting mix and insert young herb plants into holes, packing soil around the roots. Mount pipes vertically on walls or fences and water adequately.

No matter which vertical herb garden design you ultimately choose, the key is maximizing sunlight exposure and providing the proper soil quality and drainage for your herbs to thrive. Get creative with vertical spaces to produce bountiful harvests of herbs – even in the smallest urban home. With a bit of DIY spirit and these tips for maximizing space, you’ll have fresh herbs growing in your kitchen in no time!

5 Common Mistakes to Avoid in Herb Gardening

5 Common Mistakes to Avoid in Herb Gardening

Not Choosing the Right Spot for Your Herb Garden

One of the 5 common mistakes to avoid in herb gardening is not choosing the right spot to plant your herb garden. Selecting an appropriate location is crucial for your herbs to thrive. Situating your herb garden in the wrong place can lead to poor growth and lower yields of basil, thyme, rosemary and other herbs.

When deciding where to put your herb garden, you need to consider factors like sunlight, drainage and convenience. Herbs require at least 6 hours of direct sunlight daily, so be sure to choose a sunny spot, not shaded by trees or buildings. Proper drainage is also key – herbs can’t tolerate wet, soggy soil. Pick a spot that drains well after watering or rains. And for convenience, plant your herbs close to your kitchen, so they’re handy when cooking.

Here are some tips on choosing the optimal spot for your herb garden and avoiding the common mistake of picking the wrong location:

Sunny Spot

One of the most important considerations is sunlight when siting your herb garden. Herbs need a minimum of 6 hours a day of direct sun exposure to thrive. Less light will result in reduced growth and lower yields. Picking a spot that receives sunlight for the majority of the day is ideal. South-facing locations are great herb garden sites.

5 Common Mistakes to Avoid in Herb Gardening

If you don’t have a sunny yard, look for the sunniest spot available. Just be sure to observe the light conditions throughout the day and over the seasons to ensure adequate sunlight before planting. A bit of afternoon shade is fine, but avoid spots shaded for large portions of the day.

Well-Drained Soil

Proper drainage is another key factor when choosing where to locate your herb garden. Herbs can’t tolerate soggy, waterlogged soil. Excess moisture causes root rot and other problems. Ideally, select a garden spot with sandy loam soil that drains well after watering and heavy rains.

If your yard doesn’t have a well-draining area, build a raised garden bed and fill it with a soil mix formulated for drainage. Adding sand, gravel or perlite to native soil can also improve drainage before planting an in-ground herb garden. Installing drainage pipes under a sunken garden can divert excess moisture.

Close to the Kitchen

For convenience, situate your herb garden close to your kitchen and main living areas. This allows you to easily harvest fresh herbs to use in cooking. Having your herbs just steps from the kitchen door makes it more likely you’ll utilize them. It also minimizes bruising of delicate leafy herbs during transport from the garden.

When choosing the perfect spot, be sure it’s convenient, including easy access to water for irrigation. Consider creating a dedicated herb garden right outside the kitchen door or incorporating herbs into existing beds and containers nearby. Just avoid planting them too close to walls or foundations, where drainage could be problematic.

By properly siting your herb garden in a location with abundant sun, good drainage and convenience, you’ll avoid the common mistake of choosing the wrong spot. Taking these key factors into account will help ensure your herbs thrive and provide maximum yields over time.

Remember, one of the 5 common mistakes to avoid in herb gardening is not picking the right place to plant your herb garden. Be sure to select a spot that gives herbs the growing conditions they require – at least 6 hours of direct sunlight daily, well-drained soil and close proximity to your kitchen. With the proper location, your herb garden is sure to flourish.

Failing to Use the Right Soil for Herb Gardening

One of the 5 common mistakes to avoid in herb gardening is failing to use the right type of soil. Having soil with the proper structure and nutrients is crucial for growing healthy, productive herb plants. When setting up an herb garden, be sure not to make the mistake of using poor quality soil, as this can seriously impact how well your herbs grow.

The ideal soil for herb gardening is loose, fertile, and fast-draining. Heavy clay soils or very sandy soils often will not provide the aeration and drainage that most culinary herb plants prefer. Before planting, test your existing soil to determine if any amendments need to be added to achieve better texture and nutrition. You can have your soil analyzed by your local agricultural extension office for a full report.

Here are some key things to look for when evaluating soil for an herb garden:

Drainage – Herbs need soil that drains readily after watering and rainfalls. Stagnant moisture can cause root rot and other problems. Mixing in materials like compost, peat moss, or perlite can help improve drainage in dense soils.

pH Level – Most culinary herbs grow best in slightly acidic to neutral soil, with a pH of 6.0-7.0. Extremely acidic or alkaline conditions can make some nutrients unavailable to plants. Test kits can determine if the pH needs adjusting with lime or sulfur.

Nutrients – Herbs thrive when the soil contains adequate nitrogen, phosphorus, and potassium. Organic matter offers nutrients and also improves moisture retention and drainage. Mixing compost, manure, or high-quality potting soil into garden beds provides nutrition.

When preparing a new herb garden, thoroughly mix amendments like compost and peat moss into the existing soil to improve its structure and nutrient content before planting. For potted herbs, use a commercial potting mix formulated for containers rather than garden soil, which can become too compacted.

By taking the time to cultivate and enrich your soil at the start, your herbs will establish better roots, grow faster, and have more robust flavor. This gives them the strong foundation needed to withstand common herb gardening mistakes and still produce an abundant harvest. Don’t skip this vital first step for a successful, productive herb garden.

Failing to amend problem soil is one of the top 5 common mistakes to avoid in herb gardening. Ensure your herbs get off on the right foot by preparing soil with ideal drainage, pH, and nutrients needed for lush, flavorful growth before you plant. Culinary herbs are not very forgiving if their soil conditions are poor from the start, so don’t make the mistake of failing to use the right soil. With a well-prepared growing medium, you’ll be harvesting delicious herbs all season long.

Not Watering Herbs Properly

One of the most common mistakes in herb gardening is not watering herbs properly. Getting the watering schedule right for your herbs can seem tricky, but it’s important for helping them thrive. Here’s what you need to know about properly caring for herbs when it comes to their water needs.

How Much Water Do Herbs Need?

5 Common Mistakes to Avoid in Herb Gardening

When it comes to watering any plants, herbs included, it’s essential to pay attention to some key factors. These include the specific needs of the herb variety you’re growing, the soil type, weather and climate conditions, the stage of growth your plants are at, and even the type of container you might be using.

Some general guidelines can help guide your watering practices, but getting to know your individual herbs will ensure you’re giving them just what they require. Herbs native to hot, dry regions like rosemary, thyme, sage, and oregano require less frequent watering. Leafy herbs like mint, basil, and parsley enjoy consistently moist (but not soggy) soil.

Getting the balance right is essential to avoid common herb gardening mistakes when watering. Too much water can cause root rot and other problems. Too little can lead to stunted growth or even completely dried out and dead plants.

Signs You’re Underwatering Your Herb Garden

It’s easy to underwater herb plants without realizing it. Check for these signs that your herbs need more frequent or thorough watering:

5 Common Mistakes to Avoid in Herb Gardening

– Wilting or drooping leaves that don’t bounce back after watering

– Brown or yellowed leaf edges

– Lack of new growth

5 Common Mistakes to Avoid in Herb Gardening

– Stunted plants

– Soil is bone dry just an inch below the surface

Tips for Watering Herbs Properly

Now that you know what to look out for, let’s go over some tips to help you get your herb watering schedule right. Here are some best practices for avoiding the common herb gardening mistake of improperly caring for water needs:

– Water first thing in the morning so leaves can dry out in the sun. This prevents fungus or mildew growth.

– Check soil moisture before watering. Stick your finger in about an inch. Only water if soil is partly or completely dry.

– Group herbs by water needs. This makes it easier to manage different watering schedules.

– Use drip irrigation or soaker hoses to slowly deliver water to soil. This is more efficient than sprinklers.

– Add mulch around plants to retain moisture and reduce water needs. Organic mulches like bark chips work great.

– Consider using self-watering containers or reservoirs under pots to ensure a consistent moisture supply.

– Adjust watering frequency and volume based on weather, plant size, and growth stage. Less when cool, more when hot. Less when young, more when mature.

By being attentive to all the variables that affect herb water needs, you can avoid going wrong with improper watering. Pay attention to signs of under or overwatering and adjust as needed. Grouping plants and using efficient irrigation can make your herb garden watering routine much simpler.

Remember, herbal plants are very forgiving, so don’t stress too much about getting it 100% right 100% of the time. Just check soil frequently, learn your plants’ signs of thirst, and provide water as needed. You’ll have a thriving herb garden in no time!

Avoiding the common herb gardening mistake of improperly watering herbs takes some attentiveness and getting to know your plants. But it’s worth the effort for bountiful basil, parsley, rosemary and more to flavor your cooking all season long. For more tips on caring for herbs, be sure to check out our other articles on fertilization, proper sunlight, and more aspects that lead to success.

And if you’ve struggled with properly watering herbs in the past, don’t be too hard on yourself! It’s one of the most common herb gardening mistakes out there. Just follow these useful tips to get your watering routine right. Your herbs will be happy, healthy, and ready to spice up your meals in no time.

Not Giving Herbs Enough Sunlight

One of the most common mistakes in herb gardening is not giving your herbs enough sunlight. Herbs love light, and not getting enough of it can result in weak, leggy growth and reduced flavor in the leaves. When it comes to herb gardening mistakes regarding sunlight, it’s important to understand each herb’s unique light needs. With a little planning and care, you can ensure your herb garden thrives in the sunshine.

Most culinary herbs grow best in full sun, which means at least 6 hours of direct sunlight per day. Some varieties, like thyme, oregano, lavender, and rosemary really thrive when given even more light. Without adequate sunlight, these Mediterranean herbs will become stunted and woody in texture. Leafy herbs like basil, parsley, cilantro, and dill also need a good dose of sun to bring out their signature flavors and yield abundantly.

When choosing a site for your herb garden, make sure to pick a sunny spot that gets sunlight for most of the day. A south-facing location is ideal, as it receives the most direct light. Morning sun is better than afternoon sun, as it helps dry dew from the leaves, reducing the chance of fungus and mildew. If you don’t have an optimal sunny spot, consider amending the site with reflective materials like light-colored gravel or walls to maximize sunlight exposure.

While most culinary herbs need full sun, there are some that actually prefer partial shade. Mint, lemon balm, and chervil grow best with about 4 hours of sunlight and afternoon shade. Too much hot sun can cause these herbs to wilt. If you only have a very intensely sunny spot, adding a shade structure, tree canopy, or planting taller herbs as buffers can help create the right environment.

Pay attention to how your herb plants respond to sunlight over time. Signs of insufficient light include plants that are growing tall and leggy with few leaves, pale colored foliage, and reduced flavor. These issues can often be corrected by transplanting herbs to a sunnier location. It’s one of the most common herb gardening mistakes, but thankfully, it can be easily fixed!

In addition to location, you can also manipulate sunlight exposure by timing. Starting herbs from seed indoors or in a greenhouse allows tender new plants to grow with protection. This prevents issues like bolting that can happen if immature seedlings are put straight into intense outdoor sunlight. When transplanting outdoors, it’s important to gradually acclimate seedlings over 7-10 days to prevent sun damage.

Here are some key tips to ensure your herbs get all the sunlight they need:

– Choose a site with at least 6 hours of direct sun daily for most culinary herbs. South facing is best.

– Space plants properly so each has adequate air circulation and sun exposure as they grow.

– Amend shady areas with gravel, walls, or reflective materials to increase sunlight.

– Provide shade structures for herbs like mint that need protection from intense midday sun.

– Gradually acclimate transplants over 7-10 days to prevent sun damage.

– Observe plants and watch for leggy growth or pale leaves, moving to sunnier spots as needed.

With attention to light needs and a little trial and error, you’ll discover the perfect sun-drenched spots for your herbs to thrive. Avoid the common mistake of insufficient sunlight, and your herb garden will reward you with vigorous, flavorful plants. For more tips on preventing mistakes with watering, fertilizing, and more, check out our full article on the 5 most common herb gardening mistakes to avoid for success growing herbs.

Forgetting to Fertilize and Prune Herb Plants

One of the most common mistakes in herb gardening is forgetting to fertilize and prune herb plants. Proper fertilization and pruning are essential for keeping herbs healthy and productive. Avoid this common herb gardening mistake with some simple practices.

Why Fertilizing Herbs is Important

Herbs need nutrients from fertilizers to thrive. Feeding herbs encourages vigorous growth and abundant harvests. Without fertilizer, herb plants can become stunted and produce smaller yields. Herb plants deficient in nutrients also become more susceptible to pests and diseases.

Fertilizing herbs regularly prevents nutrient deficiencies. Most herbs grow best with a balanced fertilizer applied according to label instructions. Organic fertilizers like compost, fish emulsion, worm castings, or manure also nourish herbs effectively.

Aim to fertilize herb plants at least once early in the growing season. Additional light feedings every 3-4 weeks will sustain healthy growth. Pay close attention to signs of nutrient deficiencies like yellowing leaves or poor flowering and fruiting. Targeted applications of fertilizer quickly correct these issues.

Why Pruning is Crucial for Herbs

Pruning is another often overlooked herb care task. Trimming herbs promotes bushy, compact growth instead of leggy, floppy plants. Pruning also maximizes air circulation and light exposure. With improved growing conditions, herbs stay vigorous and productive for harvests.

Pruning herb plants involves:

– Pinching off spent flower heads to prolong leaf production. Removing faded blooms signals the plant to keep generating foliage.

– Snipping off damaged leaves and stems which can harbor pests and diseases. Clean cuts help herbs heal rapidly.

– Cutting back leggy growth and older stems to encourage new, healthy shoots.

– Shaping herbs to preserve a compact habit, especially useful for decorative specimens.

Most culinary and medicinal herbs respond well to pruning. Woody herbs like rosemary may need rejuvenation pruning every 2-3 years. Trim mature rosemary stems to 6 inches above soil level to renew growth.

When to Fertilize and Prune Herb Plants

Timing matters for proper feeding and pruning. Focus fertilizing efforts in early spring as growth resumes. Prune herbs during active growth periods, mostly spring through mid-summer. Remove no more than one-third of the plant during pruning sessions to avoid stress.

5 Common Mistakes to Avoid in Herb Gardening

Here is a general calendar for fertilizing and pruning common culinary herbs:

Basil – Fertilize monthly from transplanting until first flower. Pinch back flower heads and prune for shape through summer.

Chives – Scratch in balanced organic fertilizer in early spring. Remove faded blooms through season to prolong leaf production.

Cilantro/Coriander – Fertilize every 2-3 weeks while actively growing. Prune often as it tends to bolt and go to seed rapidly.

Dill – Fertilize when transplanting seedlings. Prune early in season to delay flowering and extend harvests.

Mint – Top dress with compost or organic fertilizer each spring. Prune leggy stems any time to contain spread.

Oregano/Marjoram – Feed once in early spring, prune tips early to mid-summer if plants become leggy.

Parsley – Fertilize monthly during first year. Prune often by harvesting outer stems.

Rosemary – Apply slow release fertilizer in early spring every 2-3 years. Prune annually to shape.

Sage – Scratch fertilizer into soil in early spring. Prune late spring to mid-summer to remove woody stems and shape plants.

Thyme – Top dress with compost or organic fertilizer early in season. Prune lightly to tidy appearance.

5 Common Mistakes to Avoid in Herb Gardening5 Common Mistakes to Avoid in Herb Gardening

Avoid the Common Herb Gardening Mistake of Forgetting Fertilizer and Pruning

Keep your herb garden healthy and bountiful by regularly feeding and pruning plants. Herbs thrive with a little attentive care through the seasons. Avoid forgetting these key maintenance tasks! Proper fertilization gives herb plants the nutrients they need for vigorous growth and plentiful harvests. Strategic pruning contains herbs within their space while removing damaged growth. Well-nourished and neatly pruned herbs will be poised to grace your kitchen all season long.