Cooking with Sweet Basil

Cooking with Sweet Basil

Cooking with Sweet Basil: A Flavorful Journey Through Culinary Delights

Hey there, fellow food enthusiasts! Today, we’re diving into the aromatic world of sweet basil, exploring its culinary uses, gardening tips, and cultural significance. Whether you’re a seasoned chef or a kitchen newbie, this guide will help you make the most of this versatile herb. So, let’s get started on our journey of cooking with sweet basil!

What’s the Big Deal About Sweet Basil?

Sweet basil, or Ocimum basilicum if you want to get fancy, is a fragrant herb that’s been jazzing up dishes for centuries. It’s got a slightly sweet, peppery flavor with a hint of mint, making it a go-to herb for many cuisines around the world. From Italian pesto to Thai curries, sweet basil adds a punch of flavor that can take your cooking to the next level.

Growing Your Own Sweet Basil

Before we jump into cooking with sweet basil, let’s talk about growing it. Trust me, there’s nothing quite like the satisfaction of using fresh basil you’ve grown yourself. Here are some tips to get you started:

1. Sunlight is key: Basil loves the sun, so pick a spot that gets at least 6 hours of direct sunlight daily.
2. Well-draining soil: Use a potting mix that drains well to keep your basil happy.
3. Water regularly: Keep the soil moist but not waterlogged.
4. Pinch those tips: Regularly pinch off the top sets of leaves to encourage bushier growth.
5. Harvest often: The more you harvest, the more your plant will produce!

Classic Recipes Featuring Sweet Basil

Now that we’ve covered the basics of growing basil, let’s dive into some classic recipes that showcase this herb’s versatility. These dishes are perfect for those looking to start cooking with sweet basil:

1. Caprese Salad: A simple yet elegant Italian dish featuring fresh mozzarella, tomatoes, and basil leaves drizzled with olive oil and balsamic vinegar.

2. Pesto Pasta: Blend basil, pine nuts, garlic, Parmesan cheese, and olive oil for a classic pesto sauce that’s perfect over pasta or as a spread.

3. Margherita Pizza: Top a pizza crust with tomato sauce, fresh mozzarella, and basil leaves for a taste of Naples at home.

4. Thai Basil Chicken: Stir-fry chicken with garlic, chili, and plenty of basil for a quick and flavorful meal.

Unexpected Ways to Use Sweet Basil in Cooking

Cooking with Sweet Basil
AI Generated

Ready to get a bit more adventurous with your basil? Here are some unexpected ways to incorporate this herb into your cooking:

1. Basil Ice Cream: Yes, you read that right! The sweet, herbaceous flavor of basil pairs surprisingly well with creamy desserts.

Cooking with Sweet Basil
AI Generated

2. Basil Lemonade: Add a handful of basil leaves to your homemade lemonade for a refreshing twist.

3. Basil Butter: Mix chopped basil into softened butter for a flavorful spread that’s great on bread or melted over grilled meats.

4. Basil Cocktails: Muddle basil leaves in your favorite cocktails for an herbal kick. It works especially well in gin-based drinks!

Cooking with Sweet Basil
AI Generated

The Cultural Significance of Sweet Basil

Cooking with sweet basil isn’t just about flavor – this herb has deep cultural roots too. In many parts of the world, basil is more than just a culinary ingredient:

– In India, holy basil (a close relative of sweet basil) is considered sacred and is often used in religious ceremonies.
– In Italy, basil is seen as a symbol of love. Some even believe that if a woman places a pot of basil on her balcony, it means she’s ready for her suitor to arrive.
– In some African countries, basil is believed to protect against scorpions and other dangerous creatures.

Tips for Preserving Your Basil Harvest

If you find yourself with more basil than you can use fresh, don’t worry! Here are some ways to preserve your basil for future use:

1. Freezing: Blend basil leaves with a bit of olive oil and freeze in ice cube trays for easy-to-use portions.
2. Drying: Hang bunches of basil upside down in a dry, well-ventilated area until crisp.
3. Infused Oil: Steep basil leaves in olive oil for a flavorful cooking oil.

Wrapping Up Our Sweet Basil Adventure

From growing your own plants to whipping up delicious dishes, cooking with sweet basil opens up a world of culinary possibilities. Whether you’re tossing it in a salad, blending it into a pesto, or experimenting with basil-infused desserts, this versatile herb is sure to elevate your cooking game.

So, what are you waiting for? Grab some sweet basil and start experimenting in the kitchen. Who knows? You might just discover your new favorite recipe. Happy cooking, and may your dishes always be filled with the sweet aroma of basil!

Creamy pesto vegan

Creamy pesto vegan

Creamy Pesto Vegan: A Delicious Plant-Based Twist on a Classic Sauce

Pesto is a beloved Italian sauce known for its vibrant flavors and versatility. Traditionally made with basil, pine nuts, garlic, olive oil, and Parmesan cheese, pesto has long been a favorite among pasta lovers and culinary enthusiasts. However, with the rise of plant-based diets, many are seeking vegan alternatives that capture the essence of this iconic sauce. Enter creamy pesto vegan – a delightful and dairy-free version that’s just as rich and satisfying as its traditional counterpart.

In this article, we’ll explore the world of creamy vegan pesto, from its ingredients and preparation to creative ways to use it in your cooking. Whether you’re a committed vegan or simply looking to incorporate more plant-based meals into your diet, this creamy pesto vegan recipe is sure to become a staple in your kitchen.

The Magic of Vegan Pesto

Vegan pesto maintains the core flavors of traditional pesto while eliminating animal products. The key to creating a creamy vegan pesto lies in finding the right plant-based ingredients to replicate the richness and texture of cheese. With a few clever substitutions, you can achieve a creamy pesto that’s entirely vegan and bursting with flavor.

Ingredients for Creamy Pesto Vegan

To make a delicious creamy pesto vegan sauce, you’ll need:

Creamy pesto vegan

1. Fresh basil leaves
2. Pine nuts or cashews
3. Nutritional yeast (for a cheesy flavor)
4. Garlic cloves
5. Lemon juice
6. Extra virgin olive oil
7. Salt and pepper
8. Vegan cream alternative (such as cashew cream or coconut cream)

The addition of a vegan cream alternative is what sets this recipe apart, giving it that luxurious, creamy texture that makes it so irresistible.

How to Make Creamy Vegan Pesto

Creating your own creamy pesto vegan at home is surprisingly simple. Here’s a step-by-step guide:

1. Toast the nuts lightly to enhance their flavor
2. Combine basil, nuts, nutritional yeast, garlic, and lemon juice in a food processor
3. Pulse while slowly drizzling in olive oil until well combined
4. Add your chosen vegan cream alternative and blend until smooth
5. Season with salt and pepper to taste

The result is a luscious, creamy vegan pesto that’s perfect for a variety of dishes.

Nutritional Benefits of Creamy Pesto Vegan

One of the great advantages of creamy pesto vegan is its nutritional profile. This plant-based version is typically:

– Lower in saturated fat than traditional pesto
– Rich in heart-healthy monounsaturated fats from olive oil and nuts
– High in antioxidants from fresh basil
– A good source of B-vitamins from nutritional yeast
– Dairy-free and suitable for those with lactose intolerance or milk allergies

By choosing a creamy pesto vegan option, you’re not only enjoying a delicious sauce but also reaping numerous health benefits.

Creamy pesto vegan

Creative Ways to Use Creamy Pesto Vegan

While pasta is the classic pairing for pesto, there are countless other ways to incorporate this creamy vegan pesto into your meals. Here are some inspiring ideas:

1. Spread it on sandwiches or wraps
2. Use as a dip for raw vegetables or pita chips
3. Drizzle over roasted vegetables
4. Mix into potato salad for a flavorful twist
5. Use as a base for vegan pizza
6. Stir into soups for added depth of flavor
7. Toss with grilled vegetables for a delicious side dish

The versatility of creamy pesto vegan makes it a valuable addition to any plant-based kitchen.

Tips for Perfect Creamy Pesto Vegan

To ensure your creamy pesto vegan turns out perfectly every time, keep these tips in mind:

– Use the freshest basil possible for the best flavor
– Experiment with different nuts to find your favorite combination
– Adjust the consistency by adding more or less vegan cream
– Make a large batch and freeze portions for future use
– Don’t be afraid to customize with additional herbs or spices

With these tips, you’ll be well on your way to mastering the art of creamy vegan pesto.

Storing and Preserving Your Creamy Pesto Vegan

Proper storage is key to maintaining the quality of your creamy pesto vegan. Here’s how to keep it fresh:

– Store in an airtight container in the refrigerator for up to 5 days
– To prevent browning, drizzle a thin layer of olive oil on top before sealing
– For longer storage, freeze in ice cube trays for easy portioning
– Thaw frozen pesto in the refrigerator overnight before use

By following these storage guidelines, you can enjoy your homemade creamy pesto vegan for weeks to come.

Conclusion: Embracing the Creamy Pesto Vegan Revolution

As more people adopt plant-based diets or simply look to reduce their consumption of animal products, recipes like creamy pesto vegan are becoming increasingly popular. This delicious and versatile sauce proves that you don’t need dairy to create a rich, flavorful pesto that can elevate any dish.

Whether you’re a longtime vegan or just curious about plant-based alternatives, trying your hand at creamy pesto vegan is a great way to expand your culinary horizons. With its creamy texture, vibrant flavor, and numerous health benefits, this vegan twist on a classic sauce is sure to become a favorite in your recipe repertoire.

So why not give creamy pesto vegan a try? Your taste buds – and perhaps even your health – will thank you for it!

Creamy pesto vegan

Vegan basil pasta

Vegan basil pasta

Vegan Basil Pasta: A Delicious Plant-Based Italian Classic

Are you craving a comforting bowl of pasta but want to keep things plant-based? Look no further than vegan basil pasta. This delightful dish combines the aromatic flavors of fresh basil with the satisfying texture of pasta, all while remaining completely free of animal products. In this article, we’ll explore the world of vegan basil pasta, from its origins to recipe ideas and nutritional benefits.

The Rise of Vegan Italian Cuisine

Italian cuisine has long been associated with cheese, meat, and eggs. However, the growing popularity of plant-based diets has led to a surge in vegan Italian recipes. Vegan basil pasta is at the forefront of this culinary revolution, offering a cruelty-free alternative that doesn’t compromise on taste or texture.

As more people embrace veganism for ethical, environmental, or health reasons, restaurants and home cooks alike are finding innovative ways to recreate classic Italian flavors using only plant-based ingredients. Vegan basil pasta is a prime example of how traditional dishes can be reimagined to suit modern dietary preferences.

The Magic of Basil in Vegan Pasta Dishes

Basil is a key ingredient in many Italian recipes, and it plays a starring role in vegan basil pasta. This aromatic herb adds a fresh, slightly sweet flavor that complements the neutral taste of pasta perfectly. Whether used in a pesto sauce or simply torn and sprinkled over the dish, basil elevates vegan pasta to new heights.

For those looking to explore the versatility of basil in vegan cooking, MoonBasil offers a variety of basil-inspired vegan recipes that can inspire your next culinary creation.

Nutritional Benefits of Vegan Basil Pasta

One of the advantages of vegan basil pasta is its nutritional profile. By omitting dairy and meat, this dish can be lower in saturated fat and cholesterol compared to traditional pasta dishes. Here are some key nutritional benefits:

1. Plant-based protein: Many vegan pasta recipes incorporate protein-rich ingredients like nuts, legumes, or plant-based meat alternatives.
2. Fiber: Whole grain pasta and added vegetables increase the fiber content, promoting digestive health.
3. Vitamins and minerals: Basil is rich in vitamin K, vitamin A, and antioxidants.
4. Heart-healthy fats: When made with olive oil or nuts, vegan basil pasta can provide beneficial monounsaturated fats.

By choosing vegan basil pasta, you’re not only enjoying a delicious meal but also nourishing your body with plant-based goodness.

Vegan basil pasta

How to Make Vegan Basil Pasta at Home

Creating your own vegan basil pasta is easier than you might think. Here’s a simple recipe to get you started:

Vegan basil pasta

Ingredients:
– 12 oz pasta of your choice (ensure it’s egg-free)
– 2 cups fresh basil leaves
– 1/2 cup pine nuts or walnuts
– 2 cloves garlic
– 1/4 cup nutritional yeast
– 1/2 cup olive oil
– Salt and pepper to taste
– Optional: cherry tomatoes, vegan parmesan

Instructions:
1. Cook the pasta according to package instructions.
2. While the pasta cooks, blend basil, nuts, garlic, nutritional yeast, and olive oil in a food processor to make the pesto.
3. Drain the pasta, reserving some cooking water.
4. Toss the pasta with the pesto, adding cooking water as needed to reach desired consistency.
5. Season with salt and pepper, and add optional toppings if desired.

This simple recipe can be customized to your liking, adding vegetables or plant-based protein sources to create a more substantial meal.

Variations on Vegan Basil Pasta

The beauty of vegan basil pasta lies in its versatility. Here are some exciting variations to try:

1. Creamy Vegan Basil Alfredo: Use cashew cream as a base for a rich, indulgent sauce.
2. Vegan Basil Pasta Primavera: Load up on colorful vegetables for a nutrient-packed meal.
3. Spicy Vegan Basil Pasta: Add red pepper flakes or fresh chili for a kick of heat.
4. Vegan Basil Pasta Salad: Serve chilled with a vinaigrette for a refreshing summer dish.

Experimenting with different ingredients and techniques can help you discover your favorite way to enjoy vegan basil pasta.

Pairing Vegan Basil Pasta with Drinks

To complete your vegan Italian dining experience, consider pairing your basil pasta with a suitable beverage. Here are some suggestions:

1. Vegan white wine: Look for varieties like Pinot Grigio or Sauvignon Blanc.
2. Herbal iced tea: The refreshing flavors complement the basil nicely.
3. Sparkling water with lemon: A light, effervescent option that won’t overpower the dish.

For more ideas on pairing drinks with vegan Italian cuisine, check out MoonBasil’s guide to vegan wine and food pairings.

Vegan Basil Pasta in Restaurants

Vegan basil pasta

As the demand for plant-based options grows, many restaurants are adding vegan basil pasta to their menus. When dining out, look for dishes like:

– Vegan Basil Pesto Linguine
– Plant-Based Basil Cream Pasta
– Dairy-Free Basil and Tomato Spaghetti

Don’t be afraid to ask your server about vegan options or modifications to existing menu items.

Conclusion: Embracing the Delights of Vegan Basil Pasta

Vegan basil pasta is more than just a trend – it’s a delicious, nutritious, and ethical choice that’s here to stay. Whether you’re a long-time vegan or simply looking to incorporate more plant-based meals into your diet, this versatile dish offers something for everyone. From simple homemade recipes to gourmet restaurant creations, vegan basil pasta proves that you don’t need animal products to enjoy the comforting flavors of Italian cuisine.

So next time you’re craving pasta, why not give vegan basil pasta a try? Your taste buds – and the planet – will thank you.

Vegan pesto pasta sauce

Vegan pesto pasta sauce

Vegan Pesto Pasta Sauce: A Delicious Plant-Based Twist on a Classic

Pesto sauce is a beloved Italian condiment known for its vibrant flavor and versatility. Traditionally made with basil, pine nuts, garlic, olive oil, and Parmesan cheese, pesto has long been a favorite pasta topping. But what about those following a vegan lifestyle? Enter vegan pesto pasta sauce – a delightful plant-based alternative that sacrifices none of the taste while accommodating dietary preferences. In this article, we’ll explore the world of vegan pesto, its benefits, ingredients, and how to make and use this delectable sauce.

The Rise of Vegan Pesto

Vegan pesto pasta sauce

As more people embrace plant-based diets, the demand for vegan alternatives to classic recipes has surged. Vegan pesto pasta sauce has emerged as a popular option, offering a dairy-free version of the iconic green sauce. This plant-based pesto retains the essence of traditional pesto while catering to those avoiding animal products.

Vegan pesto pasta sauce

Benefits of Vegan Pesto Pasta Sauce

Choosing a vegan pesto for your pasta dishes comes with several advantages:

1. Healthier option: Vegan pesto often contains less saturated fat than traditional versions.
2. Allergy-friendly: It’s suitable for those with dairy allergies or lactose intolerance.
3. Environmentally conscious: Plant-based ingredients generally have a lower carbon footprint.
4. Versatile: Vegan pesto can be used in various dishes beyond pasta.

Key Ingredients in Vegan Pesto Pasta Sauce

To create a delicious vegan pesto that rivals its traditional counterpart, you’ll need the following core ingredients:

1. Fresh basil leaves
2. Pine nuts or alternative nuts (e.g., walnuts, cashews)
3. Garlic cloves
4. Extra virgin olive oil
5. Nutritional yeast (as a Parmesan cheese substitute)
6. Lemon juice
7. Salt and pepper to taste

How to Make Vegan Pesto Pasta Sauce

Creating your own vegan pesto at home is surprisingly simple. Follow these steps for a tasty homemade sauce:

1. Wash and dry the basil leaves thoroughly.
2. Toast the nuts lightly to enhance their flavor.
3. In a food processor, combine basil, nuts, garlic, nutritional yeast, and lemon juice.
4. Pulse the mixture while slowly drizzling in olive oil until you achieve a smooth consistency.
5. Season with salt and pepper to taste.

For a detailed recipe and expert tips on crafting the perfect vegan pesto, check out this comprehensive guide to making vegan pesto pasta sauce.

Creative Uses for Vegan Pesto Beyond Pasta

While vegan pesto pasta sauce is undoubtedly delicious on noodles, its uses extend far beyond traditional pasta dishes. Here are some innovative ways to incorporate this versatile sauce into your meals:

1. Spread on sandwiches or wraps
2. Use as a pizza sauce
3. Mix into salad dressings
4. Drizzle over roasted vegetables
5. Use as a dip for raw veggies or crackers
6. Stir into soups for added flavor

Storing and Preserving Vegan Pesto Pasta Sauce

To make the most of your homemade vegan pesto, proper storage is key. Here are some tips:

Vegan pesto pasta sauce

1. Refrigerate in an airtight container for up to a week.
2. Freeze in ice cube trays for easy portioning and longer storage.
3. Add a thin layer of olive oil on top to prevent oxidation.

Nutritional Benefits of Vegan Pesto Ingredients

The ingredients in vegan pesto pasta sauce offer various health benefits:

1. Basil: Rich in antioxidants and anti-inflammatory compounds
2. Nuts: Provide healthy fats, protein, and fiber
3. Olive oil: Contains heart-healthy monounsaturated fats
4. Nutritional yeast: Offers B-vitamins and protein
5. Garlic: Known for its immune-boosting properties

Experimenting with Vegan Pesto Variations

While traditional basil pesto is delicious, don’t be afraid to experiment with different ingredients to create unique vegan pesto pasta sauces:

1. Sun-dried tomato pesto
2. Kale or spinach pesto
3. Roasted red pepper pesto
4. Cilantro pesto
5. Arugula pesto

Each variation offers a distinct flavor profile, allowing you to tailor your vegan pesto to complement different dishes and cuisines.

Pairing Vegan Pesto Pasta Sauce with the Right Noodles

The type of pasta you choose can greatly impact your vegan pesto experience. Consider these pairings:

1. Fusilli or rotini: The spirals trap the sauce effectively
2. Penne: Allows the pesto to coat both the inside and outside
3. Orecchiette: The small “ear” shape cups the sauce perfectly
4. Farfalle: Bow-tie pasta offers visual appeal and good sauce adherence

For more inspiration on pairing vegan pesto with various pasta shapes, visit this guide to vegan pesto pasta combinations.

Conclusion: Embracing the Versatility of Vegan Pesto Pasta Sauce

Vegan pesto pasta sauce is more than just a plant-based alternative to a classic condiment. It’s a flavorful, versatile, and nutritious option that can elevate a wide range of dishes. Whether you’re vegan, looking to reduce your dairy intake, or simply curious about plant-based cooking, vegan pesto offers a delicious way to explore new culinary horizons. By mastering the basics and experimenting with variations, you can create a vegan pesto pasta sauce that suits your taste preferences and dietary needs. So why not give it a try? Your taste buds – and perhaps even the planet – will thank you.

Herb and Spice Pairings: A Chef’s Guide to Enhancing Flavor

Herb and Spice Pairings: A Chef’s Guide to Enhancing Flavor

Complementary Flavors: Understanding How Herbs and Spices Interact

When crafting a dish, chefs carefully select herbs and spices that will enhance and complement each other. Understanding which flavors interact well is key to creating balanced and delicious cuisine. This article on “Herb and Spice Pairings: A Chef’s Guide to Enhancing Flavor” will explore how to combine herbs and spices for maximum flavor impact.

The concept of flavor pairing relies on knowing which tastes and aromas highlight one another. For example, the brightness of lemon can offset the richness of butter, while the earthiness of cumin accentuates the sweetness of carrots. When herbs and spices are thoughtfully paired, they form a greater whole where their qualities are synergistically interwoven.

On a chemical level, the diverse compounds in different herbs and spices interact to produce new flavors. The sharp, grassy qualities of parsley likely led cooks to pair it with the pungency of garlic, which mellows in the presence of parsley’s herbaceous notes. This demonstrates how herbs and spices can balance and stabilize one another. The resulting flavor combination is more complex and dynamic than either ingredient on its own.

Herb and Spice Pairings: A Chef’s Guide to Enhancing Flavor

Regional Cuisines Showcase Complementary Flavor Pairings

Across cuisines worldwide, time-honored pairings reflect how herbs and spices can accentuate one another’s characteristics. The traditions of these global spice palettes demonstrate principles chefs can apply when enhancing flavors. For example, the warming spices used in Indian curries, like cumin, cinnamon, and cardamom, build on one another to create a layered, aromatic flavor profile. And Italian cooks know that basil, oregano, and thyme combine to give depth and nuance to tomato-based dishes. By understanding how cooking cultures skillfully blend herbs and spices, chefs can recreate balanced flavor synergies.

Thinking Beyond Single Ingredients

Rather than considering herbs and spices as isolated ingredients, chefs can conceptualize how they interact within the framework of a dish. The other components of a meal can determine which herb and spice pairings have the biggest impact. For example, the citrusy flavor of cilantro brightens hearty black bean dishes, while the more delicate notes of tarragon suit lighter vegetables like asparagus. This article on “Herb and Spice Pairings: A Chef’s Guide to Enhancing Flavor” examines how to create holistic pairings that consider the entire culinary context.

Playing with Contrasts and Complimentary Notes

Skillful chefs understand how to artfully blend contrasting and complementary flavors. Pairing the heat of spicy chilies with cooling cilantro allows both to be appreciated. And combining the sweetness of cinnamon with cloves’ astringency creates more perceptual depth. Thoughtful herb and spice pairings should aim for balance, with neither overpowering the other. As this article explores, blending contrasting qualities while also emphasizing shared aromas results in optimal flavor chemistry.

Testing New Herb and Spice Combinations

While traditional pairings serve as helpful guidelines, chefs can also pioneer their own signature blends. Start by tasting herbs and spices individually to understand their flavors in isolation before combining them. Notice if any similarities arise; for example, rosemary and thyme share woodsy hints. Then smell and taste prospective pairings, making adjustments to achieve harmony. Keeping detailed notes about what works well together will help replicate successful combinations in future dishes. Over time, chefs can develop an intuitive sense for how herbs and spices interact and complement one another.

By thoughtfully combining herbs and spices, chefs can craft dishes with layered, balanced flavors. This article on “Herb and Spice Pairings: A Chef’s Guide to Enhancing Flavor” offers principles for understanding flavor synergies and pioneering original pairings. With practice, cooks can develop an innate sense for blending herbs and spices that optimally enhance any dish.

Spice It Up: Pairing Herbs and Spices with Different Food Groups

When it comes to enhancing flavor in cooking, herbs and spices are a chef’s best friend. Knowing which herbs and spices pair well with different food groups is key to bringing out the best flavors. This guide to herb and spice pairings will help you spice up everything from vegetables to meat dishes.

Pairing Herbs and Spices with Vegetables

Fresh vegetables already have vibrant flavors on their own. Using herbs and spices with vegetables should enhance and complement the existing flavors. Some classic herb and vegetable pairings include:

– Basil – Tomato, zucchini, eggplant

– Oregano – Tomato, spinach, beans

– Rosemary – Potato, carrots, squash

– Thyme – Green beans, broccoli, asparagus

– Cumin – Beets, onions, cabbage

– Curry powder – Cauliflower, sweet potato

Spicing up vegetables works best when you use fresh herbs. Start with small amounts and adjust to taste. Roasting or grilling vegetables brings out their natural sweetness, which pairs nicely with bolder spices like cumin, paprika or curry.

Herb and Spice Pairings for Meat

The hearty flavors of beef, pork, lamb and chicken stand up well to strong, aromatic herbs and spices. Some mouthwatering combinations include:

– Rosemary, garlic, thyme – Beef, lamb, chicken

– Cumin, chili powder, cayenne – Beef, pork

– Mustard, sage, parsley – Pork, chicken

– Curry blends – Chicken, lamb

– Cilantro, lime – Chicken

Marinating meats before cooking allows them to fully absorb the flavors of the herbs and spices. Braising meat dishes with wine or broth mellows gamey flavors while integrating the spices. Grilling and broiling also impart a delicious charred flavor that pairs perfectly with rosemary, garlic and other robust herbs.

Herb and Spice Pairings for Seafood

The light flavors of fish and shellfish call for herbs and spices that won’t overpower the delicate seafood taste. Try these subtle herb and spice combinations:

– Dill – Salmon, tuna

– Basil – Shrimp, scallops

– Thyme – Halibut, cod

– Tarragon – Sole, trout

– Old Bay – Crab, lobster

– Saffron – Clams, mussels

Let the fresh taste of the seafood shine through by using herbs and spices sparingly. Lemon and parsley also make great flavor enhancers for delicate fish. Avoid strong spices like cayenne or curry blends with mild seafood.

Herb and Spice Pairings for Grains and Legumes

Hearty grains like rice, quinoa and bulgur provide the perfect canvas for herbs and spices to add pops of flavor. Beans and lentils also soak up the flavors of aromatic spices. Try these combinations:

– Cumin, coriander – Rice, chickpeas, lentils

– Thyme, oregano – Barley, farro, beans

– Curry blends – Basmati rice, red lentils

– Chili powder, cayenne – Brown rice, black beans

– Cilantro, lime – Quinoa, pinto beans

Build depth of flavor in grains and legumes by simmering them in broths infused with your favorite herbs and spices. Toasting cumin or curry powder before adding it to lentils also intensifies the flavors. Finish off grain or bean dishes with a sprinkle of fresh herbs right before serving.

Endless Herb and Spice Pairing Possibilities

These suggestions just scratch the surface of possible herb and spice combinations. Part of the creativity and art in cooking lies in experimenting with different flavor pairings. Taste as you go to find out what works with your palate. Refer back to “Herb and Spice Pairings: A Chef’s Guide to Enhancing Flavor” for insight on complementary flavors.

The key is to choose herbs and spices that enhance rather than overwhelm the core ingredients. With practice, you’ll develop an intuition for which herbs and spices will meld together in perfect harmony. So grab your apron and spice rack and get ready to put new herb and spice wisdom into delicious practice!

East Meets West: Fusing Global Spice Traditions

As the world becomes increasingly interconnected through globalization, exciting opportunities arise for chefs and home cooks to fuse international herb and spice traditions. Blending the complex spice blends of Asia with the herbs and aromatics used in European cuisines can lead to innovative flavor combinations. With an understanding of the underlying principles that unite these culinary traditions, creative cooks can craft herb and spice pairings that harmoniously bridge continents.

Herb and Spice Pairings: A Chef’s Guide to Enhancing Flavor

At first glance, the intricate spice mixes used in Indian curries seem vastly different from the relatively simple herbs and aromatics favored in Italian pasta sauces. However, both traditions rely on layering flavors to create depth and complexity. Indian curries blend warming spices like cumin, coriander, and turmeric with pungent elements like garlic, ginger, and chiles. Likewise, an Italian tomato sauce often contains herbs like basil, oregano, and parsley along with aromatics such as onion and garlic. Though the specific seasonings differ, the foundational concept of combining multiple herbs and spices to develop layered, nuanced flavor is fundamentally the same.

This shared philosophical underpinning opens up intriguing possibilities for fusing these culinary styles by substituting signature herbs and spices across traditions. Replacing some of the traditional Italian herbs in a pasta sauce with Indian spices like garam masala, cumin, and mustard seeds adds exotic complexity while still harmonizing with the tomato and garlic base. Conversely, adding Italian herbs and aromatics like basil, red pepper flakes, and onions to Indian-style lentil dal creates new dimensions of flavor for this humble dish. With an spirit of experimentation and an understanding of fundamental flavor chemistry principles, creative herb and spice pairings can fuse global traditions in delicious new ways.

Beyond substituting herbs and spices directly across cuisines, cooks can also identify complementary flavors that bridge food cultures. The anise-adjacent flavors of Mediterranean herbs like basil, oregano, and marjoram pair beautifully with signature Asian spices that offer licorice notes, like star anise and fennel. Blending these herbs and spices together, whether in a stir fry or a tomato sauce, creates harmonious fusion flavors. Garlic and ginger also unite multiple global traditions, adding a pungent punch of flavor that broadly enhances dishes from pasta to curries. Creative cooks can analyze the flavor compounds that define signature herbs and spices of a cuisine to identify opportunities for fusing traditions through complementary pairings.

While blending cuisines through creative herb and spice pairings offers exciting possibilities, achieving harmonious fusion flavors requires thoughtfulness and restraint. When fusing global traditions in the kitchen, start with dishes that align in their core ingredients and cooking techniques. For example, both Indian and Thai cuisines often use coconut milk as an ingredient base for curries and stews. This natural alignment means that adding Thai herbs like lemongrass, galangal, and kaffir lime leaves will likely fuse seamlessly with an Indian curry. On the other hand, dramatically breaking conventions by adding Indian garam masala to a delicate French quiche will probably not achieve harmonious results. By fusing global spice traditions in dishes with aligned foundations, creative herb and spice pairings can form bridges across continents.

The Classics: Time-Tested Herb and Spice Combinations

When it comes to herb and spice pairings, there are certain combinations that have stood the test of time. These classic pairings complement each other beautifully and bring out the best in many dishes. Understanding and utilizing these time-tested combinations is key for any chef looking to enhance flavor.

One of the most ubiquitous classic pairings is basil and tomato. The sweet yet slightly peppery flavor of basil perfectly balances the bright acidity of fresh tomatoes. This herb and spice pairing is the foundation of many Italian pasta sauces, Caprese salads, bruschetta toppings, and more. Whether slow-simmered into a rich Bolognese or lightly sprinkled over pizza Margherita, the marriage of basil and tomato never fails to satisfy.

Another beloved pairing is parsley and garlic. Often used as a flavor base for sauces, soups, roasted vegetables, and meat dishes, parsley and garlic complement each other with a vibrant herbal quality. Mincing the two together, such as when making chimichurri sauce, allows their essences to mingle. The grassy freshness of parsley tames garlic’s pungency. An excellent way to let this classic herb and spice pairing shine is to whip up a batch of parsley garlic butter to top bread, seafood, and more.

No discussion of classic spice pairings would be complete without mentioning cinnamon and vanilla. Their affinity for each other makes them a staple in countless dessert recipes, from cookies to cakes and custards. Cinnamon’s warmth and subtle spiciness plays beautifully against vanilla’s floral sweetness. Bake up a batch of snickerdoodle cookies or cinnamon sugar cupcakes, and you’ll smell and taste why this pairing has remained popular for centuries.

Of course, we would be remiss not to mention the most ubiquitous herb and spice pairing: salt and pepper. No other seasonings are used more universally to enhance flavor. Salt enhances existing flavors in food, while pepper provides a subtle heat and bite. That’s why they sit side-by-side on dining room tables worldwide. Salt and pepper lend a welcome brightness and depth of flavor to nearly any savory dish.

These pairings have remained go-to combinations over time because of how seamlessly their flavors complement each other. Whether used in an Italian marinara, bakery treat, or simple home-cooked meal, they never overpower and instead allow both seasonings’ qualities to shine. For chefs wishing to enhance food’s flavor in a crowd-pleasing way, utilizing these classic herb and spice pairings is always a safe bet. Their balance and synergy have been finetuned through decades or even centuries of cooking.

Herb and Spice Pairings: A Chef’s Guide to Enhancing Flavor

Of course, just because salt and pepper or basil and tomato are tried-and-true combinations does not mean creativity has no place when using herbs and spices. We’ll explore unexpected yet delightful pairings later on. However, it’s important for chefs to recognize which herb and spice partnerships have stood the test of time. Understanding why these combinations work so magically well together will help inform experimentation with new pairings. With the wisdom of these classics under your belt, you can riff on tradition and open new flavor possibilities.

Unexpected Allies: Creative Pairings That Work Surprisingly Well

When it comes to herbs and spices, some combinations seem like natural partners while others may raise eyebrows. However, an adventuresome chef knows that sometimes unexpected duos can create surprisingly harmonious flavors. This section explores unorthodox herb and spice pairings that unexpectedly enhance each other.

Sweet and Heat: Fruit and Chiles

Fresh chiles may seem like an odd match for sweet fruits, but the interplay of spicy heat and fruity sweetness can be delightful. For example, serrano or habanero chiles complement tropical fruits like mango, pineapple, and papaya by adding a fiery kick to the luscious sweetness. The contrast makes both the fruit and chile flavors pop. Chiles also pair well with cooked fruits like apples or pears, which soften the chile’s punch. Intrepid cooks can experiment with fruit salsas by combining diced fruit with a minced fresh hot pepper. The sweet and spicy blend makes a exciting topping for fish or chicken.

Cool and Pungent: Mint and Garlic

Garlic and mint may not seem like compatible flavors, but they can strikingly enhance each other. The key is balancing their strength so neither overpowers. Lightly crushed mint leaves stirred into a garlicky vegetable sautee toward the end of cooking adds a refreshing counterpoint to the garlic’s punch. A touch of minced garlic or garlic-infused oil also complements the cool brightness of mint in chimichurri sauce, tabbouleh, fruit salads, and more. This unexpected pairing opens up many possibilities for herbal, savory dishes.

Herb and Spice Pairings: A Chef’s Guide to Enhancing Flavor

Earthy and Floral: Mushrooms and Rosemary

Mushrooms and rosemary both have robust, earthy flavors and aromas. But instead of competing, they complement each other beautifully. Rosemary’s piney notes enhance the natural umami savoriness of mushrooms without overwhelming their subtle flavors. Sauteed mushrooms gain depth from a sprinkle of minced rosemary, while rosemary skewers or roast potatoes pair well with creamy mushroom gravy. An unexpected mushroom and rosemary risotto or soup is deeply satisfying. The herb’s floral aroma also balances the mushroom’s earthiness.

Spiced and Nutty: Curry Powder and Coconut

Coconut milk is a staple of Southeast Asian and Indian curries, but coconut also complements global spice blends. Its subtle sweetness and richness tames spices like cumin, coriander, turmeric, and chiles while allowing their flavors to shine. Coconut milk adds body to curried stews and vegetable dishes while coconut meat or flakes provide toasty contrast to spice blends in cookies, granola, and cereals. Meanwhile, massaman and panang curries use spices to add warmth to coconut-based sauces. Blending nutty coconut with spices yields globally inspired fusions.

As this section demonstrates, creative chefs know that experimenting with unexpected herb and spice pairings can lead to new taste discoveries. The key is balancing flavors so that neither overpowers while finding combinations that intrigue. By fusing unorthodox ingredients like fruit and chiles or mushrooms and rosemary, chefs can create surprisingly harmonious and exciting dishes. The possibilities for unexpected allies are limited only by the imagination.

Season to Taste: Tailoring Herb and Spice Blends to Individual Tastes

When it comes to herb and spice pairings, there is no one-size-fits-all approach. The key is customizing blends to suit individual tastes. An essential aspect of enhancing flavor is understanding how to season to each person’s preferences.

Assessing Taste Preferences

The first step in tailoring herb and spice blends is evaluating personal taste inclinations. Consider factors like affinity for heat, tolerance for bitterness, enjoyment of aromatics, and fondness for specific global cuisines. Observe how often salt, acid, sweetness, or richness is added to balance dishes. All these preferences indicate which directions to take herb and spice combinations.

For those who enjoy bold flavors and spices, blends with warmth and punchy highlights like chili, cayenne, curry powders, or peppercorns pair well. For milder palates, gentler herbs like parsley, basil, dill complement without overpowering. Sweet profiles find balance with cinnamon, nutmeg, ginger, and maple. Salty cravings harmonize with garlic, onion, dill. Customizing for personal taste makes food more satisfying.

Adapting Regional Blends

In addition to individual tastes, regional cuisine influences how herbs and spices can be blended. Mediterranean flavors like oregano, rosemary, and marjoram mix well. Indian profiles combine turmeric, cumin, coriander, and cardamom. Asian traditions utilize garlic, ginger, sesame, soy sauce, rice vinegar. Middle Eastern staples include za’atar, sumac, lemon, parsley, mint. Adjusting blends to draw from cultural spice legacies that one enjoys is an easy way to season to personal heritage or adventurousness.

Considering Ingredients & Preparation

The ingredients and preparation methods also impact how to balance herbs and spices. Heartier foods like red meat, game, or oil-based dishes can handle bolder seasonings. More delicate ingredients like fish, vegetables, and dairy often call for restraint, complementing their subtler nature. Grilled, roasted, or fried foods develop layers that work with complex blends, while steamed, poached, or raw preparations allow fresh herb accents to shine.

Seasoning Through Various Phases

Layering seasoning during preparation, cooking, and finishing ensures flavors develop fully. Sauteeing aromatics as a base, adding spices mid-cooking, and sprinkling fresh herbs before serving builds depth. This phased approach provides a scaffolding of flavor.

Adjusting Proportions

Getting proportions right when blending herbs and spices enables balancing to individual tastes. Start with smaller amounts and increase gradually, tasting throughout cooking. Consider which flavors play the lead role, which support, and which garnish. This helps prevent any one herb or spice from overpowering. Tailoring ratios to preferred intensity levels refines an integrative balance.

Experimenting Purposefully

Customizing herb and spice combinations is an iterative, creative endeavor. Experiment judiciously by changing one element at a time. Keep most of a recipe or blend consistent, only modifying a single ingredient per trial. Additionally, keep detailed notes on modifications and reactions to flavors. Over time, this focused approach reveals ideal personalized balances.

Trying Established Blends

While experimentation can lead to new seasoned discoveries, it’s often helpful to rely on established herb and spice pairings. Classical blends like herbes de Provence, quatre épices, garam masala, five spice, and soul seasoning serve as perfect seasoning starting points. Their formulas are grounded in cultural wisdom, developed over time. Adapt them gradually to emphasize flavors most enjoyable.

Evaluating After Tasting

The final vital step in seasoning to taste is evaluating after tasting. Be honest about reactions to flavors and textures. Diagnose if certain herbs or spices feel too pronounced or muted. Decide which directions to adjust — increase savoriness? Brighten with acid and herbs? Determine if the dish seems balanced and craveable. Refining seasoning is an ever-evolving process of assessment and adjustment.

A Chef’s Flavor Intuition

Ultimately, tailoring herb and spice combinations stems from intuition that develops over time. Beginning with recipes then branching into own creations, a chef hones an implicit sense for balancing seasons. Embrace experimenting, take cues from regional cuisines, and focus on your flavor preferences. With these insights and some trial and error, you’ll be able to “season to taste” like an expert.

Grow Your Own: Tips for Cultivating Herbs and Spices at Home

For chefs and home cooks alike, having access to fresh herbs and spices can make all the difference in producing flavorful dishes. While dried herbs and spices certainly have their place in the pantry, nothing quite compares to the vibrant aroma and taste of just-picked basil, oregano, rosemary or other herbs. Fortunately, with a little effort, it’s possible to grow many culinary herbs and even some spices right at home.

When embarking on cultivating your own herbs and spices, it’s important to understand each plant’s ideal growing conditions. Most culinary herbs thrive in a sunny spot with well-drained soil. However, some varieties like shade while others require consistent moisture. Do your research to determine sunlight, water and soil needs before planting. This will set your “Herb and Spice Pairings: A Chef’s Guide to Enhancing Flavor” garden up for success.

Companion Planting

Strategic companion planting allows herbs and spices to help each other grow. For example, pairing chives and carrots together will deter carrot flies and other pests. And planting basil alongside tomatoes can boost flavor and growth for both plants. Consider companion planting to maximize the output of your herb and spice garden.

Container Gardening

Lack outdoor space? No problem! Many culinary herbs grow beautifully in containers, making it possible to cultivate a flourishing “Herb and Spice Pairings: A Chef’s Guide to Enhancing Flavor” garden on a patio, balcony or windowsill. Opt for at least 12-inch diameter containers with drainage holes at the bottom. This will provide ample room for root development. Container gardening also allows you to move plants as needed to capture sunlight or protect from frost.

Soil Quality Matters

The foundation of any successful garden starts with high-quality soil. When growing herbs and spices, well-drained, nutrient-rich soil is essential. Amend garden beds yearly with aged compost or manure to nourish plants. For container gardens, use a quality potting mix, refreshed with new mix every one to two years. Healthy, living soil equals healthy, abundant herbs and spices!

Start Plants from Seed

Starting herbs and spices from seed allows you to curate a customized collection of plants suited exactly to your space, climate and taste preferences. Though it requires more effort upfront versus buying starter plants, the reward of nurturing seeds into mature, productive plants is gratifying. Follow seed packet instructions for depth, spacing, sunlight and days to germination. A seed starting heating mat can be useful for encouraging even germination.

Take Cuttings from Established Plants

Growing herbs and spices from cuttings is an easy propagation method that maintains desired varietal characteristics. Take 3-6 inch cuttings from the tips of healthy, established plants in early summer. Strip lower leaves, dip the cut end in rooting hormone and plant in potting mix. Keep evenly moist until new growth emerges. Basil, oregano, thyme, rosemary and sage all root readily from cuttings.

Water and Feed Wisely

Providing consistent moisture and nutrition without overdoing it takes some finesse. Employ drip irrigation on a timer to efficiently deliver water right to the roots. Most herbs thrive with about an inch of water per week. For nutrients, use a balanced organic vegetable fertilizer once every 2-4 weeks during the active growing season. Go lightly on fertilizer to prevent excessive leafy growth at the expense of flavor.

Harvest Often

Frequent harvesting encourages steady regrowth and better flavor development for leafy herbs like basil, mint, cilantro and parsley. Use scissors for clean cuts. For woody herbs, prune back older growth to stimulate new shoots. Allow seed-producing plants like dill and cumin to fully mature and dry on stems before collecting seeds. Timely harvesting keeps “Herb and Spice Pairings: A Chef’s Guide to Enhancing Flavor” plants vigorous and productive.

Preserve that Fresh Flavor

Enjoy herbs and spices at peak flavor all year by preserving summer’s bountiful harvest. Air-drying works beautifully for many varieties. Simply tie cut stems in small bundles and hang to dry in a warm, dark place until brittle. For basil and other delicate herbs, freeze chopped leaves with a bit of water or oil in ice cube trays. Frozen herbs retain excellent flavor for months. With a little planning, you can savor garden-fresh “Herb and Spice Pairings: A Chef’s Guide to Enhancing Flavor” all winter long.

When grown with care and attention, a home herb and spice garden becomes a treasured source of unique, vibrantly flavored ingredients. Get to know your plants, tend them consistently, and experiment with new varieties. Soon you’ll have customized blends and pairings that reflect your unique culinary vision. The “Herb and Spice Pairings: A Chef’s Guide to Enhancing Flavor” possibilities from your backyard or windowsill are endless.

Storing and Preparing: Maintaining Freshness and Maximizing Flavor

Proper storage and preparation of herbs and spices is key to bringing out their maximum flavor potential in cooking. In this section of our herb and spice pairings guide, we provide tips from top chefs on best practices for keeping your herbs and spices fresh, as well as advice on preparation methods to truly allow their flavors to shine.

As any chef knows, the foundation of cooking with herbs and spices is working with ingredients at the peak of freshness. The volatile aromatic compounds that give many herbs and spices their concentrated flavors and aromas can quickly dissipate if not stored properly after purchase.

“One of the most common mistakes I see home cooks make is buying spices in bulk then letting them languish in the pantry for months or even years,” says Chef Marie Smith. “The result is extremely lackluster flavor and a waste of money.” She recommends purchasing herbs and spices in smaller quantities that you know you will use within a few months.

Cool, dark places like cupboards are ideal for storage to preserve freshness. Make sure herbs and spices are stored in airtight containers, whether the original packaging or jars, to lock in aromatics. Glass jars are optimal as they block light exposure. Chef Michael Chen advises, “I like to portion out the amounts of dried herbs and spices I will realistically use within a month or two and keep those small jars easily accessible, refilling as needed from a main supply kept in the freezer for maximum retention of flavor oils.”

With fresh herbs like basil, parsley, cilantro, and mint, proper storage is also key after purchase. “I find herbs lose flavor and wilt very quickly when bundled in plastic clamshell packaging from the grocery store,” says Chef Alicia Lopez. She recommends gently rinsing fresh herb bunches, lightly shaking off excess moisture, then wrapping loosely in paper towels or clean dish towels before placing in resealable plastic bags in the refrigerator crisper drawer. This helps regulate condensation while still allowing airflow. The paper towel or cloth will also absorb excess moisture.

Prepping dried herbs and spices correctly maximizes their flavor impact in your herb and spice pairings. Whole dried spices like cumin seeds, black peppercorns, cloves and cinnamon sticks should be freshly ground right before incorporating into a dish or rub. The intense aromatics get locked into the whole form, only being released when crushed or grated. Investing in a dedicated electric spice grinder can make this easy.

For recipes requiring dried leafy herbs like oregano, rosemary, thyme and basil, take a tip from Chef Chris Hill: “I never just shake dried herbs right from the jar into a dish. Take a moment to gently rub them between your fingers first to release the aromatic oils before adding them.” This simple technique boosts herbal flavor considerably.

When using fresh herbs in cooking, proper chopping technique is also vital. “Imagine you are trying to delicately coax out every nuance of flavor trapped in those leaves,” instructs Chef Natalia Cruz when demonstrating her specialized herb chopping method. She stacks clean, dry herb leaves, then rolls them into a tight cigar shape. With a very sharp knife, she makes thin, diagonal slices across the roll, turning the knife as she chops to mince the herbs finely without bruising. Bruising damages plant cells, causing herbs to oxidize and lose flavor faster. A uniform, almost paste-like texture releases maximum herbal oils into your dishes.

Proper storage and prep truly enhances your ability to craft outstanding herb and spice pairings. Follow these pro tips from the experts to become a master of maximizing flavors. From drying and freezing abundance from your garden to always keeping often-used dried spices freshly ground, implementing these best practices will bring your dishes to life with vibrant, aromatic spice and herbal notes.

Recipes and Replications: Putting Herb and Spice Wisdom Into Practice

Now that we’ve covered the fundamentals of herb and spice pairings and enhancing flavors, it’s time to put that knowledge into practice with some delicious recipes. Carefully combining herbs and spices can transform an ordinary dish into an extraordinary culinary experience.

Lemon Chicken with Rosemary

This simple baked lemon chicken dish is taken to new heights with the addition of fragrant rosemary. The pairing of lemon and rosemary is a classic one, as the bright citrus notes of lemon complement the woodsy pine flavors of rosemary. The acidity of the lemon also helps soften the potent rosemary, allowing its essence to infuse the chicken as it bakes.

Ingredients:

– 4 bone-in, skin-on chicken thighs

Herb and Spice Pairings: A Chef’s Guide to Enhancing Flavor

– 2 lemons, thinly sliced

– 2 sprigs fresh rosemary, minced

– 2 tbsp olive oil

– Salt and pepper to taste

Instructions:

1. Preheat oven to 400°F.

2. Rinse chicken thighs and pat dry with paper towels. Place chicken in a baking dish in a single layer.

3. Arrange lemon slices over the top and around chicken. Sprinkle with minced rosemary.

4. Drizzle chicken with olive oil and season generously with salt and pepper.

5. Bake for 35-40 minutes until chicken is fully cooked.

6. Serve chicken topped with pan juices from baking. Garnish with additional fresh rosemary.

The tart lemons contrast beautifully with the woodsy rosemary in this dish. Baking concentrates the flavors, while the chicken fat and pan juices bring it all together into a bright, aromatic meal. This herb and spice pairing adds intrigue to a weekday dinner while keeping it easy and approachable.

Moroccan Spiced Carrot Salad

For this salad, we utilize the popular Moroccan spice blend called ras el hanout. With a complex mix of up to 12 spices including cumin, coriander, cardamom, cinnamon, paprika and more, ras el hanout lends an exotic flair to roasted carrots. The spices pair flawlessly with the natural sweetness of carrots to create a salad brimming with warmth and flavor.

Ingredients:

– 1 lb carrots, peeled and cut into 1/2 inch slices

– 1 1/2 tbsp olive oil

– 2 tsp ras el hanout spice blend

– 1/3 cup pistachios, chopped

– 1 tbsp lemon juice

– 1 tbsp honey

Herb and Spice Pairings: A Chef’s Guide to Enhancing Flavor

– 1/4 cup fresh cilantro, chopped

– Salt to taste

Instructions:

1. Preheat oven to 400°F.

2. On a baking sheet, toss carrots with olive oil and ras el hanout.

3. Roast for 20-25 minutes, stirring halfway, until carrots are tender.

4. In a serving bowl, combine roasted carrots, pistachios, lemon juice, honey and cilantro. Toss to coat.

5. Season with salt to taste. Serve at room temperature.

The carrots caramelize beautifully in the oven, developing a sweet, earthy flavor that harmonizes flawlessly with exotic ras el hanout spices. Crunchy pistachios, bright lemon and fresh cilantro balance out the warmth. This unique salad celebrates the joys of Moroccan and Middle Eastern spice traditions.

As these recipes demonstrate, mindfully combining herbs and spices can greatly enhance the flavor of your cooking. A Chef’s Guide to Enhancing Flavor with Herb and Spice Pairings explores how to effectively utilize nature’s flavor boosters in your own kitchen. With some guidance on complementary and creative combinations, anyone can elevate everyday fare into extraordinary cuisine.

Herb and Spice Pairings: A Chef’s Guide to Enhancing Flavor

The Art and Science of Layering Flavors: An Expert Analysis

When it comes to cooking with herbs and spices, layering flavors is both an art and a science. The key is understanding how different seasonings interact and complement each other to create complex and mouthwatering combinations. As experts in herb and spice pairings, chefs must balance knowledge of flavor chemistry with intuition and creativity.

At its foundation, pairing herbs and spices relies on identifying common chemical compounds. For example, herbs like rosemary, sage, and thyme contain pinene, a compound with a pine-like aroma. This makes them natural partners for resinous spices like juniper berries. When ingredients share key flavor molecules, they seamlessly blend together.

However, complementary flavors also play an important role. Sweet cinnamon has an affinity for tart fruits and spices like cardamom. The sweet-sour interplay adds intrigue. Even when herbs and spices don’t share chemical structures, their contrasting tastes can heighten and balance each other beautifully. Skillful chefs understand how to match or oppose flavors to create interest.

The sequence in which ingredients are added also matters. Building depth of flavor is like constructing a layered cake where herbs and spices make up tiers of tasting notes. Base seasonings should meld with core ingredients to create a backdrop. The middle layers of flavor should peak through prominently. Top notes like herbs and citrus zests add bright, finishing touches.

Finally, chefs must factor in aroma, mouthfeel, and even the emotions certain flavor combinations evoke. Peppery spices like cayenne can make dishes taste literally hotter through the trigeminal nerve. Creamy dairy helps temper the heat. Herb and spice pairings also connect us to memories, places, and cultures. The total sensory experience goes beyond biochemical reactions.

Mastering the art and science of flavor pairing allows chefs to conduct an orchestra of herbs and spices. But intuition and creativity are still key. As famous chef Paul Bocuse put it, “the most creative chef is the one who is the best organized.” With an expert command of ingredients, techniques, and combinations, chefs can focus their imagination on crafting signature recipes and multi-dimensional blends.

So approach herbs and spices with curiosity, knowledge, and an experimental spirit. Taste as you season, allowing your palate to guide you. Keep tasting notes organized by flavor profiles. Study world cuisines to expand the roster of herbs and spices you regularly cook with. Above all, follow your instincts – with passion and practice, you will develop an artful knack for layering flavors.

The Ultimate Guide to Making Infused Oils at Home

The Ultimate Guide to Making Infused Oils at Home

Why Make Your Own Infused Oils?

Homemade infused oils offer numerous advantages over store-bought versions. Crafting your own unique oil blends gives you full control over the ingredients and flavors, allows for creativity and experimentation, and results in fresher, higher quality oils. Understanding the basics of infusing and learning some simple techniques can open up an exciting new culinary dimension.

As we’ll explore throughout this ultimate guide to making infused oils at home, creating your own oils enables you to:

– Carefully select premium ingredients – the exact herbs, spices, garlic, chiles, etc. that appeal to your personal tastes and cooking needs. You can play with different herb and spice combinations, varieties, and ratios to customize the flavor profile.

– Know exactly what’s going into your oil. No mystery ingredients, preservatives, or old, flavorless spices of questionable freshness like you find in some store-bought versions.

– Highlight and accentuate the natural flavors of your ingredients. Proper infusion techniques draw out and concentrate the aromatic essences.

– Produce fresher-tasting oils bursting with flavor nuances. The quicker you use homemade infused oils after crafting them, the better they’ll taste.

– Avoid rancidity or “off” flavors that develop over time with poor storage. You can make smaller batches and use them up more quickly.

– Give personalized homemade gifts for family and friends. Infused oils presented in attractive bottles make wonderful presents for any occasion.

– Potentially save money compared to specialty oils sold in gourmet shops. Once you acquire any necessary equipment, homemade oils only require ingredients.

– Discover a fun, rewarding hobby that sparks your creativity. Experiment with different herb/spice and oil combinations to find your signature flavors.

– Control exactly how strong or mild you want the flavor infusion to be. Customize to your personal tastes.

As you’ll see throughout the rest of this guide to making infused oils at home, the basic process involves steeping herbs, spices, garlic, citrus zest, chiles, and other flavoring agents in a carrier oil like olive, avocado, coconut, or nut oils. Over time, the oils absorb and concentrate the essences and aromatics. The result: oils infused with incredible flavors perfect for drizzling, sautéing, dipping bread, dressing salads and pastas, marinating proteins, etc. You’re limited only by your imagination and palate.

While you can certainly purchase pre-made infused oils from the grocery store or specialty shops, they often lack flavor dimension, use lower quality base oils, or contain mystery ingredients you can’t pronounce. Other times they break the bank despite unremarkable taste.

Making your own lets you control the entire process from start to finish. As you’ll discover, infusing oils at home doesn’t require advanced skills or expensive equipment. With a few key tips on selecting quality ingredients, using proper techniques, and storing oils correctly, anyone can craft amazing infusions. We’ll cover all the key information you need throughout this ultimate guide.

The benefits of infusing your own oils rather than buying premade versions include full control over the flavor profile, the ability to incorporate the freshest ingredients, the pride of creating personalized homemade gifts, potential cost savings, and the fun creative outlet. Infusing unique oil blends opens up an exciting culinary dimension where you’re limited only by your imagination. The rest of this guide will equip you with everything you need to know. So read on to begin your infused oil journey!

Choosing Your Oils and Herbs/Spices

When creating your own infused oils at home as part of the ultimate guide to making infused oils at home, one of the most important steps is choosing high-quality ingredients – specifically the base oils and herbs/spices you will use. The ingredients you select will directly impact the flavor and overall quality of your homemade infused oil.

Base Oils

The base oil acts as the lipid solvent for the flavors and nutrients from the herbs and spices. Choosing an oil with stability and a neutral flavor allows the herbal flavors to shine. The most common oils used for infusions are:

Olive Oil – Extra virgin and pure olive oil are both good quality choices. The bold flavor stands up well to pungent herbs like rosemary, oregano, and thyme.

Grapeseed Oil – This affordable, neutral-flavored oil has a high smoke point. It works well for lighter herbs like lavender and lemon verbena. Grapeseed oil is also often used for chili and garlic infusions.

The Ultimate Guide to Making Infused Oils at Home

Sunflower Oil – Another neutral-tasting oil that infuses easily. Sunflower oil is commonly used for making truffle, mushroom, and citrus-flavored oils.

Coconut Oil – Imparts a subtle tropical essence. Use refined coconut oil for cooking at higher temperatures. Pair with lemongrass, lime, ginger, or curry.

Avocado Oil – With its buttery flavor, avocado oil makes an excellent base for ancho chile, cilantro, cumin, and smoked paprika infused oils.

Almond Oil – This mildly nutty oil allows the true flavors of basil, sage, and lavender to develop fully during infusion.

Herbs and Spices

Herbs and spices contain essential oils and compounds that infuse into the base oil to create flavor. Dried herbs and spices work best as they are more concentrated and stable than fresh ingredients. Some top options include:

Basil – The sweet flavor of basil shines when infused into olive or almond oil. Use for finishing drizzles, marinades, and pesto.

Oregano – A pungent, zesty herb that infuses beautifully into olive oil along with red pepper flakes for a spicy Greek oil.

Rosemary – An extremely versatile herb for infusions including garlic-rosemary and lemon-rosemary oils. Pairs well with olive, grapeseed or coconut oil.

The Ultimate Guide to Making Infused Oils at Home

Thyme – Use dried thyme leaves or stems to make a robust, woodsy infused oil for sautéing mushrooms, chicken, and fall vegetables.

Lavender – For sweet floral flavor, pair dried lavender buds with almond or grapeseed oil. Use the oil for cakes, cookies, and salad dressings.

Citrus Peels – Use the peels from lemons, limes, oranges or grapefruit to make a bright, citrusy infused oil. Grapeseed or olive oil work best as bases.

Chilies – Dried chilies, flakes, or powders can be used to make spicy infused oils. Pair ancho or chipotle with avocado oil and red pepper flakes with olive oil.

Garlic – For bold garlic flavor, infuse peeled cloves into olive or grapeseed oil. Use for aioli, pasta sauce, marinades and bread dipping.

Peppercorns – Whole black peppercorns infuse beautifully into grapeseed or coconut oil for a versatile all-purpose cooking oil with a kick of heat.

Cumin Seeds – Dry roast the seeds first to intensify the earthy flavor before infusing into olive oil. The oil can be used for tacos, chili, roasted vegetables and more.

Experiment with different herb and spice combinations to create your own unique infused oil blends as part of the ultimate guide to making infused oils at home. Keep in mind that the strength of the herb or spice flavor will concentrate over the infusion time so start with less and add more as desired.

Infusion Methods – Stovetop, Oven, Sun

When making your own infused oils at home, you have a few different methods to choose from. The infusion method you select will depend on factors like your available time, patience level, and what equipment you have on hand. The three main techniques for infusing oils are stovetop, oven, and sun infusions.

Stovetop Infusion

A stovetop infusion is the quickest way to make infused oil, usually taking only 5-10 minutes of active cooking time. To infuse oil on the stovetop, start by finely chopping or bruising your herbs, spices, garlic, citrus zest, chili peppers, or other flavoring agents. The more surface area exposed, the better the flavors will infuse. Place the chopped ingredients into a small saucepan and cover completely with oil. Olive, coconut, avocado, grapeseed, and nut oils all work well.

Heat the oil over medium-low heat until bubbles start to form around the edges. Reduce the heat to low and gently simmer for 5-10 minutes, stirring frequently. Monitor the pan closely to prevent burning. You’ll know the infusion is complete when the oil is very fragrant and has taken on the color of the ingredient. Strain out the solids through a fine mesh sieve lined with cheesecloth. Allow the infused oil to fully cool before bottling. Store in an airtight container in the fridge for up to a month.

The stovetop method works well for making quick infused oils using fresh herbs, garlic, citrus, and some spices. Just be careful not to burn the delicate flavors. This also isn’t suitable for harder spices and ingredients like vanilla bean that need longer infusion.

Oven Infusion

The oven method for infusing oils takes a bit more patience but requires very little hands-on effort. It’s perfect for harder spices like cinnamon sticks, vanilla bean, peppercorns, and star anise that need more prolonged heating to fully release their flavors.

Preheat your oven to its lowest possible temperature setting, ideally between 170-200°F. While the oven heats up, combine your chopped or crushed spices, herbs, or other aromatics with oil in an oven-safe dish. Glass baking dishes, mason jars, or ramekins all work well. Make sure your container is big enough to allow the oil to expand as it heats up.

Once the oven reaches temperature, place your uncovered infusion vessel in the oven for 1-4 hours. The longer the infusion time, the more intense the flavor will become. Check it periodically and give it a gentle stir. When the oil is quite fragrant and has taken on the color of your infusion ingredients, remove it from the oven. Allow to fully cool, then strain out the solids. Bottle and store the infused oil in the fridge for up to a month.

An oven infusion is ideal for making deeply flavored oils with spices, citrus peels, dried herbs and chilies, vanilla, and other ingredients that need prolonged heating. Just be sure not to burn the oil with overly high oven temperatures.

Sun Infusion

Harnessing the gentle, consistent heat of the sun is an easy way to make infused oils without turning on your stove or oven. Sun infusions do take quite a bit of patience though, as the oils need 2-6 weeks in a sunny spot to fully extract the flavors. If you have a windowsill that gets lots of direct sunlight, this is your perfect infusion spot!

Making a solar infused oil starts the same way as the other methods – chop or crush your herbs, spices, garlic, citrus zest, or other aromatics to expose more surface area. Place in a clean glass jar and cover completely with oil. Make sure to leave at least 1 inch of headspace to allow for expansion as the oil heats up during the day.

Seal the jar tightly and place it in your sunniest window. Give the jar a gentle shake once a day to distribute the flavors. In about 2 weeks you’ll start to notice the color changing. After 4-6 weeks your solar infused oil will be intensely flavored and ready to strain and bottle. Store in the fridge for up to 6 months.

A long sun infusion works very well for delicate herbs like basil, tarragon, dill, and cilantro which can lose some of their brighter notes from heat infusion. Citrus zest and garlic also shine with a nice slow solar infusion. Just be patient and make sure your jar gets plenty of direct sunlight every day.

Mastering the infusion process is crucial for crafting your own signature infused oils. Once you understand the fundamentals, you can start experimenting with different oils, herbs, spices, lengths of infusion and more. Refer back to this definitive guide on stovetop, oven and solar infusions whenever you need a refresher. Soon you’ll have endless combinations of incredible infused oils to use in all your favorite recipes. For even more tips on infusing oils at home, check out the rest of this ultimate guide series on “The Ultimate Guide to Making Infused Oils at Home”.

Storage Tips for Maximum Freshness

Once you have put in the time and effort to make your own infused oils at home, you will want to store them properly so they stay fresh as long as possible. Proper storage is key for maximizing the shelf life of infused oils and preventing problems like rancidity or mold growth. This section of the Ultimate Guide to Making Infused Oils at Home will provide tips for getting the most out of your homemade infused oil creations.

Start With Quality Ingredients

High quality oils and fresh, dry herbs are essential starting points for homemade infused oils that will store well. Choosing the freshest extra virgin olive oil or avocado oil and vibrant, recently dried herbs free of moisture or debris will set you up for success. Building an infused oil on poor quality or old oil and herbs risks shorter shelf life down the road.

Store in Clean, Dry Containers

The containers you select for storing infused oils should be thoroughly clean and bone dry before filling. Any debris, dust, droplets of water or herb bits lingering in containers can encourage mold growth during storage. Opt for glass containers with tight sealing lids over plastic. Dark bottles help protect oils from light exposure. Make sure containers are large enough to leave ample headspace above the oil, as oxygen can accelerate spoilage.

Refrigerate When Possible

Temperature control is your friend when it comes to maximizing how long your homemade infused oils will stay fresh and flavorful. The fridge preserves infused oils best, slowing oxidation and preventing rancidity or mold growth. If fridge space is limited, at minimum store oils in a cool, dark cupboard away from heat sources like the stove or dishwasher. The one exception is nut oils, which solidify in the fridge – these are best kept in cupboards.

Watch for Cloudiness & Layer Separation

It’s common for homemade infused oils to develop some cloudiness or layer separation during storage – this is caused by the natural separation of flavorful particles, moisture and oil over time. Gently heating and stirring infused oil blends can often reincorporate this separation. However, if you notice extensive water accumulation or foaming, persistent cloudiness or any dark speckles of mold growth, it’s best to discard an infused oil rather than risk getting sick from contamination.

Use Clean Utensils When Removing Oil

Always be sure to use clean, dry utensils each time you open up your stored infused oil bottle to remove some for cooking or baking. Double dipping with dirty spoons or cups introduces water, herb bits and bacteria that will rapidly decrease freshness during storage between uses.

Consider Shorter Duration Infusions

Infusing oils for shorter durations can often yield lighter, more delicately flavored oil blends that keep better compared to longer infusions. Steeping herbs for 1-2 weeks rather than months creates milder oils less likely to deteriorate quickly. You can always make more small batches of short-infused oils to layer flavors over long storage times.

Use Within One Year

While properly stored infused oils can often last up to two years without spoiling, it’s safest to use up any homemade blends within 12 months. Mark the production date on labels and use oils on a rotation system, enjoying the freshest batches early on. If more than a year passes and clear signs of rancidity like unpleasant smells or dark color changes arise, it’s best to let that infused oil go.

Freeze For Even Longer Storage

Freezing infused oils is one storage method that can substantially extend shelf life beyond the one year mark. The very cold temperature prevents moisture accumulation, slows oxidation and inhibits bacteria growth. Thaw frozen infused oils overnight in the fridge before use. Transfer any remaining thawed oil back into the freezer. With this technique, infused oils can last for years while retaining flavor and freshness.

By following these tips for proper storage hygiene, temperature control and best practices on duration, the infused oils handcrafted in your home kitchen can stay vibrant, delicious and mold-free for maximum enjoyment. Don’t let poor storage cut short all your hard infusion work. For more great information, be sure to check out the rest of the Ultimate Guide to Making Infused Oils at Home.

Recipes and Uses for Flavored Oils

Infused oils are extremely versatile ingredients that can be used to add big, bold flavors to all kinds of dishes. The ultimate guide to making infused oils at home wouldn’t be complete without a robust set of recipes and recipe ideas to help you make the most of your homemade flavored oils.

One of the best things about infused oils is that they can be swapped into recipes calling for regular olive oil or vegetable oil. Using an infused oil instead will instantly amplify the dish’s flavor. For example, try making pesto with basil oil instead of regular olive oil. The end result will have a much more intense, aromatic basil flavor.

Here are some of our favorite ways to use various infused oils:

Lemon Oil: This bright, citrusy oil is delicious drizzled over seafood, used to dress leafy green salads, or even mixed into cake batters and frostings. For an extra lemony punch, use it to make lemon curd or lemon squares.

Garlic Oil: Saute vegetables, eggs, meats, and seafood in garlic oil to give them a nice garlicky flavor without having to chop and cook raw garlic. Garlic oil also makes a mean garlic bread!

Chili Oil: Add a spicy kick to Asian noodle and rice dishes by stir-frying them briefly in chili oil. You can also use it to make spicy mayonnaise for dipping vegetables, chicken wings, or egg rolls.

Herb Oils (Basil, Rosemary, Thyme, etc.): These herby oils are perfect for dressing pastas, flatbreads, bruschetta, and panzanella salads. For roasted vegetables and meats, try brushing or drizzling them with herb oil before and after cooking.

Truffle Oil: Made by infusing oil with real black or white truffles, this ultra-luxe oil should be used sparingly as a finishing touch on pastas, risottos, and mashed potatoes. It also makes gourmet popcorn and french fries!

Walnut Oil: With its subtle, nutty flavor, walnut oil is delicious on winter salads featuring bitter greens, pears, blue cheese, and dried cranberries. It’s also nice drizzled over roasted root vegetables like beets and carrots.

Sesame Oil: This oil adds wonderful nutty, toasty flavor to Asian noodle bowls, stir fries, and salad dressings. It’s also great for making from-scratch Asian sauces and marinades.

In addition to using infused oils for cooking, they make fantastic gifts and pantry staples. Here are some easy recipes for infused oil-based products you can make at home:

– Flavored Vinegars: For bright, tangy herbed vinegars, combine a sprig of your favorite herb with vinegar (white, red wine, rice wine, etc.) in a sterilized bottle. Basil, thyme, rosemary, tarragon, and oregano all infuse beautifully into vinegars.

– Vinaigrettes: Whisk together infused oil, vinegar, mustard, salt, and pepper for an easy homemade salad dressing. Lemon oil and red wine vinegar is a classic combination.

– Compound Butter: Blend infused oil into room-temperature butter along with herbs, lemon zest, roasted garlic, etc. Chill overnight, then slice and serve atop meats, fish, and vegetables.

– Mayonnaise: Slowly whisk infused oil into an egg yolk to make flavored mayo. Garlic oil and lemon oil make stellar aiolis.

– Finishing Oils: Sometimes it’s best to let your infused oil shine with just a simple drizzle over finished dishes. Having a variety of infused finishing oils is a great way to quickly elevate proteins, grains, vegetables, soups and more.

The possibilities are truly endless when cooking and baking with infused oils made from the ultimate guide to making infused oils at home. We encourage you to get creative and use them anywhere you would normally use regular olive or vegetable oil to give your dishes an instant flavor boost. Over time, you’ll discover which infused oil and food pairings you like best. Then you can tailor your homemade infused oils to match your personal tastes and cooking style.

Most Popular Oil and Herb Combinations

When exploring homemade infused oils, one of the most exciting parts is choosing which herbs, spices, or other flavorful ingredients to infuse into your oil. The possibilities are endless! However, some classic combinations tend to rise to the top as crowd favorites.

Extra Virgin Olive Oil

Extra virgin olive oil is one of the most versatile and commonly used oils for infusions. Its fruity, grassy flavor pairs beautifully with many herbs and spices. Some of the most popular infusions using extra virgin olive oil include:

– Rosemary Infused Olive Oil: Rosemary’s woodsy, pine-like notes mesh flawlessly with olive oil’s natural flavor. Use for sautéing veggies, roasting potatoes, marinades, etc.

– Basil Infused Olive Oil: The sweet licorice and mint tones of basil sing when infused into olive oil. Perfect for Caprese salads, pastas, dipping bread, and pesto.

– Lemon Infused Olive Oil: Bright citrus flavors give olive oil a summery twist. Use for salad dressings, seafood, chicken, and more.

– Garlic Infused Olive Oil: For those who can’t get enough garlic flavor, this oil packs a savory punch. Ideal for pasta, bread dipping, and Mediterranean dishes.

– Chili Infused Olive Oil: Add some heat to your olive oil by infusing chili peppers. Spice up pizza, eggs, chicken, grains, and vegetables.

Coconut Oil

Coconut oil has grown incredibly popular in recent years due to its high smoke point and sweet, nutty flavor. Some tasty infused coconut oil ideas include:

– Coconut Lime Infused Coconut Oil: A Caribbean-inspired tropical blend, lovely in curries, marinades for shrimp or chicken, and stir fries.

– Ginger Infused Coconut Oil: Ginger’s warming zing melds nicely with coconut. Use in Asian noodles, stir fries, curries.

– Coffee Infused Coconut Oil: For the ultimate morning blend; nice spread on toast or swirled into coffee.

– Vanilla Infused Coconut Oil: A touch of vanilla makes this oil perfect for baking, smoothies, oatmeal, even popcorn!

– Orange Infused Coconut Oil: Bright citrus flavor to enhance seafood, desserts, smoothies, and dressings.

Avocado Oil

Prized for its very high smoke point and mild flavor, avocado oil allows the herbs and spices to take center stage when infused. Top options include:

– Chili Infused Avocado Oil: The oil’s neutral profile lets spicy chili flavors shine. Use for stir frying, eggs, grains, and grilled meats.

– Basil Infused Avocado Oil: Sweet basil notes stand out against the smooth, buttery avocado oil. Toss with fresh summer salads or pasta.

– Lemon-Thyme Infused Avocado Oil: A herbaceous, citrusy infusion for chicken, fish, and seasonal veggies straight from the grill or oven.

– Cilantro-Lime Infused Avocado Oil: Bright, zesty flavors to use in Southwestern style dishes like fajitas, tacos, quesadillas.

– Smoked Paprika Infused Avocado Oil: For incredible depth of flavor in roasted veggies, grilled meats, pan sauces.

Grapeseed Oil

Another fantastic neutral oil for infusions is grapeseed oil. Its high smoke point also allows it to withstand heating. Top grapeseed oil combinations:

– Rosemary Infused Grapeseed Oil: Rosemary’s piney essence stands out against the very subtle grapeseed oil profile. Use for roasted potatoes, meat rubs.

– Thyme Infused Grapeseed Oil: Thyme’s earthy, herbal notes mesh beautifully with this light oil. Enhance chicken, fish, warm vegetable salads.

– Garlic Infused Grapeseed Oil: Maximizes that garlicky punch for enhanced flavor in stir fries, pasta, salad dressings.

– Lemon-Parsley Infused Grapeseed Oil: A fresh, lively infusion for seafood, chicken, seasonal produce straight from the garden.

– Curry Infused Grapeseed Oil: For fans of spice, infuse with your favorite curry blend. Use in curries, stews, roasted cauliflower.

The options for infused oil and herb combinations truly are endless. Have fun playing around with your favorite oils, herbs, spices, citrus, peppers, etc. and find your own winning combinations to enhance your cooking! And don’t forget that infused oils also make wonderful homemade gifts.

The key is to choose high quality oils and ingredients at their peak freshness. This will ensure the best possible flavor in your infused oils. Proper storage methods post-infusion are also vital to maximize shelf life. For more tips on choosing oils and herbs as well as storage recommendations, check out the other sections in this ultimate guide to infused oils.

Troubleshooting Problems with Rancidity or Mold

Even when using best practices, problems can occasionally arise when infusing oils at home. Two of the most common issues are rancidity and mold growth. By understanding what causes these problems and how to prevent them, you can continue crafting delicious infused oils safely.

What Causes Rancidity?

The Ultimate Guide to Making Infused Oils at HomeThe Ultimate Guide to Making Infused Oils at Home

Oil rancidity occurs when fats break down through oxidation. Exposure to heat, light, and oxygen speeds up this process. You may notice rancid oil smells unpleasant or tastes bitter, metallic, or soapy. Consuming rancid oils poses minimal health risks but can cause temporary stomach upset.

Certain oils like olive and coconut oil have higher resistance to rancidity thanks to their fatty acid profile. More delicate oils like almond, walnut, and avocado oil spoil faster. Infusing more perishable oils requires extra care.

Tips to Prevent Rancidity

Follow these best practices when making infused oils to avoid rancidity:

– Start with fresh, high-quality oil. Check expiration dates before buying.

– Limit light exposure by storing oils in dark bottles. Amber bottles offer an attractive presentation while blocking light.

– Refrigerate infused oils after straining to help preserve freshness.

– Use clean, dry utensils and containers to prevent contamination.

– Strain oils quickly once done infusing. Leaving herbs soaking for too long introduces more water and speeds spoilage.

– Consider adding vitamin E oil, available in capsule form. Its antioxidant properties help oils resist rancidity.

– If infusing more delicate oils, plan to use within a 1-2 months. Freezing in ice cube trays lets you thaw small portions as needed.

Signs of Mold Growth

You may notice fuzzy patches or spots in range of colors from white to black. Sometimes oil separates, leaving cloudy blobs. Mold growth nearly always indicates contamination with water or debris during infusion.

While some mold species release harmless mycotoxins, others create dangerous toxins posing health risks if consumed. Never taste or eat moldy infused oil. Properly dispose and start over with fresh ingredients.

Avoiding Mold Growth

Follow strict hygiene practices when infusing oils at home to prevent mold growth:

– Sterilize jars or bottles first by submerging in boiling water 10 minutes. Air dry fully upside down.

– Wash herbs thoroughly and dry completely before adding to oil. Pat off any moisture with clean paper towels.

– Use a dry funnel when straining to prevent herb debris from clinging to container sides.

– Never add water to infusing oils. Even droplets left from washing equipment can introduce mold.

What If My Oil Goes Bad?

If despite your best efforts, an infused oil shows early signs of spoilage:

– Check for visual mold growth or an unpleasant smell. Taste only if oil appears perfect.

– If detected quickly, reheating on the stovetop or in oven may salvage the batch.

– Toss out immediately if mold seen or tastes rancid. Erring on the side of caution protects your health.

With proper handling and storage, most infused oils stay fresh 1-6 months. But if you notice any signs of spoilage, don’t take risks. When in doubt, throw it out! Making a new batch poses no hardship when armed with tips from this ultimate guide to infused oils.

Creative Infused Oil Gift Ideas

Infused oils make thoughtful, useful gifts for any occasion. Not only do they look beautiful, but they provide the recipient with a versatile ingredient to enhance their cooking. With so many possible herb and spice combinations, you can customize an oil to match the recipient’s taste preferences. Get creative with your presentation to take your infused oil gift to the next level.

Pretty Bottles and Labels

Start by choosing an attractive bottle, jar, or cruet to hold your homemade infused oil. Clear glass allows the recipient to view the herb flavors inside. Tint the oil a sunny yellow with turmeric or calendula petals, deep green with basil or oregano, or reddish-orange with chili peppers inside. For a professional look, design and print labels listing the oil and herb flavors. Adhere the labels to your bottles with decorative touches like raffia, ribbon, or fabric.

Themed Gift Baskets

The Ultimate Guide to Making Infused Oils at Home

Build an entire gift basket around your infused oil. Choose a theme based on the individual’s interests or lifestyle. For a cook, include additional herbs and spices to complement the oil, along with recipe cards. For a gardener, incorporate packets of the herb seeds used to make the oil. Wellness baskets might contain the oil alongside essential oils, bath salts, or candles. Tailor picnic, pasta night, grilling, or other theme baskets to the recipient’s hobbies.

Oil and Vinegar Duos

Pair your infused oil with a complementary infused vinegar for a dynamic duo. Herb-infused vinegars provide acidity to balance and bring out flavors. Bottle the oil and vinegar together in a divided cruet for easy salad dressing making. Popular combinations include basil oil and balsamic or red wine vinegar, lemon-rosemary oil and white wine vinegar, and chili oil mixed with apple cider vinegar.

Oil Dippers

Give a bread dipper set featuring your infused oil. Submerge baguette slices, pretzel crisps, or pita chips in the oil for an instant appetizer. Or present the oil in a shallow dish alongside crusty bread cubes or crackers for dipping. You can further embellish the gift by including cheeses, olives, roasted nuts or vegetables, and other dip accompaniments.

Oil Dispenser Sets

Dispense your infused oil in style with a pouring spout, pump, or spray top bottle. Integrate the dispenser into a complete set – for instance, an herb grinder, sea salt, pepper mill, and infused oil cruet arranged on a tray. Or bundle small pump bottles of several flavored oils as a collection. Useful additions like salad dressing whisks, vinegar dispensers, or funnel pitcher sets encourage creative usage.

Sauces and Marinades

Boost the flavor of the recipient’s cooking with your homemade infused oil blended into gourmet sauces and marinades. Bottle the oil with spices and herbs like garlic, shallots, mustard and wine for a salad dressing base. Mix the oil with soy sauce, brown sugar, rice vinegar and ginger for a ready-to-use stir fry sauce. Or emulsify the oil into a herb-accented vinaigrette, pesto or chimichurri marinade for meats or vegetables.

Oils for Baking

Bakers will appreciate flavored oils to take their homemade goodies up a notch. Bake gingerbread cookies or carrot cake with cinnamon-orange oil for warmth, lemon loaf with Meyer lemon oil brightness, or olive rosemary oil focaccia for herby depth. Include recipe cards tailored for the specialty oil so the recipient can easily incorporate it into their baking.

Gardening Oils

For the gardener, make a custom oil showcasing herbs and flowers from their garden. Use oregano, rosemary, lavender or other plants they love to nurture. Present the oil in a watering can or rustic planter decorated with gardening gloves, seed packets, garden markers with fun sayings, or other accessories they can use.

Pampering Oils

Promote relaxation with an infused oil designed for self-care. Choose soothing herbs like lavender, chamomile, vanilla and rose petals to infuse in almond, jojoba or coconut carrier oils. Package the oil alongside items like essential oils, bath salts, lotions, loofahs and candles for a rejuvenating spa experience.

Hopefully these ideas sparked some creativity for the infused oil gifts you’ll make. With countless herb and oil combinations possible, you can develop unique flavor profiles suited to anyone’s taste. Thoughtfully packaged and personalized oils show loved ones how much you care.

The Health Benefits of Infused Oils

Infused oils not only add flavor to dishes, but they can also provide various health benefits. The herbs, spices, garlic, citrus, or chili peppers used to infuse the oils contain antioxidants, anti-inflammatory compounds, and other bioactive nutrients that get transferred to the oil during infusion.

The Ultimate Guide to Making Infused Oils at Home

Some of the top health benefits associated with common infused oil ingredients include:

Basil – Contains antioxidants like flavonoids that can help protect cells from damage and reduce inflammation. Basil oil may also have antimicrobial effects.

Oregano – Highly antioxidant and has natural plant compounds like thymol and rosmarinic acid that have antiviral, antibacterial, antifungal, and anti-inflammatory effects.

Rosemary – Rosemary infused oil is high in antioxidants like carnosic acid and rosmarinic acid that fight inflammation and potentially protect brain health by preventing cognitive decline.

Garlic – The beneficial sulfur compounds in garlic, like allicin, have antimicrobial, antiviral, and antioxidant effects in the body and may boost heart health.

Lemon/Citrus – Contains inflammation-fighting antioxidants and phytochemicals that support immunity and provide vitamin C. Lemon oil also has an energizing citrus aroma.

The Ultimate Guide to Making Infused Oils at Home

Chili Pepper – Capsaicin and other compounds give chili peppers their heat and health perks, including increasing metabolism, reducing blood pressure, easing sinus congestion, and relieving pain through topical use.

Ginger – Gingerol, shogaols, zingerone and other anti-inflammatory compounds give ginger its distinct flavor and make ginger oil a soothing remedy for nausea, digestive issues, pain, and arthritis.

Turmeric – Curcumin is turmeric’s main bioactive ingredient and the source of its vibrant color and many medicinal effects, like fighting inflammation, protecting brain function, and reducing joint arthritis and pain.

In addition to the potent plant compounds in infused oils that provide health benefits, oils like olive oil and avocado oil have healthy fats that benefit the heart and brain on their own. So infusing them amplifies their positive effects.

The way infused oils are used also impacts the health benefits obtained. Using basil infused olive oil as an ingredient in Mediterranean diet recipes provides antioxidant and anti-inflammatory protection. Topical uses allow the skin to absorb active oil ingredients too. Rubbing chili oil on sore muscles can relieve pain. And massaging lavender-infused almond oil provides aromatherapy effects.

Tips for Maximizing Health Benefits

The Ultimate Guide to Making Infused Oils at Home

To get the most out of infused oils for health:

– Use high quality, fresh ingredients – older herbs/spices and oils contain fewer active compounds

– Allow enough infusion time for oils to extract key ingredients from herbs/spices/garlic

– Store properly in cool, dark place to preserve integrity of fragile plant compounds

– Consume within recommended timeframe before ingredients degrade

– Use infused oils regularly in recipes, dressings, marinades, and skincare routines

The possibilities with infused oils are endless. And infusing your own oils at home gives you total control over the ingredients and flavors. This allows you to create customized blends that cater to your taste buds and health needs. So explore fun herb and spice combinations that make your meals and self-care routines healthier and more exciting.

Cooking with Spices: Tips for Balancing Flavors

Cooking with Spices: Tips for Balancing Flavors

The Basics of Cooking with Spices

Cooking with Spices: Tips for Balancing Flavors – The Basics of Cooking with Spices

Spices add incredible depth, aroma, and flavor to dishes from cuisines all over the world. Learning how to cook with spices opens up many possibilities in the kitchen. When used properly, spices can transform the flavor of vegetables, grains, proteins and more. However, it’s important to understand the basics of cooking with spices to create balanced, harmonious flavors. This article on cooking with spices will cover tips for balancing strong spices, spice pairings, using spices to enhance foods, and more.

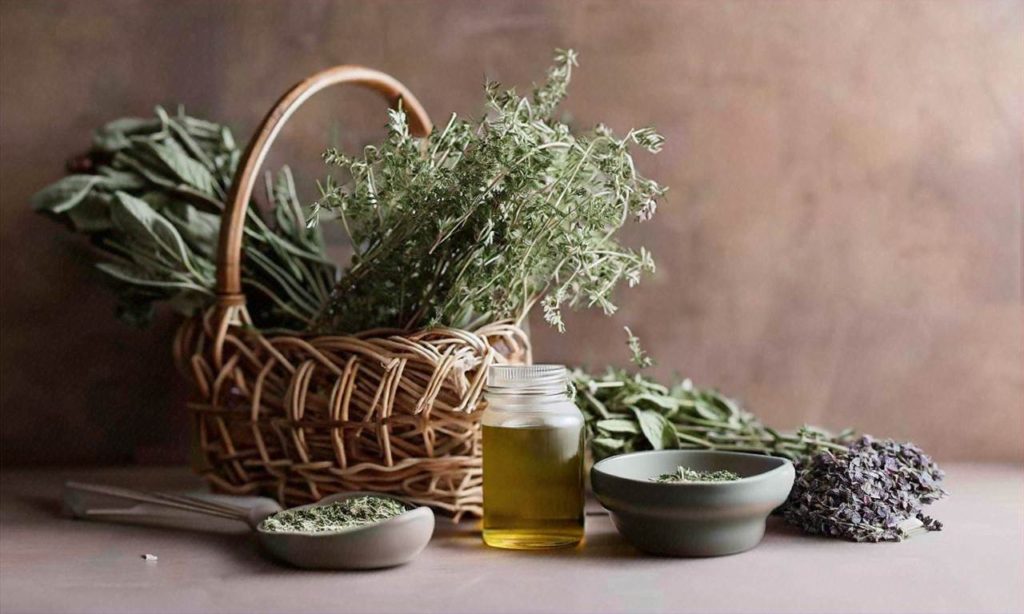
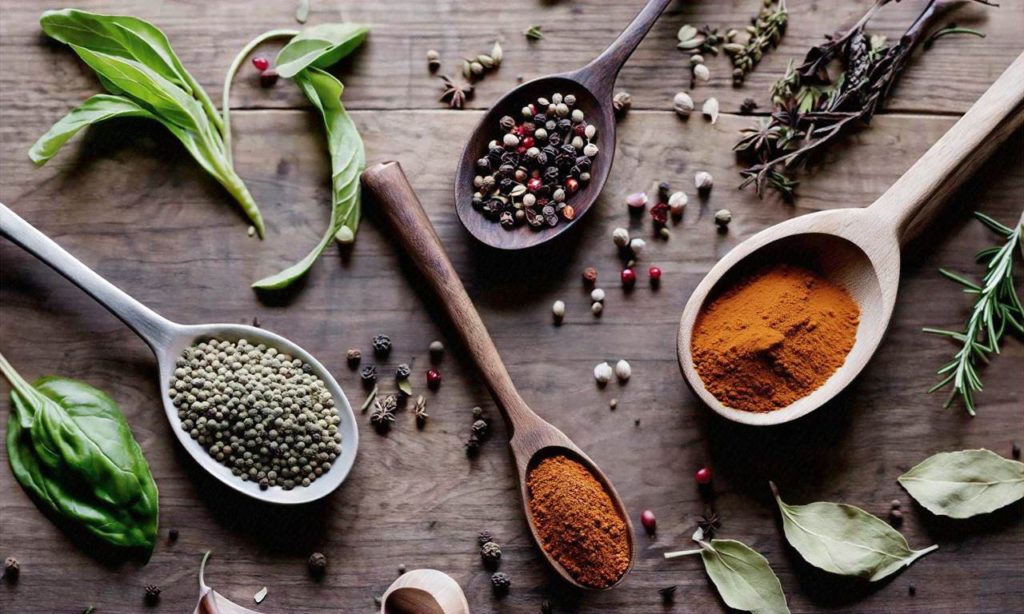
What are spices? Spices come from the roots, seeds, fruit, bark or vegetative parts of plants. Common spices used in cooking include cinnamon, cumin, curry powder, ginger and turmeric. Herbs come from the leafy, green parts of plants, like basil, oregano and rosemary. When learning how to cook with spices, it helps to understand their unique flavors and aromas.

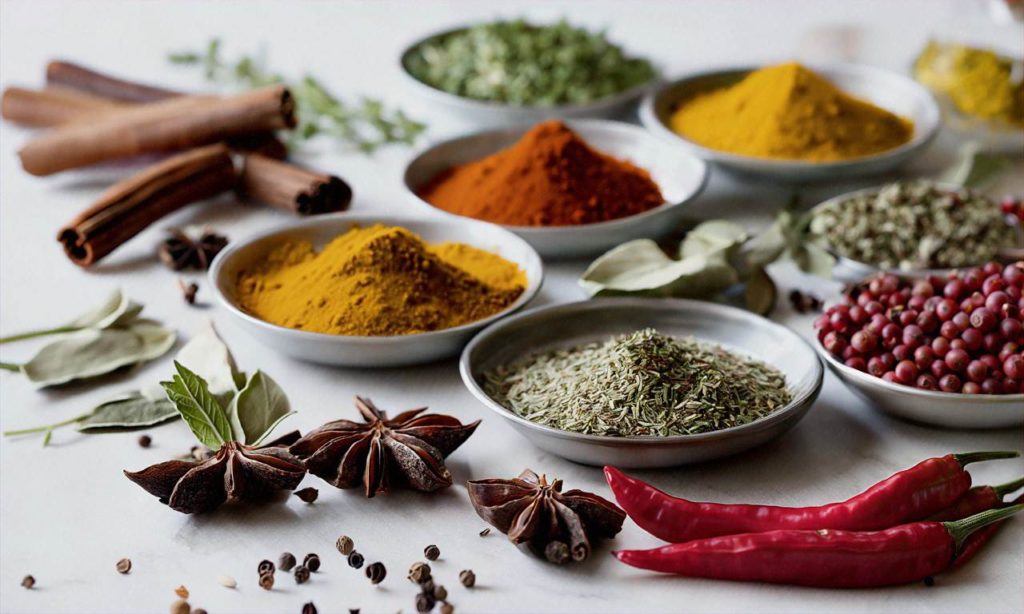
Why use spices in cooking? Spices add incredible aroma, flavor, color and texture to foods. Different spice blends characterize the cuisines from India, Thailand, Mexico and other parts of the world. Specific spices complement ingredients like tomatoes, chicken, lentils and fish. With the right balance, spices make dishes more interesting and satisfying to eat. They also provide antioxidants and anti-inflammatory compounds that offer potential health benefits.

Start with small amounts: Learning how to balance spices takes experimentation. When using a new spice, start with a small amount, taste and adjust. It’s easier to add more spice than taking it out once it’s overwhelming. Toasting whole spices briefly before grinding them releases their essential oils and intensifies their flavor. However, spices can burn quickly, so watch them closely on the stove.

Consider combinations: Many signature spice blends build layers of flavor with different spices. Garam masala contains cumin, coriander, cardamom, cinnamon, cloves and black pepper. By combining spices, complex and well-balanced flavors emerge. Cooking with spices is about discovering combinations that complement each other. Regional cuisines provide inspiration for blending spices in new ways.

Mind the heat: Some spices like cayenne, chili powder, mustard and black pepper add heat to dishes along with flavor. Keep in mind your own and your guests’ tolerance for spicy food. Balance hot spices by combining them with cooling spices like cinnamon, cumin, and turmeric. Adding a fat like olive oil or coconut milk also helps temper heat. Start with small amounts of hot spices and allow guests to add more at the table.

Toast whole spices: Toasting briefly intensifies the aroma and flavor of many whole spices like cumin seeds, coriander seeds, mustard seeds and fennel seeds. Heat a dry skillet and add the whole spices, tossing frequently. Once fragrant and slightly darkened, after just 1-2 minutes, remove them from the heat so they don’t burn. Then grind the toasted spices and add to your dish. Their aroma and flavor will be beautifully heightened.

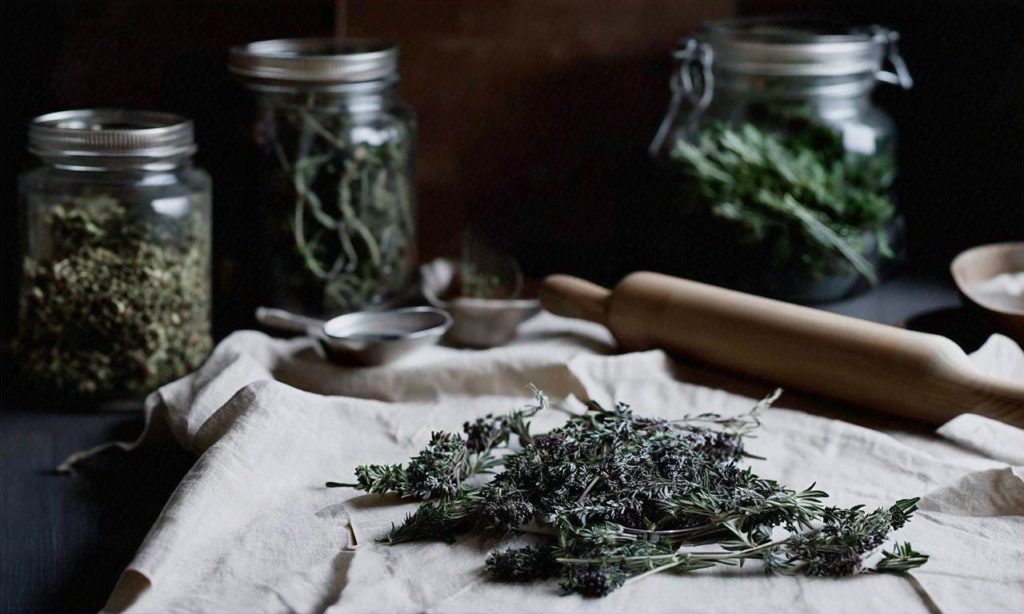
Store spices properly: To retain flavor and potency, store spices in airtight containers away from heat, moisture and direct sunlight. Replace them every year or two as their volatile oils dissipate over time. Try labeling containers with purchase dates and rotate older spices to the front to ensure freshness. Investing in fresh, quality spices makes a remarkable difference in cooking with spices.

We hope these basics give you confidence in exploring spices! The keys are using them judiciously, finding complementary combinations and balancing flavors. Well-used spices make food more satisfying, interesting and enjoyable to eat. This introduction covered why to use spices, getting started with amounts and combinations, managing heat, toasting whole spices and proper storage. Read on to discover more tips, pairings and techniques for cooking with spices and balancing flavors.

Common Spice Pairings and How to Use Them

Certain spices just seem to go hand-in-hand in the kitchen. Learning some of the most popular tried-and-true spice pairings can help guide you when experimenting with spice blends or adding spices to recipes. Understanding what makes specific spices complement each other so well can also give you the confidence to move beyond basic pairings and discover new flavor combinations.

Some classic pairings like garlic and basil or cinnamon and allspice reflect the spices’ shared place of origin and history of being used together in established cuisines. Other go-to combinations like chili powder and cumin or ginger and turmeric unite spices with similar flavor profiles. Contrasting but balancing combinations like rosemary and lemon or cumin and mint play complementary spices against each other for more complex flavors.

Getting the basics down of some of the most ubiquitous spice pairings used in cooking and knowing how to use them provides a strong foundation for endless recipe experimentation and innovation when cooking with spices.
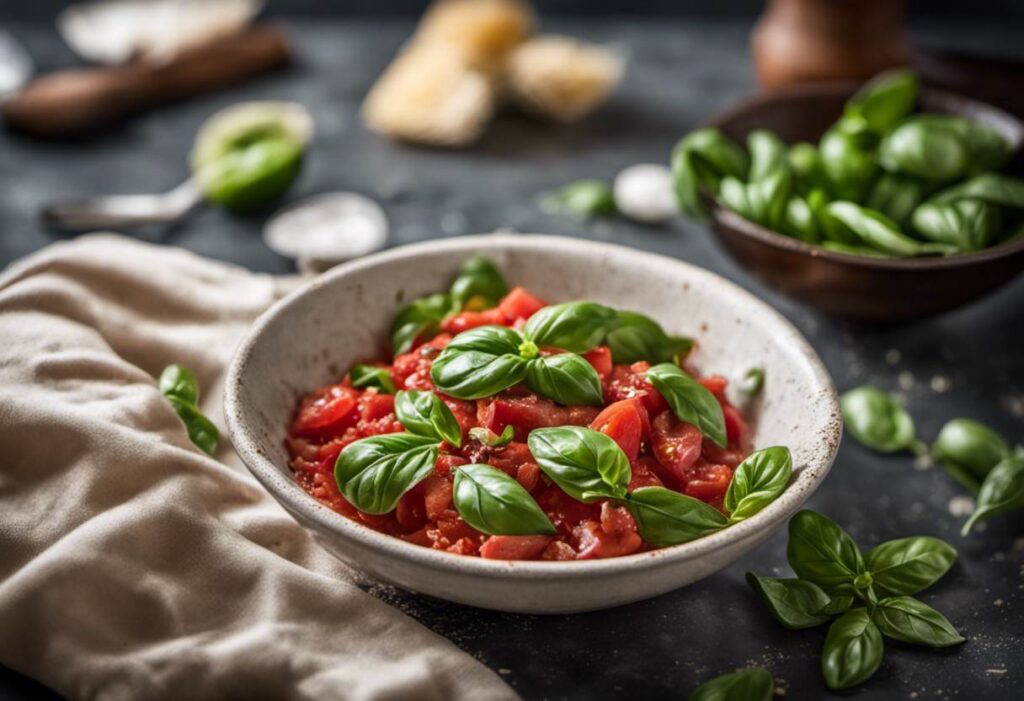
Garlic and Basil

This dynamic Mediterranean herb and spice duo stars together in everything from pasta sauce to pesto to pizza. The pungent bite of garlic balances beautifully with the sweet, gently peppery flavor of basil. Use them together abundantly in tomato-based pasta sauces, savory Mediterranean vegetable dishes like ratatouille, fresh pestos and herb spreads, and as pizza toppings.

Cinnamon and Allspice

Warming allspice echoes the sweet-spicy flavor of cinnamon for a pairing that evokes baking spices. They taste fantastic together in baked goods like pies, cakes, cookies, and quick breads as well as in spice rubs for roasted vegetables, meats, and tofu. Add them together along with ginger and clove for ultimate apple and pumpkin pie spice blends.

Chili Powder and Cumin

This dynamic Tex-Mex duo adds smoky, savory depth. Chili powder contributes mild heat while earthy cumin balances with its distinctive nutty, slightly bitter flavor. They’re essential ingredients together in chili con carne, tacos seasonings, enchilada sauce, fajitas, and more Tex-Mex classics. Sprinkle them liberally on meats and veggies before grilling or roasting too.

Ginger and Turmeric

Ginger’s warming bite and subtle citrusy sweetness beautifully complements the earthy, bitter, slightly mustardy flavor of turmeric. They feature prominently together in Indian and Southeast Asian cuisines. Use them as a base for from-scratch curry powder or garam masala blends. Or add them together along with other spices like cumin and coriander to flavor curries, lentil dals, rice dishes, marinades, and stir fries.

Rosemary and Lemon

Herby rosemary’s piney bite plays perfectly against tart, bright lemon. They give chicken, fish, veggies, and even desserts a fresh Mediterranean flavor. Use them together abundantly for roasted lemon chicken or fish, lemon rosemary oven potatoes, mixed roast veggies, and lemon rosemary cookies or cake.

Cumin and Mint

Cooling mint balances the intense earthy, bitter, almost lemony flavor of cumin. This Middle Eastern pairing adds intrigue to spice rubs, marinades, grain salads like tabbouleh, yogurt dips, and more. Use ground cumin and fresh mint liberally together to season lamb, lentil and bean dishes, grains, and vegetables.

Experimenting with some of these tried-and-true spice pairings together in your own recipes is a great way to start comfortably exploring cooking with spices. Once you understand how certain spices complement each other so perfectly, you can begin branching out and discovering more unusual but still harmonious flavor combinations. With the endless variety of spices available today, there’s no limit to innovative pairings and captivating new spice blend ideas to uncover when cooking with spices.

Tips for Balancing Strong Spices

Strong spices like chili peppers, ginger, garlic, and curry can add immense flavor to dishes when used properly. However, it’s easy to overdo it with potent spices, resulting in a dish that is too spicy or intensely flavored to enjoy. With some careful tips and techniques, you can balance strong spice flavors to make harmonious and complex dishes.

Assess Your Spice Tolerance

Before cooking with strong spices like chili peppers, consider your own tolerance for spice as well as who you are cooking for. If you or your guests don’t enjoy very spicy food, use smaller amounts of hot peppers or milder varieties. You can always add more spice later if needed.

Start with Small Amounts

It’s easier to add more spice than take it out of a dish, so begin by adding small amounts of potent spices. Start with just a pinch of cayenne or half a minced chili pepper before adjusting to taste. You can build depth of flavor without overwhelming heat this way.

Bloom Spices in Oil or Liquid

Blooming spices like garlic, ginger, or curry powder in oil or liquid helps mellow their raw edge. Cook briefly in oil or broth before adding other ingredients. This smooths and rounds out the flavor.

Balance Heat with Acid and Sweet

Contrast spicy heat with acid from citrus juice or vinegar and sweetness from tomatoes, carrots, coconut milk, or a touch of sugar. The interplay of flavors makes both the heat and the contrasting notes more vibrant.

Soak Dried Chilies Before Using

For very hot dried chilies like arbol or pequín peppers, soaking them in hot water for 10-30 minutes helps extract some of the fieriness. Use the soaking liquid for a milder heat level.

Use Herbs and Spices Together

Pair hot spices with fresh herbs like cilantro, mint, basil, or parsley. The bright, cooling flavors balance out heat. Spices like cumin, coriander, and fennel also mitigate heat.

Add Dairy to Tame Spiciness

Ingredients like yogurt, cream, and coconut milk have a cooling effect on spicy dishes. Stir in a spoonful or two near the end for a mellower flavor. Cheese can also help cut spice intensity.

Adjust Serving Sizes Mindfully

When working with very hot peppers like habaneros or ghost peppers, remember that a little goes a long way. Adjust serving sizes to just 1-2 tablespoons of a sauce or one small pepper in a large pot of soup or stew.

Let Flavors Develop Over Time

The intensity of some spices mellows the longer they cook. If a dish tastes too spicy at first, let it sit for 5-10 minutes for flavors to meld before adjusting. Time often balances bold flavors.

Taste and Adjust Carefully

Be sure to taste as you season, and resist overcompensating with more salt or acid when heat is high. Focus on rounding out flavors with sweet, creamy, or herbaceous notes instead. Careful tweaking and time will result in balanced spice.

With a few simple techniques for blooming, soaking, pairing, and adjusting spice amounts, you can create dishes with layered, nuanced heat. Paying attention to spice tolerance levels and carefully tweaking flavors as food cooks will help you master the art of balancing strong spices.

Complementary Spices for Different Cuisines

Certain spice combinations just seem to go hand-in-hand with specific cuisines around the world. Learning some of these classic pairings can help home cooks easily infuse authentic and balanced flavors into dishes. When cooking with spices for various world cuisines, consider the following complementary blends:

Italian Cuisine

Some of the most popular spices used in Italian cooking include basil, oregano, rosemary, sage, garlic, onion, red pepper flakes, fennel, and parsley. These herbs and spices complement tomato-based pasta sauces, risottos, roasted vegetables, focaccia breads, and more. Try mixing fresh chopped basil, oregano, crushed red pepper and garlic for a zesty pizza sauce. Or add chopped rosemary and garlic when roasting potatoes or making focaccia bread.

Indian Cuisine

Indian food balances warming spices like cumin, turmeric, cinnamon, cardamom, clove, ginger and black pepper with cooling spices like coriander, fenugreek, fennel and mint. Common spice blends like garam masala and tandoori masala also feature these spices. To make a basic garam masala, try mixing cumin, coriander, cardamom, cinnamon, black pepper and clove. This blend nicely complements curries, lentils and vegetable dishes.

Mexican Cuisine

The base of many Mexican spice blends includes garlic, onion, oregano, cumin and chili peppers. Add corn, cilantro, lime and cacao to round out distinctive flavors. Mix cumin, oregano, garlic and chili powder for tacos al pastor. For rich mole sauces, try blending ancho chilies, cinnamon, cloves, cumin and cacao powder. Brighten enchiladas with cumin, garlic and lime zest in the sauce.

Chinese Cuisine

Chinese five spice powder typically contains Sichuan pepper, clove, cinnamon, fennel and star anise. This blend nicely complements roast meats, stir fries and noodle dishes. Garlic, ginger and scallions are also popular. For a homemade five spice blend, combine 2 teaspoons each of the five spices. Start with 1⁄4 teaspoon of this blend for 1 pound of meat or vegetables and adjust to taste.

Thai Cuisine

Lemongrass, lime, basil, cilantro, garlic, galangal and chili peppers are hallmarks of Thai food. For red or green curry paste, blend some combination of these ingredients with shallots, ginger and spices like coriander, cumin and turmeric. The balance of hot, sour, salty and sweet flavors helps make Thai food so craveable. Add freshly squeezed lime and a sprinkle of crushed red pepper flakes to your pad Thai or Thai basil chicken.

Mediterranean Cuisine

Mediterranean spice blends vary across the region but often include garlic, oregano, parsley, basil, cumin, cinnamon, allspice, mint and lemon. Mix garlic, lemon zest, oregano and olive oil for an easy marinade base for proteins. Or blend cinnamon, cumin and parsley into ground lamb before making kebabs or meatballs. Bright parsley, mint and lemon nicely balance the richness of foods cooked in olive oil.

Cajun & Creole Cuisine

Cooking with Spices: Tips for Balancing Flavors

The robust and eclectic flavors of New Orleans and Cajun cooking come from the influence of French, Spanish, Italian, German, West African and Native American cuisines over hundreds of years. Core spices include garlic, black pepper, thyme, oregano, cayenne pepper, paprika and filé powder made from ground sassafras leaves. This cuisine also makes abundant use of onions, bell peppers, celery and tomatoes. Start with the classic “holy trinity” of onions, celery and bell peppers when making jambalaya, gumbo or crawfish étouffée.

The world of spices offers endless flavor combinations unique to various cuisines. But no matter the cuisine, balancing the flavors and aromas of spices is key for the most delectable dishes. Follow some of the basic complementary spice guidelines for different world cuisines covered here. Then have fun experimenting with adjusting amounts or trying new spice blends in your cooking with spices!

Using Spices to Enhance Specific Foods

Cooking with Spices: Tips for Balancing Flavors

Spices can transform the flavor of many foods. By using spices purposefully, you can bring out the best qualities of ingredients and make dishes more complex and delicious. Here are some tips for enhancing specific foods with spices.

Meat

Spices are very effective at bringing out the rich, savory flavor of red meats like beef, pork, and lamb. For beef, classic spice blends like Montreal steak seasoning add lots of umami flavor. Dry rubs made with spices like black pepper, paprika, garlic powder and onion powder are also excellent on grilled meats. Lamb goes well with warming spices like cumin, cinnamon, cayenne, and cloves. Pork pairs nicely with sweet spices like ginger, nutmeg, allspice and brown sugar.

Seafood

The delicate flavor of fish and shellfish gains depth from herbs and spices. Old Bay seasoning, with its blend of mustard, paprika, celery salt and other spices, is a popular choice for seafood. Lemon and parsley brighten up the flavor of fish and shrimp. Cajun blackening spice mixes also work well to give seafood extra kick. Avoid strong spices that will overpower more subtle seafood flavors.

Poultry

Poultry benefits from a wide range of spices that enhance its versatility. Chicken stands up well to bolder spices like garlic, cumin, thyme, rosemary and sage. For Thanksgiving turkey, poultry seasoning with thyme, sage, marjoram and nutmeg is the perfect blend. Indian-style tandoori chicken uses spices like cayenne, cinnamon, cumin and garlic to make the meat flavorful. Lighter spices like lemon and parsley taste refreshing with poultry.

Vegetables

Spices can make vegetables more crave-worthy. Roasting vegetables brings out their natural sweetness, which pairs well with spices like cumin, paprika, garlic and onion powder. Add chili powder, cayenne or crushed red pepper to turn up the heat. Italian herb blends give depth of flavor to eggplants, squash, peppers and more. For richness, add warming spices like cinnamon and nutmeg to cooked vegetables. Even just salt, pepper and lemon can make vegetables pop.

Legumes and Grains

Beans, lentils and whole grains tend to have earthier, nuttier flavors that combine nicely with bold spice blends. Cumin is commonly paired with chickpeas in curries and stews. For lentils and beans, add smoky paprika or flavorful garam masala. Biryani or pilaf rice dishes use fragrant spices like cardamom, cloves and cinnamon. To finish whole grains like farro or quinoa, stir in fresh herbs, lemon zest, or a drizzle of chili crisp sauce.

Baked Goods and Desserts

Both sweet and savory spices enhance baked goods. Ginger, cinnamon, nutmeg and cloves add comforting warmth to cookies, cakes and pies. Anise and fennel bring out subtle licorice notes in pastries and other desserts. Savory baked goods like breads, biscuits and scones taste great with herbs like rosemary, thyme and oregano baked right in. Add a pinch of cayenne to chocolate desserts for a kick. Finish off baked goods with a dusting of cinnamon sugar or cumin salt.

Eggs

Even simple scrambled or fried eggs become more exciting with spices. Add a pinch of turmeric or saffron to make colorful, flavorful scrambled eggs. Stir chopped herbs like chives, dill or parsley into egg salad. For a spicy kick, add cayenne, paprika or chili flakes to omelets and frittatas. Whip up curry-spiced deviled eggs. Shakshuka is a classic Middle Eastern dish of eggs poached in a tomato sauce spiced with cumin, paprika and cayenne.

No matter what you’re cooking, there is likely a spice blend to make it shine. Keep your pantry stocked with a variety of dried herbs and spices so you’re ready to add flavor to everyday dishes. Don’t be afraid to experiment with new spice combinations too. With just a dash of this or a pinch of that, you can take your cooking to bold new heights.

Spice Storage Tips

Properly storing spices is key to preserving their freshness and flavor. Here are some tips for keeping your spices in peak condition for all your cooking with spices endeavors.

Buy Spices Whole

Purchasing spices whole, rather than pre-ground, can help them retain aroma and flavor longer. Whole spices have natural oils that when left intact, act as a protectant from elements that cause spices to lose potency. Try grinding or crushing small batches of spices as needed so they stay fresh.

Store Spices in Airtight Containers

Whether you buy pre-ground or whole spice, be sure to transfer them from packaging into airtight glass, metal, or ceramic containers. Air exposure causes oxidation which makes spices go stale faster. Clear glass jars allow you to easily identify contents. For extra protection, keep containers in a cool, dark space like a cupboard.

Keep Away From Heat, Light, and Moisture

Heat, light, and moisture are enemies to fresh, vibrant spices and can speed up oxidation. Avoid storing spices near heat sources like the stove, oven, or toaster. Choose a space not exposed to direct sunlight. Make sure storage areas are free from steam and condensation. Controlling temperature and humidity helps spices maintain volatile oils.

Practice First-In, First-Out

When cooking with spices, use a first-in, first-out system when possible. Move older product to the front of your pantry or spice rack. Use spices that have been sitting the longest first, then newest additions last. This method helps you get through inventory before peak flavor dissipates. Date jars when contents are purchased or opened.

Freeze Spices for Long-Term Storage

Freezing select ground spices prolongs freshness beyond typical pantry storage. Good freezer candidates include oregano, basil, thyme, rosemary, marjoram, and sage. Simply spoon spices into an ice cube tray, cover with water or oil, and freeze. Pop cubes into airtight freezer bags. Frozen cubes provide flavor as they thaw during cooking.

Keep Inventory and Restock

Do a periodic spice inventory, checking for stale, lackluster flavors. If you notice a decline, replace those items with fresh spices. Try not to hoard large quantities of any one spice. For the best flavored cooking with spices, buy smaller amounts more frequently to prevent overload of any spice that could lose potency before use.

Know When It’s Time to Toss and Replace

Unfortunately, spices don’t last forever. If you notice dull color, weakened aroma, altered texture, diminished flavor impact, or any signs of moisture or mold, it’s time to compost. As a general rule, toss ground spices after 1-2 years. Whole spices can hold flavor potency slightly longer at 3-4 years max. Regardless of form, replace any spice that just doesn’t seem vibrant.

Implementing a few fundamental spice storage strategies can make all the difference in lifting your cuisine with intensely flavored, perfectly balanced spices. Follow these spice care tips for delicious cooking with spices recipes your family and friends will love.

Buying Quality Spices

Finding high-quality spices can make all the difference in your cooking. The intensity of flavor, aroma, and color that spices impart depends greatly on their freshness and proper storage and handling before purchase. Here are some tips for selecting and buying spices that will enhance your dishes.

Know Where to Shop

The best places to buy spices are specialty spice shops, ethnic markets, and the spice section of higher-end or gourmet grocery stores. These retailers are more likely to have high turnover of inventory and staff knowledgeable about the spices. Chain supermarkets often have lower spice quality since the product may sit longer on shelves.

Assess Dry Spices Carefully

When buying dry spices like cumin, turmeric, or oregano, check manufacturing or expiration dates and choose the freshest option. Give any spice container a sniff test – you should be greeted with an intense aroma when you open the lid, not a faint dusty scent. And inspect the color of the powder or seeds/leaves – they should not be dull but rather vivid.

Evaluate Whole Spices

For whole spices like peppercorns, cinnamon sticks, cardamom pods, or bay leaves, examine size, color and aroma. Peppercorns should be uniform in size without lots of broken bits. Cinnamon and bay leaves should have good color without many blemishes. Cardamom pods should not look dried out or have loose seeds. And all whole spices should release fragrance when gently pressed.

Understand Ideal Storage

It’s also essential to consider how spices were stored before you bought them. Humidity, heat, and light all degrade spices quickly. For maximum freshness, spices should be kept in airtight containers away from heat, moisture and sunlight. When shopping, choose spices displayed in tightly sealed containers in a cooler, darker part of the store.

Ask Questions

Don’t hesitate to ask questions about spices when shopping at specialty stores. Inquire about turnover rates, storage methods, and popularity to help gauge freshness and quality. Ask when and where a spice was harvested or purchased. Good spice purveyors will be happy to share this information with interested customers.

Do Your Research

Particularly when shopping online, do some quick research on the spice seller before you buy. Check for any reviews, certifications, or sustainability standards that can help identify reputable spice sources. Or look for vendors specializing in spices and seasonings rather than general retailers.

Buy Smaller Quantities

Because spices lose potency over time, it’s best to buy spices in smaller quantities if you don’t use them frequently in your cooking. Unless you bake and cook often with cinnamon, for instance, a large bottle may lose its flavor before you use it all. Consider your usage amount and frequency when choosing spice quantities.

Determine Fair Pricing

Spices can range hugely in price because of factors like quality, rarity, origin, and processing method. Consider fair pricing for both your budget and the quality level you seek. Very cheap spices are likely old, mixed with fillers, or lower grade. But the most expensive may not be necessary for home cooking. Aim for good value for high-quality spices best suited to your recipes rather than either extreme.

Trust Your Senses

Your senses of smell, taste and sight are the best tools for assessing spice quality. Rely on them when shopping to inspect spices and determine the true vibrancy that will enhance cooking. Let these buying quality spice tips guide you in selecting ingredients with optimal flavor and freshness.

Spice Substitutions

Knowing how to substitute spices in recipes can save a dish when you’re missing a key ingredient. While no substitute can perfectly replicate the flavor of the original spice, there are good alternatives you can use in a pinch. With some thoughtful spice substitutions, you can still achieve a beautifully balanced, flavorful meal.

Allspice

If you don’t have allspice, a blend of cinnamon, cloves, and nutmeg can mimic the sweet and slightly peppery flavor. Use 1/2 teaspoon of this spice blend for every teaspoon of allspice called for. Allspice is commonly used in recipes for gravies, stews, mulled wines and ciders, Middle Eastern dishes, jerk seasonings, and more.

Cinnamon

Cassia has a very similar flavor to true cinnamon and can generally be used interchangeably in recipes. If using cassia when a recipe calls for cinnamon, use a little less since cassia has a stronger, more intense flavor. Cinnamon is a warm, sweet spice used around the world in both savory and sweet dishes.

Cloves

Allspice, nutmeg, cinnamon and ginger all have subtle clove undertones. Use one of these spices sparingly as an emergency substitute if you don’t have cloves on hand. Cloves pair well with cinnamon, nutmeg, ginger and orange. They are used in spice blends, marinades, pickled and preserved foods, baked goods and more.

Cumin

Caraway seeds have an anise-like flavor similar to cumin. Use the same amount called for in the recipe. Chili powder and garam masala also work for some dishes. Cumin is essential for Mexican, Indian and Middle Eastern cuisine, used in everything from curries to tacos.

Cooking with Spices: Tips for Balancing Flavors

Curry Powder

Make your own quick curry blend by combining 2 teaspoons turmeric, 1 teaspoon each of ground coriander, ground cumin, ground ginger and ground cinnamon. Omit any ingredients you don’t have. Commercial curry powder already contains a mix of spices like these. Curry powder is used to flavor many Indian and Southeast Asian dishes.

Ginger

Ground allspice or cinnamon provide some of the warmth missing without ginger, while lemon juice can replicate some of the tartness. Minced radishes and galangal root also share similarities with fresh ginger. Ginger adds a bright, citrusy heat to both sweet and savory recipes.

Nutmeg

Substitute mace, allspice, cinnamon or cloves for nutmeg. Use small amounts, as these all have stronger flavors. Nutmeg is used frequently in sweets and baked goods, but also works well in cream-based savory dishes.

Paprika

Depending on the type called for in the recipe, you can substitute chili powder or cayenne pepper for the heat, and turmeric for the vibrant red-orange color. Paprika ranges from mild and sweet to hot and spicy. It brings a rich red color and pops of flavor to many dishes.

Saffron

Turmeric can provide a similar yellow color to dishes, while ingredients like annatto and carrot powder also work. Combine turmeric with ginger, nutmeg and cardamom to approximate the flavor. Saffron is known as one of the world’s most expensive spices thanks to the labor-intensive process of harvesting the fragile purple crocus flowers.

Star Anise

Crushed anise seeds bring a similar pronounced licorice flavor. Chinese five spice seasoning contains both star anise and anise seeds, and makes a handy substitute in a pinch. Star anise is most frequently used in Chinese and Vietnamese cooking.

Getting Creative with Spice Substitutions

Don’t be afraid to experiment with spice substitutions in your cooking. Start by considering spices that share flavor profiles – warming spices like cinnamon, cloves nutmeg and allspice can often stand in for one another. Spices with lemon/citrus notes like cumin, coriander and ginger also make good substitutes for one another.

When substituting spices, use a light hand at first, then adjust to suit your tastes. Keep in mind that spice seeds will be less potent than their ground version. Toasting whole spice seeds briefly before using can help intensify their oils and flavors.

Proper storage is also key for preserving spices’ flavors and potency. Keep spices away from light, heat and moisture to prevent them from fading or spoiling.

Taking time to understand the flavor notes in your favorite spices makes substituting much easier. With some creativity and knowledge of spice flavors, you can keep crafting stellar dishes even when you don’t have every ingredient on hand. Cooking with spices is all about experimentation and balance – don’t be afraid to try spice substitutions to create your own signature flavors.

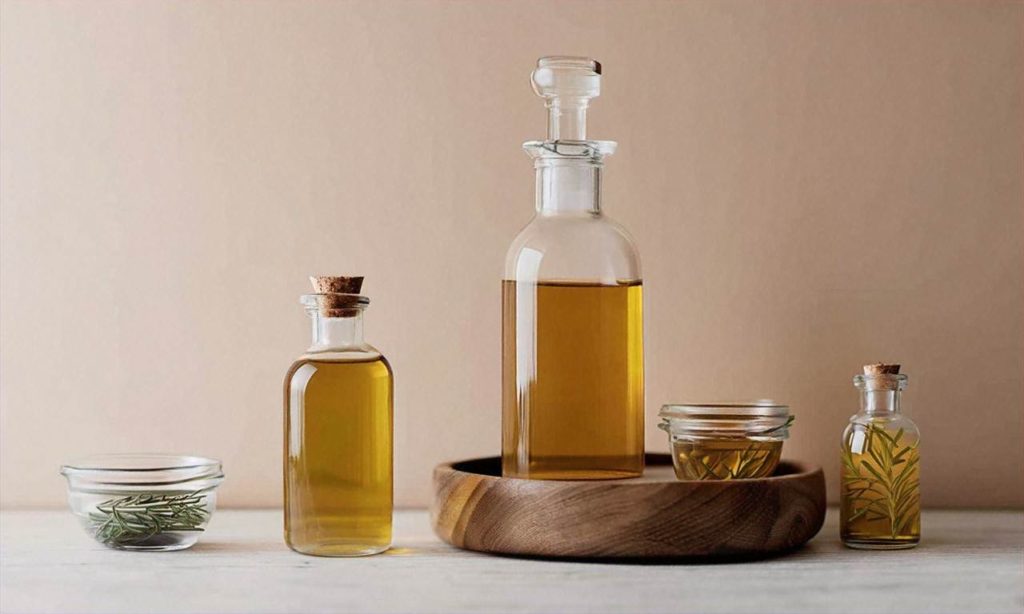
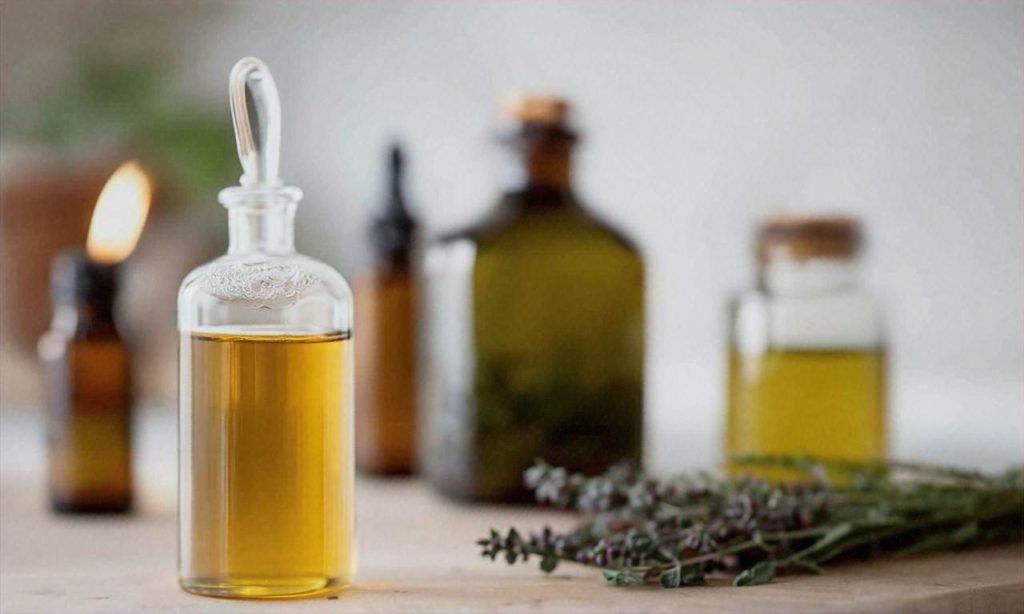
Infusing Oils and Vinegars with Spices

Spices can be used to infuse oils and vinegars, adding another dimension of flavor to your cooking. Infused oils and vinegars make great gifts, can be used in a variety of dishes, and allow you to experiment with different spice flavor combinations.

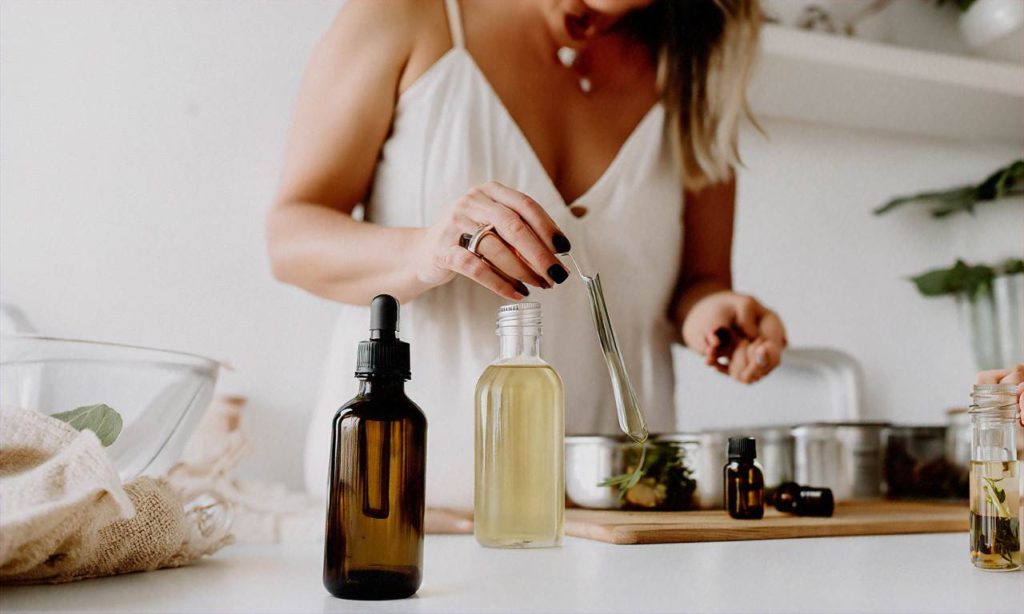
When infusing oils and vinegars at home, there are some important guidelines to follow. Choosing the right herbs, spices, oils and vinegars will ensure you end up with a quality, safe product. Here’s an overview of the process, along with tips for infusing your own spice-infused oils and vinegars at home.

Choosing Ingredients for Infused Oils and Vinegars

When creating infused oils and vinegars, you first need to select high-quality ingredients. The better the ingredients, the better the final product will taste.
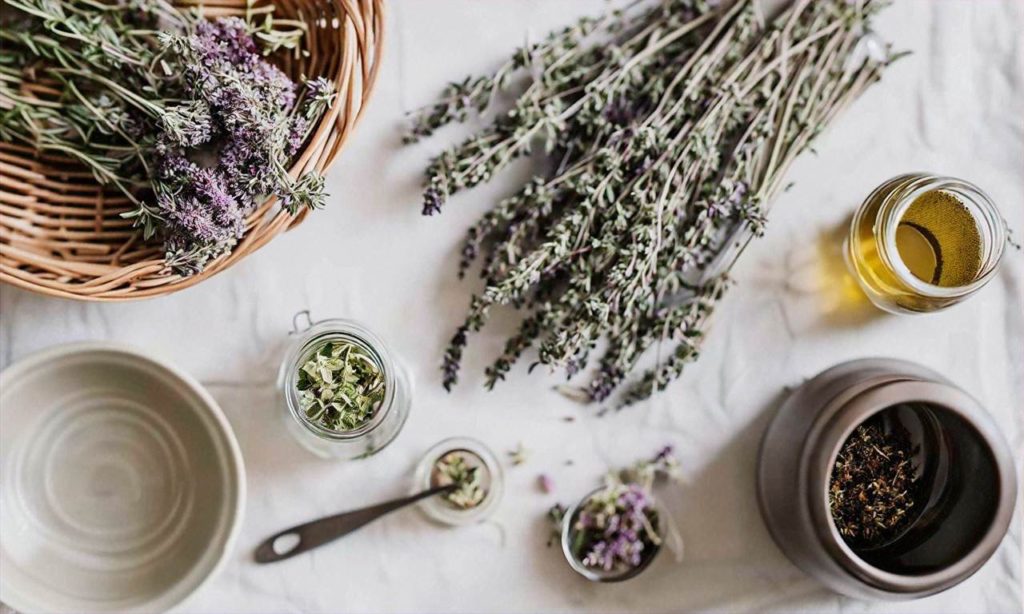
Herbs and Spices

The herbs and spices you choose will depend on your taste preferences and planned uses. Some top options include:

– Peppercorns

– Whole cloves

– Cinnamon sticks

– Cardamom pods

– Star anise

– Vanilla beans

– Citrus zest

– Rosemary

– Oregano

– Thyme

– Lavender

Make sure all herbs and spices are fresh. Dried herbs and spices work best to help prevent spoilage.
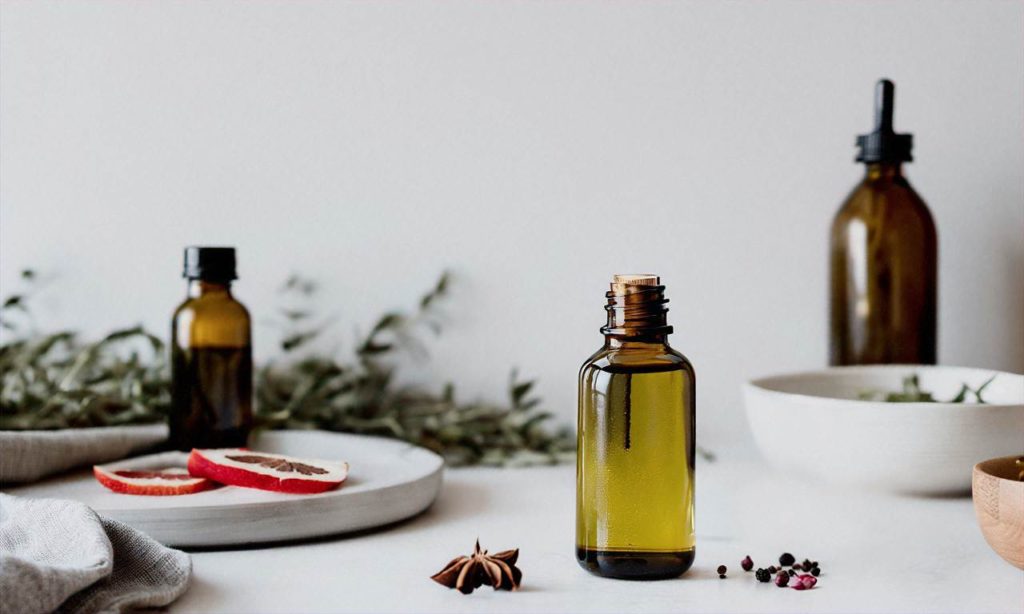
Cooking with Spices: Tips for Balancing Flavors

Oils

For infused oils, choose quality oil with a neutral flavor that will let the spices shine through. Top options include:

– Grapeseed oil

– Sunflower oil

– Safflower oil

Extra virgin olive oil can also work well, but has a strong flavor of its own.

Vinegars

White wine vinegar and champagne vinegar have subtle flavors that complement, but don’t overwhelm herbs and spices. Apple cider vinegar is another great choice. Stay away from dark vinegars like balsamic, red wine vinegar or sherry vinegar — these can overpower other flavors.

Process for Infusing Oils and Vinegars

There are a few methods you can use to infuse oils and vinegars at home:

Stovetop Method

Add herbs, spices and oil or vinegar to a saucepan. Heat over low, keeping the temperature between 160°F and 180°F for 15 to 30 minutes. Cool completely before bottling.

Oven Method

Combine ingredients in an oven-safe dish or jar. Bake at 200°F for 2 to 3 hours. Cool completely before bottling.

Cold Infusion

Combine room temperature oil or vinegar with herbs and spices in a jar or bottle. Store in a cool, dark place, shaking daily for 2 to 6 weeks. Strain out solids before use.

No matter what infusion method you choose, proper storage is critical for safety. Make sure to strain out all herb and spice solids, as these can introduce bacteria and lead to spoilage. Store infused oils and vinegars in sterilized bottles or jars in the refrigerator for up to 6 months. Freeze for longer storage.

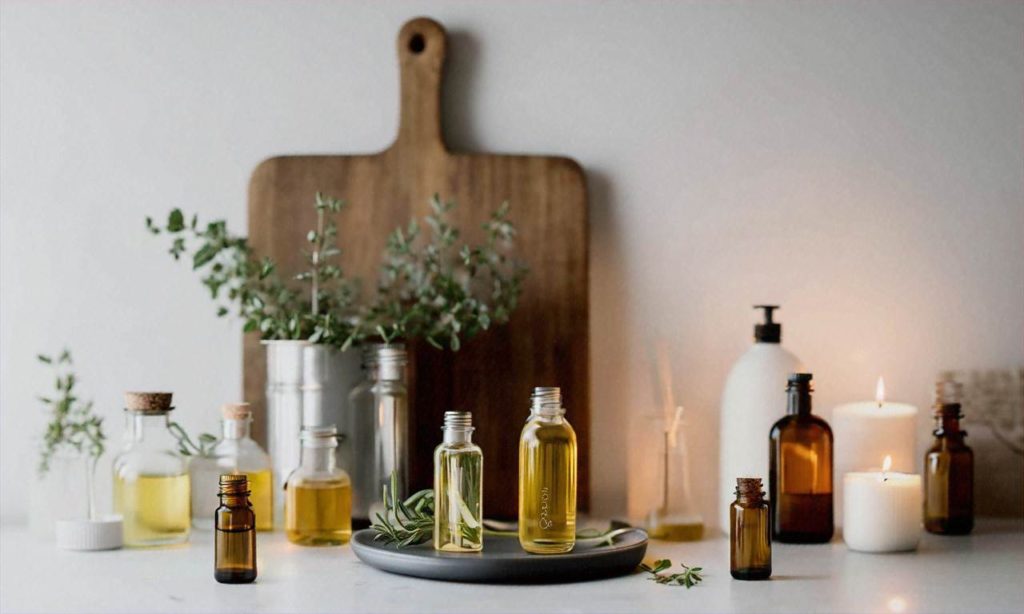
Using Your Infused Oils and Vinegars

The possibilities are endless when using your homemade infused oils and vinegars!

– Use them as marinades and salad dressings

– Make herb-infused vinegar shrubs for cocktails

– Use spice-infused oils for sautéing aromatics like onions and garlic

– Make infused vinegar pickles

– Use infused oils for bread dipping

– Drizzle infused oils over hummus, pasta, grilled meats, soups and more

– Splash infused vinegars into pan sauces and gravies

Some delicious flavor combinations to try:

– Lemon-Rosemary Oil

– Orange-Clove Vinegar

– Cinnamon-Cardamom Oil

– Lavender-Thyme Vinegar

– Spicy Chili Oil

Feel free to experiment with your own herb, spice and flavor combinations too. Track what infusions you create and how you end up using them. Over time, you’ll discover which combinations you use most in your cooking with spices.

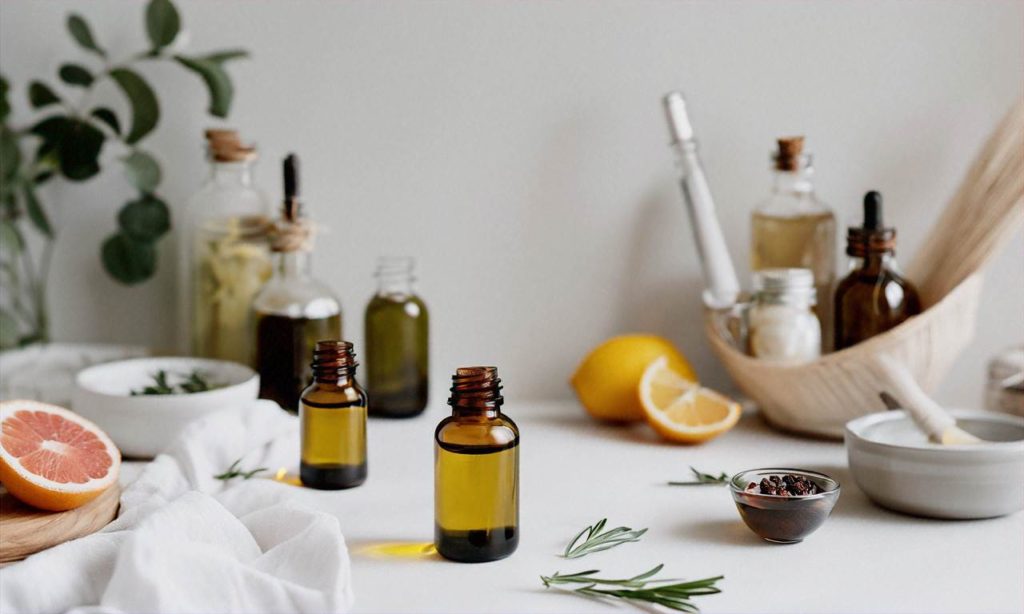
Safety Tips When Infusing Oils and Vinegars

When making infused oils and vinegars at home, be sure to follow proper food safety guidelines:

– Make sure all equipment, bottles and jars are completely sterilized first

– Use dried herbs and spices rather than fresh

– Strain out all herb and spice solids after infusing

– Refrigerate after making, for up to 6 months

– Check regularly for signs of spoilage or mold

– Discard any oils or vinegars that smell or look off

With the proper technique, infusing your own oils and vinegars can allow for creativity in the kitchen. You’ll end up with quality, artisanal products that make great gifts or cooking ingredients. Use our tips to guide you in choosing ingredients, methods and flavor combinations. Over time, you’ll learn exactly how to infuse oils and vinegars with spices tailored to your taste.

Making Your Own Spice Blends

Creating your own signature spice blends is a great way to add unique flavors to your cooking while saving money. It also allows you to control the quality and freshness of the spices you use. When making DIY spice blends, keep these tips in mind:

Get to Know Your Spices

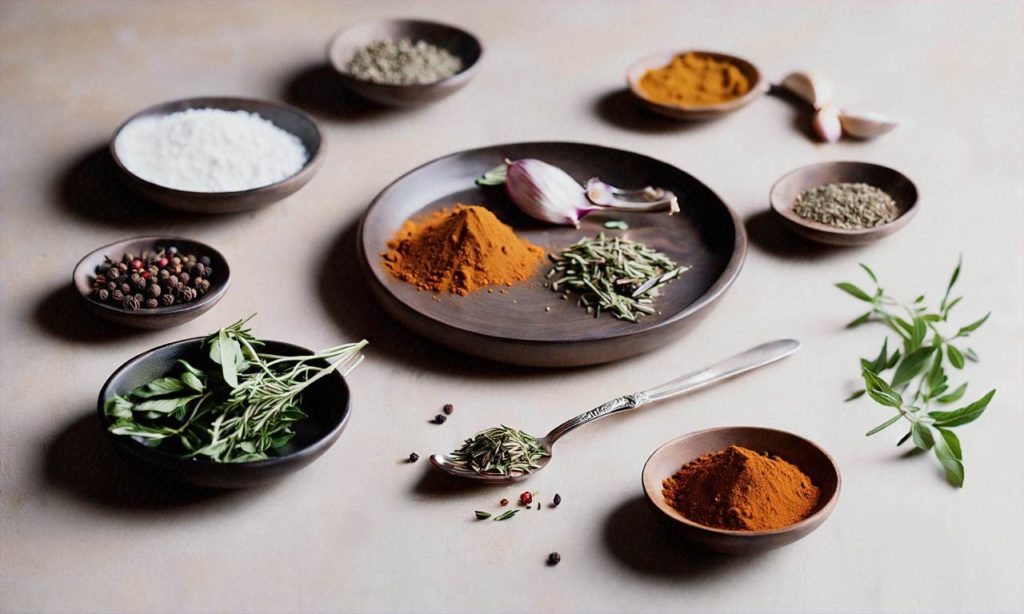
Before blending your own spices, take the time to experiment with different spices individually. Pay attention to each spice’s flavor profile, potency, and uses. Understanding the characteristics of individual spices will help you better balance and blend them. Some spices to familiarize yourself with include cumin, cinnamon, ginger, turmeric, oregano, basil, and garlic powder.

Start with a Base Spice

Many custom spice blends are anchored by a base spice that makes up the largest portion of the mix. Common base spices include salt, pepper, paprika, and cumin. The base creates the blend’s essential flavor, while supplementary spices enhance or alter it. For example, if you wanted an Italian-inspired blend, you may use oregano as the base.

Include Complimentary Spices

Choose supplementary spices that have complementary flavors to the base spice and to each other. If your base spice is sweet, balance it with spices known for savory, spicy, earthy or citrusy notes. Popular pairings include garlic powder with basil, cinnamon with nutmeg, and cumin with coriander. But don’t limit yourself to conventional combinations – experimentation is part of the fun!

Pay Attention to Proportions

The ratios of spices in your signature blend dramatically impacts its overall flavor. Start by adding small amounts of supplemental spices to your base spice. For the average blend, the base spice should make up at least half of the total amount. From there, add supplementary spices a teaspoon at a time until you achieve the desired synergy of flavors. Tweak and adjust to fit your tastes. Keep notes so you can recreate successes.

Consider Intended Uses

Tailor your homemade spice blend’s ingredients and proportions to how you plan to use it. Blends for grilling may emphasize spicy, woodsy spices and salt, while blends meant for cookies could feature warm baking spices. If you’ll use a blend to season various foods, strike a balance with universal flavors. Envision your ideal dishes when perfecting mixes.

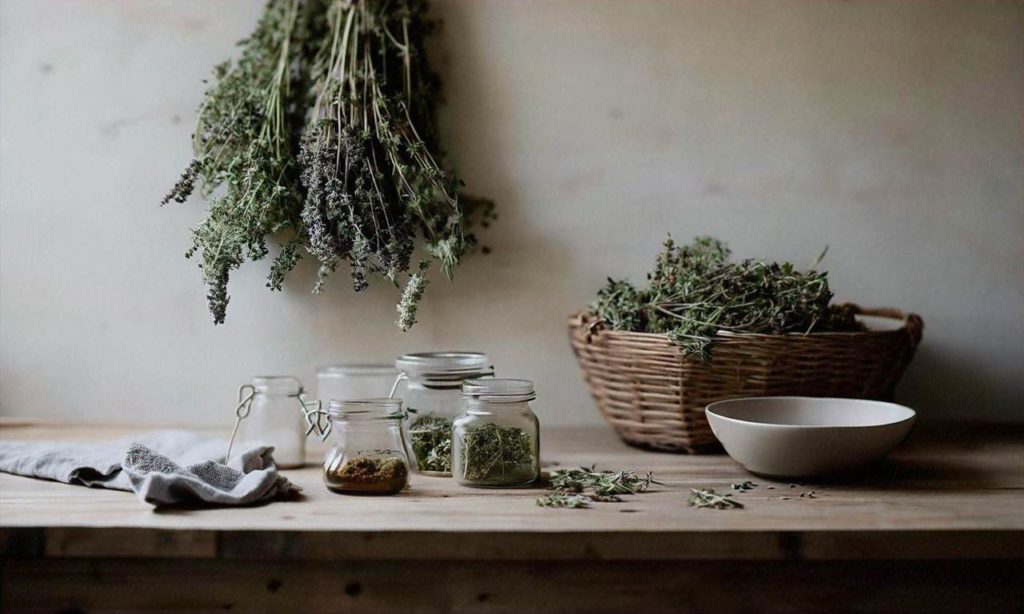
Store Properly to Retain Freshness

To preserve the flavors and potency of your spice blends:

– Store blends in airtight containers away from heat, moisture and sunlight. Glass jars work well.

– Only make as much of a blend as you’ll use within a few months. Spices lose potency over time.

– If blends lose their punch, add more of the bolder spices like chilies, ginger and garlic.

Get Inspired by Cuisine-Specific Blends

Each cuisine has signature spice blends that can spark ideas for your own combinations:

– Italian – basil, oregano, rosemary, garlic

– Indian – cumin, turmeric, ginger, coriander

– Mexican – cumin, chili powder, garlic, oregano

– Moroccan – cumin, cinnamon, paprika, cayenne

– Thai – lemongrass, garlic, galangal, kaffir lime

Try These Beginner-Friendly Blends

If you’re new to blending spices, these mixes make good starting points:

All-Purpose Seasoning Blend

Makes 1⁄2 cup. Good for meats, veggies and more.

Cooking with Spices: Tips for Balancing Flavors

– 1⁄4 cup salt

– 3 Tbsp. paprika

– 2 tsp. garlic powder

Cooking with Spices: Tips for Balancing Flavors

– 2 tsp. onion powder

– 1 tsp. black pepper

– 1 tsp. dried oregano

– 1⁄2 tsp. cayenne pepper (optional)

Pumpkin Pie Spice

Makes 1⁄4 cup. Ideal for autumnal baked goods.

– 3 Tbsp. ground cinnamon

– 2 tsp. ground ginger

– 1 tsp. allspice

– 1 tsp. nutmeg

– 1⁄2 tsp. cloves

BBQ Dry Rub

Makes 1⁄2 cup. Use on grilled meats, tofu and tempeh.

– 1⁄4 cup brown sugar

– 2 Tbsp. smoked paprika

– 1 Tbsp. chili powder

– 1 Tbsp. ground cumin

– 2 tsp. garlic powder

– 2 tsp. salt

– 1 tsp. pepper

We hope these tips inspire you to experiment with crafting your own unique spice blends! Feel free to tweak flavors to match your tastes and culinary creations.

Preserving the Bounty: How to Dry and Store Herbs

Preserving the Bounty: How to Dry and Store Herbs

Intro to Drying Herbs at Home

# Intro to Drying Herbs at Home

Drying herbs at home is a time-honored tradition that allows you to preserve the bountiful harvest from your garden or local farmers market to enjoy all year long. As interest in home cooking, gardening, and natural living continues to grow, more people are discovering the joys and benefits of drying their own herbs.

## Why Dry Your Own Herbs?

Drying herbs at home enables you to customize your dried herb selection to your taste preferences. You can choose which herbs to grow or buy fresh, then dry only those varieties perfectly suited to how you like to cook. Drying them yourself also ensures maximum flavor and aroma, as herbs begin losing these precious oils soon after being cut or picked. By drying them promptly yourself, you capture far more of their essence than store-bought dried herbs can offer.

You’ll also save money by drying herbs at home, rather than purchasing pre-packaged dried herbs which can be quite expensive in the quantities needed for frequent cooking use. Growing and drying your own allows you to inexpensively dry herbs in bulk.

## Satisfaction from the Seed to Jar Process

For many home cooks, gardeners, and those seeking a more self-sufficient lifestyle, there is great satisfaction that comes from preserving your own food. Drying herbs you have nurtured from seeds or cuttings, through harvest, is rewarding on many levels. The seed-to-jar process enables you to create customized spice blends perfectly matched to your cooking style. You’ll also reduce food waste by fully utilizing herbs at their peak freshness, then storing the excess to enjoy all year long.

## Key Benefits of Drying Herbs at Home

– **Save money** by not having to buy expensive store-bought dried herbs

– **Customize** your herb and spice selection to suit your taste

– **Maximize flavors & aromas** by drying herbs promptly after harvest

– **Reduce waste** by preserving seasonally abundant fresh herbs

– **Satisfaction** of the seed-to-jar process from garden to kitchen

## Getting Set Up for Drying Herbs at Home

While specialized equipment can be used, all you really need to get started drying herbs at home is some simple supplies you likely already have on hand. Herbs can be hung bundled to air dry, set on racks or trays, or for faster drying, a basic electric food dehydrator is very useful. Either way, with good air circulation, fresh herbs, and a little patience as they dry, you’ll have delicious dried herbs to enjoy or give as gifts.

The rest of this article will cover in detail…

Best Herbs for Drying

When it comes to drying herbs at home, some varieties preserve better than others. The best herbs for drying are those that have high oil content, as the oils help the herbs retain flavor and aroma even when the moisture has been removed. Here are the top herbs to consider drying.

Preserving the Bounty: How to Dry and Store Herbs

Rosemary

With its woodsy, pine-like fragrance and hints of lemon and mint, rosemary has one of the strongest and most complex flavors of common herbs. Its high oil content allows rosemary to retain its bold flavor profile very well when dried. To dry rosemary, hang small bundles upside down or place leaves on a drying rack. Dried rosemary pairs beautifully with meats, tomatoes, beans, breads, and eggs. Use dried rosemary in spice rubs, herbed salts and sugars, infused vinegars and oils, or in aromatic sachets.

Oregano

A staple of Italian and Mediterranean cuisine, pungent oregano also dries nicely. Oregano has a relatively high oil content, allowing its spicy, aromatic notes to come through when dried. Air drying works best for oregano. Use dried oregano in spice mixes for pizza, pasta, meat, fish, vegetables, salad dressings, and more. Or make flavored oils and vinegars with rehydrated dried oregano.

Thyme

With over a dozen varieties ranging from lemon to caraway, thyme is a wildly versatile culinary herb. Its small leaves and high oil content make thyme an excellent choice for drying. Hang thyme bundles to air dry or use a food dehydrator. Dried thyme maintains its sweet earthiness and bright herbal notes very well. Use it in everything from soups to roasted vegetables to marinades and compound butters.

Sage

Popular in fall dishes, sage has a woodsy, slightly peppery flavor. Its silver green leaves dry easily, retaining good color and flavor. Hang sage bundles to air dry fully before crumbling the crisp dried leaves from the stems. Use dried sage to season rich meats like pork, duck or sausage as well as winter squash dishes, hearty bean dishes, stuffings and dressings. Sage also makes a wonderful tea.

Lavender

Though technically an ornamental, culinary-grade lavender has a sweet, floral quality used to infuse everything from sugar to shortbread cookies. English lavender varieties like Munstead or Hidcote work best. Cut lavender stems when flowers are fully opened and hang small bundles to dry thoroughly. Use dried lavender to make floral sugars, salts, lemonades and scones. Or use in savory rubs for meats and chicken.

Bay Leaves

Bay leaves impart a distinctive, slightly menthol-like note popular in European and Indian cuisine. Fresh bay leaves do not fully release their unique flavor until dried. Air drying bay leaves is simple – just hang branches upside down. Crumble the dried bay leaves before use. Simmer stews, beans or grains with a bay leaf then remove before serving. Or make a bay leaf-infused oil.

Tarragon

Known for its distinct licorice-anise flavor, tarragon’s long slender leaves can be dried easily at home. Simply gather stems, secure with a rubber band, and hang upside down to dry. Dried tarragon makes an interesting addition to herbal vinegar or compound butter. It also pairs nicely with fish, chicken, eggs, tomatoes and carrots. Use sparingly though, as tarragon’s flavor intensifies when dried.

Marjoram & Summer Savory

Close herb cousins marjoram and summer savory have a mild, sweet flavor similar to oregano. Their petite leaves dry quickly either on a rack or hanging in bundles. Dried marjoram and savory are perfect for spice rubs, herbed oils and flavored salts. Use to season eggs, fish, poultry, tomatoes, mushrooms and more. Their mellow flavor allows them to blend nicely with heartier dried herbs.

Mint

Cool and refreshing mint comes in several popular varieties including peppermint and spearmint. Mint’s high oil content helps retain its unmistakable flavor when dried properly. For best results, dry smaller mint leaf bundles hung upside down in a dark, well-ventilated area. Once fully dried, store mint in an airtight container away from light. Use dried mint in tea blends, beverages, desserts, fruit salads and more.

No matter which herbs you choose to dry, the key is making sure stems and leaves dry completely before storage to avoid mold growth. Dried correctly, these aromatic herbs will add flavor to your cooking all year long. Be sure to label all dried herbs with the name and date before storing. Refer to “How to Dry Herbs with Each Method” for more specifics on the best drying technique for each herb variety. With the bounty of summer preserved, you can bring vibrant herbal flavor to soups, stews and slow-cooked dishes throughout the fall and winter.

Drying Methods: Air Drying, Using a Dehydrator, Freezing

When it comes to preserving fresh herbs from the garden or market, drying is one of the easiest and most effective methods. Drying removes the moisture from herbs, allowing them to be stored for months while retaining their aromatic oils and flavors. There are several techniques for drying herbs at home to lock in that just-picked freshness before the bounty of summer fades.

Air Drying Herbs

Air drying takes advantage of natural airflow to slowly remove moisture from fresh herb leaves over the course of several days or weeks. To air dry herbs, gather stems together in small bundles with rubber bands or string and hang them upside down in a warm, dry, dark place with good ventilation. Some good spots include a kitchen, pantry, attic, or shed. The herbs should not be in direct sunlight or exposed to high humidity during the drying process.

Check the herb bundles periodically until the leaves are crispy and crumble easily between your fingers. This drying process can take one to four weeks depending on the moisture content of the herbs, the temperature and airflow of the space, and the herb variety. Delicate herbs like basil, mint, and parsley may dry faster than hardy herbs like rosemary, sage, thyme and oregano.

Once the herbs are crispy dry, you can crumble them off the stems into airtight glass jars or containers. Make sure to label jars with the herb variety and date before storing in a cool, dark place for up to a year. With proper air drying and storage methods, you’ll have access to garden-fresh flavor all year long when making recipes from “Preserving the Bounty: How to Dry and Store Herbs.”

Preserving the Bounty: How to Dry and Store Herbs

Using a Food Dehydrator

A food dehydrator offers an accelerated way to dry herbs using controlled low heat airflow. Using an electric food dehydrator shortens the typical air drying time to just a few hours and protects delicate herbs from mold, mildew, and dust during the process.

To use a dehydrator, wash and pat dry fresh herb stems to remove dirt or debris. Lay the stems in a single layer on dehydrator trays, making sure not to overpack them. Set the dehydrator between 95°F to 115°F and let it run for two to four hours. Check periodically until the leaves become crispy and crumble easily. Then store the dried herbs in airtight containers as described above.

The major benefit of using a food dehydrator is the fast active drying time compared to passive air drying. Dehydrators also provide more control and predictability over the process. Just be careful not to dry the herbs at too high a temperature, as this can diminish the aromatic essential oils. Refer to your dehydrator manual for specific time and temperature guidelines based on the model.

Freezing Herbs

Freezing is best for soft, leafy herbs like basil, chives, cilantro, dill, mint, and parsley which don’t hold up as well to air drying or dehydrators. To freeze herbs, wash and dry the leaves, then chop them finely or puree in a food processor. Spoon the herbs into ice cube trays and cover with water or oil before freezing overnight.

Once frozen, pop the herb cubes out of the tray and transfer to airtight freezer bags. Squeeze out excess air and label with the variety and date. Frozen herbs will keep for about six months before losing flavor. Their delicate leaves turn mushy when thawed but can be easily incorporated into sauces, soups, pestos, and more. The freezing process better preserves the color and flavor of delicate herbs compared to drying methods.

Get the Most out of Dried Herbs

Now that you know the best practices for air drying, using a food dehydrator, and freezing, you can stock up on herbs to flavor recipes all year long. Refer to “Preserving the Bounty: How to Dry and Store Herbs” for more tips on storing, using, and blending dried herbs. Discover creative ways to use your dried herb bounty and the fascinating history behind herb preservation across cultures and cuisines.

How to Dry Herbs with Each Method

# How to Dry Herbs with Each Method

Drying herbs at home is a great way to preserve the bounty from your garden or local farmers market. Properly dried herbs can retain much of their flavor and aroma for months when stored correctly. There are a few methods for drying herbs at home to best maintain their quality.

## Air Drying

Preserving the Bounty: How to Dry and Store Herbs

Air drying is the most common method for preserving herbs at home. To air dry herbs, gather clean herb sprigs into small bundles using cotton string or rubber bands. Hang these bundles in a warm, dry, dark place with good airflow. The warmth helps the moisture evaporate while the darkness prevents light from diminishing the flavors and aromas.

Ideal places for air drying herbs at home include a kitchen, pantry, attic or garage. Hang the herb bundles from the ceiling or place them in wire racks. Make sure the herbs are not touching each other or any surfaces. Air flow is crucial so the herbs dry quickly before any mold develops. Check the bundles every few days until the herbs are fully dried. This can take 1-2 weeks depending on the moisture content.

Some good herbs for air drying include:

– Oregano

– Sage

– Thyme

– Rosemary

– Lavender

– Mint

– Lemon Balm

These hardy herbs retain their flavors well when air dried. More delicate herbs like basil, chives and parsley are better preserved through freezing.

## Using a Dehydrator

Preserving the Bounty: How to Dry and Store Herbs

A food dehydrator offers an accelerated way to dry herbs at home while preserving more of their original quality. Dehydrators use low consistent heat, airflow and timed drying cycles to efficiently remove moisture. Most dehydrators have stackable trays with mesh screens that allow airflow on all sides.

To dry herbs in a dehydrator, place cleaned herb sprigs or leaves in a single layer on the trays. It’s best not to overfill the trays or overlap the herbs too much. Set the temperature between 95-100°F and let the machine run its cycle, usually 6-12 hours. Check periodically and stop when the herbs are crispy. Then promptly store in airtight containers.

Some great herbs for dehydrating include:

– Basil

– Oregano

– Marjoram

– Chives

– Parsley

– Cilantro

The gentle even heat helps retain more essential oils and flavor in these delicate herbs compared to air drying.

## Freezing Herbs

Freezing is a great way to preserve the fresh flavors of more delicate herbs like basil, chives and cilantro. Start with clean fresh herb leaves, chopped if large. Place mounded portions on a baking sheet and put in the freezer until frozen solid. Then promptly transfer to airtight containers or bags. Label with the herb type and freeze for up to 6 months.

The quick freezing process helps lock in the flavors, colors and nutrients better than drying. Frozen herbs are great for adding to soups, stews, sauces and more all year long. Try these herbs frozen:

– Basil

– Chives

– Cilantro

– Parsley

– Dill

– Tarragon

Freezing isn’t ideal for sturdy woody herbs like rosemary, thyme and sage. For best results, air dry these herbs instead.

Follow these simple methods for drying or freezing herbs at home to preserve the bountiful flavors of the growing season. With proper storage, dried and frozen herbs can add their aromatic qualities to all sorts of delicious recipes for months to come.

Storing Dried Herbs Properly

Once you’ve gone to the effort of drying your fresh herb bounty, you’ll want to make sure you store the dried herbs properly so they retain maximum flavor and aroma. Proper storage is key for preserving dried herbs from season to season.

When storing dried herbs, the enemies are light, heat, moisture and air. Protecting your dried herbs from these elements will help them retain volatile oils and prevent loss of flavor, changes in color and texture, and spoilage. Here are some tips for storing dried herbs properly after drying.

Use Opaque, Airtight Containers

You’ll want to store your dried herbs in containers that block light and prevent air and moisture from getting in. Clear glass jars may seem attractive, but light causes herbs to lose color and aroma over time. Instead, use containers made of opaque materials like ceramic, metal or opaque plastic. You can reuse glass jars and containers if they have tight-fitting lids. Mason jars work very well for storing dried herbs. Any container should have an airtight seal. You want to keep as much air out as possible to prevent oxidation. Vacuum sealing bags or canisters are ideal for an airtight environment and for pushing out air before sealing.

Store Herbs in a Cool, Dark Place

In addition to airtight, opaque containers, store dried herbs in a cool, dark place. Warmth and light will speed deterioration of herbs. Store containers in a cupboard, pantry or cabinet away from heat sources like appliances or windows. An ideal storage temperature is between 50°F and 70°F. The refrigerator is usually too humid, but the freezer can be used if herbs are vacuum sealed or stored with desiccants.

Check for Moisture and Mold

No matter how airtight you think your storage method is, it’s wise to check dried herbs periodically for moisture and mold. Condensation can form even in sealed containers when temperatures fluctuate. Look for moisture collecting inside containers or droplets on herbs, which can cause mold. Check for fuzzy mold starting to grow on leaves or stems. Discard any dried herbs that show moisture or mold. They can contaminate the rest of your dried stock.

Use Desiccants

Desiccants are moisture-absorbing substances that can pull existing moisture from containers and herbs. This prevents condensation and moisture from damaging dried herbs in storage. Common desiccants are silica gel packs, dry rice, chalk, sand and salt. They are especially useful if storing herbs in the refrigerator or freezer where excess moisture can collect.

Proper Labelling

Always label dried herb containers with the name and date. Dried herbs tend to look similar, so labels prevent confusion. Date labels let you use older stock first and know when it’s time to discard dried herbs. Track storage times for each type of herb. Heartier herbs like oregano, thyme and rosemary can last 1-2 years or longer. More delicate herbs like basil, parsley, chives and mint last about a year.

Creative Storage Ideas

In addition to traditional containers and humidity-controlled methods, get creative with how you store dried herbs. Decorative glass bottles, wire baskets and magnetic strips for herb jars open up visual storage options. Dried herb wreaths and bouquets make beautiful displays. Shelving units or pull-out vertical herb gardens bring frequently used herbs within easy reach. Match storage style with your kitchen or pantry decor.

With proper opaque, airtight containers stored in cool, dark spaces, checking moisture and mold, using desiccants, labelling and getting creative, you can successfully preserve all your lovingly home-dried herbs. Follow these dried herb storage tips, and you’ll be enjoying the flavorful bounty of your herb garden for months or even years after harvest.

Using Dried Vs. Fresh Herbs in Recipes

When it comes to using herbs in cooking and recipes, most chefs and home cooks have a preference for either fresh or dried herbs. Both come with their own sets of pros and cons, and it largely depends on the specific recipe and what flavors you are trying to achieve. Understanding when to use dried herbs versus fresh herbs can elevate your dishes to new heights.

The key difference between dried and fresh herbs lies in their intensity of flavor. During the drying process, herbs lose moisture but gain potency as their oils become more concentrated. As a general rule of thumb, 1 teaspoon of dried herbs equals 1 tablespoon of fresh. So when substituting, be sure to adjust quantities accordingly. Overdoing it on potent dried herbs can ruin a dish.

Preserving the Bounty: How to Dry and Store Herbs

Fresh herbs like basil, parsley, cilantro, dill, and mint add a vibrancy and brightness that complements many dishes beautifully. Their grassy, green flavor provides balance against rich, fatty, or acidic components. Fresh herbs are best used raw or added at the end of cooking. Too much heat diminishes their delicate notes.

Meanwhile, heartier dried herbs like oregano, thyme, rosemary stand up well to longer cooking times, allowing their flavors to infuse gradually into braises, stews, soups and more. Their intensity pairs especially well with roasted meats, long-simmered beans or hearty tomato sauces. Just remember that a little goes a long way.

Certain herbs retain their flavor better after drying than others. Oregano, thyme, bay leaves, and rosemary are prime candidates for drying and do well in slow-cooked preparations. On the other hand, more delicate herbs like basil, cilantro, dill, mint and parsley lose some of their nuance when dried. They are best used fresh.

When developing your own recipes, consider whether you want a punch of strong herbal flavor or a brighter, greener taste. This will guide you towards using the dried or fresh version of that particular herb. And never be afraid to experiment! Taste and adjust until you achieve the perfect flavor profile. With practice, balancing and layering herbs will become second nature.

Getting the Most Out of Your Dried Herbs

Dried herbs are a wonderful way to preserve the bounty from your garden or farmers market purchases. Properly stored dried herbs can last for months or even years, allowing you to enjoy their flavor, aroma, and health benefits long after fresh herbs have wilted. This section will provide tips on how to get the maximum flavor, nutrition, and usage out of your dried herbs.

Maximize Flavor

Flavor is the number one reason most people dry herbs at home. To get the most flavor out of dried herbs, it’s important to harvest or purchase herbs at their peak. For home gardeners, pick herbs just before flowering when the essential oil content is highest. Store dried herbs in airtight containers away from light and heat to help preserve the volatile aromatic oils. Over time, dried herbs will lose potency so try to use within one year. Before adding older dried herbs to recipes, rub them between your fingers to release the oils.

When cooking with dried herbs, use about 1/3 of the amount you would use with fresh. Their flavor is highly concentrated. Start with less and add more to taste. The small, dried pieces tend to disperse nicely throughout a dish. However, very old, dried whole herbs may need crushing or crumbling to release more flavor. In slow cooked recipes, add dried herbs early on so they have time to rehydrate and impart their essence. In quick cooking preparations, sprinkle them in at the end.

Get More Nutrition

Drying concentrates the nutrients and health promoting compounds in herbs as the water volume is decreased. The antioxidant, anti-inflammatory, and antimicrobial properties remain intact. Stock your pantry with dried antioxidants like oregano, sage, rosemary, and thyme to boost the nutrition of soups, grains, meats, vegetables and more in daily cooking. The portability, shelf life and nutrition density of dried herbs makes them perfect for backpacking meals and emergency food storage as well.

Creative Uses

Think beyond seasoning and explore other creative ways to use your dried herb bounty. Make fragrant herbal vinegars, oils, butters or salts to add intrigue to cooking and gift giving. Use them in homemade soaps, sachets or potpourri. Brew flavorful sun tea. Craft herbal crafts and wreaths for seasonal decor. Mix dried lavender, rose petals or lemon verbena into baked goods, jam glazes or beverages. The possibilities are endless.

Follow Proper Storage

Getting the most out of your dried herbs depends greatly on proper storage. After drying, allow herbs to equilibrate in moisture content for 1-2 weeks before jarring up. Then store dried herbs in airtight glass jars kept out of direct light. Label jars with the herb name and date to help use older herbs first. Store delicate herbs like basil for up to 6 months. Heartier herbs like oregano and thyme can last 1-2 years stored properly. Refrigeration can help prolong shelf life but is not required.

Check periodically for moisture build up in stored jars. Excess moisture invites mold growth which necessitates discarding herbs. If condensation occurs, the herbs likely were not dried thoroughly enough before storage. Consider investing in a dehydrator which dries herbs faster and more evenly than air drying. Follow the manufacturer’s instructions for best results.

The satisfaction of growing, harvesting, and preserving herbs from garden or market is hard to beat. With proper drying technique and storage, you can enjoy their convenience, nutrition, and flavor for months on end. We hope these tips will help you get the most out of your dried herb bounty this season and beyond.

Creative Ways to Use Dried Herbs

Dried herbs open up a world of flavor possibilities in the kitchen. When herbs are dried properly, they retain much of the aromatic oils and intense flavors that make them so versatile in recipes. With a little creativity, home cooks can transform dishes by artfully incorporating dried herbs.

One creative way to use dried herbs is to make compound butters. These flavorful butters are easy to prepare. Simply allow a stick of butter to soften and mix in 2-3 tablespoons of dried herbs like rosemary, thyme, or oregano along with a clove of minced garlic, lemon zest, or other complementary ingredients. Form the flavored butter into a log, wrap tightly, and chill before slicing off pats to top meats, vegetables, breads, and more. The butter melts over hot foods, releasing a burst of herbal flavor.

Preserving the Bounty: How to Dry and Store Herbs also recommends rehydrating dried herbs to use in place of fresh. To rehydrate, cover the dried herbs with hot water and let sit for 5-10 minutes before draining thoroughly. Rehydrated herbs like basil, cilantro, and parsley can be used to prepare pesto, chimichurri, compound butters, and salad dressings. Their softened texture and revived flavor closely resembles fresh.

Get creative with dried herb blends by mixing your own signature combinations to liven up everyday dishes. Play with herbal flavors like lemon thyme, oregano, and marjoram or make a Moroccan-inspired blend with cumin, coriander, and mint. Use the blends to season meat rubs, sprinkle over vegetables before roasting, or whirl into hummus, tapenades, and salad dressings.

Preserving the Bounty: How to Dry and Store Herbs suggests infusing vinegars and oils with dried herbs to extract vibrant flavor. Popular herb combinations include rosemary, garlic, and red pepper flakes or basil, oregano, and lemon zest. Use the infused vinegars to make herbal salad dressings and marinades or the infused oils for dipping breads. The longer the dried herbs steep, the more intense the infusion.

Finally, one of the most creative ways to use dried herbs is by making herbal teas. Tea blends pair nicely with dried mints, lemon balm, lavender, fennel, rose petals, hibiscus, and more. For best flavor extraction, cover the herbs with boiling water and allow to steep for 5-7 minutes. Sweeten if desired or enhance the tea with a squirt of citrus juice. Sip these aromatic herbal infusions hot or chilled over ice.

Dried herbs offer so many possibilities to craft flavorful foods and beverages at home. With a supply of herbs dried properly and stored correctly, home cooks can get creative blending spices and experimenting with new ways to incorporate intense herbal flavor into everyday meals.

Preserving the Bounty: How to Dry and Store Herbs

Seasonings and Spice Blends from Dried Herbs

Dried herbs are extremely versatile ingredients that can be used to add flavor to almost any savory dish. One of the best ways to make the most of your home-dried herb bounty is to use them to create customized spice blends and herb seasonings. Blending dried herbs together, or with other dried spices and ingredients, allows you to create unique flavor combinations that put your dried herbs to excellent use.

When creating dried herb spice blends and seasonings, the possibilities are endless. You can opt for simple combinations featuring two or three complementary herbs, or craft complex blends with five or more herbs and spices. The blends can then be used to season everything from meat and fish, to vegetables, grains, and more. Staple herbs to have on hand for blending include rosemary, thyme, oregano, basil, and sage. Consider combining these with ingredients like garlic powder, onion powder, crushed red pepper, lemon zest, and more.

Some herb and spice blend ideas to try:

Herbes de Provence – This traditional French blend combines savory, lavender, basil, thyme, and fennel seed. Delicious with chicken, fish, lamb, and vegetables.

Italian Seasoning – A mix of basil, oregano, rosemary, thyme, garlic powder, and crushed red pepper. Perfect for pasta sauces, pizza, tomatoes, chicken, and more.

Za’atar – A Middle Eastern blend featuring thyme, oregano, marjoram, sesame seeds, and tangy sumac. Great on flatbreads, hummus, lamb, and vegetables.

Fines Herbes – A French blend with subtle onion and garlic flavors. Made with parsley, chives, tarragon, and chervil. Lovely with eggs, chicken, fish, potatoes, and rice.

Pork Rub – For grilled and roasted pork, combine rosemary, thyme, sage, garlic powder, onion powder, paprika, mustard powder, salt, and pepper.

Lemon-Dill Seasoning – Mix lemon zest with dried dilled, parsley, chives, and tarragon. Sprinkle on fish, chicken, potatoes, and vegetables.

Once you’ve created your own signature spice blends, store them in airtight containers out of direct sunlight to preserve freshness. Make sure to label each container with the blend name and ingredients. Over time, the flavor and potency of dried herb blends will start to diminish. For best results, try to use up homemade blends within 3-6 months. You can also make the blends in smaller batches that you can remake fresh when needed.

When cooking with your homemade herb blends and seasonings, add them at the beginning of the cooking process whenever possible. This allows time for the flavors to fully develop and permeate the ingredients. Start with smaller amounts, taste, and add more blend to adjust flavor as desired. Remember that dried herb flavors will concentrate and intensify as dishes cook.

Get creative with how you incorporate your homemade herb blends into recipes. Use them to coat proteins before searing or roasting. Mix them into compound butters, marinades, dressings, and sauces. Sprinkle them over finished dishes. The possibilities are endless!

Creating your own herb spice blends and seasonings is an extremely gratifying way to preserve and make the most of herbs you grew and dried yourself. Experiment, customize flavors to your taste, and soon you’ll have signature blends that enliven and elevate everyday cooking.

The History of Drying Herbs

Preserving the Bounty: How to Dry and Store Herbs

# The History of Drying Herbs

Preserving the Bounty: How to Dry and Store Herbs

Herbs have been dried and preserved for thousands of years as a way to make their flavor, nutrients, and medicinal properties last longer. The practice of drying herbs likely originated out of necessity – to store herbs for use during colder months or periods when fresh herbs were not available. However, drying has evolved into an artform and science over the centuries.

Archaeological evidence shows that as early as 1200 BC, ancient Egyptians dried herbs like oregano, mint, sage, and thyme for use in cooking, medicine, religious ceremonies, cosmetics, and more. Clay pottery found in ancient Egyptian tombs contained trace elements of dried herbs and spices.

In ancient Greece and Rome, dried herbs like rosemary, bay leaves, and parsley were commonly traded. These civilizations understood the technique of air-drying herbs in bunches or on trays out in the hot Mediterranean sun. Storing herbs in clay jars was also practiced to retain aroma and flavor.

During the Middle Ages, herbs were grown and dried extensively in monastery gardens across Europe. Monks perfected drying methods and became skilled apothecaries, using dried herbs extensively for medicinal purposes during a time when little other medicine was available.

The spice trade expanded drying and preservation techniques even further as merchants transported herbs longer distances around the globe. Spices like black pepper, cinnamon, cardamom and others from Asia and the Middle East were shipped dried to Europe by land and sea. Later, herbs native to the New World like chili peppers, vanilla, and allspice were dried and exported back to Europe as the exploration age took off.

Of course, no discussion of herb drying history is complete without mentioning the Salem Witch Trials of 1692. Many of the “witches” who were persecuted and executed in Salem grew and dried herbs, which led locals to become suspicious of their practices. This illustrates how in some historical periods, herb craft was seen as mystical and dangerous rather than the useful culinary and medicinal art it truly was.

Today, thanks to centuries of accumulated wisdom, drying techniques allow us to enjoy the preserving the bounty of flavor, nutrients, and unique properties herbs have to offer year round. While modern technology like refrigeration and freezing exist, drying remains popular for intensifying herb flavor as moisture dissipates, ease of storage, sustainability, and retaining medicinal qualities that can degrade from freezing.

Understanding the rich history of drying gives deeper appreciation of herbs’ enduring role in cuisine, health, culture and our lives. When we utilize the power of herbs in everyday cooking or remedies, we stand on the shoulders of herb craftspeople from ancient times and connect to humanity’s long tradition of gathering nature’s bounty.

Regional Dried Herbs in Cuisine

Herbs and spices have been used to flavor and preserve foods for thousands of years. Different regions around the world have their own unique dried herbs that are integral parts of the local cuisine. Understanding the dried herbs used in regional cooking can open up new flavor profiles and dishes to try at home.

The Mediterranean region is well known for its use of oregano, thyme, rosemary, and sage. These hardy herbs grow well in hot, sunny climates and lend themselves perfectly to drying. Dishes like pasta sauces, roasted vegetables, meat rubs, and stuffings are often seasoned with a blend of dried Mediterranean herbs. Going beyond the usual suspects, za’atar is a Middle Eastern spice blend made with thyme, oregano, marjoram, sesame seeds and sumac that is used on everything from breads to meats. Preserving these aromatic herbs by air drying or using a dehydrator allows cooks to enjoy their flavor all year round.

India is the source of many warm, earthy dried herbs and spices like turmeric, cumin, coriander, fenugreek, cinnamon, cardamom, and curry leaves. These are blended into complex masalas and garam masalas to flavor regional specialties. Drying these herbs, spices, and blends concentrates their essences for heightened flavor and aroma. They keep for months when stored properly, allowing Indian cooks globally to recreate authentic dishes.

Provence in France has given us two of the most popular dried herbs – lavender and herbes de Provence. The floral notes of dried lavender have many culinary uses like flavoring sugars, desserts, beverages, vinegars, honey, and more. Herbes de Provence typically contains a mixture of rosemary, thyme, oregano, and savory that perfectly seasons everything from roasts to vegetables when rehydrated or blended into a seasoning salt.

Mexico’s earthy, smoky dried herbs like chipotle chiles, ancho chile powder, Mexican oregano, and epazote are irreplaceable in authentic mole sauces, salsas, beans, soups, and meats. Using dried chiles allows the flavor to be concentrated without too much spiciness. Regional herbs like epazote have antimicrobial properties that aid in preserving foods in hot climates. With creative use of Mexican dried herbs and chiles, home cooks can put together complex layers of flavor.

Understanding the dried herbs used in regional cuisines opens up new dimensions of flavor in the kitchen. Experimenting with za’atar from the Middle East, garam masala from India, herbes de Provence from France or dried chiles from Mexico allows anyone to add authentic touches to their cooking. Though fresh herbs have their place as well, extending the bounty through proper drying techniques preserves the essence of herbs to be used all year long. Whether air dried, dehydrated or frozen, dried herbs impart convenience along with concentrated flavor and aroma. As this article has shown, incorporating regional dried herbs into cuisine is an easy way to add new flavors and complexity while preserving the harvest.

Mastering the Art of Flavor Layering with Herbs and Spices

Mastering the Art of Flavor Layering with Herbs and Spices

The Art of Layering Flavors with Herbs and Spices

The art of cooking is all about layering flavors to create depth and complexity. Mastering the skillful use of herbs and spices is key to elevating the flavor profile of any dish. When herbs and spices are thoughtfully paired and added in the right stages of cooking, they meld together to form a symphony of aromas and tastes that delight the palate.

The first step to mastering the art of flavor layering with herbs and spices is understanding their flavor profiles. Herbs like basil, oregano and thyme have green, fresh notes that brighten up dishes. Spices like cumin, coriander and cinnamon add warmth and sweetness. By thoughtfully combining herbs and spices, you can build flavor layers that transition from bright green tops to warm, earthy bases.

Another key technique of flavor layering is to first cook aromatics like onion and garlic to deepen their flavor. Then add herbs and spices to bloom in the hot oil, releasing their essential oils. This builds a flavor base. Next, add main ingredients like vegetables or meat, allowing the layers to infuse. Finally, finish with fresh herbs to add vibrancy. This moves flavors from earthiness to brightness.

When layering flavors through cooking, don’t forget finishing touches. Herb-infused oils and spice blends elevate the flavors even further. Balancing bitter and sweet notes prevents any one flavor from overpowering. Thoughtful seasoning through all stages of cooking is key to mastering the art of flavor layering with herbs and spices.

The end goal is a symphonic harmony of flavors that transitions beautifully throughout each bite. Mastering the subtle art of knowing which herbs and spices to combine at the right stages allows home cooks to orchestrate flavor journeys that delight. So explore layering bright herbal notes with warming spices and unlocking new depths of flavor.

Understanding Flavor Profiles of Common Herbs and Spices

Herbs and spices are the foundation for mastering the art of flavor layering. By understanding the unique flavor profiles of common herbs and spices, home cooks can learn how to combine them for maximum impact.

When building layered flavors in a dish, it helps to think of herbs and spices in terms of flavor “notes” – like in music or perfumery. Some offer sharp, pronounced top notes while others provide deeper, richer base notes. Skillful layering creates a harmonious balance across the flavor spectrum.

Here is an overview of popular culinary herbs and spices broken down by predominant flavor notes:

Top Note Herbs:

Basil – Sweet, peppery, licorice

Chives – Mild onion and garlic

Cilantro – Bright, citrusy, soapy

Dill – Grassiness, anise

Lemongrass – Bright lemon zest

Marjoram – Pine, citrus

Mint – Cool and peppery

Oregano – Woodsy, earthy, warm

Rosemary – Pine, lemon, eucalyptus

The pronounced flavors of these top note herbs can stand out even in small quantities, so restraint is key when layering them into a dish. Too much risks overpowering other ingredients.

Mid Note Herbs and Spices:

Cumin – Earthy and bitter

Paprika – Sweet and smoky

Parsley – Light, fresh, grassy

Tarragon – Licorice, vanilla, anise

Thyme – Woodsy, clove, mint

These mid note seasonings bridge the gap between top and base notes. They have enough depth to avoid getting lost among bold ingredients but enough restraint to let other flavors shine.

Base Note Herbs and Spices:

Allspice – Clove, cinnamon, nutmeg

Cardamom – Woodsy, citrusy, ginger

Cinnamon – Warm, sweet, woody

Cloves – Sharp, warm, bitter

Coriander – Citrusy, floral, sage

Ginger – Zesty, peppery

Nutmeg – Sweet, spicy

The rich yet subtle flavor profile of base note seasonings acts as the foundation. Much like bass notes in music, even small amounts provide depth and dimension without overtaking the melody.

By thoughtfully combining herbs and spices from across the flavor spectrum, home cooks can master the art of building layered, harmonious flavor journeys in their cooking.

Complementary Herb and Spice Pairings for Maximum Impact

When layering flavors in cooking, using complementary herbs and spices can take your dishes from bland to brilliant. Skillfully combining certain herbs and spices creates an explosion of flavor, with each ingredient enhancing the others. By thoughtfully pairing complementary herbs and spices, home cooks can master the art of flavor layering for maximum impact.

One foundational pairing is rosemary and garlic. The piney woodiness of rosemary beautifully balances the pungent bite of garlic. Add both while sautéing vegetables, roasted meats, and tomato sauces to lend depth and complexity. Experiment with using fresh or dried rosemary to vary the intensity.

Basil and tomato is another classic combination, as the sweet licorice notes of basil cut through the bright acidity of tomato. For best results, add torn fresh basil leaves at the end to preserved the flavor. This pairing adds lightness and brightness to Italian dishes from pizza to Caprese salad.

Peppery cayenne and warming cumin complement each other when blended into Tex-Mex dishes like chili con carne. The heat of the cayenne contrasts with the earthiness of cumin for a well-rounded flavor profile. Balance to taste and use restraint with the cayenne to allow the cumin to shine.

Mastering the Art of Flavor Layering with Herbs and Spices

Cilantro and lime also make perfect partners, as the citrusy acidity of lime balances the grassy, aromatic cilantro. Mix together in salsas, marinades for meats, and sprinkle over finished Thai or Mexican dishes. The lime brings out the crisp freshness of the cilantro.

Mastering the Art of Flavor Layering with Herbs and Spices

For something sweet, cinnamon and vanilla make a classic pairing as the heat of cinnamon contrasts with floral vanilla. Bake into desserts and drinks, or sprinkle on fruit. Pairing these spices creates a comforting blend of spicy warmth and sweetness.

Experiment with herb and spice combinations to discover new complementary pairings. Taste as you cook and adjust amounts to achieve the perfect balance and maximum flavor impact. With practice, home cooks can truly master the subtle art of layering herbs and spices to take any dish from bland to brilliant.

Building Depth of Flavor from Base to Top Notes

Mastering the art of flavor layering with herbs and spices is all about building depth of flavor. When herbs and spices are skillfully combined, they create a flavor journey that gradually unfolds from the first bite to the last.

The key to achieving this depth of flavor is to think about seasonings as having base, middle and top notes. Base notes provide the foundation, middle notes add complementary flavors, and top notes supply finishing touches. Careful layering creates a dynamic interplay of flavors that keeps the palate intrigued.

Most dishes start with aromatics like onion, garlic and celery which make up the base notes. Sautéeing the aromatics in oil allows their flavors to permeate the entire dish. To this foundation, culinary herbs like thyme, rosemary, oregano and bay leaf can be added to provide earthy, bittersweet flavors. These make up the middle notes that create richness and complexity. Finally, top notes like freshly cracked black pepper, chili flakes and chopped parsley give a burst of flavor and vibrancy just before serving.

Building depth of flavor is an art that involves restraint. The base and middle notes do the heavy lifting in terms of flavor. Top notes should be used judiciously so they don’t overwhelm the fundamental flavors. Understanding flavor profiles of herbs and correctly layering them creates dishes with incredible depth and dimension.

Another way to reinforce base notes is by infusing oils and vinegars with herbs and spices. Extra virgin olive oil infused with rosemary and garlic doubles down on the aromatics even before cooking begins. Similarly, red wine vinegar infused with peppercorns and bay leaf brings those earthy, bittersweet notes to salad dressings and marinades. When thoughtfully combined, these infused ingredients anchor the foundational flavors.

The interplay of base and top notes can transform everyday dishes. For example, pairing bitter greens like kale or collard greens with the bright heat of chili flakes balances out the strong bitter notes. This combo highlights the vegetal flavors of the greens instead of letting bitterness dominate. Even humble dishes like roasted potatoes pop with flavor when rosemary, garlic and oregano season the base while lemon zest and parsley provide brightness on top.

Skillful layering of herbs and spices creates depth by building complexity through every stage of cooking. Base notes laid first, middle notes to enhance, and top notes to punctuate each play a role. Mastering the art of restraint allows the flavors to shine through. With practice, layering herbs and spices becomes an intuitive way to craft dishes with incredible depth and dimension.

Infusing Oils and Vinegars with Herb and Spice Blends

One of the keys to mastering the art of flavor layering with herbs and spices is infusing oils and vinegars with customized blends. This allows you to impart deep, complex flavors into dishes in a way that perfectly balances and harmonizes with the other ingredients.

When infusing oils and vinegars, you want to carefully select herbs and spices that will complement each other. Some classic pairings include basil, oregano and garlic; rosemary and black pepper; or cilantro, cumin and coriander. You can also experiment with bolder flavors like cloves, cinnamon sticks or cardamom pods.

Start by gently heating up some olive or vegetable oil in a small saucepan or slow cooker insert over low heat. Add your selected herbs and spices, using about 1-2 tablespoons of fresh herbs or 1-2 teaspoons of dried herbs per cup of oil. For spices, start with 1/2 teaspoon per cup of oil and adjust to taste.

Allow the oil to barely simmer or maintain a low temperature for 30-60 minutes, stirring occasionally, until the herbs and spices have imparted their essence. Longer infusion times will result in a more intensely flavored oil. Some spices may need only 15-30 minutes to fully infuse.

Be careful not to actually fry or cook the herbs and spices on high heat, as this could make your oil bitter or burnt tasting. A gentle heat is all that is needed to slowly draw out the flavors. Monitor the temperature closely.

For vinegars, use a similar approach. Gently heat white wine vinegar, rice vinegar or apple cider vinegar along with your choice of herbs, spices, garlic, shallots or peppercorns. Simmer for 15-30 minutes while stirring periodically.

Once done infusing, allow the oil or vinegar mixture to fully cool. Use a fine mesh strainer to filter out all of the solids. This will leave you with a beautifully flavored infused oil or vinegar that has perfectly integrated the herbs, spices and aromatics.

Funnel your artisanal infused oil or vinegar into bottles, add labels describing the blend, and seal with an airtight lid. Store in a cool, dark place for up to 1 month.

There are endless possibilities when infusing oils and vinegars to elevate your cooking to the next level. Mastering the intricate balance and layered depth of flavors using herbs and spices is truly an art form. With some experimentation, you can create unique infused oils and vinegars that will make every dish sing.

Elevating Everyday Dishes through Skillful Seasoning

Adding herbs and spices to everyday dishes is one of the easiest ways to take your cooking to the next level. With just a small amount of effort, you can transform simple ingredients into restaurant-quality meals bursting with complex flavors. Mastering the art of flavor layering with herbs and spices starts with understanding which seasonings work well together.

One of the best ways to elevate a basic recipe is to introduce complementary flavors that highlight or balance the existing ingredients. For example, hearty stews and braised meats are perfectly suited to earthy herbs like thyme, rosemary, and bay leaves, which accentuate the rich, savory notes. Bright citrus herbs like lemon verbena or lemongrass add a refreshing contrast to creamy or starchy dishes like risotto or potato gratin.

When layering seasonings, start with background flavors like onion, garlic, or mild peppers to build depth of flavor. Then incorporate bolder seasonings like chilies, mustard seed, or cumin sparingly, so they don’t overwhelm. Finally, add fresh herbs right at the end for a vibrant flavor pop. Following this progression from base to top notes ensures maximum flavor impact.

It’s also important to balance flavor profiles across the five basic taste groups – bitter, sweet, salty, sour and umami. For example, adding a touch of honey or maple syrup can smooth out bitter notes from herbs like rosemary or sage. A splash of vinegar or citrus balances rich, salty meats like bacon or prosciutto. Dried mushrooms, tomato paste and Parmesan cheese add savory umami flavors, which complement nearly any dish.

Here are some examples of using common herbs and spices to elevate simple everyday meals:

Baked Chicken – Base flavors like onion, garlic and paprika, then add oregano, basil, cilantro or marjoram. Finish with lime juice and zest.

Roasted Vegetables – First olive oil and garlic, then earthy rosemary, thyme or sage. Toss with balsamic at the end.

Pasta Marinara – Sauté onion and garlic, then add a pinch of red pepper flakes, dried oregano and basil. Finish with torn fresh basil leaves.

Omelets – Cook eggs with onion and mild peppers first. Add dried dill, tarragon or chervil and feta or goat cheese. Finish with chives.

As you can see, mastering the subtle art of seasoning through layering herbs and spices can utterly transform simple everyday dishes. With a knowledge of flavor profiles and a deft hand at balancing and enhancing basic ingredients, it’s easy to elevate home cooking to new heights. The journey to mastery begins by experimenting with new herb and spice blends. Soon you’ll be creating flavor symphonies in every meal!

Balancing Bitter, Sweet, Salty and Sour with Herbs

Herbs can be incredibly versatile ingredients when it comes to balancing the five basic tastes – bitter, sweet, salty, sour, and umami. Their wide range of flavors allows cooks to perfectly calibrate the taste profile of any dish. Mastering the art of flavor layering with herbs entails understanding how to counterbalance and complement different taste elements.

Bitters herbs like thyme, rosemary, and sage can temper sweetness or richness. Their pronounced flavor notes stand up well to sweet ingredients like fruits, caramelized vegetables, honey, maple syrup, and desserts. Adding a touch of finely chopped rosemary at the end brightens up an overly sweet muffin batter. A sprinkling of thyme balances out the sugary-sour taste of strawberry jam.

Sweet herbs such as basil, tarragon, and mint offset salty and sour ingredients. The gentle sweetness and aroma of basil meshes beautifully with the acidity of tomatoes, countering bitterness and allowing the flavor layers to mingle. Tarragon’s licorice-anise flavor tempers the tartness of vinaigrettes and creamy salad dressings. Mint’s cooling sweetness balances salty meats like lamb as well as the sour tang of yogurt-based raita sauces and chutneys.

Mastering the Art of Flavor Layering with Herbs and Spices

Savory herbs including dill, parsley, chives, and cilantro handle saltiness well. Their clean, fresh taste contrasts salty components without canceling out the seasoning. Chopped dill or parsley mixed into otherwise one-dimensional salty foods like crackers, fries, or chips makes them more complex. Chives sliced over cooked grains or roasted potatoes cuts through the starchiness. Cilantro’s citrusy flavor lifts overly salty dishes like curry chicken or taco meat filling.

Sour herbs such as sorrel, lemon verbena, and lemon balm turn up the acidity level while lessening bitterness. Sorrel’s intense lemony tartness counters rich, fatty dishes like egg dishes, cream sauces, and duck. Infusing vinegars or vinaigrettes with lemon verbena or lemon balm heightens sourness in marinades and salad dressings. Their acidity also balances hearty bitter vegetables like broccoli rabe or bitter greens.

Skillfully using herbs’ innate taste affinities allows cooks to strike an ideal balance within a dish’s flavor profile. Mastering the art of restraint helps prevent individual flavors from overwhelming while letting them shine through. With practice, we can all become flavor layering artists!

Letting Ingredients Shine with Subtle Spice Enhancement

When layering flavors with herbs and spices, it’s important not to overwhelm the palate or mask the starring ingredients. The key is subtle enhancement – complementing without overpowering. With skillful seasoning, you can lift a dish to new heights while still letting the main components shine.

Choose Supporting Spices Wisely

Selecting the right spices is key for subtle enhancement. Some safe bets are spices like cinnamon, nutmeg, ginger, and cardamom. These warm, aromatic spices add background notes without stealing the show. Start with small amounts – 1/4 to 1/2 teaspoon per pound – and adjust to taste. The spices should whisper rather than shout.

Think Fresh and Bright

Herbs like cilantro, parsley, basil, oregano, and thyme are excellent for providing fresh, bright pops of flavor. Use them at the end for a vibrant finish. The volatility of the aromatic compounds in fresh herbs make them perfect for a final flourish.

Bloom Spices for Maximum Flavor

Blooming spices in oil or ghee before adding other ingredients helps develop and mellow their flavors. First, briefly toast the whole spices in the oil over medium heat until fragrant, about 1 minute. Turn off the heat and let sit for 5-10 minutes before proceeding with the dish. This unlocks the spices’ essential oils for the perfect subtle infusion.

Use a Light Hand with Chilies

When adding heat with chilies, err on the side of restraint. Subtle smoldering heat that lingers in the background allows other flavors to take center stage. Start with a small portion of minced chili, or use milder varieties like ancho or New Mexico chilies. You can always add more punch later.

Mastering the Art of Flavor Layering with Herbs and Spices

Make Herbs and Spices the Secret Stars

With artful use of herbs, spices, and chilies, you can dramatically elevate the flavor experience of any dish while still keeping the starring ingredients front and center. Mastering the subtle enhancement from herbs and spices is what takes good food to great heights. As you layer in flavors with a delicate touch, you’ll learn how to transform dishes into harmonious flavor journeys – with the main components shining brightly all the while. Subtle seasoning is truly the art of letting ingredients speak for themselves at full voice.

Creating Harmonious Flavor Journeys from Start to Finish

Mastering the art of flavor layering with herbs and spices is all about creating a harmonious journey of tastes from the first bite to the last. Careful seasoning throughout the cooking process can build depth of flavor and lead the palate on a delightful trip where each element complements the last.

The Key to Building Flavor Complexity

Creating a complex yet balanced flavor profile relies on the skillful combination of herbs, spices, saltiness, sweetness, bitterness, and sourness. Mastering the art of flavor layering involves understanding how to translate taste sensations in your mind to actual ingredients and combinations in a dish. It requires an intuition built from experience about how flavors interact and taste over time.

The journey begins by choosing a few key herbs and spices that form the flavor foundation. These base notes create an undertone to build upon. Next, incorporate ingredients that provide secondary traits like sweetness or acidity to highlight the herbs and spices. Finally, finish with gentle bright, floral, or fruity top notes – like cilantro, lemon zest, or pepper.

When layering flavors in this way, you create a dynamic flavor experience from the first bite to the last. Each step of the process lets previously added ingredients mingle and deepens the overall taste sensation.

Building Flavor Journeys from Start to Finish

Here is an overview of how to construct a harmonious flavor journey from start to finish:

1. Base Notes – Establish the core flavor direction with herbs, spices, or ingredient combinations that give a distinctive personality. This forms the flavor background.

2. Mid Notes – Enhance and unify base notes with ingredients like salts, sugars, acids, umami flavors, oils, butters, etc. This creates a well-rounded central taste profile.

3. Top Notes – Brighten with vibrant fresh herbs, zests, peppers, or spices. Their volatile oils provide punctuation.

4. Putting it Together – Cook base flavors first to mellow their notes. Add mid-layer ingredients during final cooking stages. Finish with delicate top notes at the end.

5. Check Seasoning – Adjust along the way to achieve the desired taste balance and flavor intensity. Let the dish “rest” to allow flavors to meld harmoniously.

6. Final Touches – Garnish with herbs and spices that underscore or contrast with the main profile. Use them to reinforce the flavor message.

Following this flavor building journey results in a dish with a complex, evolving taste profile that keeps the palate intrigued from the first aroma and bite to the final satisfying spoonful. Layering flavors is truly an art form that relies on intuition gained from experience. Mastering this skill allows home cooks to transform simple ingredients into symphonies of taste.

An Example Flavor Journey: Lemon Chicken Tagine

As an example, imagine creating a Moroccan lemon chicken tagine. The characteristic flavors could develop in layers like this:

Base Notes – Toast cumin seeds to release their nutty flavor before adding chicken pieces browned in olive oil. Include crushed garlic, ginger, paprika, and cinnamon sticks.

Mid Notes – Once chicken is nearly cooked, add chicken stock, honey or dates, preserved lemon, olives, and roasted veggies. Simmer to unify flavors.

Top Notes – Finish with a generous sprinkle of chopped cilantro and lemon or orange zest.

The result delivers a flavor journey that evolves in waves – from the rich base spices, to the sweet and salty middle eastern profile, to the final fresh punctuation. The lemon and herbs linger on the tongue, completing the harmonic series of taste sensations.

Mastering the Subtle Art of Restraint

Creating balanced, craveable dishes relies on the subtle art of restraint. Showcasing the signature flavors of quality ingredients through delicate enhancement is the ultimate sign of flavor mastery.

Follow the flavor layering principles here while letting top quality foods take the spotlight. You will learn which ingredient combinations create flavor magic. Soon, you will be composing your own memorable taste journeys from start to delicious finish.

Mastering the Art of Restraint and Balance

When layering herbs and spices in cooking, it can be tempting to add more and more components to create an increasingly complex medley of flavors. However, skillfully balancing herbs and spices is as much about knowing when to exercise restraint as it is about combining compatible ingredients. Mastering the art of flavor layering relies on understanding the intricate interplay of tastes and aromas that contribute to a harmonious end result.

The key to restraint and balance begins with thoughtfully selecting a few herbs and spices that will form the flavor foundation. Choosing anchor ingredients that combine well creates a solid base to build upon. For example, in Moroccan spice blends, cumin and coriander often provide an earthy, nutty backbone, while ginger and black pepper incorporate subtle heat. Too many disparate flavors at the base can overwhelm the palate and muddle the aromatic qualities of added ingredients.

Once the flavor base is established through two to four complementary herbs and spices, skillful layering relies on incrementally incorporating accent ingredients like cinnamon, turmeric, saffron or mint. Knowing which supporting flavors to mix in requires understanding how the additions will interact with foundational and other enhancing components. An artful balance is created by selecting herbs and spices in proper proportions so that no single taste dominates the blend. The resulting melody of flavors then fully unfolds, with no jarring notes.

A light hand is instrumental when augmenting herb and spice mixtures, as additions of even small amounts can significantly shift the overall flavor. Restraint requires developing an intuitive sense for how much of an ingredient is needed to achieve the desired aromatic effect. This proficiency is cultivated over time, as one gains familiarity with various herbs and spices and learns how readily they infuse foods. Judicious seasoning prevents individual components from masking more subtle flavors or textures of other ingredients.

Exercising flavor restraint also involves allowing time for ingredients to properly meld, which enables nuanced aromatic qualities to emerge. Curries, for example, are best made a day or two ahead to let complex blends of herbs and spices thoroughly permeate proteins and vegetables. The passage of time softens sharp edges, harmonizes tastes, and coaxes out delicate notes. Rushing flavor layering by overzealously dosing herbs and spices often yields muddled, uneven results. Patience truly is a virtue when handling such intricate combinations.

Ultimately, balancing herbs and spices is a delicate craft that relies as much on limitation as on intricacy. Skill comes not from seeing how many ingredients one can combine, but from thoughtfully selecting a choice few that draw out each other’s exceptional qualities. Mastering restraint develops one’s judgment for which flavor pairings naturally enhance without overcomplicating. In the hands of a sensitive and discerning artisan, herbs and spices gracefully unite to produce a magnificent sensory experience far greater than the sum of their parts.