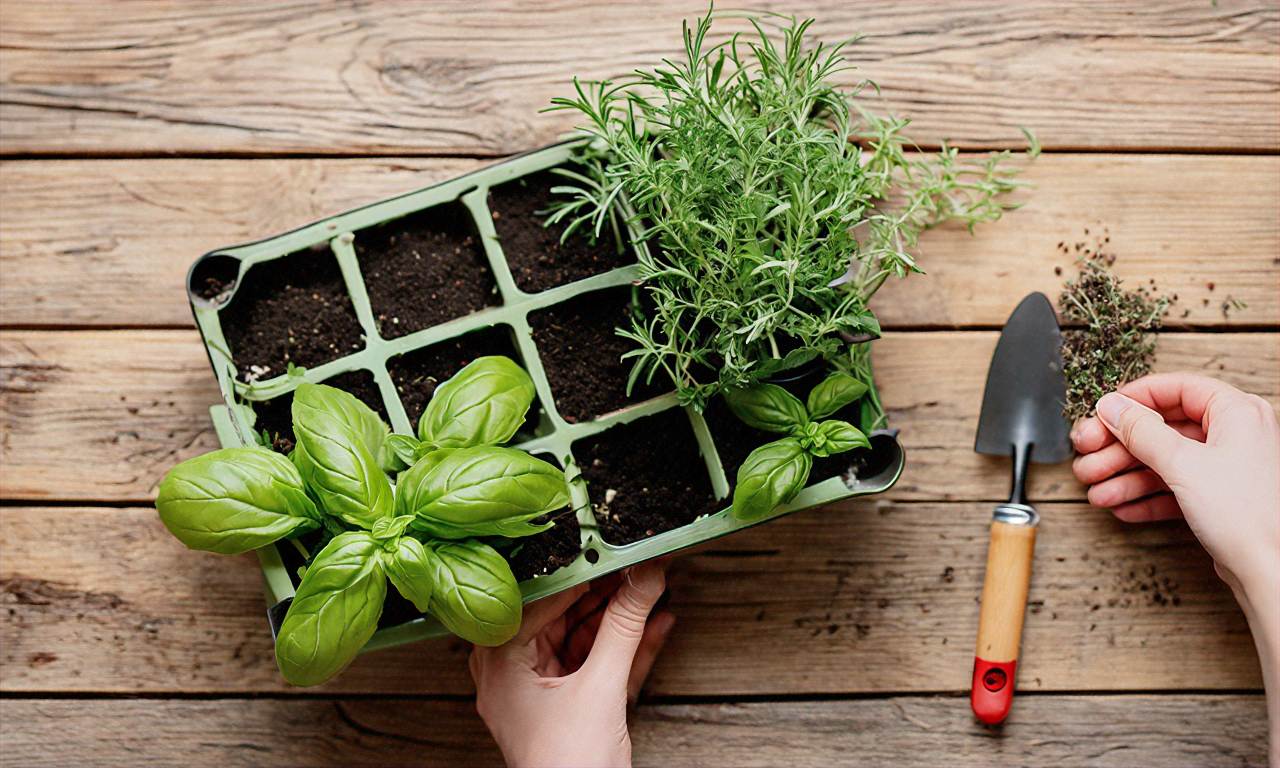
Choosing the Right Herbs for Your Garden
When embarking on growing your first herb garden, one of the most exciting steps is deciding which herbs to plant. With thousands of herb varieties to choose from, the options can feel overwhelming for a beginner herb gardener. This guide to choosing herbs will walk you through the key considerations to help you select the best herbs for your needs and environment.
First, assess your climate conditions and growing zone. Most culinary herbs thrive in zones 3-9, but some varieties are more cold hardy or heat tolerant than others. Understanding your average temperatures, sunlight, rainfall and growing season will allow you to pick herbs suited to your region. For example, basil requires warmer conditions and would need container growing or transplanting indoors in colder climates.
Next, take stock of the sunlight exposure you can provide. Most herbs require at least 6 hours of direct sunlight daily. If you only have shady spots, focus on shade-loving options like mints, parsley and cilantro. You’ll also want to pay attention to soil drainage and moisture, as herbs like drier soil while others need consistent water.
When first starting out, it’s smart to choose versatile, easy-to-grow herbs that allow for plenty of harvest opportunities to cook with. Some of the best beginner-friendly herbs include:
– Basil – fast-growing with frequent harvests for pesto, tomato dishes and more
– Chives – perennial onion flavor great for eggs, salads and as edible garnish
– Cilantro – quick-growing leaves key for Mexican and Asian cuisines
– Dill – popular pickling herb that readily self-seeds
– Mint – perennial that spreads aggressively, nice for tea, desserts, juleps
– Oregano – aromatic leaves used widely in Italian, Greek dishes
– Rosemary – shrub-like plant with piney flavor for roasts, vegetables, breads
– Sage – savory herb for hearty fall and winter meals
– Thyme – essential ingredient in a bevy of baked goods, meats, soups
When selecting your target herbs, also consider how much you cook with certain flavors and ingredients. For instance, devote more space to parsley and basil if you regularly make Italian food. Focus on cilantro if Mexican is your go-to. Tailor herbs to match your menu.
It’s also smart for beginners to look for herb varieties labeled as disease-resistant to minimize troublesome issues. Compact or dwarf cultivars are also great starter plants, as they take up less space and require less pruning.
Don’t just look at individual herb varieties in isolation. Make sure to research how to effectively combine and rotate herbs in the garden to improve soil health over time. You’ll also want to intersperse flowers and flowering herbs to attract beneficial pollinators.
While it’s tempting to plant every herb that catches your eye, restrain yourself to 3-5 herbs for your first garden. You can always expand and diversify once you feel comfortable caring for your starter plants. When in doubt, you really can’t go wrong with the classics: basil, parsley, cilantro and thyme make an excellent beginner garden!
Following these tips for selecting herbs tailored to your growing conditions, cooking needs and gardening experience will set you up for an abundant first harvest. Soon your kitchen will be overflowing with homegrown herbal flavor.
Preparing the Soil for Planting
Proper soil preparation is a crucial first step when starting an herb garden. Many beginners make the mistake of not giving their soil the attention it needs before planting. However, taking the time upfront to ready your soil will pay off all season long with thriving herbs. This beginner’s guide to growing your own herb garden will walk you through the key things to know when preparing soil for planting.
Assess Your Soil Type
The first step is determining what type of soil you currently have. Soil can generally be classified into three main types – clay, sandy, and loam soils. Clay soils contain small mineral particles that cling together and drain slowly. Sandy soils have larger particles that allow water to drain rapidly but do not retain moisture well. Loam soils are an ideal blend of sand, silt, and clay that provide good drainage while retaining moisture and nutrients.
Most herbs prefer loam soils for optimal growth. However, assessing your native soil will indicate if any amendments need to be added to create better growing conditions. For example, sandy soils may require mixing in compost or coir to improve moisture retention. Meanwhile, clay soils can be loosened up by blending in materials like compost or perlite to prevent compaction.
Add Nutrient-Rich Compost
Whether starting with sandy, clay or loam soil, mixing in 2-4 inches of quality compost or well-rotted manure is highly recommended when preparing soil for an herb garden. The organic matter and nutrients found in compost feeds soil microbes and provides a slow-release food source for herbs as they grow.
Compost also lightens heavy clay soils while helping sandy soils better retain moisture. It’s generally best to spread compost over the planned garden bed and use a spade or fork to turn over and blend together the top 8-12 inches of native soil with the compost. This will provide an enriched planting bed ideal for herbs.
Adjust the Soil pH Level
Testing and adjusting the pH level of your prepared soil bed is also important. Soil pH significantly impacts nutrient availability for plant uptake and growth. Most culinary herbs prefer a neutral to slightly alkaline soil pH between 6.5-7.5. Extremely acidic or alkaline conditions can prevent herbs from accessing certain nutrients or cause toxicity.
Use an inexpensive soil pH testing kit to check if your soil’s pH falls within the optimal herb growing range. If it tests too acidic, dusting lime over the bed and turning it under can raise pH. If too alkaline, mixing sulfur into the top layers can help lower pH. Getting soil pH within the ideal zone supports robust establishment and growth of an herb garden.
Improve Drainage
Herbs need soil that drains well to avoid root rot yet still retains some moisture. Excess standing water or overly dense, compacted soil prevents healthy root systems. If you have heavy clay soil or low-lying areas that collect water, take measures to improve drainage before planting.
Adding raised garden beds on top of poor draining native soil can help. Mixing in materials like sand, small pebbles or perlite creates air pockets that facilitate drainage. Installing French drains, gravel trenches or tile drainage pipes can also divert excess moisture. Preparing soil with proper drainage prevents waterlogged roots and encourages vigorous herb growth.
Allow Beds to Settle Before Planting
After blending in compost and any needed amendments to improve texture, nutrients and pH, allow your prepared soil beds to settle for 1-2 weeks before sowing herb seeds or transplanting seedlings. This gives beneficial microbes and fungi time to stabilize and begin breaking down organic matter. Raking lightly to level the bed also enables you to spot and remove any weeds or debris.
Letting soil settle before planting is an easy way to set your beginner herb garden up for success. The improved texture and nutrient availability supports better seed germination and quicker establishment of transplanted herb plants.
Follow these key steps for preparing soil and your budding green thumb will be rewarded with thriving herbs all season long. Proper planning and preparation creates the ideal foundation. Pair enriched, fertile soil with the joy of nurturing herbs, and your personal garden will soon be overflowing with vibrant plants. So go ahead – prepare, plant and grow your very own herb garden this year!
Deciding Where to Locate Your Herb Garden
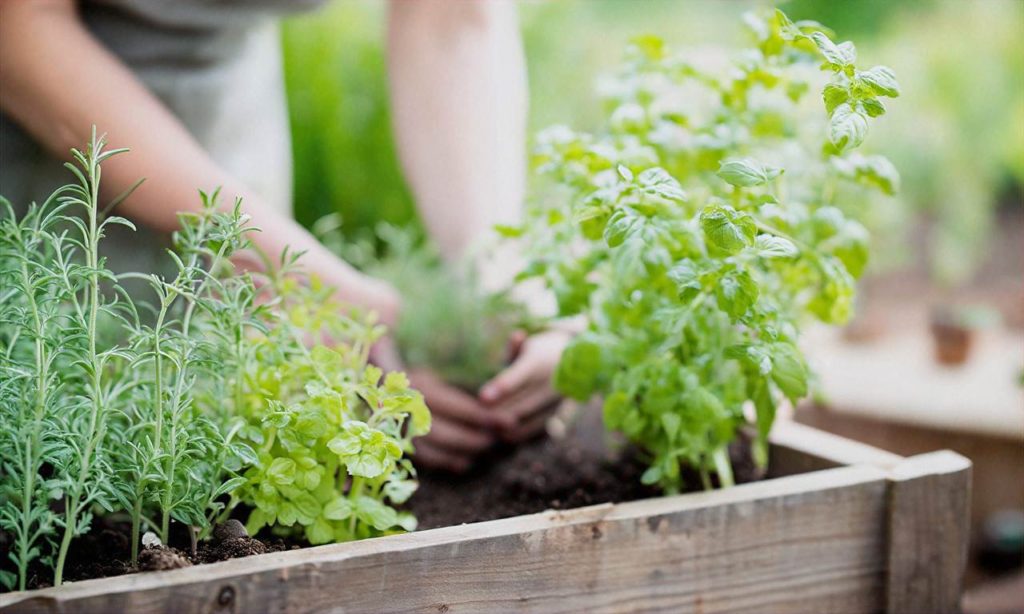
When starting an herb garden for the first time, one of the most important decisions is where to locate it. The location of your herb garden will impact how well your herbs grow and thrive. This beginner’s guide to growing your own herb garden will walk through the key factors to consider when deciding where to put your herb garden.
Sunlight
Most culinary herbs need at least 6 hours of direct sunlight per day. Some herbs, like basil, oregano, and thyme, do best with 8-10 hours of sunlight. When deciding where to locate your herb garden, be sure to pick a sunny spot. Observe the area over the course of a day and make note of any shadows that may limit sunlight access. South-facing areas usually get the most sun.
If you don’t have any spots that get full sun, look for locations that get at least 6 hours of sunlight, especially during the main part of the day. You can also supplement sunlight with grow lights. Proper sunlight is crucial for robust herb growth and good flavor production.
Soil Quality
In addition to sunlight, soil quality plays a big role in how well herbs will grow. Most culinary herbs prefer loose, well-drained soil that is rich in organic matter. Avoid planting herbs in dense clay or soggy soil. Test the drainage of a potential herb garden location by digging a small hole 12 inches deep, filling it with water, and observing how quickly the water drains away. The hole should drain completely within an hour.
You can amend dense soil by mixing in compost or other organic material like peat moss before planting. Feeding your herbs with compost or fertilizer throughout the growing season will help enrich the soil over time. Locate your herb garden where you have or can create optimal growing conditions.
Water Access
Easy access to water is another consideration for siting your herb garden. While most herbs are drought tolerant once established, regular watering is important, especially for seedlings and plants in containers. Having a spigot, hose, or irrigation system nearby will make watering simple.
If easy water access isn’t possible, locate your herb garden closer to your house. You can water with collected rainwater or carry water in a watering can. Mulching around plants also helps retain soil moisture. But proximity to a water source will prevent potential issues and make caring for your herbs much simpler.
Convenience and Aesthetics
When deciding precisely where to put your herb garden, also factor in convenience and aesthetics. Consider locating it near your kitchen door for quick access when cooking. Or place it somewhere visible from inside the house where you can monitor growth. Position the garden so it can be admired and enjoyed as part of your landscape.
If you’ll be growing herbs on a balcony or patio, use attractive containers and place them where their appearance complements your space. The placement of your herb garden is about more than just sunlight and soil. Choose a spot that makes tending to your herbs a pleasure rather than a chore.
With attention to sunlight, soil quality, water access, and aesthetics, you’ll be sure to locate your beginner herb garden in the optimal spot. Proper placement will set your herbs up for success and make maintaining them enjoyable for years to come. Follow this beginner’s guide when deciding where to put your herb garden, and you’ll soon be harvesting delicious homegrown herbs.
Planting and Caring for Herb Seedlings
Once you have prepared the soil and decided on a spot for your herb garden, it’s time to plant your herb seedlings. Caring for the seedlings properly after planting is crucial to get them off to a healthy start. Here is a beginner’s guide to planting and caring for herb seedlings in your home herb garden.
Select Healthy Herb Seedlings
When purchasing or receiving herb seedlings to plant in your garden, inspect them closely to ensure you select only the healthiest ones. Look for seedlings with green leaves and healthy white roots. Avoid any that are brown, wilted, or have black roots as these likely will not thrive after planting.
Water Seedlings Before Planting
Be sure to water your herb seedlings lightly before planting them. Watering them will help the soil adhere to the roots after transplanting them into the ground. However, you don’t want them sopping wet. Aim for moist but not soaked through.
Dig Proper Holes for Transplanting Seedlings
Use a trowel, shovel or garden fork to dig holes in your prepared garden soil based on the size of each herb seedling’s root ball. As a general rule, the holes should be about twice the width and depth of the pot or cells the seedlings are currently growing in. Make sure the holes have loosened soil on the bottom to allow the roots to penetrate downwards more easily.
Carefully Transplant Herb Seedlings
Hold each herb seedling by its leaves, not the stem, and gently place the root ball into the hole you dug. Make sure the plant is positioned at the same level in the ground as it was in its pot. Refill the hole with loose soil, pressing gently around the plant to support it. Space plants according to spacing recommendations for each herb variety.
Water Transplanted Seedlings Well
As soon as your herb seedlings are transplanted into the ground, water them thoroughly. Soak the soil around each seedling to remove any air pockets and help the roots establish contact with surrounding soil. Proper watering right after transplanting prevents shock and promotes faster growth.
Consider Using Row Covers
Row covers made from fabric or plastic sheeting can protect tender herb seedlings from harsh weather fluctuations. These covers allow air, light and water through while moderating soil temperature. Row covers prevent battering from wind and rain. They also keep insect pests away.
Provide Adequate Sunlight
Most culinary and medicinal herbs thrive best in full sun, which means at least 6 hours of direct sunlight daily. Be sure to situate your herb garden in a sunny area or the seedlings may stretch and fail to flourish. Proper sunlight is vital for robust herb growth.
Use Organic Fertilizer if Needed
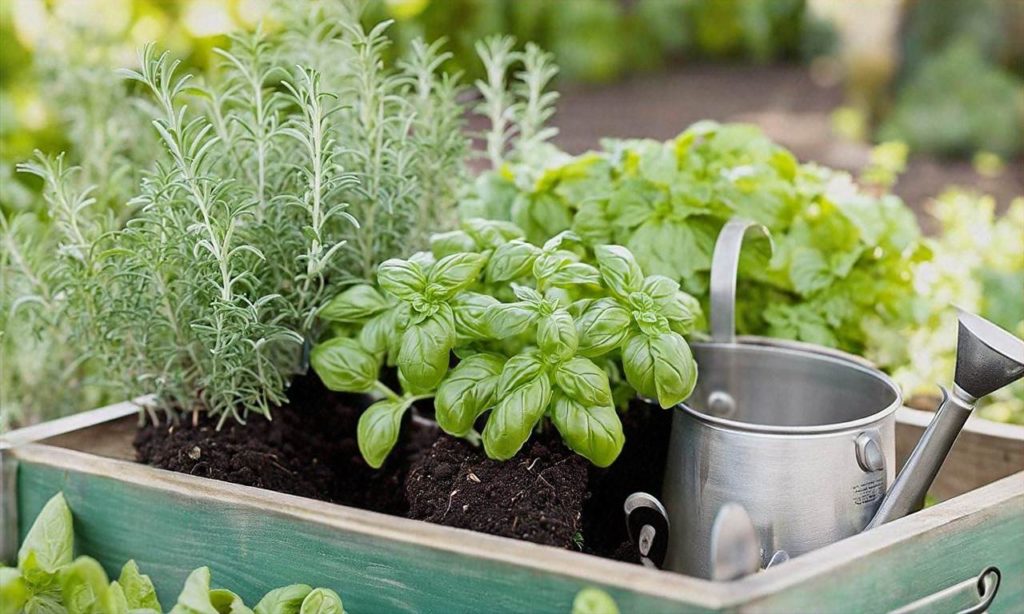
While compost-enriched soil should provide sufficient nutrients, fast-growing herb seedlings may benefit from supplemental organic fertilizer. Use an all-purpose organic fertilizer, following package instructions for how much and how often to apply it. Fertilizing gives seedlings an extra nutrient boost.
Monitor Soil Moisture
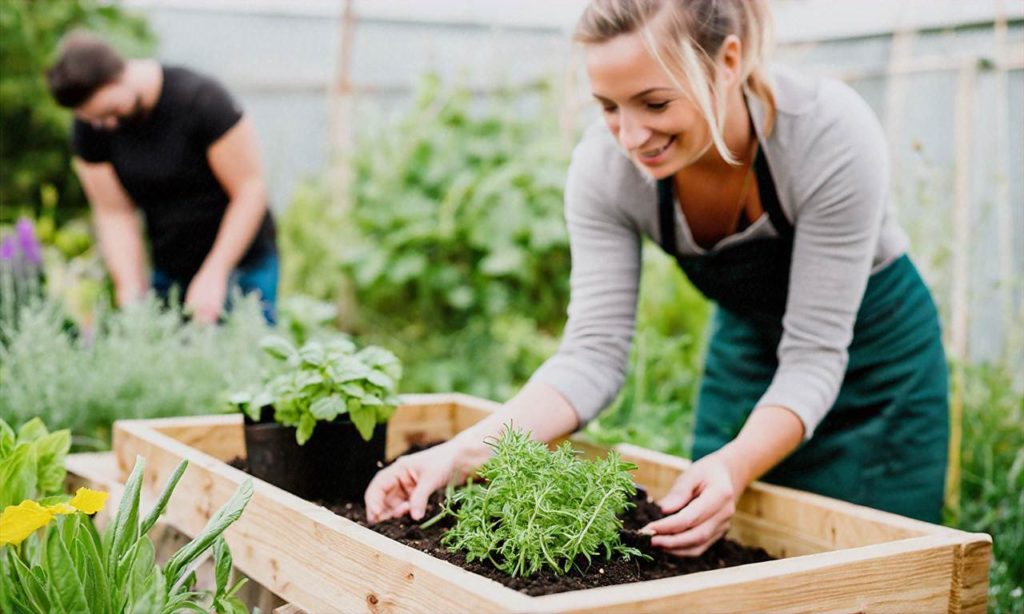
Check the soil moisture around your newly planted herb seedlings daily. Herbs prefer consistently moist but well-drained soil. Allow the soil to slightly dry out between waterings but don’t let it become completely parched. Proper moisture prevents drought stress.
Gently Loosening Soil Helps
If the soil around your newly planted herb seedlings becomes too compacted, gently loosen it with a hand trowel or fork. Be careful not to disturb the roots. This allows better water, air and nutrient penetration into the soil to feed plant roots.
Watch for Insect Pests
Keep a close eye out for insect pests like aphids, snails and caterpillars which may attack tender new growth on herb seedlings. Deal with any pests you spot right away before they get out of control and damage plants. Pick them off by hand or use organic sprays.
Address Diseases Quickly
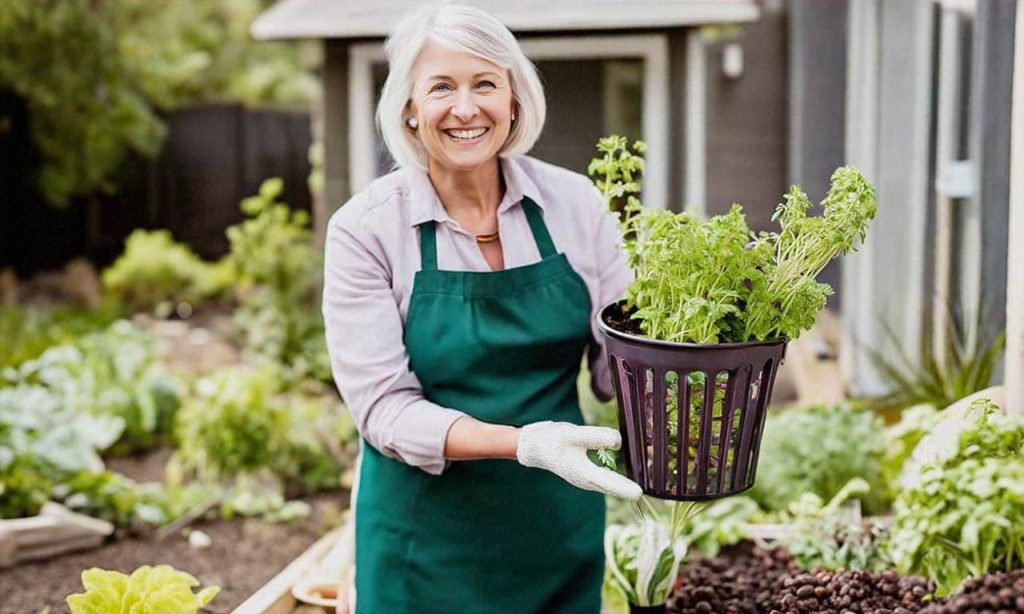
Various fungal diseases may sometimes trouble herb seedlings, especially in damp conditions. Prevent diseases by providing good air circulation. Remove and destroy any seedlings with disease symptoms like powdery mildew right away to keep issues from spreading.
Pinch Off Flower Buds
Herb seedlings often develop flower buds as they mature but flowering diverts a plant’s energy from leaf and stem growth. Pinch off any flower buds you notice on seedlings to promote a stronger harvest of leaves to use for culinary purposes later on.
Transplant Seedlings Promptly
If you grow herb seedlings indoors or purchase them already several weeks old, transplant them promptly into the garden. Older seedlings that get root bound in small pots may fail to thrive when planted outside. Transplant them while still young for best success.
Follow this beginner’s guide for properly planting and caring for the herb seedlings in your garden and you will give them the best chance of growing into a vibrant harvest of herbs for your kitchen. Pay close attention to their needs in the first few weeks after transplanting and your effort will pay off all season long.
Ongoing Herb Garden Maintenance
Maintaining your herb garden does not have to be difficult or time-consuming, even for beginners. With some basic care and attention, your herb garden will thrive for years to come. Here are the key things you need to know about keeping your herb garden healthy and productive in the long run.
Watering Your Herbs
One of the most important parts of herb garden maintenance is proper watering. Most culinary herbs prefer drier soil and do not like soggy roots. Aim to water your herbs thoroughly once the top inch or two of soil becomes dry. Check the soil moisture by digging down with your finger. During hot and dry weather, your herbs may need watering every few days. Container gardens also tend to dry out more quickly than in-ground beds.
Set up a regular watering schedule, but adjust as needed based on factors like weather, plant size, and soil type. Overwatering can cause root rot and other problems for herbs. Underwatering will cause wilting, poor growth, and lower yields. Get to know each of your herbs’ preferences. Some, like mint, prefer consistently moist soil, while others, like lavender and rosemary, thrive on less frequent deep watering.
Mulching
Applying 2-3 inches of organic mulch around your herb plants serves multiple purposes. It helps retain soil moisture so you water less often. Mulch also prevents weeds, moderates soil temperature, and as it breaks down it adds nutrients to the soil. Organic mulch materials like wood chips, shredded bark, chopped leaves, or compost are ideal for herb gardens. Replenish the mulch layer as needed each year.
Weeding
It’s important to stay on top of weeds in your herb garden, which compete with your plants for water, nutrients and sunlight. Weed by hand frequently, being careful not to disturb the herb plants’ roots. Adding mulch as discussed above will also significantly cut back on weeds. For more stubborn weeds, use an organic herbicide formulated for edible gardens.
Pruning Herb Plants
Pruning your herbs encourages bushy, compact growth and higher yields. For leafy herbs like basil, mint, sage, etc., pinch or snip off flower buds as they form to promote more leaf production. Remove any damaged or diseased growth as soon as you spot it. Periodically prune back leggy growth and cut back your herbs by one-third to one half to stimulate new growth. Harvest often by cutting sprigs of herbs frequently. At the end of the season, cut woody herbs like rosemary and thyme back more severely. Let your herbs go dormant in winter before a early spring pruning.
Fertilizing
While herbs do not require very nutrient-rich soil, applying organic herb fertilizer or compost 1-2 times per growing season will boost plant health and yields. Use an organic all-purpose fertilizer formulated specifically for edible herb gardens, following package instructions for best results. Alternately, work aged compost or well-rotted manure into the top few inches of soil surrounding your herbs. This will provide a slow-release feeding.
Avoid over-fertilizing your herbs, however, as this can diminish their signature flavors and aromas. Herbs thrive best in soil of average, not excessive, fertility. Test your garden soil periodically and amend as needed based on those results.
Pest and Disease Prevention
Herb gardens are generally less prone to pests and diseases than vegetable gardens. But it still helps to take some preventative measures to keep your plants healthy. These include crop rotation, cleaning up plant debris, removing affected growth immediately, and hosing plants off with water to discourage pests like aphids. Support beneficial insects by avoiding pesticides and planting flowers they like.
Companion planting with aromatic herbs like mint, garlic, basil and onions can also help repel pests. Scout for issues frequently and address them promptly to avoid spreading. Common herb garden pests to look out for are spider mites, aphids, whiteflies and caterpillars. Diseases to prevent include blights, fungal issues and root rot from overwatering. Maintaining vigor through proper care is key to avoiding problems.
Overwintering Tender Herbs
If you live in a climate with cold winters, plan ahead for overwintering any tender perennial herbs like rosemary, sage, thyme, oregano, lemon balm, etc. These plants cannot withstand freezing temperatures and frost. Pot up plants to bring indoors before fall. Prune them back by one-third to reduce stress. Find the sunniest indoor spot possible and continue watering over the winter. Not all herbs require this, but for non-hardy perennials it will allow them to live on for years to come.
By following these basic herb garden maintenance practices, both beginning and seasoned herb gardeners can enjoy an abundant harvest of homegrown herbs. Pay attention to your plants, tend to issues promptly, and avoid both under-and-overcare. With routine care, you will reap flavorful, nutritious herbs for months on end.
Harvesting and Preserving Homegrown Herbs
# Harvesting and Preserving Homegrown Herbs
Growing your own herbs can be very rewarding, but knowing how and when to harvest them is key to getting the most out of your herb garden. This beginner’s guide to harvesting and preserving homegrown herbs will ensure you can enjoy their flavor all year long.
## When to Harvest Herbs
Timing is everything when it comes to harvesting herbs. Here are some tips on identifying peak harvest times:
– Harvest leafy herbs like basil, mint, or parsley when the plant has reached 6-12 inches in height. Pinching off leaves regularly encourages more growth.
– Harvest just before plants flower for the best flavor in cooking herbs like thyme, sage, rosemary, and oregano.
– Let dill and cilantro go to flower and seed before harvesting.
– Harvest chives when they are 6 inches tall. Cut the grass-like leaves off at ground level and they will continue to regrow all season long.
The beginner’s guide to growing your own herb garden recommends checking plants frequently to identify when they are ready for picking. The oil concentration can diminish after plants bolt or flower, so pay attention to timing for best results.
## How to Harvest Herbs
– Use clean, sharp scissors or garden shears when harvesting herbs. Tearing leaves by hand can damage plants. Cut just above leaf nodes where new offshoots will emerge.
– For leafy herbs like basil, mint, cilantro and parsley, cut whole stems rather than just picking a few leaves. This encourages more compact growth.
– Harvest chives, dill and fennel by cutting back the plant, leaving 2-3 inches above soil level. They will regrow for secondary harvests.
– When harvesting oregano, thyme, sage and rosemary, leave some leaves and stems intact for plant health. Just harvest as needed.
Being careful when cutting herbs ensures the plants remain healthy and productive in your beginner herb garden all season long.
## Preserving Your Homegrown Herb Harvest
Enjoying homegrown herbs from your garden year round is easy with proper preservation techniques:
### Drying Herbs
The most common way to preserve herbs for winter is by drying. Simply tie freshly harvested herbs into small bundles with twine or string and hang upside down in a warm, dry, and dark place until crumbly dry. Alternatively, lay single herb layers out on a screen or rack. Once dried, store whole or crumbled into airtight containers and keep in a cool cupboard. Dried herbs retain their potency for up to a year. Great herbs to dry include oregano, thyme, sage and rosemary.
### Freezing Herbs
Chopped leafy herbs like parsley, basil, chives, cilantro and dill can be frozen and stored in airtight containers or freezer bags. Mix herbs with a bit of water or olive oil before freezing into ice cube trays for easy use while cooking. Frozen herbs will keep for about six months. Frozen herb cubes bring fresh flavor to winter soups and stews!
### Herb-Infused Vinegars & Oils
The flavor of homegrown herbs can also be preserved by steeping them in vinegar or oil, then straining out the herbs once infused. Try popular flavor combos like basil-infused balsamic vinegar or rosemary olive oil. Store infused vinegars and oils in airtight bottles in a cool, dark place and use within a year.
With the simple harvesting, drying and freezing methods from this beginner’s guide to growing your own herb garden, you can enjoy the fresh flavors of homegrown herbs all year long!
Troubleshooting Common Herb Garden Issues
Even the most careful herb gardener can run into issues with their plants. Don’t be discouraged if you encounter problems – these troubleshooting tips will help get your herb garden thriving again.
Not Enough Sunlight
Many culinary herbs, like rosemary, thyme, sage, and oregano, require at least 6 hours of direct sunlight per day. Without adequate sunlight, they may become leggy and fail to thrive. If your herb garden isn’t getting enough sun, consider moving it to a brighter spot or supplementing with grow lights. You can also prune leggy herbs to encourage bushier new growth.
Soil Drainage Problems
Herbs hate sitting in waterlogged soil. Poor drainage causes root rot and other fungal diseases. Make sure your herb garden has amended soil with plenty of compost or peat moss to lighten heavy soils. Raised beds also improve drainage. If you have heavy clay soil, consider creating a raised bed with purchased potting mix for your herbs.
Pests Like Aphids and Whiteflies
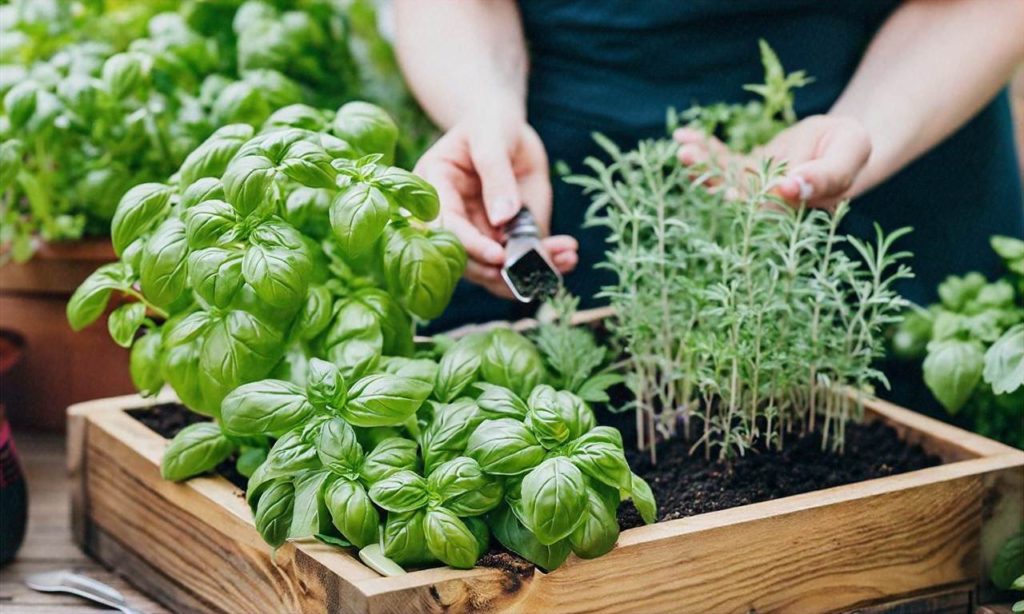
Common herb garden pests include aphids, spider mites, whiteflies, and caterpillars. They damage plants by sucking juices and chewing on leaves and stems. Start by spraying pests off plants with a strong stream of water. For heavier infestations, use insecticidal soap or neem oil. Always follow product instructions carefully.
Animals Nibbling Plants
Rabbits, deer, squirrels, and other critters find herbs tasty. Protect plants with wire mesh fences around your garden. You can also try natural or chemical animal repellent sprays and granules. Be sure they’re safe for edible plants.
Powdery Mildew
Powdery mildew is a common fungal disease of herbs like sage, bee balm, and cilantro. It coats leaves in white fungal spores that spread quickly. Improve air circulation and avoid wetting foliage when watering to reduce powdery mildew. Remove and destroy affected plant parts. As a last resort, use fungicides labeled for edible plants.
Overwatering
It’s easy to overwater container herbs, causing root rot from too much moisture. Let soil dry out between waterings and always pour water directly into the pot, not from the top. Container herbs may need watering daily in summer and only once a week in winter when growth slows.
Underwatering
Just as too much water can damage herbs, so can too little. Drooping, wilting leaves that don’t perk up after watering indicate underwatering. Consistently check soil moisture, especially in summer, and water container herbs when the top inch becomes dry. Use your finger to test moisture levels.
Nutrient Deficiencies
Herbs need proper nutrition to stay healthy. Yellowing leaves and poor growth can signal a nutrient deficiency. Use a balanced liquid fertilizer every 2-4 weeks during the growing season to prevent deficiencies. Too much fertilizer can also damage herb plants, so don’t overdo it!
Diseases from Damp Conditions
Wet foliage and high humidity promote fungal and bacterial diseases of herbs. Space plants appropriately to allow air circulation. Water carefully, keeping moisture off leaves. Remove any diseased foliage immediately and don’t compost it. Allow plants to dry out between waterings.
Cold Weather Damage
Many popular culinary herbs, like basil, sage, cilantro, and lemon balm are very cold sensitive. Temperatures below 45°F can damage or kill them. In cold climates, grow these herbs only during the warm season or bring container plants indoors over winter. Cover herbs outside with row cover fabric if cold snaps occur.
Beginner’s Guide to Growing Your Own Herb Garden: Troubleshooting Common Issues
By properly preparing your herb garden and providing your plants with good growing conditions, you can avoid many common issues. But even experienced herb gardeners run into problems sometimes. Don’t let setbacks discourage you. With a little troubleshooting and TLC, you can get your herb garden thriving again all season long.
For more tips on growing a successful kitchen herb garden, refer back to other sections of this Beginner’s Guide to Growing Your Own Herb Garden series. The journey towards herb gardening success starts with learning!
Top 10 Easiest Herbs for Beginners
When starting your first herb garden, it’s best to begin with herbs that are relatively easy to grow, especially for beginners. Choosing easy-care herbs in the beginning will help ensure gardening success and encourage you to expand your culinary garden over time. Here are 10 of the easiest herb varieties that are great for beginner gardeners.
1. Basil – A warm-weather annual, basil is one of the most popular and easy-to-grow herbs. Its leaves lend bold flavor to many dishes. This quintessential Italian herb thrives in a sunny spot with rich soil and consistent moisture. Pinch back the stem tips to promote bushy basil plants.
2. Chives – As a cold-hardy perennial, chives serve as a tasty garnish and grow well planted from seeds or transplants. Chives sport pretty purple flowers in spring and prefer full sun exposure and well-drained soil. Cut chive leaves close to the ground, and they’ll keep growing all season long.
3. Cilantro – Known for its pungent leaves, cilantro grows quickly from seeds sown directly in the garden after the last spring frost date. This cool-weather annual herb bolts and turns bitter in hot weather but often reseeds itself. Cilantro needs moist, nitrogen-rich soil and partial shade in hot climates.
4. Dill – An annual herb that towers over other plants, dill can be grown from seeds or transplants set out after the danger of frost. Dill enjoys full sun and moist, well-drained soil. Use dill leaves fresh or dried in pickling recipes, salad dressings, fish dishes and more.
5. Mint – Spearmint, peppermint and other mint varieties are perennial herbs known for spreading vigorously. Plant them in containers to control their growth. While mint can tolerate some shade, it thrives best with full sun exposure and consistently moist soil. Use fresh mint leaves in teas, desserts, jellies and more.
6. Oregano – Closely related to marjoram, oregano is a cold-hardy perennial that serves as a flavorful addition to pizza, pasta and many Greek and Italian dishes. This easy-to-grow Mediterranean herb prefers a site with good drainage and at least 6 hours of sunlight. Its leaves can be used fresh or dried.
7. Parsley – Often used as a garnish, parsley is a versatile biennial herb that gives two years of abundant leaves from one planting. Curly and flat-leaf Italian parsley varieties grow well from seeds or transplants set out in early spring once the threat of frost has passed. Site parsley in full sun.
8. Rosemary – An aromatic evergreen shrub, rosemary grows well in containers and thrives with full sun and well-drained soil. You can begin rosemary from plants purchased at garden centers. Use fresh rosemary leaves to flavor roasted meats and vegetables, marinades, breads and more.
9. Sage – Known for its soft gray-green foliage, garden sage is a perennial herb that deserves a permanent place in your kitchen garden. It prefers full sun and dry conditions. Start with transplants set out after the last spring frost. Use fresh sage leaves to flavor poultry, stuffings, pasta and more.
10. Thyme – Offering hints of mint and lemon, common thyme is a tiny-leafed perennial. Both creeping and upright thymes grow well from transplants, cuttings or divisions and do best with full sunlight and average to dry soil. Use fresh sprigs and leaves to flavor meat, fish, vegetable dishes, herbal butters and more. Thyme plays well with others in an herb garden.
When creating your first edible garden, starting with this list of 10 easiest herbs for beginners will set you up for success. As you gain more gardening experience and confidence, you can continue adding more challenging and unusual herbs to expand your homegrown collection. What herb varieties are you most excited to plant in your beginner’s herb garden?
Saving Money by Growing Your Own Herbs
One of the best perks of having your own herb garden is saving money on buying fresh herbs. Store-bought herbs can be very expensive, especially for popular culinary herbs like basil, cilantro, parsley, rosemary, thyme, oregano, chives, mint, and sage. Growing a selection of your favorite herbs at home can save you a lot of money over the course of a year.
According to research, a package of fresh herbs at the grocery store can cost $2-$3 on average. If you cook frequently with herbs like cilantro, parsley, basil, or mint, those costs can really add up. With an herb garden, after the initial small investment in materials and seeds or seedlings, you’ll have an unlimited supply of fresh herbs for free for months on end.
Depending on the size of your beginner’s herb garden and how many different types of herbs you grow, you could save $50, $100 or even a few hundred dollars per year by harvesting your own herbs instead of buying them. That’s money that goes right back into your pocket.
When calculating potential savings from growing your own herbs, be sure to account for how much you typically spend on herbs over the course of a year. Track how often you purchase certain herb varieties and the average cost per package. This will give you a spending baseline that you can then compare to your at-home herb gardening costs.
The main startup costs for a beginner’s herb garden include containers, soil, seeds or starter plants, fertilizer or compost, and gardening tools. However, many of these items are one-time purchases that can be reused year after year, or costs may already be sunk if you have existing gardening supplies.
Seeding herbs from scratch is highly affordable – a packet of 100s of seeds costs just a few dollars. You can also take cuttings or divide existing herb plants to propagate new ones for free. If buying starter plants, young herb seedlings typically range from $3-$5 per plant. Choose the most budget-friendly option for acquiring your first batch of herbs.
When cared for properly, most culinary herbs will continue producing leafy growth for 2+ years, giving you an exceptionally high return on your initial investment. As long as you nurture your herbs and harvest them sustainably, you’ll continue yielding savings season after season.
Beyond the financial savings, growing your own herbs also means you’ll have the freshest, most flavorful herbs possible. Homegrown herbs hold onto more aroma, vitamins, and beneficial plant compounds compared to herbs that have been sitting in grocery store packaging for days or weeks after being harvested.
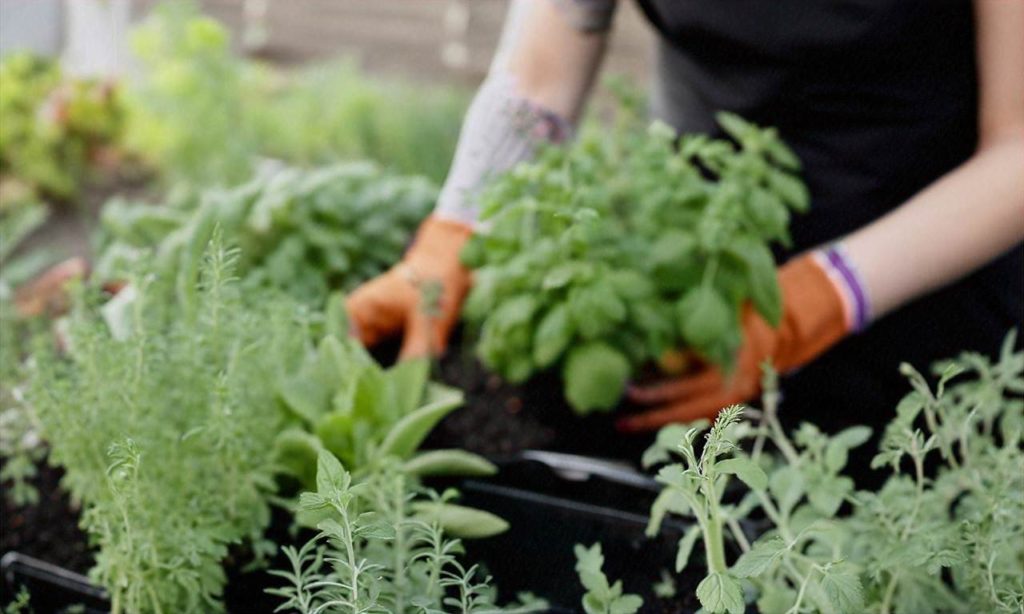
Nothing beats using freshly picked herbs from your backyard to elevate your favorite recipes. Plus you’ll have the satisfaction of knowing you grew them yourself.
When you crunch the numbers, dedicating a corner of your garden to a beginner herb garden, or even a few containers on a patio or windowsill, can lead to noteworthy cost savings in the kitchen. Get creative harvesting and preserving abundant herbs to enjoy their benefits for months after the growing season too.
Over time, the efforts put into planting and maintaining your first herb garden will pay for themselves multiple times over. Growing basic culinary herbs is also one of the most beginner-friendly gardening projects out there.
Equipped with some gardening fundamentals from this beginner’s guide to growing your own herbs, you can start shrinking those grocery bills and putting extra green back in your wallet by establishing an herb garden tailored to your taste, space, and budget.
