Cilantro Versus Coriander: Understanding the Differences

Cilantro Versus Coriander: Understanding the Differences

What’s the Difference Between Cilantro and Coriander?

Here is a draft introduction for the section “What’s the Difference Between Cilantro and Coriander?”:

Cilantro and coriander are two names that refer to different parts of the same plant Coriandrum sativum. This aromatic herb is known for its use in a variety of cuisines around the world. However, the terminology can be confusing as cilantro and coriander are often used interchangeably despite referring to distinct parts of the plant. So what exactly sets cilantro and coriander apart?

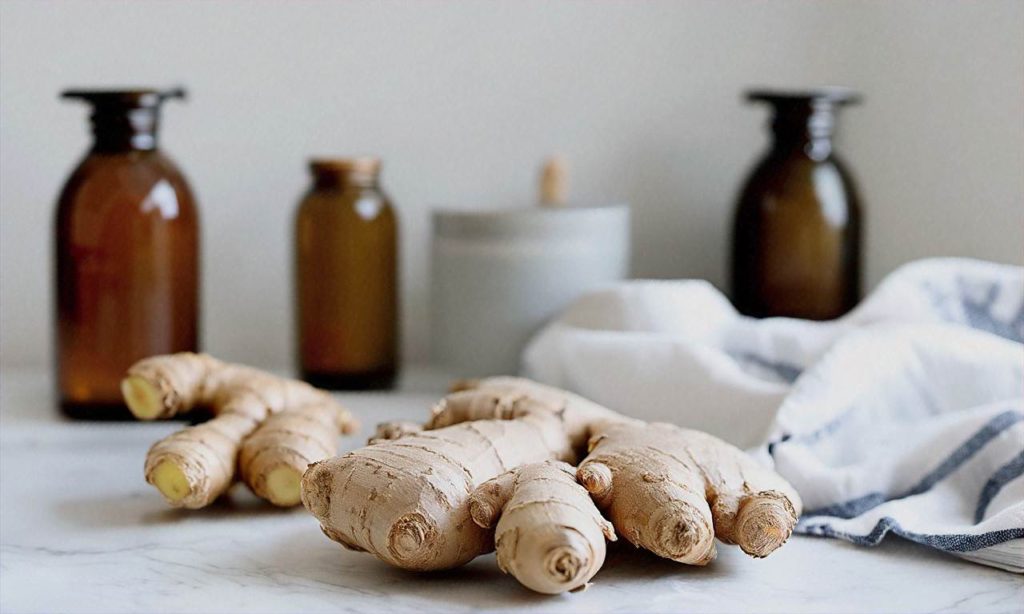
In basic terms, cilantro refers to the green, leafy parts of the Coriandrum sativum plant. These fresh leaves and stems have a bright, citrusy flavor profile. Coriander, on the other hand, refers to the dried seeds produced by the Cilantro Versus Coriander: Understanding the Differences plant. Unlike the leaves, the round coriander seeds have an earthy, sage-like taste when crushed.

While both cilantro leaves and coriander seeds originate from the same plant, their different flavors, uses in cooking, and even health benefits set them apart. Understanding the distinctions between these two common ingredients enables cooks to better utilize them for their unique aromatic qualities.

So in summary:

– Cilantro = leaves/stems of the Coriandrum sativum plant

– Coriander = dried seeds of the Cilantro Versus Coriander: Understanding the Differences Coriandrum sativum plant

In the following sections, we’ll explore the differences between cilantro and coriander in more detail – from their contrasting flavors and culinary uses to how to grow and store each part of this dynamic herb. Discerning the differences between these two ingredients is key to unlocking their full potential in the kitchen.

Cilantro Refers to the Leaves, While Coriander Refers to the Seeds

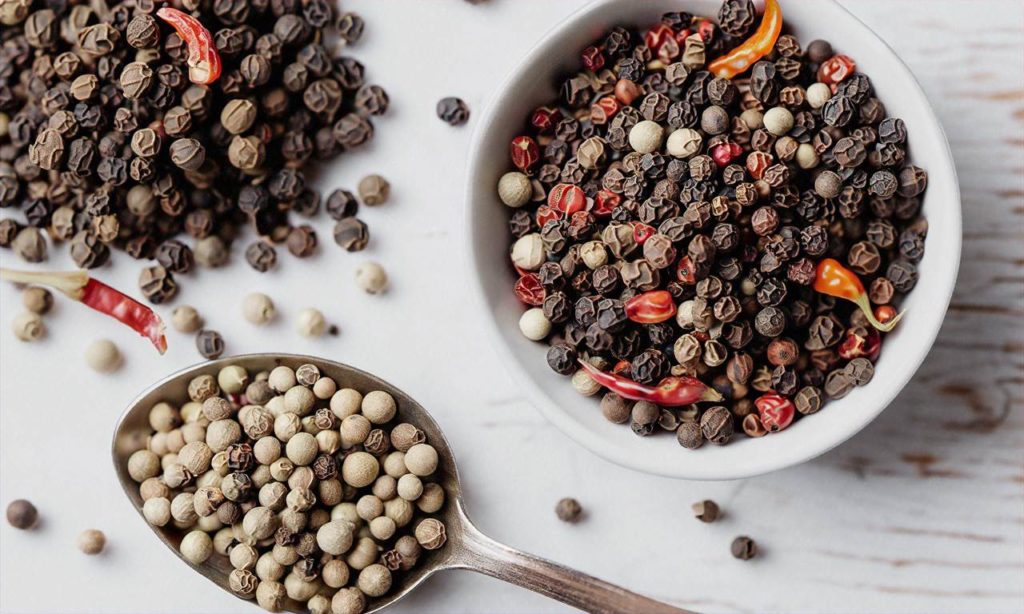
Cilantro and coriander come from the same plant, scientifically known as Coriandrum sativum. However, different parts of this plant are referred to by the common names “cilantro” and “coriander.” Cilantro refers specifically to the green, leafy parts of the coriander plant. In contrast, coriander refers to the dried, round seeds that the plant produces.

While both cilantro leaves and coriander seeds originate from the same Coriandrum sativum plant, they have distinctly different flavors and culinary uses. Cilantro’s green leaves have a bright, citrusy flavor profile. The taste is described as a blend of lemon, sage, and mint. On the other hand, coriander seeds have an earthier, musky taste with hints of sage and lemon.

Understanding that cilantro refers to the leaves and coriander to the seeds is key to properly using them in recipes. Cilantro leaves are almost always used fresh to add a punch of vibrant flavor to dishes like salsa, guacamole, Thai curries, and Mexican tacos. Meanwhile, ground coriander seeds are ideal for subtly enhancing the flavor of breads, stews, pickling blends, sausages, and Indian curries. Using the terms cilantro and coriander correctly ensures you are adding the right part of the Coriandrum sativum plant for the intended flavor.

When shopping for cilantro or coriander, it is also essential to know which term refers to which part of the plant. Look for bunches of fresh green cilantro leaves near other fresh herbs in the produce section. The cilantro leaves should be vibrant green and show no signs of wilting. You can often find ground coriander powder in the spice aisle, while whole dried coriander seeds may be with other bulk dried herbs and spices.

Properly storing cilantro and coriander also requires understanding which term refers to the leaves and which refers to the seeds. To best maintain fresh cilantro leaves, trim the ends, place in a cup of water with a plastic bag over the top, and refrigerate. The leaves should stay fresh for around 10-14 days stored this way. Coriander seeds, on the other hand, will last for months stored in an airtight container in a cool, dark place.

With the basics down of cilantro referring to the flavorful leaves and coriander denoting the earthy seeds, you are set to start cooking with confidence. Understanding the differences between cilantro and coriander unlocks a world of diverse flavors to enhance all types of cuisines. Whether adding brightness with fresh cilantro or savoriness with ground coriander, you now have the knowledge to truly taste and appreciate how the same Coriandrum sativum plant produces two very different spices.

They Come from the Same Plant but Have Different Tastes

Cilantro and coriander come from the same plant, known scientifically as Coriandrum sativum. However, the terms “cilantro” and “coriander” refer to different parts of the plant and therefore have distinctly different tastes and culinary uses.

Cilantro refers to the green, leafy parts of the Coriandrum sativum plant. The leaves, which are also sometimes called coriander leaves, have a bright, citrusy flavor with lemon and lime notes. Cilantro is a staple in various cuisines around the world, used commonly in Mexican, Indian, Chinese, and Southeast Asian cooking. Its fresh flavor is perfect for adding vibrancy to salsas, curries, stir fries, and more.

In contrast, coriander refers to the dried, round seeds that come from the Coriandrum sativum plant. Coriander seeds have an entirely different flavor profile from cilantro. They have a warm, earthy, sage-like taste with a subtle sweetness. The seeds are often toasted or heated to bring out their flavor before grinding and adding them to dishes. Ground coriander is a key ingredient in many Indian, Middle Eastern, and North African spice blends and curries. It also sometimes used in breads, pastries, and pickling recipes.

So in summary, cilantro and coriander come from the same Coriandrum sativum plant, but cilantro refers to the fresh, citrusy leaves, while coriander refers to the dried, earthy seeds. Their different tastes come from the unique chemical compounds present in the distinct parts of the plant. Both pack a tasty punch and have an important role to play in global cuisine!

Cilantro Has a More Vibrant, Citrusy Flavor

Cilantro, which refers to the green leaves and stems of the Coriandrum sativum plant, is highly prized for its vibrant, citrusy flavor. When it comes to “Cilantro Versus Coriander: Understanding the Differences,” cilantro has a flavor profile that stands in stark contrast to the earthy, musky notes of coriander seeds.

Cilantro’s citrusy flavor comes from its high concentration of aromatic compounds and essential oils. These include linalool, camphor, and decanal, which give cilantro its characteristic bright, lemony taste and aroma. In particular, cilantro contains a substance called aldehyde, which produces those zesty top notes reminiscent of lime or lemon zest.

In addition to the dominant citrus flavors, cilantro also contains subtle undertones of parsley and grass. The combination creates a cooling, crisp flavor that works well in a variety of dishes from salsas to curries. Cilantro’s refreshing taste can help cut through rich or spicy ingredients, balancing out bolder flavors.

When comparing “Cilantro Versus Coriander,” it’s clear that cilantro has a much more vibrant, lively essence compared to the muted earthiness of coriander seeds. Cilantro provides an instant burst of sunshiny citrus, while ground coriander imparts subtle background notes instead.

Using Cilantro to Enhance Dishes

Cilantro’s bright citrus flavor allows it to enhance a wide variety of savory dishes. Its taste works well alongside spicy chilies, pungent garlic, rich coconut milk, juicy limes, and more. Cilantro also pairs nicely with ingredients like tomato, avocado, beans, rice, fish, and chicken.

Here are some popular ways that cilantro’s vibrant citrus flavor is put to good use in the kitchen:

Salsas and Sauces: Cilantro is a key ingredient in many Mexican and Latin American salsas and sauces like salsa verde, chimichurri sauce, and mojo sauce. Its zesty flavor cuts through and cools down spice.

Guacamole: Cilantro adds a nice acidity to balance out the richness of avocado in guacamole recipes. Its citrus taste brightens up the creaminess.

Salads: From fruit salads to vegetable-heavy sides, a sprinkle of chopped cilantro can impart a burst of lemon essence. This works well in bean salads, tomato-cucumber salads, or tropical fruit salads.

Curries and Stews: South Asian and Thai curries benefit greatly from freshly chopped cilantro stirred in at the end. The cooling citrus notes contrast beautifully with coconut-based curries.

Marinades and Rubs: Cilantro’s citrus flavors allow it to help tenderize and impart flavor when used as part of a protein marinade or spice rub for grilled meat, fish, poultry, or tofu.

Garnishes: Using cilantro leaves as a vibrant garnish instantly livens up any dish. Sprinkle on tacos, noodles, rice bowls, eggs, soup, and more right before serving.

The possibilities are endless when it comes to making use of cilantro’s citrusy vibrancy. Any dish that can benefit from a little lemon zing can also shine with the addition of fresh cilantro. When comparing “Cilantro Versus Coriander: Understanding the Differences,” cilantro clearly claims the bolder, more dynamic flavor.

Health Benefits of Cilantro’s Citrus Flavors

In addition to providing a bright, refreshing flavor, cilantro’s citrus notes also impart some excellent health benefits. Here is an overview of some of cilantro’s top nutrients and what they do:

Vitamin C: With higher vitamin C content than even citrus fruits, cilantro helps support immune function and iron absorption.

Cilantro Versus Coriander: Understanding the Differences

Vitamin A: The vitamin A in cilantro acts as an antioxidant that may help promote healthy vision and prevent cell damage.

Phytonutrients: Cilantro contains plant compounds like quercetin and kaempferol that have anti-inflammatory and antioxidant properties to help protect cells.

Potassium: The potassium in cilantro helps regulate fluid balance, nerve transmission, and blood pressure.

Along with these key nutrients, cilantro provides dietary fiber, magnesium, and trace amounts of B vitamins, zinc, calcium, and phosphorus. So using fresh cilantro not only livens up food with its vibrant citrus flavor but also boosts its nutritional value.

Cilantro Versus Coriander: Understanding the Differences

When exploring the question of “Cilantro Versus Coriander: Understanding the Differences,” it’s clear that cilantro offers some fantastic health bonuses on top of its incredible flavor. Coriander does as well, but cilantro has higher concentrations of certain vitamins, minerals, and antioxidants. So using both fresh cilantro leaves and coriander seeds in cooking provides a well-rounded nutritional profile.

Tips for Getting the Best Flavor from Cilantro

Since cilantro has such a delicate, volatile flavor, properly storing and handling it is important to retain maximum flavor and aroma. Here are some useful tips:

Buy fresh, unwilted bunches with no sliminess or yellowing. The leaves should look perky.

Wrap cilantro loosely in damp paper towels and store in an airtight container or bag in the fridge crisper drawer. It will keep fresh for 7-10 days this way.

Rinse and dry cilantro well right before using it. Don’t wash too far ahead or it can develop a slimy texture.

Chop cilantro at the last minute before adding it to uncooked dishes for the strongest flavor.

Add chopped cilantro at the very end of cooking for hot dishes so the heat doesn’t cause it to wilt.

Save the stems and roots to add to stocks for extra cilantro flavor in soups or stews.

Always use fresh cilantro within a couple weeks for the best citrus taste. Dried cilantro loses much of its vibrancy.

When exploring the question “Cilantro Versus Coriander: Understanding the Differences,” following these simple tips will help you get the most out of cilantro’s vibrant citrus essence. Proper storage and handling makes all the difference.

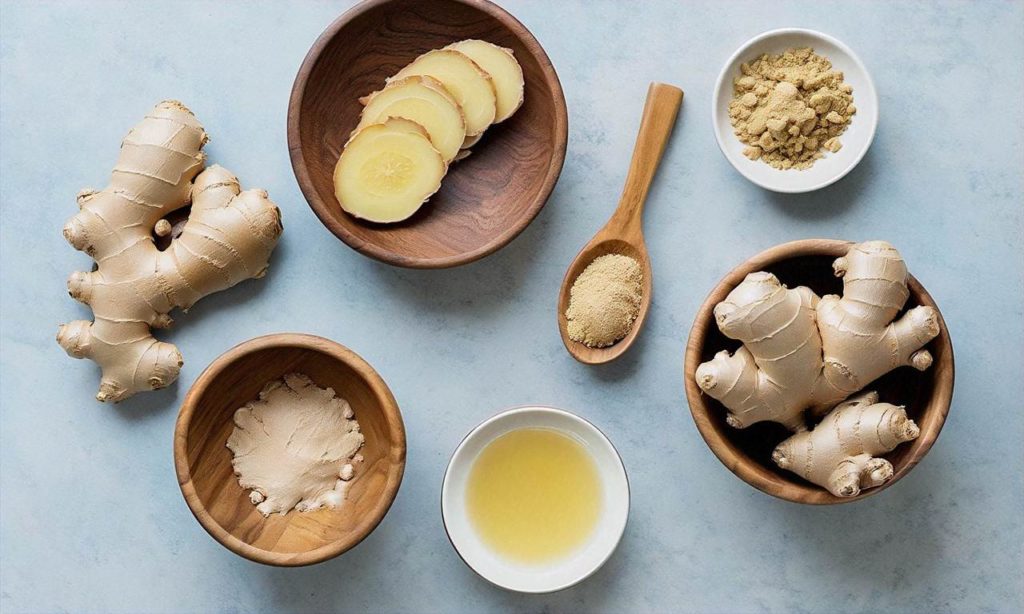
Coriander Seeds Have an Earthy, Sage-Like Flavor

Unlike the bright, citrusy taste of cilantro leaves, coriander seeds have an entirely different flavor profile. The small, round seeds impart a warm, earthy, and mildly sweet flavor that has been described as a cross between sage and lemon.

When crushed or ground, the seeds release an array of woodsy, spicy, and sage-like notes reminiscent of a forest floor. The flavor is more subtle than cilantro, but no less complex. Coriander seeds have floral overtones along with hints of cinnamon and nutmeg.

The unique taste and aroma of coriander seeds sets them apart from the more pungent cilantro leaves. Coriander seeds lend a wonderful background flavor to dishes when toasted and ground. They are indispensable in curries, breads, and many other foods across various global cuisines.

Using Coriander Seeds in Cooking

Coriander seeds can be used whole or crushed in marinades, pickles, sausages, and brewing certain beers. When dry roasted and ground into powder, coriander seed takes on an even more intense, charred flavor. The earthy, sage-like taste stands up well to bold flavors and spices.

Ground coriander compliments and enhances the flavor of meats like pork, chicken, fish, and lamb. It also sparks up lentil dishes, beans, potatoes, vegetables, and sauces. Coriander helps mellow the gaminess in game meats like venison while accentuating their natural sweetness.

Toasting the seeds before grinding helps intensify the warm, woodsy notes. Here’s a quick tip: add the ground seeds towards the end of cooking as the flavor fades with prolonged heating.

The earthy sage and lemon essence permeates Indian, Middle Eastern, North African, and Latin American cooking. Ground coriander is a key ingredient in garam masala, curry powder, pickling spices, sausage seasonings, and is used liberally in Belgian witbier and German bock beers.

Health Benefits of Coriander Seeds

The health benefits of coriander seeds may surprise you. They have been used medicinally for millennia to treat various ailments.

Coriander seeds assist with digestion and contain antioxidants that help rid the body of free radicals. They are also antibacterial and antifungal which supports immune function.

Cilantro Versus Coriander: Understanding the Differences

Some of the many health benefits of this versatile spice include:

– Anti-inflammatory properties to reduce swelling and joint pain

– Antioxidant protection against cell damage

– Lowering blood sugar levels

– Cleansing heavy metals from the body

– Reducing nausea and upset stomach

– Killing foodborne pathogens like salmonella

How to Grow Coriander

The good news for all you aspiring gardeners out there is that cilantro and coriander come from the same plant. So when you plant cilantro for the leafy greens, be sure to let some go to flower and seed if you want a coriander harvest.

Cilantro is quick growing, and under the right conditions you’ll have abundant leaves in 40-50 days. Mature cilantro plants flower out with pretty white blooms that develop into the prized coriander seeds.

Here are some tips for growing cilantro so you can reap a dual cilantro and coriander harvest:

– Plant cilantro seeds 1⁄4 inch deep in a spot that gets full sun

– Keep the soil consistently moist for best growth

– Harvest cilantro leaves when the plant is about 6 inches tall

– Allow some plants to remain so they bloom white flowers

– The flowers give way to coriander seeds to harvest

– Snip off the seed heads when the seeds turn brown

– Store the seeds in an airtight container out of sunlight

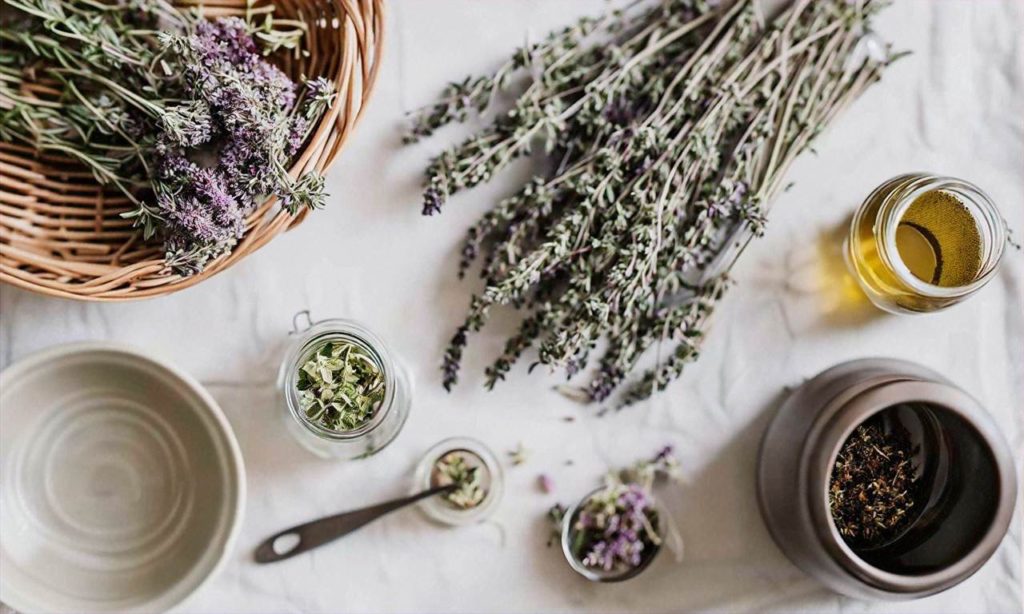
Drying and Storing Coriander Seeds

Cilantro Versus Coriander: Understanding the Differences

Properly stored dry coriander seeds will retain optimum flavor for up to a year. It’s best to dry the seeds fully before storage. Here are some tips:

Cilantro Versus Coriander: Understanding the Differences

– Allow seed heads to mature and dry on the plant

– Snip off the heads and place in a paper bag, dry in a warm area with good airflow

– To quicken drying, lay seed heads on a screen or sheet pan for a couple weeks

Cilantro Versus Coriander: Understanding the Differences

– Check for moisture by breaking a seed open to make sure the inside is dry

– Store thoroughly dried seeds in an airtight glass jar out of sunlight

A dual harvest of fresh, citrusy cilantro leaves and earthy, woodsy coriander seeds allows home cooks to enjoy the best of both worlds from the same plant. Understanding the differences between cilantro and coriander unlocks new dimensions of flavor for your cooking.

Cilantro is More Commonly Used in Various Cuisines

Cilantro, also known as Chinese parsley, is a popular herb used in cuisines around the world. From Mexican salsas to Indian curries, cilantro adds a distinct flavor and aroma that enhances many dishes. Understanding the differences between cilantro and coriander can help cooks appreciate how versatile this herb truly is.

Cilantro is a fundamental ingredient in Mexican and Tex-Mex cooking. It brightens up salsas, tacos, enchiladas, tamales, and more with its citrusy, slightly peppery taste. Cilantro’s cooling quality helps balance out spicier chiles and seasonings. A sprinkle of chopped cilantro at the end brings a fresh pop to richly flavored moles. No authentic Mexican table would be complete without a bunch of cilantro for diners to add as desired.

Likewise, cilantro features prominently in Indian, Pakistani, Bangladeshi, Nepali, and Sri Lankan cuisines. It mixes with spices like cumin, turmeric, and red chili powder to make complex curries and dry rubs for meats and vegetables. Cilantro chutneys are also popular, made by blending the herb with garlic, onions, lemon juice, mint, and green chiles. This cooling chutney contrasts nicely with hot curries and dry dishes.

Cilantro also makes appearances in various Asian cuisines. It is used in some Vietnamese and Thai noodle dishes, Lao salads, Cambodian wraps, and Burmese curries. Chinese cooks add cilantro to flavor eggs, dumplings, and stir-fries. Filipino cuisine uses it in chicken adobo, noodle soups, and dipping sauces.

Even outside Asia, cilantro still finds a place in global cuisine. It seasons North African chermoula marinades for meat and fish. Italian parsley and cilantro combine in Argentina’s beloved chimichurri sauce. And the famous tabbouleh salad of the Middle East gets its trademark flavor from lots of chopped cilantro mixed with bulgur wheat, tomatoes, lemon juice and olive oil.

While ground coriander seed definitely has its place in world cuisine, it’s fresh cilantro leaves that bring vibrancy and life to dishes across cultures. Understanding the differences between cilantro and coriander can help cooks unlock new dimensions of flavor in their cooking. With its citrusy notes and versatility, cilantro deserves a spot in every cook’s herb rotation.

Cilantro Versus Coriander: Understanding the Differences

Coriander is Often Ground and Used in Curries and Breads

Coriander refers to the dried, round seed pods of the coriander plant, which are often ground into a powder and used as a spice in various cuisines around the world. While cilantro leaves have a bright, citrusy flavor, coriander seeds have an earthy, sage-like taste with hints of lemon. This distinct flavor profile makes coriander a versatile ingredient used in many dishes.

One of the most common uses of ground coriander is in curry dishes and gravies. Whether it’s a Thai red curry, Indian chicken tikka masala, or a Malaysian rendang, that warming, slightly sweet aroma comes from coriander. The spice helps build layers of flavor along with other aromatics like cumin, turmeric, and chili peppers. Just half a teaspoon can provide a curry with a beautiful background note.

Cilantro Versus Coriander: Understanding the Differences

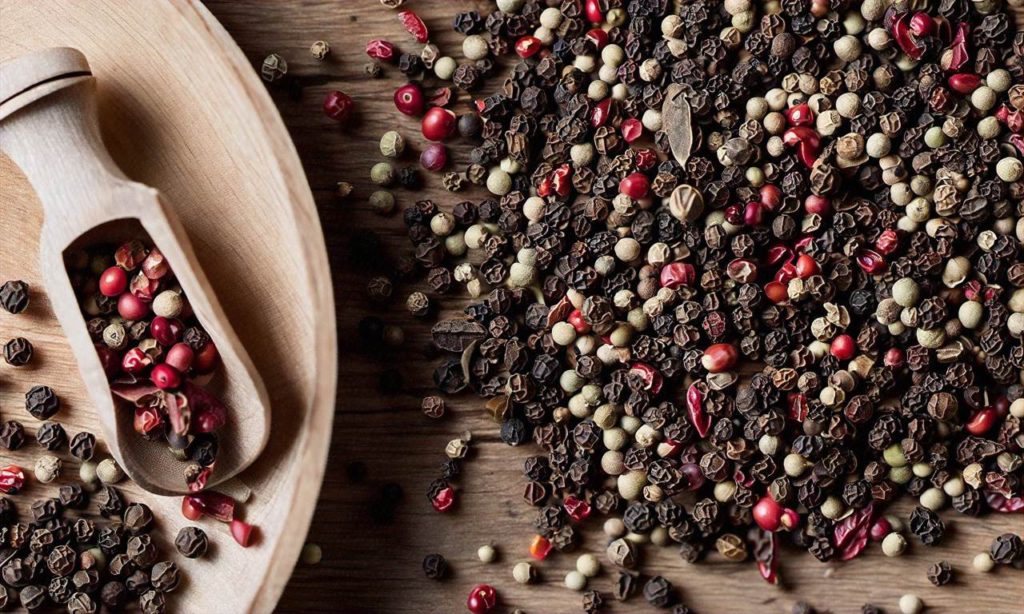
Coriander is also traditionally paired with meat dishes to help cut through some of the richness. It’s combined with garlic and black pepper in spice rubs for barbecued chicken, pork, lamb, and seafood to lend some citrusy brightness. Or the seeds may be blended into the mix for homemade sausage and patties for a warming sensation. Those earthy, sage-like tones somehow make meat taste even more meaty.

This versatile little spice is also found in all kinds of bread around the world. The most famous is probably Indian naan, which gets some extra aroma and character from coriander seeds baked right into the dough. Some cultures in Europe also have a history of adding ground coriander to their rye and wheat breads for extra flavor. And just a small sprinkle on top of a loaf before baking can provide a wonderful finishing touch.

So whether it’s curries, meat rubs, sausages or baked goods, coriander seeds lend their warm, earthy aroma to all kinds of dishes. Their lemon-sage flavor manages to blend seamlessly with other spices without overpowering them. Understanding the differences between cilantro and coriander helps home cooks better appreciate their unique flavors and best uses in the kitchen.

While the more tender cilantro leaves impart freshness when used as a garnish or added to salsas, coriander seeds provide depth of flavor to long-cooked stews, hearty meat dishes, and baked goods when ground into a powder. So they really complement each other beautifully! Cilantro Versus Coriander: Understanding the Differences between these two ingredients that come from the same plant can elevate your cooking by helping utilize their individual strengths.

When cooking with the earthy goodness of coriander spice, start with small amounts like 1⁄4 to 1⁄2 teaspoon, taste, and slowly increase to allow its aroma to shine through. Being careful not to overdo it with this pungent seasoning is key to balance when layering flavors in your dish. And opt for grinding the seeds fresh yourself with a mortar and pestle or small electric spice grinder for maximum vibrancy. Already ground coriander will lose some intensity but still packs lots of flavor.

Trying new ways to experiment with coriander in curries, rubs, sausages, and baked goods can lead you to discover exciting new flavor combinations. Allowing each ingredient’s unique essence to come through by not overpowering them with spice keeps the flavors harmonious. Understanding cilantro and coriander’s differences this way pays off in creating more delicious and well-balanced meals.

So whether you’re making your family’s favorite chicken tikka masala, a new French country pâté studded with coriander-flavored pork tenderloin, or baking a loaf of cheddar coriander bread, you’ll be amazed how this versatile little seed’s flavor stands out while also blending seamlessly with other ingredients. Appreciating the earthy, lemony notes coriander brings allows this unsung hero to shine and elevate total dish harmony.

Cilantro and Coriander Offer Different Health Benefits

Cilantro and coriander offer different health benefits that make them both worthwhile to incorporate into your diet. Cilantro, which refers to the green, leafy parts of the plant, contains significant amounts of vitamins and minerals. Just a quarter cup of cilantro provides over 15% of your recommended daily intake of vitamin K, which plays an important role in bone health and blood clotting. Cilantro is also high in vitamin C, an essential antioxidant that supports immune function. Additionally, cilantro contains compounds like quercetin that have demonstrated anti-inflammatory effects in research studies.

On the other hand, coriander refers to the dried seeds of the cilantro plant. These small, round seeds have their own unique health advantages. Coriander seeds are a good source of minerals like iron, magnesium, and calcium. They also contain antioxidants, including two compounds called coriandrin and dihydrocoriandrin, which may help lower blood sugar in people with diabetes. Some early research shows coriander seed extracts may also protect liver health.

So while cilantro and coriander come from the same plant, they provide some differing health bonuses. Adding more cilantro to dishes like salsa, salads, and Thai curries can help you meet your vitamin C and K needs. Incorporating more coriander seeds into recipes like chutneys, breads, and curries can boost your intake of essential minerals and antioxidants. Combining both the leafy cilantro and the dried coriander seeds in recipes when possible may provide the most health advantages. The differences between cilantro and coriander show the incredible diversity found within a single plant and its parts. Understanding these distinctions allows cooks to maximize the potential benefits of this versatile herb.

Cilantro Versus Coriander: Understanding the Differences

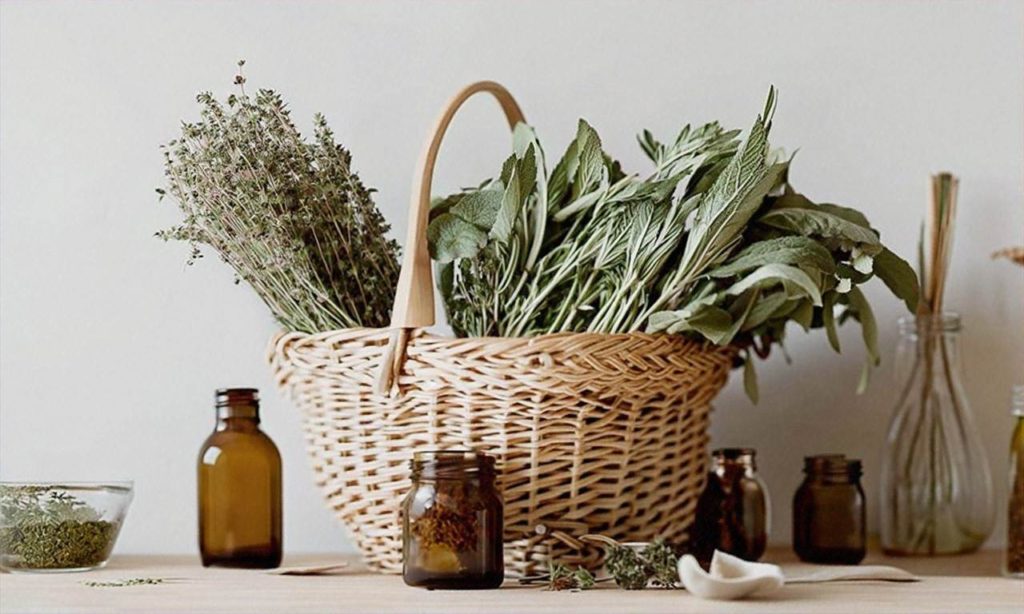
How to Grow Your Own Cilantro and Coriander

Growing your own cilantro and coriander is easy and rewarding. Not only does it allow you access to fresh herbs for cooking, but it also enables you to understand the differences between cilantro and coriander first-hand.

To grow cilantro and coriander, start by purchasing seeds or seedlings from your local garden store or nursery. Cilantro and coriander come from the same plant, so the seeds will be labeled as coriander.

When choosing where to plant them, pick a spot that gets plenty of sunlight – at least 6 hours per day. The soil should be well-draining and rich in organic matter. Amend the soil with compost or aged manure before planting if needed.

You can either direct sow the coriander seeds outdoors, or start them indoors 4-6 weeks before your last expected frost date. If sowing directly, plant the seeds 1⁄4-1⁄2 inch deep and 6 inches apart. If starting indoors, plant multiple seeds together in small pots or trays, then thin and transplant them outside once the weather warms up.

Make sure to water cilantro and coriander regularly, especially when seeds are first sprouting and becoming established. The plants should receive about 1 inch of water per week. Allow the soil to dry slightly between waterings.

Once your cilantro and coriander plants reach 3-4 inches tall, you can begin harvesting. For cilantro, snip some of the leafy green foliage, leaving at least a third of growth on the plant. This will allow it to continue producing leaves.

To harvest coriander seeds, allow the plants to fully mature and produce flowers and seed heads. Once the seeds turn brown, snip the seed heads from the plant and place them in a paper bag. Crush the bag to separate the dried seeds, then store them in an airtight container.

By growing cilantro and coriander yourself, you’ll gain first-hand knowledge of how they progress from leafy herbs to producing flavorful seeds. Pay attention as “Cilantro Versus Coriander: Understanding the Differences” becomes clear before your eyes.

Understanding cilantro versus coriander differences enables their best use in the kitchen. Cilantro’s vibrant green leaves pack a bright, citrusy punch perfect for salsas, curries, and garnishes. Mature coriander seeds have an earthy, sage-like flavor that enhances breads, meats, and lentil dishes when ground.

Growing cilantro and coriander is simple when you give them sun, rich soil, consistent moisture, and ample space. Then enjoy fresh cilantro leaves and aromatic coriander seeds from your own garden.

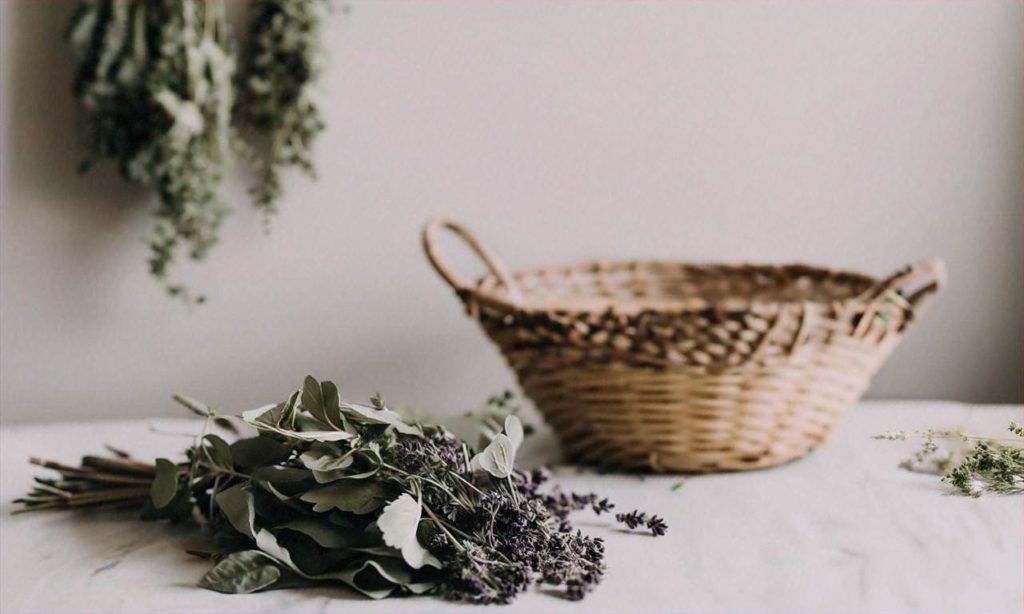
Storing and Preserving Cilantro and Coriander

Both cilantro and coriander lose their flavor quickly after harvesting, so proper storage is key to preserving their unique tastes and health benefits. Here are some tips for storing cilantro leaves and coriander seeds.

Storing Cilantro

Cilantro is highly perishable and can go bad within a few days if not stored properly. Here are some storage tips for fresh cilantro:

– Store cilantro by trimming the ends of the stems and placing in a jar or container with about an inch of water. Cover loosely with a plastic bag and refrigerate. This will keep cilantro fresh for up to a week. Make sure to change the water every other day.

– You can also wrap cilantro loosely in a damp paper towel and place in a resealable plastic bag. Store in the refrigerator crisper drawer for 3-5 days.

– Chopped cilantro can be placed in an airtight container or freezer bag and stored in the freezer for a few months. This is great for having cilantro ready to throw into salsas, curries, etc.

– To revitalize limp cilantro, cut the stems and place in ice water for an hour before patting dry and using. The cold water perks up the leaves.

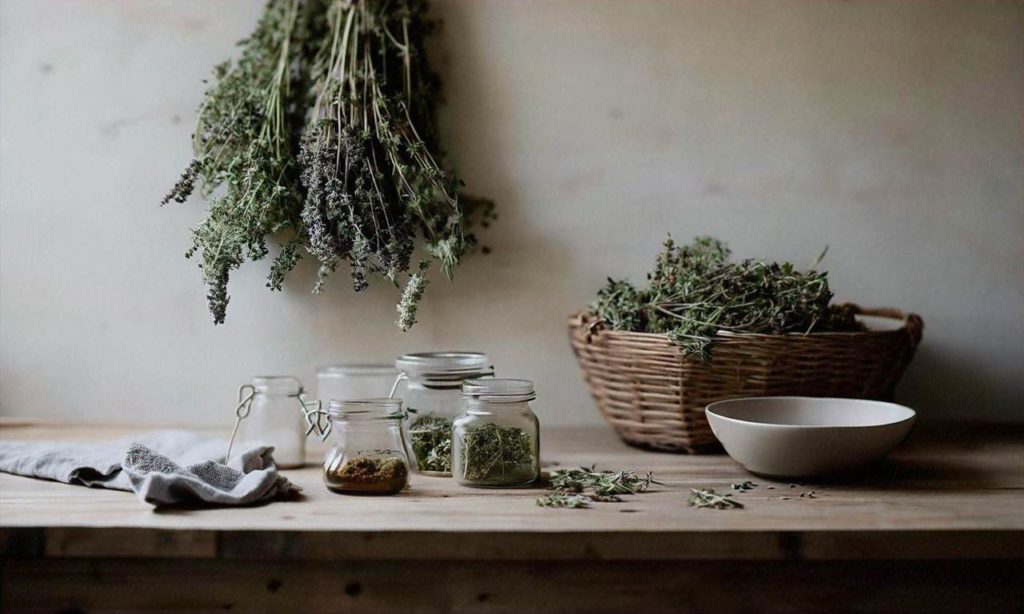
Preserving Coriander Seeds

Unlike cilantro leaves that need to be used quickly before wilting, coriander seeds can be stored for long periods if properly preserved. Here are some tips:

– Store coriander seeds in an airtight glass jar out of direct sunlight, in a cool dark place. This will keep ground and whole coriander seeds fresh for up to a year.

– For longer storage, keep coriander seeds in the freezer inside airtight containers. They will stay fresh for 18-24 months.

– You can also preserve freshly harvested coriander seeds using canning methods. Place seeds in clean jars, cover with vinegar and process using a hot water bath for long term freezer or shelf storage.

– Dehydrating is another preservation method for coriander seeds. Use a food dehydrator or low oven to dry freshly harvested seeds thoroughly before storing in airtight containers.

No matter if it’s fresh cilantro or dried coriander seeds, proper storage keeps the signature flavors intact. Follow these tips on storing and preserving to enjoy cilantro versus coriander for their unique and vibrant tastes. Check out the rest of “Cilantro Versus Coriander: Understanding the Differences” for more on using each part of this dynamic herb.

Popular Dishes That Use Cilantro or Coriander

# Popular Dishes That Use Cilantro or Coriander

Cilantro and coriander, while coming from the same plant, are used very differently in a variety of popular dishes around the world. Their unique flavors lend themselves to certain cuisines and dishes more so than others.

## Dishes That Commonly Use Cilantro

Cilantro, with its bright, citrusy flavor, is a staple in various Latin American and Asian cuisines. Here are some of the most popular dishes that traditionally use cilantro:

– Salsas and Pico de Gallo: Cilantro is a key ingredient in many Mexican salsas and pico de gallo, providing a fresh taste and aroma. The herbs stand up well to the acidity from ingredients like lime juice and tomatoes.

– Pho: This popular Vietnamese noodle soup almost always comes with a generous helping of fresh cilantro. The flavor of the broth is enhanced by the herby, aromatic cilantro.

– Chimichurri Sauce: Chimichurri is an uncooked sauce from Argentina and Uruguay that makes heavy use of fresh cilantro. Along with parsley, garlic and olive oil, cilantro gives chimichurri its vibrant green color and flavor.

– Guacamole: What would guacamole be without cilantro? The cooling, citrusy taste serves as a perfect complement to the rich and creamy avocado base. Cilantro elevates simple mashed avocados into a flavorful dip.

– Curries: Thai and Indian curries often finish dishes with a sprinkle of freshly chopped cilantro. The herbs add a note of brightness to rich, complex curries.

## Dishes That Commonly Use Coriander

Coriander seeds have an entirely different flavor profile from cilantro leaves and are used in their ground form in various dishes around the world:

– Curries: While fresh cilantro is used as a finishing touch, ground coriander is a key component in curries and curry powders. It adds an earthy, sage-like flavor to Indian and Middle Eastern curries.

– Breads: From tortillas to naan, coriander is frequently used as part of the spice mix in doughs for flatbreads around the world. It provides a subtle background flavor.

– Sausage: Coriander seeds are one of the whole spices used in sausage seasoning, imparting warmth and sophistication to meat mixtures.

– Pickling Spice: Coriander figures prominently in pickling spice blends. As pickles cure, the coriander takes on an almost citrusy taste that enlivens the vegetables.

– Belgian Witbier: This classic Belgian wheat beer style uses coriander seeds as one of the traditional spices. Alongside orange peel and other botanicals, it creates the beer’s distinctive flavor profile.

As you can see, while cilantro and coriander come from the same plant, their uses in global cuisines differ greatly. Cilantro provides vibrancy, while coriander lends an earthy, subtle flavor. Understanding the flavor differences between cilantro versus coriander is key to using them successfully in dishes.

The Healing Powers of Ginger: From Kitchen to Medicine Cabinet

The Healing Powers of Ginger: From Kitchen to Medicine Cabinet

The Ancient History of Ginger as Medicine

Ginger has been used as a medicinal herb for thousands of years. References to ginger’s healing powers date back to ancient China, India and the Middle East.

The Sanskrit writings of ancient India describe ginger as a universal medicine. Chinese traditional medicine has recommended ginger for over 2,500 years to treat digestive issues, nausea, diarrhea and rheumatism. The ancient Greeks imported ginger from China and India to use for medicinal purposes as well.

In the Middle East, ginger has had a place in traditional Arabic and Unani medicine systems for relieving digestive ailments. The prophet Mohammed is said to have recommended ginger to his followers for its healing properties.

The traditional ayurvedic medicine system of India has extensively used ginger root to help with arthritis, stomach problems, nausea and colds. Ayurveda describes ginger as having a warm quality that promotes healthy digestion and eases gastric troubles.

Through the spice trade, ginger made its way to ancient Rome and Europe during the Middle Ages. Ginger was prized for its medicinal properties as much as for its culinary uses. The Greek physician, Pedanius Dioscorides, wrote about ginger root’s ability to warm and soothe digestion in De Materia Medica – a medical text that was consulted for over 1,500 years!

The ancient applications of ginger focused on gastrointestinal relief in particular. However, traditional Chinese and Indian medicine systems understood ginger as a warming herb that dispels cold from the body, relieves pain, stimulates circulation and acts as an overall tonic.

While ginger no longer needs to be imported over long trade routes, science is now confirming many of the traditional uses of ginger as a digestive aid, anti-inflammatory, antioxidant and more. As we’ll explore in this article, modern research is uncovering how ginger lives up to its long history as a versatile, healing food and medicinal spice.

The Science Behind Ginger’s Health Benefits

Ginger has been used as a medicinal herb for thousands of years, but modern science is shedding new light on the specific compounds and mechanisms behind its impressive healing abilities. The main bioactive compounds in ginger are gingerols, paradols, shogaols and zingerone. These compounds have powerful anti-inflammatory, antioxidant, anticancer, antibacterial and digestive effects in the body.

The Healing Powers of Ginger: From Kitchen to Medicine Cabinet owe much of their potency to gingerols, the main phytochemical present in fresh ginger. As ginger ages and dries out, gingerols slowly transform into shogaols, which have their own unique health benefits. Additionally, cooking and heating ginger causes gingerols and shogaols to convert into zingerone—another antioxidant compound. The diverse phytochemicals in The Healing Powers of Ginger: From Kitchen to Medicine Cabinet provide its extensive pharmacological properties.

Several scientific reviews have focused on The Healing Powers of Ginger: From Kitchen to Medicine Cabinet’s ability to combat inflammation. Ginger suppresses multiple inflammatory pathways in a similar fashion as NSAID pain medications, but without the adverse side effects. The Healing Powers of Ginger: From Kitchen to Medicine Cabinet also inhibits the production of nitric oxide and pro-inflammatory cytokines—key drivers of chronic inflammation.

Additionally, scientific research suggests that ginger and its components block oxidative stress by scavenging free radicals and boosting antioxidant defenses in tissues throughout the body. Oxidative stress contributes to nearly every chronic illness, including cancer, neurodegenerative diseases, cardiovascular conditions and autoimmune disorders. As a potent antioxidant, The Healing Powers of Ginger: From Kitchen to Medicine Cabinet may help prevent and treat these serious diseases.

While The Healing Powers of Ginger: From Kitchen to Medicine Cabinet has many therapeutic components, researchers believe that 6-gingerol is primarily responsible for its anti-nausea and anti-vomiting effects. Multiple studies have found that just 1 gram of The Healing Powers of Ginger: From Kitchen to Medicine Cabinet significantly reduces nausea, vomiting and vertigo associated with motion sickness, pregnancy, chemotherapy and surgery.

The wide-ranging health benefits of The Healing Powers of Ginger: From Kitchen to Medicine Cabinet also include supporting heart health and mitigating diabetes symptoms. Ginger has been shown to lower blood sugar, hemoglobin A1c, LDL cholesterol and triglycerides in diabetic animal models and patients. Compounds like 6-gingerol help relax blood vessels and improve circulation, which reduces high blood pressure and vascular dysfunction—major precursors of cardiovascular disease.

While more research is still needed, the existing body of scientific evidence highlights ginger’s potential as a versatile, side effect-free alternative and complement to conventional medicine. The diverse phytochemical makeup of The Healing Powers of Ginger: From Kitchen to Medicine Cabinet provides it with anti-inflammatory, antioxidant, anticancer, antibacterial and digestive-enhancing properties that benefit nearly every system in the body. Harnessing ginger’s healing potential can help prevent and treat a wide range of chronic diseases.

The Healing Powers of Ginger: From Kitchen to Medicine Cabinet

Ginger Fights Inflammation and Oxidative Stress

Ginger has been used for centuries to treat inflammatory conditions. Modern research is now confirming ginger’s potent anti-inflammatory and antioxidant capacities.

Ginger contains active compounds like gingerols, shogaols, paradols and zingerone that inhibit inflammatory pathways in the body and protect cells from oxidative damage. Through these mechanisms, ginger shows promise for fighting inflammation and oxidative stress associated with numerous health conditions.

What Causes Inflammation and Oxidative Stress?

Inflammation is a normal immune response triggered by injury or infection. However, excessive or chronic inflammation contributes to many modern diseases like heart disease, diabetes, cancer, arthritis and autoimmune disorders.

Factors like poor diet, stress, toxin exposures and aging can all cause increased, out-of-control inflammatory responses in the body. This leads to tissue damage and the progression of disease.

Similarly, oxidative stress reflects an imbalance between free radical production and the body’s antioxidant defenses. Free radicals are unstable molecules that can harmfully react with proteins, DNA and cell membranes.

An accumulation of this oxidative damage over time is believed to accelerate aging and disease. Diet, lifestyle, genetics and environmental factors influence how much oxidative stress someone experiences.

Fortunately, foods like ginger provide a rich array of antioxidant compounds to help combat inflammation and oxidative damage.

Ginger Suppresses Pro-Inflammatory Pathways

The key to most of ginger’s therapeutic effects lies in its ability to modulate major inflammatory pathways in the body.

For example, ginger has been found to suppress nuclear factor kappa B (NF-kB). This is a protein complex involved in regulating immune and inflammatory genes. Excess NF-kB activation drives chronic inflammatory responses and is implicated cancer, arthritis, diabetes and neurodegeneration.

Additionally, ginger inhibits the production of inflammatory cytokines – proteins released by immune cells to communicate and coordinate inflammatory responses. Unchecked, prolonged cytokine activity also contributes to unchecked inflammation and disease progression.

By downregulating these central drivers of chronic inflammation, ginger exhibits broad anti-inflammatory effects with wide therapeutic potential.

Ginger Protects Against Oxidative Damage

In addition to suppressing inflammatory pathways, ginger also provides antioxidant protection against cell and tissue damage from oxidative stress.

The same gingerol, shogaol and zingerone compounds that exhibit anti-inflammatory activities are also potent free radical scavengers. They can neutralize dangerous reactive oxygen species before they can damage important cellular components like protein and DNA.

Some studies suggest fresh ginger has higher antioxidant capacity than popular antioxidant-rich fruits like oranges and lemons. The antioxidant effects of ginger appear comparable to nutritional powerhouses like spinach and broccoli as well.

Through both anti-inflammatory and antioxidant mechanisms, ginger shows immense promise for addressing the root causes of many inflammation-related health conditions.

The Healing Powers of Ginger: From Kitchen to Medicine Cabinet

Inflammation and oxidative stress drive the progression of most modern, chronic diseases. Ginger’s broad anti-inflammatory and antioxidant capacities provide a natural, side effect-free strategy for combatting these processes early.

While clinical evidence for ginger’s effects on specific diseases is still emerging, the fundamental ability of ginger compounds to modulate major drivers of chronic inflammation and oxidative damage is well established.

By adding more ginger to your diet or utilizing ginger supplements when appropriate, you can harness the potential healing powers of ginger rooted in traditional medicine but backed by modern science.

Ginger Fights Inflammation and Oxidative Stress

Ginger May Ease Nausea and Vomiting

Ginger has long been used as a natural remedy for nausea and vomiting. The rhizome contains active compounds like gingerol and shogaol that have demonstrated antiemetic properties in numerous scientific studies. As research continues to confirm ginger’s ability to ease these unpleasant symptoms, it solidifies ginger’s place in the medicine cabinet as a safe, effective botanical treatment.

Nausea and vomiting can arise from a variety of causes, including motion sickness, pregnancy, chemotherapy, and gastroparesis. These distressing symptoms significantly reduce quality of life. Pharmaceutical medications for nausea and vomiting often come with adverse side effects, highlighting the need for well-tolerated alternatives. Ginger fits the bill with its high safety profile and versatility.

The Healing Powers of Ginger: From Kitchen to Medicine Cabinet have been demonstrated through clinical trials administering ginger for nausea and vomiting relief. A 2016 meta-analysis of 12 studies with 1,278 pregnant women found taking ginger significantly reduced nausea symptoms compared to placebo. It also decreased vomiting episodes. This confirms ginger as an excellent natural option for countering morning sickness.

Likewise, multiple studies reveal ginger is highly effective at alleviating nausea and vomiting associated with motion sickness, especially seasickness. In one trial, naval cadets prone to motion sickness received 1,000 to 2,000 mg of ginger root powder in capsule form before embarking on a sailing voyage. The ginger capsules slashed their sensations of nausea and vomiting by a whopping 72 and 79 percent respectively.

Ginger has further proven its mettle at controlling chemotherapy-related nausea, one of the most distressing side effects for people undergoing cancer treatment. The rhizome works as an alternative or complement to anti-nausea medications. A review of multiple chemotherapy trials determined ginger provided a significant advantage over placebo for managing acute vomiting in adults. It also found ginger effective for reducing chemotherapy-related nausea, although conclusions were less definitive due to variability in study methods.

What accounts for ginger’s prowess against nausea and vomiting? Medical researchers are still investigating its exact mechanisms of action. However, they believe constituents like gingerols and shogaols exert anti-nausea effects by interacting with serotonin receptors and digestive enzymes. Through these actions, ginger is thought to speed gastric emptying, stimulate antral contractions, and exert central nervous system effects that suppress vomiting.

With proven efficacy and safety, ginger deserves a spot at the forefront of natural, botanical treatments for nausea relief and vomiting control. It offers an affordable, accessible option for managing these unpleasant symptoms and improving quality of life. Ginger products like teas, capsules, extracts, and essential oils rich in gingerol make it easy to harness the Healing Powers of Ginger: From Kitchen to Medicine Cabinet whenever nausea strikes.

Ginger Can Reduce Muscle Pain and Soreness

Ginger has been used for centuries to treat muscle aches and pains. Modern science is now confirming its ability to reduce muscle pain and soreness, especially after exercise.

Several studies have found that consuming ginger can reduce pain and inflammation in muscles. For example, in one study of 74 volunteers, taking 2 grams of ginger daily significantly reduced exercise-induced muscle pain over 11 days.

Participants who took ginger also reported a substantial reduction in the intensity of muscle soreness. Researchers believe the active compounds in ginger, such as gingerols and shogaols, interact with inflammatory pathways that drive muscle pain.

Another study gave raw and heat-treated ginger supplements to 34 young adult females during heavy menstrual bleeding, which often causes muscle cramps and pain. The ginger supplements significantly reduced the duration and severity of muscle pain compared to a control group.

Additionally, multiple studies have confirmed ginger’s ability to reduce markers of inflammation and oxidative stress, which are underlying causes of muscle soreness after strenuous exercise or injury.

The anti-inflammatory and antioxidative properties of ginger are likely behind its ability to alleviate muscle aches and pain while accelerating recovery. Ginger may also reduce the production of certain neurotransmitters that relay pain signals in the body.

Along with reducing subjective feelings of muscle soreness, some studies indicate ginger can preserve muscle strength and function after demanding physical activity.

For instance, one study found that ginger supplements allowed 60 male athletes to maintain muscle strength and performance throughout a 6-week training period, while those given a placebo experienced declines. Researchers attributed this protective effect to ginger’s antioxidative and anti-inflammatory properties.

While most studies use doses of around 2 grams of raw ginger powder per day, some research suggests benefits at lower daily intakes, such as 500 mg. The optimal dose to reduce muscle soreness likely depends on the individual and type of physical activities performed.

Consuming ginger appears most effective at alleviating muscle pain and soreness when taken for at least 5 days in a row. Ginger supplements are sometimes standardized to contain a minimum concentration of gingerols, the active compounds linked to pain relief.

In addition to supplements, ginger can be consumed as a tea, added to foods and drinks, or used as an essential oil to potentially ease muscle pain resulting from strains, sprains, exercise, menstrual cramps or an intense workout.

However, more high-quality clinical trials are still needed to determine optimal dosing. Talk to your health practitioner before taking ginger supplements regularly or in high doses, especially if you take medication or have a medical condition.

Overall, research strongly supports the traditional use of ginger to soothe muscle aches and pain through reductions in inflammation and oxidative damage that drives muscle soreness after exercise or injury. Consuming ginger may accelerate recovery while preserving strength and function in overworked muscles.

Ginger May Benefit Heart Health and Diabetes Symptoms

Ginger has shown promise in benefiting heart health and alleviating symptoms of diabetes. Its anti-inflammatory and antioxidant properties may be partly responsible for these potential health benefits.

Ginger for Heart Health

Several studies have indicated that ginger may support cardiovascular health. Gingerols, the main bioactive compounds in ginger, have been found to prevent platelet aggregation. This means they prevent blood clots from forming and lower the risk of heart attack and stroke.

In a clinical trial of patients with type 2 diabetes, 2 grams of ginger powder per day significantly lowered markers of oxidative stress. Oxidative stress damages blood vessels and raises heart disease risk. The healing powers of ginger from kitchen to medicine cabinet were on full display in protecting the heart.

Ginger also reduced LDL “bad” cholesterol, total cholesterol, and blood triglycerides. Lowering these heart disease risk factors further points to ginger’s cardioprotective effects. Preliminary research also shows ginger extract may relax blood vessels, helping lower high blood pressure.

Ginger for Diabetes Symptoms

The potential diabetes benefits of ginger are also quite remarkable. In the same study on diabetic patients mentioned earlier, ginger supplementation for 8 weeks noticeably lowered fasting blood sugar.

Another study gave ginger supplements to diabetics for 12 weeks. HbA1c, a marker of long-term blood sugar levels, decreased by 10% compared to placebo. Additionally, insulin sensitivity improved, indicating better blood sugar regulation. The authors concluded that ginger shows promise as a safe, effective treatment for optimizing blood sugar levels.

Researchers believe the natural chemicals gingerol and shogaol are likely responsible for these anti-diabetic properties. Through their antioxidant and anti-inflammatory actions, ginger helps mitigate common underlying factors behind insulin resistance.

Key Takeaways

In summary, human clinical trials show ginger benefits heart health by:

– Preventing platelet aggregation and blood clot formation

– Lowering LDL cholesterol, blood triglycerides and oxidative stress

– Potentially lowering blood pressure

Ginger also shows promise for alleviating diabetes symptoms by:

– Lowering fasting blood glucose in the short and long term

– Improving insulin sensitivity and blood sugar regulation

The healing powers of ginger from kitchen to medicine cabinet are wide-ranging, with cardiovascular and anti-diabetic effects that demonstrate its potential from common culinary herb to medicinal wonder. Those looking to obtain these therapeutic effects can take ginger supplements, drink it as a tea, or simply use it more liberally for cooking.

Ways to Add More Ginger to Your Diet

Ginger is an incredibly versatile and flavorful ingredient that can be incorporated into a wide variety of dishes. As research continues to uncover ginger’s potent medicinal properties, finding ways to add more of this zingy rhizome into your diet can provide some exciting health benefits. From sweet to savory and everything in between, here are some delicious ways to harness the healing powers of ginger from your kitchen.

Add Fresh Ginger to Smoothies and Juices

One of the simplest ways to add more ginger to your diet is by grating or mincing some into your morning smoothie or juice. The spicy kick complements fruit flavors like pineapple, mango, and orange while also enhancing the nutrient density. Ginger blends especially well with green leafy veggies like kale or spinach too. Start with a 1⁄2 to 1-inch knob of fresh ginger root and adjust to taste.

Infuse Water with Ginger Slices

For a refreshing ginger-infused water, thinly slice unpeeled ginger and add to a pitcher of ice water along with citrus slices. Allow to steep for at least a couple hours so the ginger essence infuses the water. Keep a batch in the fridge and enjoy the subtle gingery flavor all day long.

Bake with Ground Ginger

Ground ginger is fantastic for baking everything from gingerbread cookies to carrot cake. Add a teaspoon or two when baking to give a warming, spicy-sweet flavor. Ground ginger also pairs nicely with ingredients like molasses, cinnamon, nutmeg, and cloves for a nostalgic gingerbread spice flavor.

Make Ginger Tea

Sipping steaming ginger tea is a time-honored remedy for nausea and other digestive woes. Grate fresh ginger or use dried ginger powder to make a strong cup of ginger tea. Sweeten with a bit of honey and squeeze in some lemon for a soothing hot beverage. Use about 1 teaspoon freshly grated ginger per cup of water and allow to steep 5-10 minutes before straining.

Marinate Meat in a Ginger-Based Sauce

Ginger makes an excellent meat tenderizer and adds so much flavor when used to marinate chicken, beef, pork and seafood. Whisk together olive oil, soy sauce, honey, garlic and plenty of freshly grated ginger then pour over meat in a shallow dish. Let marinate for 30 minutes up to overnight before cooking.

Stir-fry with Minced Ginger

To keep ginger’s crisp flavor, add minced ginger early on when stir-frying veggies and protein on the stovetop. First sauté aromatics like garlic and onions then add thin matchsticks or minced ginger before pouring in other ingredients. This allows the ginger to infuse the cooking oil for maximum flavor.

Make Quick Pickled Ginger

Thinly sliced ginger pickled in a simple brine makes for a tasty garnish or palate cleanser between bites. Use as a topping for grains and salads or enjoy alongside rich meats or fried foods. Make sure to peel ginger before slicing paper-thin or shredding.

Blend into Dressings and Sauces

For an extra punch of flavor and health benefits, finely grate fresh ginger into salad dressings, marinades, chili, soups, and stir fry sauces. Start with about 1⁄2 teaspoon per serving and adjust according to taste preference.

Bake with Fresh Ginger

Add thin coins or minced ginger to cookie, cake, muffin and bread recipes for warmth and spice. Ginger pairs especially nicely with ingredients like molasses, brown sugar, orange, chocolate, raisins, nuts, pumpkin, sweet potatoes, apples, pears, and bananas.

Candy Crystallized Ginger

For a sweet-spicy treat, slice fresh ginger then boil in sugar syrup before tossing in granulated sugar to candy. Enjoy this crystallized ginger on its own as a snack or dessert topping or dip into chocolate for a gourmet candy.

The Healing Powers of Ginger: From Kitchen to Medicine Cabinet

As research continues revealing ginger’s incredible healing powers ranging from its anti-inflammatory properties to ability to ease nausea and muscle soreness, finding ways to incorporate more ginger into your diet can provide some exciting health benefits. With such versatility as an ingredient, creatively using ginger to spice up both sweet and savory dishes can be an easy and delicious way to harness its medicinal potential right from your kitchen.

Ginger Tea, Juice and Supplements

Ginger has been used for centuries as a healing remedy, and with good reason. Modern science is now confirming many of the traditional uses of this pungent root. When it comes to harnessing ginger’s health benefits, there are several easy ways to work it into your routine.

Ginger Tea

One of the most popular ways to consume ginger is in tea form. Ginger tea is simple to prepare – just steep sliced or grated ginger root in hot water for 5-10 minutes. Many people enjoy ginger tea for its ability to ease digestion after meals. Studies show that ginger tea can help with nausea, vomiting, loss of appetite, and motion sickness. The warming and anti-inflammatory properties of ginger tea may also help relieve cold and flu symptoms.

To make ginger tea:

– Peel and slice or grate a 1-inch piece of fresh ginger root

– Steep the ginger slices in a cup of hot water for 5-10 minutes

– Add lemon, honey or other herbs as desired

Drink up to 3 cups of ginger tea per day to harness its healing powers. The frequent consumption of ginger tea may provide relief for several gastrointestinal issues thanks to the healing powers of ginger derived directly from the kitchen into the medicine cabinet.

Ginger Juice

Juicing fresh ginger root is another easy way to incorporate its health benefits into your diet. Ginger juice contains concentrated amounts of gingerol, the main bioactive compound that gives ginger its potent medicinal properties. Research suggests that ginger juice may be especially powerful against nausea and vomiting. The anti-inflammatory effects of ginger juice can also help with joint and muscle pain, as well as cardiovascular and brain health.

To make ginger juice at home, blend grated ginger with a bit of water in a high-speed blender. Start with a 1-inch knob of ginger root per cup of water. Drink up to 2 cups per day, ideally on an empty stomach first thing in the morning. The healing powers of ginger in juice form provides an easy method to transfer its medicine cabinet abilities straight from the kitchen.

Ginger Supplements

Ginger supplements in capsule or tablet form offer a convenient way to get a concentrated dose of ginger’s health benefits. Look for supplements made from fresh organic ginger root for maximum potency. The most researched ginger supplements contain between 500-1000 mg of ginger extract per capsule. This standardized dose can ensure you’re getting an effective amount of ginger’s active compounds like gingerols and shogaols. Research different ginger supplement brands for best quality and value.

Studies suggest ginger supplements may be particularly helpful for relieving nausea, vomiting, digestive issues, inflammation and pain. Ginger supplements have also been shown to reduce risk factors for heart disease and help manage blood sugar levels. For most people, taking 1-2 ginger supplement capsules per day with food is enough to harness many of the healing powers of ginger derived from kitchen origins into easy medicine cabinet accessibility.

The Healing Powers of Ginger: From Kitchen to Medicine Cabinet

As with any supplement, it’s best to start with lower doses and work your way up to assess tolerance. Speak with your healthcare provider before taking ginger supplements if you take any medications or have a medical condition, as ginger can interact with certain drugs.

Ginger Essential Oil Uses and Benefits

Ginger essential oil has been used for centuries to harness the healing powers of ginger. With its warm, spicy, and energizing scent, ginger essential oil provides a multitude of health benefits.

Ginger Essential Oil for Pain Relief

One of the most popular uses of ginger essential oil is for natural pain relief. The active compounds in ginger oil, like gingerols and shogaols, have analgesic and anti-inflammatory properties. Massaging diluted ginger oil onto sore muscles and joints can provide relief from aches and pain. Ginger oil helps stimulate circulation, bringing warmth to painful areas. It also blocks pain receptors to reduce discomfort.

For menstrual cramps, ginger oil can be massaged onto the lower abdomen. The warming and anti-inflammatory properties help relax muscles and ease cramping. Ginger oil has also been traditionally used to relieve headaches. By rubbing a drop on the temples and forehead, the active compounds can help inhibit pain-causing prostaglandins.

Respiratory Benefits of Ginger Essential Oil

Ginger essential oil has long been used in Ayurvedic practices to help relieve respiratory conditions like coughs, colds, and congestion. When diluted and inhaled, ginger oil can help open up sinuses and clear mucus buildup. The anti-inflammatory compounds like gingerols make breathing easier by reducing inflammation in the nasal passages and lungs.

Ginger oil also has expectorant properties, helping to loosen phlegm and mucus to make coughs more productive. Try adding a couple drops to a steam inhalation to open airways or diffuse at night to relieve nighttime coughing. The antimicrobial activity of ginger oil may also inhibit growth of bacteria and viruses to help fight respiratory infections.

Soothing an Upset Stomach with Ginger Oil

From motion sickness to morning sickness, ginger has a long history of being used to settle uneasy stomachs. Inhaling ginger essential oil can help reduce nausea by activating parts of the brain that control the vomiting reflex. The oil also helps soothe stomach discomfort and indigestion.

Try putting a drop behind your ears, on your temples, or diffusing ginger oil the next time you feel queasy. The warming, energizing aroma of ginger oil can help relieve stomach distress. Ginger oil is even used to prevent seasickness and nausea associated with surgery or chemotherapy. Its ability to quickly ease stomach troubles makes ginger an essential oil medicine cabinet must-have.

The antibacterial activity of ginger essential oil can also help treat gastrointestinal infections that cause diarrhea, nausea, and dehydration. Studies show ginger oil’s active compounds inhibit growth of pathogens like listeria, salmonella, E. coli and staph infections in the gut.

Skin Care Uses for Ginger Essential Oil

With potent antioxidant and anti-inflammatory properties, ginger essential oil is also used to promote skin health. It contains protective compounds like gingerol that can shield skin from free radical damage that causes signs of aging. Ginger oil helps stimulate circulation to give skin a healthy glow while reducing puffiness.

The Healing Powers of Ginger: From Kitchen to Medicine Cabinet

The oil also helps treat inflammatory skin conditions like acne and rosacea. By reducing skin inflammation, redness, and swelling, it can help clear up chronic skin issues. Try adding a couple drops to your normal face wash or night cream to improve complexion.

Ginger oil’s antimicrobial properties also make it useful for treating fungal infections like athlete’s foot or nail fungus when applied topically. Simply add a few drops to a carrier oil and massage onto affected areas twice daily.

The Takeaway: Harness the Healing Potential of Ginger Oil

With its warm, spicy aroma and active medicinal compounds, ginger essential oil is one of the most versatile oils to have on hand. It provides an array of health benefits from easing nausea and pain to respiratory relief and skin care. Ginger oil perfectly captures the essence of this powerful medicinal root that has been relied on for centuries to harness the healing powers of ginger from kitchen to medicine cabinet.

Risks and Precautions for Ginger Use

While ginger is considered safe for most people, there are some risks and precautions to be aware of when using it as a natural remedy.

Interactions with Medications

Ginger can interact with certain medications, including blood thinners and diabetes drugs. People taking these medications should consult their doctor before taking ginger supplements or consuming large amounts of ginger.

Blood Clotting

There are some concerns that ginger may increase bleeding risk or slow blood clotting in some people. People with bleeding disorders or upcoming surgery should use caution with ginger.

Heartburn

Ginger may worsen heartburn in some people. Those with a history of acid reflux or ulcers may want to avoid large amounts of ginger.

Allergic Reactions

Allergic reactions to ginger are rare but possible. Discontinue use if any signs of an allergic reaction develop.

Pregnancy Precautions

While ginger is sometimes recommended for morning sickness, pregnant women should consult their physician before taking ginger supplements. Very high doses may pose risks during pregnancy.

Dosing

Stick to recommended doses for ginger supplements. Consuming very high amounts can sometimes cause stomach upset or heartburn. Check with your doctor about the appropriate ginger dosage for your needs.

Quality and Source

Purchase ginger supplements from reputable sources and choose supplements that have been third-party tested for purity and quality. When cooking with ginger, opt for fresh ginger root over dried ground ginger which loses some compounds over time.

As with any natural supplement, there are some minor precautions to keep in mind when using ginger to harness its healing potential. Consulting your physician can help determine if ginger supplements or increased ginger consumption could benefit your health, as well as finding the safest way to add this ancient medicinal spice into your routine.

The Healing Powers of Ginger: From Kitchen to Medicine Cabinet

The Takeaway: Harnessing Ginger’s Healing Potential

The Healing Powers of Ginger: From Kitchen to Medicine Cabinet

Ginger has been used as a medicinal herb for thousands of years, but modern science is now confirming its many health benefits. The takeaway is that ginger is more than just a flavorful spice – it is a versatile natural remedy that deserves a place in every kitchen and medicine cabinet.

Harnessing Ginger’s Healing Potential

With its ability to fight inflammation, nausea, muscle pain, and oxidative stress, ginger root is proving itself an effective remedy for a wide range of ailments. Both fresh and dried ginger can be readily worked into recipes and drinks, making it easy to incorporate into your daily routine.

While more research is still needed, the existing body of evidence suggests ginger positively impacts multiple systems in the body in the following ways:

Anti-Inflammatory Effects

Numerous studies have shown ginger exhibits anti-inflammatory properties that rival NSAID pain relievers. The compounds gingerol, shogaol, and zingerone are likely responsible for decreasing inflammation. This can alleviate joint pain, menstrual cramps, and post-exercise muscle soreness.

Immune-Boosting Antioxidants

Ginger contains high levels of antioxidants like vitamin C, beta-carotene, capsaicin, and numerous phytochemicals. Together, these compounds boost immune function and protect cells from damaging free radicals that contribute to chronic disease.

Nausea and Vomiting Relief

Clinical research strongly supports using ginger to ease nausea related to motion sickness, pregnancy, and chemotherapy. Consuming ginger before and during travel can prevent motion sickness with few side effects. Pregnant women may also find relief from morning sickness.

Heart and Diabetes Benefits

While more research is needed, some studies suggest ginger may benefit heart health by lowering LDL cholesterol and hypertension, two major risk factors for heart disease. Ginger may also modestly lower blood sugar and hemoglobin A1c in people with type 2 diabetes when consumed regularly. This indicates it may improve diabetic symptoms when paired with conventional treatment.

Given all of these therapeutic uses, ginger root is one of the most versatile medicinal herbs available. The takeaway is that ginger can be readily worked into your diet and lifestyle to harness its natural healing potential. The healing powers of ginger reach far beyond the kitchen into the medicine cabinet.

Ways to Add More Ginger

Fresh ginger root keeps for up to three weeks when stored properly in the fridge. It can be grated, juiced, pickled, or sliced and added to smoothies, stir fries, curries, and teas for an anti-inflammatory boost. Dried ground ginger works well in baked goods like ginger molasses cookies or gingerbread. Candied ginger also makes for a healthy treat.

When buying fresh ginger, look for plump, smooth roots with taut skin. Wrinkled or dried-out ginger will have less flavor and nutritional value. See our recommended recipes using fresh ginger:

– Ginger Turmeric Tea

– Carrot Ginger Soup

– Ginger Salmon Bowl

Ginger Supplements

The Healing Powers of Ginger: From Kitchen to Medicine Cabinet

For those looking to take a more concentrated medicinal dose, ginger is available in capsule, tincture, extract, lozenge, and essential oil form. Always follow dosing instructions carefully when using supplements. Consult your doctor before taking ginger extracts or essential oil if you take any medications or have a medical condition, as ginger can potentially interact with certain drugs.

The Takeaway: Harness Ginger’s Healing Potential

In conclusion, ginger root contains a powerful combination of compounds with medicinal properties spanning many therapeutic uses. Science continues to uncover its anti-inflammatory, antioxidant, and anti-nausea effects. Harnessing ginger’s healing potential is as simple as incorporating fresh or dried ginger into your recipes, drinks, and snacks. With its safety and versatility as a remedy, ginger is an aromatic healer that can move from your kitchen into your medicine cabinet.

The Healing Powers of Ginger: From Kitchen to Medicine CabinetThe Healing Powers of Ginger: From Kitchen to Medicine Cabinet

Discover the World of Peppercorns: Types, Uses, and Recipes

Discover the World of Peppercorns: Types, Uses, and Recipes

The Diverse World of Peppercorns

When you hear the word “peppercorn,” you likely think of the dried black orbs that live in your pepper grinder. However, there’s an entire diverse world of peppercorns that goes far beyond the common black variety.

Peppercorns come from pepper plants, which belong to the Piper genus in the Piperaceae family. There are over 1,000 species of pepper plants, although only a handful produce the peppercorns that are dried and used as the spice we know as black pepper. These peppercorn-producing plants grow in tropical regions near the equator, including areas of India, Indonesia, Malaysia, and Brazil.

Within the most common peppercorn-producing species such as Piper nigrum, there is still diversity in the peppercorns themselves. Peppercorns are categorized into types based on when they are harvested and how they are processed. The four main commercial types are black, white, green, and red peppercorns.

Black peppercorns are what most of us think of as regular pepper. They are harvested when almost but not fully ripe, then dried until wrinkled and dark black. This drying concentrates their spicy, earthy flavor.

White peppercorns come from nearly ripe peppercorns that have had the dark outer layer removed before drying, resulting in a milder flavor. Since the dark outer layer is missing, white peppercorns blend into lighter dishes without speckling them.

Green peppercorns are unripe, fresh peppercorns that are packed in brine or vinegar right after picking to preserve their bright green color and more herbaceous, fruity flavor. They lend a fresh, bright quality to recipes.

Red peppercorns are ripe peppercorns that are packed in brine or vinegar, retaining a pinkish-red hue and sweet, mellow flavor. They provide visual interest and mild heat.

This core group makes up the bulk of the world’s commercial peppercorn trade, but there are many more exotic varieties out there. Some examples include:

-Tellicherry peppercorns: A high quality black peppercorn grown in the Tellicherry region of India, known for its large size and bold flavor. It has received a geographical indication status.

-Lampong peppercorns: An Indonesian black peppercorn prized for its complex flavor with hints of pine and eucalyptus. It has a protected designation of origin.

-Sichuan peppercorns: Not technically a true peppercorn, this pink-red berry from the prickly ash tree has a lemony flavor and produces a tingling numbness unique from black or white pepper. It’s a staple of Chinese five spice powder.

-Cubeb pepper: This peppercorn from Java has an aroma reminiscent of pine and allspice. It was very popular in medieval European cooking before falling out of favor.

-Long pepper: Once more popular than black peppercorns, this wrinkled, grayish peppercorn has a hotter, more complex flavor. The ancient Romans were particularly fond of it in their cooking.

-Voatsiperifery peppercorns: Grown exclusively on Madagascar, this rare white peppercorn is milder than other varieties with a subtle citrusy note.

This quick tour demonstrates the diversity found in peppercorns around the world. Beyond differences in flavor, the varying types of pepper bring unique textures, colors, aromas, and heat levels to recipes. Discover the world of peppercorns by branching out from standard black pepper and trying different varieties in your own cooking.

Black, White, Green, and Red: The Main Types of Peppercorns

Peppercorns come in a rainbow of colors, each with their own unique flavors, aromas, and uses. The four main types of peppercorns are black, white, green, and red. Discover the world of peppercorns by learning about these key varieties.

Black Peppercorns – The Most Popular Variety

When most people think of pepper, they are thinking of black peppercorns. Black pepper comes from the Piper nigrum vine and is the most widely used type of peppercorn today. In fact, black pepper makes up about 20 percent of the world’s spice trade.

Black peppercorns have a robust, earthy flavor with hints of citrus and tobacco. Their flavor is bold and hot, though not nearly as spicy as chili peppers. Black pepper’s taste comes from a chemical called piperine. Many savory dishes call for coarse grinds of black peppercorns to add punch and a bit of heat.

White Peppercorns – A Milder Flavor

Discover the World of Peppercorns: Types, Uses, and Recipes

White peppercorns come from the same Piper nigrum vine as black ones, but they are harvested at a different time. White peppercorns are actually black ones that have had their dark outer layer removed. This gives white pepper a milder, more delicate flavor than black pepper.

Since the outer layer is gone, white peppercorns don’t have that same earthy flavor. Instead, their aroma is more floral and woody. White pepper has notes of clove, eucalyptus, vanilla, and cinnamon. Its flavor is much less aggressive than black pepper, making it ideal for lighter dishes. White pepper is also popular in cream sauces and mashed potatoes where those dark flecks of black pepper would stand out.

Green Peppercorns – Unripe With Unique Flavor

While black and white peppercorns come from fully mature pepper vines, green peppercorns are unripe drupes picked early in the season. Since they don’t have time to develop that outer skin, green peppercorns retain some chlorophyll from the vine that gives them their vibrant green color. They are then treated to stabilize and preserve that color.

Green peppercorns are mild like white ones but with their own distinct herbal taste. They have fresh, vibrant, almost grassy flavors reminiscent of green bell peppers and lemongrass along with that classic pepper zing. Green peppercorns work well in Thai and other Southeast Asian dishes. Try them in curries, stir fries, and marinades.

Red Peppercorns – Pretty and Fruity

The smallest and most exotic peppercorns are red ones from the Baies rose plant. These little ruby-hued balls look more like berries than peppercorns. They grow in lush, damp climates like southern India and Indochina.

Red peppercorns are not at all spicy like black or white ones. In fact, they have an incredibly sweet, fruity flavor almost like strawberries or raspberries. They are floral and fragrant with a hint of black pepper flavor way in the background.

Pretty red peppercorns make a colorful garnish for salads, desserts, and drinks. Use them to make infused vinegars and oils. You can also grind them up to season fruit dishes, chocolate confections, and more. Their sweet kick pairs wonderfully with berries, citrus, vanilla, wine, and more.

The Many Colors of Flavorful Pepper

Black, white, green, and red peppercorns each have such unique flavors, it’s hard to imagine they all come from the same family of plants. Yet while their tastes differ dramatically, they all contain that signature spicy zing that makes pepper so addicting.

The next time you use pepper, think about which variety would work best in your dish. Do you need the punchy heat of black peppercorns to season a steak? How about floral, fruity red pepper to garnish a dessert? Or maybe some green peppercorns to give bright, herbal notes to a Thai curry.

With black, white, green and red peppercorns to choose from, you can take any dish around the world of flavors. Discover the world of peppercorns by trying out all these tasty varieties.

Where Do Peppercorns Come From? A Look at Their Origins

Peppercorns have a long and storied history, originating in India over 4000 years ago and spreading across the ancient world via land and sea trade routes. Today, pepper is cultivated across the tropics, with key producers including India, Indonesia, Brazil, Vietnam, and Malaysia.

Discover the World of Peppercorns: Types, Uses, and Recipes explores the geography, climate, and growing conditions that allow pepper vines to thrive and produce the coveted peppercorns that add bite, aroma, and depth to cuisines across the globe.

India: The Original Home of Black Pepper

As highlighted in Discover the World of Peppercorns: Types, Uses, and Recipes, black pepper is native to the Malabar Coast of Southwest India, with references to pepper appearing in ancient Indian scriptures dating back over 4000 years. The tropical climate, heavy monsoon rains, and lush forests of the Western Ghats provide ideal growing conditions for black pepper vines.

Traditionally, pepper vines would be cultivated on forest trees, climbing up to heights of over 30 feet. Today, while wild forest pepper is still harvested in parts of India, most cultivation has shifted to dedicated pepper trellises on plantations.

Key black pepper growing regions in India include the states of Karnataka, Kerala, Tamil Nadu, and Goa. India remains one of the world’s largest producers and exporters of high-quality black pepper.

Indonesia: World’s Top Producer of White and Black Pepper

While black pepper originated in India, today Indonesia dominates global pepper production. The island nation is the world’s number one producer of both white and black peppercorns, highlights Discover the World of Peppercorns: Types, Uses, and Recipes.

With a hot, humid tropical climate and abundant rainfall, Indonesia’s islands of Bangka and Lampung provide perfect pepper growing conditions. In fact, the Lampung province on the island of Sumatra is known as the “home of white and black pepper” and accounts for over 40% of Indonesia’s pepper exports.

Originally introduced by Indian and Chinese traders, pepper cultivation in Indonesia took off under Dutch colonial rule. Today, smallholder farms focused exclusively on pepper account for over 95% of Indonesia’s production. Key growing regions include the islands of Sumatra, Bangka-Belitung, Sulawesi and Java.

Brazil & Vietnam: Major Producers of Black Pepper

While less well-known as points of origin, Brazil and Vietnam also play major roles in global black pepper production, as highlighted in Discover the World of Peppercorns: Types, Uses, and Recipes.

In Brazil, the tropical climate and rainforest ecosystem of the Amazon allows black pepper vines to thrive. The states of Pará and Amapá are the epicenter of Brazilian pepper production. In Vietnam, Phú Quốc Island off the southern coast, along with parts of the Central Highlands, provide ideal growing conditions.

These tropical pepper powerhouses use trellising systems that allow vines to climb steel wires or living tree trunks, just as in traditional Indian cultivation. From the vines come the coveted black peppercorns, to be dried and exported across the world.

Malaysia: A Rising Star in White Pepper Production

While dwarfed by the massive pepper outputs of Indonesia, Brazil and Vietnam, Malaysia earns an honorable mention as an up-and-coming peppercorn supplier, as highlighted in Discover the World of Peppercorns: Types, Uses, and Recipes.

Located near the equator, Malaysia’s tropical climate allows black pepper vines to thrive. While it has historically been overshadowed by neighbors like Indonesia and India, Malaysia has invested heavily in expanding pepper production over the last decade.

The states of Sarawak and Sabah in northern Borneo are leading the charge as Malaysia’s premier pepper growing regions. In particular, the white pepper output of Sabah has been increasing rapidly. Expect Malaysian white and black peppercorns to continue gaining global market share in the years ahead.

From Tropical Origins to Global Destinations

While pepper vines thrive in hot, humid equatorial climates, peppercorns and their intense, intoxicating flavor find their way into cuisines across vastly different geographies. Whether grown in India, Indonesia, Brazil, Vietnam or Malaysia, the journey from vine to table often spans thousands of miles.

Discover the World of Peppercorns: Types, Uses, and Recipes takes you on a peppercorn’s voyage from lush tropical origins to dishes across the globe – a trip nearly as lengthy and captivating as pepper’s ancient story itself.

Using Peppercorns: Cooking Tips and Recipe Ideas

Peppercorns can transform the flavor of savory dishes, adding a touch of spicy heat or a subtle earthiness depending on the type used. Discover the world of peppercorns and learn how to use their unique flavors to make your food taste extraordinary.

When cooking with peppercorns, start with small amounts and adjust to taste. Cracked or coarsely ground peppercorns will provide bursts of intense flavor, while finely ground pepper offers more even distribution. Try mixing colors for additional complexity. Here are some tips for using various types of peppercorns:

Black Peppercorns:

– Coarse cracks or grounds are excellent on meat, eggs, vegetables, pasta, pizza and more

– Add to rubs and marinades for a touch of heat

– Use in hearty dishes like stews, pot roasts, casseroles and chili

– Toast lightly to bring out aromas before grinding

White Peppercorns:

– Finely ground white pepper is perfect for lighter dishes where you don’t want black flecks

– Excellent for cream sauces, mashed potatoes, salads, fish and chicken

– Brings a spike of flavor without altering color

– Pair with lemon, ginger and other bright flavors

Green Peppercorns:

– Pickle in vinegar for a tangy, fresh pepper flavor

– Add to salad dressings, marinades, pasta sauce and rice dishes

– Milder heat pairs well with seafood, poultry, tofu and vegetables

– Use crushed or cracked over finished dishes

Discover the World of Peppercorns: Types, Uses, and Recipes

Red Peppercorns:

– Impart a fruity, subtly spicy flavor

– Excellent crushed over meat, vegetables, fish and egg dishes

– Use whole in pickling blends and brines

– Make a unique seasoning blend with salt and other dried herbs

Now that you know how to use the different types of peppercorns, here are some recipe ideas to help you discover the world of peppercorns:

Peppercorn Crusted Steak

Dry-aged beef seasoned with a cracked black peppercorn crust for an incredibly flavorful exterior. Serve with mashed potatoes to soak up the juices.

Creamy Peppercorn Chicken

Boneless chicken breasts simmered in a rich sauce made with brandy, chicken stock and cracked green and white peppercorns. Spoon over rice or pasta.

Peppercorn Shrimp Skewers

Jumbo shrimp marinated in lemon, olive oil and coarse red peppercorn cracks, then grilled. The sweet peppercorn flavor pairs beautifully with the char.

Peppercorn Chocolate Mousse

A sophisticated, bittersweet chocolate mousse with a hint of black peppercorn heat. An unexpected but addictive combination! Garnish with berries.

As you can see, peppercorns are incredibly versatile in cooking. Their diversity allows cooks to add flavorful heat and aroma to dishes across the culinary spectrum. Whether using cracked black peppercorns on a steak, finely ground white in a delicate sauce, pickled green peppercorns for brightness or mellow red peppercorns for fruitiness, peppercorns are a spice lover’s dream.

So go on, discover the world of peppercorns by experimenting with types, grinds and recipes. Let peppercorns transform your cooking and tantalize tastebuds with layers of flavorful heat.

Peppercorn Health Benefits: The Compounds That Make Them Nutritious

Peppercorns Health Benefits: The Compounds That Make Them Nutritious

Peppercorns may be small, but these dried berries pack a nutritional punch. Discover the world of peppercorns and learn about the health-promoting compounds that make various peppercorn varieties so good for you.

Peppercorns are high in antioxidants, anti-inflammatory agents, and essential nutrients. The diverse antioxidant content comes from two key groups of plant nutrients: polyphenols and carotenoids. These beneficial compounds are found in all types of peppercorns, including black, white, green and red varieties.

Polyphenols Protect Cells and Fight Inflammation

Polyphenols are micronutrients naturally found in many plant foods. Over 8,000 different polyphenols have been identified by researchers. Peppercorns contain various polyphenols, including ferulic acid, quercetin, gallic acid, catechins, and anthocyanins (in red peppercorns).

These polyphenols have antioxidant and anti-inflammatory effects in the body. They help protect cells from oxidative damage, fight inflammation, and reduce disease risk factors.

For example, the polyphenols in black pepper may help regulate blood sugar levels and reduce oxidative stress and inflammation related to diabetes. Compounds in Sichuan peppercorns could have cancer-fighting properties by inducing cell death in certain cancer cell lines.

Carotenoids: Antioxidants for Healthy Vision and Immunity

Carotenoids are the yellow, orange, and red plant pigments that give some peppercorns their vibrant colors. The carotenoid content is especially high in red peppercorns. Key carotenoids found in this peppercorn variety include capsanthin, capsorubin, cryptoxanthin, lutein, zeaxanthin, and beta-carotene.

These carotenoids have antioxidant effects to boost eye health and immune function. Lutein and zeaxanthin can improve visual function by protecting the eyes from blue light damage. Beta-carotene, cryptoxanthin, and other peppercorn carotenoids get converted into active vitamin A to support healthy immunity.

Essential Nutrients: Manganese, Iron, and Vitamin K

In addition to antioxidants and anti-inflammatory agents, peppercorns provide essential micronutrients like manganese, iron, and vitamin K.

One teaspoon of black peppercorns contains about 12% of the recommended daily intake for manganese. This mineral is necessary for healthy nerve signaling, blood sugar control, bone development, and immune function.

Small amounts of iron in peppercorns improve oxygen transport in the blood to boost energy levels. Vitamin K promotes proper blood clotting and supports bone and heart health. The vitamin K content is highest in green peppercorns.

Boosting Bioavailability for Better Absorption

To get the most health benefits out of peppercorns, it helps to maximize nutrient bioavailability. Combining pepper with other spices or herbs can inhibit or enhance the absorption of health-promoting compounds.

Piperine, the main bioactive alkaloid in black peppercorns, has been shown to increase absorption of nutrients like selenium, beta-carotene, curcumin, and vitamins A, C, and E. Enjoy peppercorns paired with bright, antioxidant-rich herbs like turmeric or antioxidant-packed veggies like tomatoes.

Proper storage and preparation methods also impact bioavailability. Grind peppercorns just before using them for more intense flavor and nutrition. Use a blend of cooking methods like sautéing followed by gentle simmering in soups, stews, and curries.

Discover the World of Peppercorns for a Health Boost

While more research is needed, the diverse antioxidants, anti-inflammatory agents, and nutrients in various peppercorn varieties appear to promote human health. So do not be afraid to add a pinch or two of black, white, green, or red peppercorns into your favorite savory dishes and meals to amplify nutrition along with flavor. Discover the world of peppercorns today to boost your overall health and wellness all the way from farm to table.

Buying and Storing Peppercorns: How to Keep That Spice Kick

Peppercorns are the dried berries from the pepper plant, providing a sharp and spicy kick to dishes. But like all spices, peppercorns lose their potency over time. Follow these tips on buying and storing peppercorns to keep them fresh and flavorful.

Where to Buy Peppercorns

You can find whole peppercorns at well-stocked grocery stores, spice shops, and online. When buying, look for peppercorns that are uniform in color and free from spots or dusty coating. Reputable spice companies provide information on where and when the pepper was harvested. This helps ensure you’re getting a high-quality, potent product.

How Much to Buy

Since ground pepper loses flavor quickly, buy whole peppercorns and grind as needed. The optimal amount to buy depends on how frequently you cook with pepper. Buying in smaller quantities, like 2-4 ounces, ensures you use it before it loses potency. Home cooks may go through a pound every few months.

Look for tightly sealed containers, whether plastic, glass, or metal. Well-sealed containers prevent volatile essential oils from escaping, keeping your Discover the World of Peppercorns: Types, Uses, and Recipes peppercorns flavorful longer.

Proper Storage

Exposure to light, heat, air, and moisture causes peppercorns and spice mixes containing peppercorn to lose their kick. Follow these tips to prolong shelf life:

– Store in a cool, dark place away from heat sources like the stove or oven. An ideal temperature is around 68°F.

– Keep peppercorns in their original airtight container or transfer to an airtight glass jar. Opaque containers also limit light exposure.

– Buy whole peppercorns instead of pre-ground. Grind them as needed to maximize flavor.

– Check containers periodically to ensure the seal remains intact. Refresh with new peppercorns if you detect loss of aroma.

– Buy peppercorns from sellers with good product turnover to ensure freshness. Check packaging dates when available.

With optimal storage methods, whole peppercorns can retain their potency and flavor for around three years. Pre-ground pepper lasts only around three to four months before flavor loss is noticeable. Refrigerate pre-ground pepper in an airtight container to extend life slightly if you don’t use it often.

How to Tell if Peppercorns Are Still Good

It’s easy to tell if your peppercorns or spice mixes containing peppercorn are past their prime. Signs of stale pepper include:

– Fading color and appearance

– Diminished or missing aroma

– Weak flavor lacking punch

– Presence of off-flavors like musty or bitter notes

Discover the World of Peppercorns: Types, Uses, and Recipes

If your peppercorns exhibit any of these qualities, it’s time to replace them with a fresh supply.

Storing Peppercorn Blends

Popular spice blends like steak seasoning, garam masala, Chinese five spice, and herbes de Provence often contain peppercorns. Store these the same way you would pure peppercorns. An airtight container in a cool, dark place maintains optimal flavor.

Be aware that the other herbs and spices in the blend may have shorter shelf lives. Citrus peel, onions, and herbs deteriorate faster than peppercorns. So while the pepper flavor may last for years, other notes may fade. Taste test occasionally and refresh stale blends with a new batch.

Freezing Peppercorns

While freezing can extend the shelf life of some spices, results vary for peppercorns. Some cooks report success keeping whole peppercorns in the freezer for extra-long storage.

However, freezing may diminish some volatile aromatics. And moisture can still permeate bags and containers in the freezer. So while freezing may preserve peppercorns very long term, some nuances of flavor may be sacrificed. You’re better off buying smaller amounts and storing in a cool, dark place.

How to Keep Pepper Kick with Prepared Meals and Leftovers

From meal prepping ingredients to leftover dinners, improper storage can rob Discover the World of Peppercorns: Types, Uses, and Recipes peppercorns and pepper-heavy dishes of their punch. Here are some dos and don’ts:

Do:

– Make dishes to be frozen within a day or two, not longer.

– Allow dishes to cool thoroughly before freezing.

– Use freezer-safe packaging like bags and airtight containers.

– Freeze for no more than 2-3 months.

Don’t:

– Freeze peppery dishes for longer than a few months. Flavor will still diminish over time.

– Store peppercorns or ground pepper in the freezer long-term.

With some care taken to buying and storing, your peppercorns can retain their signature spice and heat for years. Follow these tips to avoid lackluster dishes due to flavorless pepper. Keep your dishes tasting bold and vibrant by refreshing stale peppercorns and pre-ground pepper.

From Ancient Trade to the Modern Table: The History of Pepper

Pepper has a long and storied history as one of the world’s most popular spices. References to pepper appear in ancient Greek and Sanskrit texts, indicating it was an important trade item over 4,000 years ago. But how did pepper make its way from a flowering vine in Southern India to being a ubiquitous presence on modern dining tables?

Discover the World of Peppercorns: Types, Uses, and Recipes traces pepper’s spread along early trade routes to become one of history’s most sought-after spices. Pepper’s popularity is thanks in part to its versatility – the many Discover the World of Peppercorns: Types, Uses, and Recipes lend flavor and zest to dishes across cuisines. From ancient times to today, pepper continues being among the most common spices added to blends and recipes.

Pepper’s Origins in Ancient Trade

Pepper is native to South Asia, particularly in the monsoon forests of Kerala in southwest India. As early as 1000 BCE, pepper was an important trade good that made its way to the Middle East along maritime trade networks. Numerous ancient historians, from Pliny to Marco Polo, referenced the spice trade between Southern India and regions along the Mediterranean. Pepper and other spices like cinnamon and nutmeg were incredibly valuable – they were dubbed “black gold.”

Peppercorns as Currency

In fact, for centuries pepper functioned as a de facto currency in addition to a cooking ingredient. Alaric the Visigoth demanded over a ton of black peppercorns as part of his ransom of Rome in the 5th century CE. When the Portuguese explorer Vasco de Gama reached Southwest India by sea in 1498, he was astounded by the abundance of pepper. The Portuguese and other European powers quickly sought to dominate the supply chain of what Europeans sometimes called “black gold.” Establishing colonial outposts and trade monopolies over the Indian pepper industry became incredibly lucrative.

The Columbian Exchange: Pepper Goes Global

As European colonization connected previously disconnected parts of the globe, ingredients like pepper, along with corn, potatoes, and tomatoes crossed oceans and reshaped cuisines. Historians call this the Columbian Exchange. While many spices like cinnamon, cloves, and nutmeg were already present in European kitchens by medieval times, the amount of pepper brought back and traded by ships multiplied exponentially in the 16th century. Soon pepper appeared across Europe, the Americas, Africa and Asia in curries, stews, breads, confections and preserving mixes.

Pepper Today: From Ancient Spice to Modern Staple

Walk into any grocery store today and you’re guaranteed to find Discover the World of Peppercorns: Types, Uses, and Recipes ground black pepper seasoning along with salt. Pepper’s popularity has endured over millennia because it adds depth, heat, and complexity to dishes both savory and sweet. The world’s top pepper producers are still India, Indonesia, Vietnam, and Brazil.

The uses of peppercorn today would still be recognizable to spice traders of antiquity – pepper flavors meats, broths, marinades, and vegetables. But pepper now appears in more diverse cuisines and dishes than ever before thanks to globalized trade connecting distant regions. Exploring peppercorn types and uses today reveals the spice’s continuing history of shaping how cultures approach flavor.

Peppercorn Recipes: Main Dishes, Sides, Desserts and More

Peppercorns can transform both savory and sweet dishes, adding a distinctive kick and fragrance. From main courses to sides, desserts and more, peppercorns are a versatile spice that no pantry should be without. Discover the world of peppercorns and explore new recipes featuring these flavorful dried berries.

Peppercorn-Crusted Steak

This peppercorn-crusted steak makes for an easy, impressive main. The cracked peppercorns form a flavorful, crispy crust on the exterior of the steak while keeping the inside nice and juicy. Serve with roasted potatoes or pasta for a satisfying meal.

Ingredients:

– 2 steaks of your choice (ribeye, NY strip, filet mignon work well)

– 2 tbsp whole black peppercorns, coarsely cracked

– 2 tbsp olive oil

– 2 tbsp butter

– Salt to taste

Instructions:

1. Take steaks out of fridge and allow to come closer to room temperature, about 20 minutes. Pat dry.

2. Coarsely crush the peppercorns with a mortar and pestle or the bottom of a heavy pan. Spread out on a plate.

3. Brush both sides of steaks lightly with olive oil then press both sides firmly into the cracked peppercorns.

4. Heat a cast iron skillet over high heat. When very hot, add butter.

5. Cook steaks to desired doneness, about 2-4 minutes per side for medium rare. Baste with melted butter several times when flipping.

6. Let steaks rest 5 minutes before serving. Enjoy your peppery, buttery steak!

Peppercorn Salmon

Salmon gets a flavor upgrade when encrusted with bold Madagascar peppercorns. Their fruitiness pairs beautifully with the fish. Serve on a bed of lemon pepper rice or roasted veggies.

Ingredients:

– 4 salmon fillets

– 2 tbsp whole Madagascar peppercorns

– Zest of 1 lemon

– 2 tbsp olive oil

– Salt and pepper to taste

Instructions:

1. Crush peppercorns coarsely with mortar and pestle or bottom of pan.

2. Mix crushed peppercorns and lemon zest. Spread out on a plate.

3. Brush salmon lightly with olive oil. Season with salt.

4. Firmly press salmon fillets into peppercorn mixture until coated.

5. Roast at 400°F skin-side down for 12-15 minutes until cooked through.

6. Serve salmon peppercorn-side up with desired sides.

Peppercorn Scalloped Potatoes

This creamy, peppery potato dish makes the ultimate comfort food side. The cracked peppercorns add bite to balance out the richness.

Ingredients:

– 3 lbs russet or Yukon gold potatoes, sliced

– 1 cup shredded cheddar

– 3 tbsp butter

– 3 tbsp flour

– 2 cups milk

– 1 tbsp whole black peppercorns, cracked

– 1 tsp salt

– 1⁄4 tsp nutmeg

Instructions:

1. Heat oven to 375°F. Grease a 9×13 baking dish.

2. Layer 1/3 of the potatoes evenly into the dish, covering the bottom. Sprinkle some of the cheese, salt, and pepper.

3. Make another layer with 1/3 of the potatoes and seasonings. Top with last third of potatoes and seasonings.

4. In a saucepan, melt butter over medium heat. Whisk in flour for about 1 minute. Gradually whisk in milk and bring to a gentle boil, stirring frequently, until thickened to a creamy sauce.

5. Pour sauce evenly over the potatoes.

6. Bake uncovered for 1 hour 10 minutes. Let sit 10 minutes before serving.

Peppercorn Chocolate Bark

A bit of black pepper gives this dark chocolate bark a subtle kick. With contrasting peppermint pieces, this sophisticated dessert will have your guests talking. Wrap in cellophane for perfect edible gifts.

Ingredients:

– 12 oz good-quality dark chocolate

– 1 tbsp whole black peppercorns, coarsely cracked

– 1⁄4 cup crushed peppermint candies

– Pinch flaky sea salt

Instructions:

1. Line a baking sheet with parchment. Have peppercorns and peppermint crushed and ready.

2. Melt chocolate in microwave or over double boiler. Spread evenly onto sheet in about a 1⁄4 inch layer.

3. Sprinkle over cracked peppercorns and peppermint pieces, gently pressing so they adhere.

4. Sprinkle lightly with a couple pinches of sea salt flakes.

5. Refrigerate 30 minutes or until completely set. Break into irregular pieces before serving or gifting. Store in an airtight container for up to 2 weeks.

Whether you’re cooking up peppercorn steak, scalloped potatoes, salmon or even chocolate bark, you’ll love exploring new dimensions of flavor with these versatile dried pepper berries. Keep discovering the incredible world of peppercorns!

Grinding Peppercorns: Tools and Methods for Unleashing Flavor

Peppercorns are bursting with intense, aromatic flavors that can greatly enhance your cooking. However, getting the most out of your peppercorns requires proper grinding. By using the right tools and techniques, you can unlock the full potential of peppercorns and add that final punch of flavor to your dishes.

The Best Peppercorn Grinders

Manual and Electric Options

When it comes to grinding peppercorns, you have two main options – manual or electric grinders. Manual grinders require twisting a crank by hand to crush the peppercorns. Electric grinders do the work for you at the push of a button. Both have their pros and cons in terms of convenience and grind size control.

Here are some of the most popular peppercorn grinders to consider:

Manual Grinders:

– Peugeot Paris U’Select – Highly-rated French model with adjustable coarseness settings

– Unicorn Magnum Plus – Heavy-duty metal grinder with extra large hopper capacity

Electric Grinders:

– Cole & Mason Derwent – Sleek, rechargeable electric model with 6 preset grind sizes

Discover the World of Peppercorns: Types, Uses, and Recipes

– Olde Thompson Stainless Steel – Classic electric grinder with light and efficient motor

Tips for Choosing a Peppercorn Grinder

No matter which type of grinder you select, keep these tips in mind:

– Grind Mechanism – Ceramic and carbon steel provide the most uniform grind

– Adjustable Settings – Ability to choose fine or coarse gives more versatility

– Hopper Size – Bigger is better for handling whole peppercorns

– Durability – Solid interior mechanism ensures long-lasting performance

Proper Grinding Techniques

Getting the Right Grind Size

One of the keys to maximizing peppercorn flavor is using the appropriate grind size. A fine powder is ideal for blending into liquids and batters. Meanwhile, coarsely cracked peppercorns will give a burst of flavor and texture when used as a finishing touch.

Most chefs recommend keeping whole peppercorns to grind fresh at the time of cooking or serving. Pre-ground pepper quickly loses its aroma and flavor. For recipes that require intense pepper flavor throughout, try grinding in stages – early in cooking and as a last step before eating.

Discover the World of Peppercorns: Types, Uses, and Recipes

Here are some examples of appropriate grind sizes for different applications:

Extra Fine Powder – Salad dressings, marinades, spices rubs

Fine Grind – Sauces, soups, stews, breads

Medium Grind – Meat, fish, roasted vegetables

Coarse Cracked – Finishing touch for pasta, pizza, grilled meats

Whole Peppercorns – For use in a mill at the table

Storing Ground Pepper

Keeping the Flavor Intact

Once peppercorns have been ground, it’s important to store them properly to maintain freshness. Here are some storage tips:

– Keep in air-tight container away from light, heat, and moisture

– Glass jars or stainless steel tins work better than plastic

– Only grind what you plan to consume within a month

– For long-term storage, keep whole peppercorns (lasts years)

– If ground pepper smells dull/stale, it’s lost flavor and should be replaced

Following these simple grinding, size, and storage principles will help you get the most out of your peppercorns. Experiment with different grinders and settings to find your favorite flavors and textures. Discover the World of Peppercorns: Types, Uses, and Recipes today!

Peppercorn Gardening: How to Grow Your Own Peppers

For any culinary enthusiast seeking to Discover the World of Peppercorns: Types, Uses, and Recipes, growing your own peppercorn plants can be a fun and rewarding gardening project. Freshly harvested peppercorns have an unbeatable flavor and aroma that enhances all kinds of recipes and dishes. Follow this guide to peppercorn gardening to learn how to grow your own peppers at home.

Getting Started with Peppercorn Gardening

Many types of pepper plants can thrive in home gardens with the right conditions. Most peppercorn varieties require warm weather and plenty of strong sunlight. Before planting peppercorn seeds or seedlings, prepare your garden bed with nutrient-rich soil and make sure it gets at least 6-8 hours of direct sun daily. Amend clay-heavy soils with compost or other organic material to allow for good drainage.

Once your garden bed is prepared, determine the best time to plant based on your local climate. Peppercorn plants grow best when daytime temperatures are between 70-90° F and night temperatures stay above 60° F. This makes late spring to early summer the ideal planting window in most temperate regions. Gardeners in cooler climates may need to start peppercorn seeds indoors up to two months before the last expected frost date.

Choosing Peppercorn Varieties to Grow

Gardeners can choose from many types of peppercorn plant varieties. Some of the most popular options include:

• Black peppercorns – Derived from the Piper nigrum vine, these peppercorns have a bold, earthy flavor. Grow black peppercorn vines on trellises or poles in zones 10-11 or bring potted vines indoors in winter.

• Szechuan peppercorns – For a touch of heat and citrus, grow the Zanthoxylum piperitum shrub. Prefers growing zones 8-11.

• Pink peppercorns – These mild, fruity peppercorns come from the Baies rose plant, which grows best in zones 10-11.

Discover the World of Peppercorns: Types, Uses, and Recipes

• Green peppercorns – Actually unripe black peppercorns, these can be grown using the same Piper nigrum vines.

• Long pepper – An ancient peppercorn variety still popular in Indian cuisine, derived from Piper longum vines. Thrives in growing zones 10-12.

Plant your chosen peppercorn variety according to the seed packet or plant tag instructions. Water seedlings regularly until they become established. Place trellised varieties near a vertical support structure. Over time, you’ll be harvesting vibrant peppercorns to enhance your culinary creations!

Caring for Peppercorn Plants

Peppercorn plants need consistent moisture and warm temperatures to produce abundant fruit. Water plants about one inch per week, adjusting for rainfall. Use drip irrigation or soaker hoses to keep foliage dry and prevent disease.

Apply a balanced fertilizer when planting and once more during the growing season. Watch out for aphids, spider mites, and fungal issues, treating any outbreaks quickly with organic sprays. Prune back overgrown vines to stimulate new growth. Add mulch around the plants to lock in moisture and deter weeds.

With the right care and conditions, your homegrown peppercorn plants will flourish!

Harvesting Peppercorns for Spice

Peppercorn plants produce slender fruit that ripens to become the peppercorns used in cooking. Depending on variety, plants typically take between 100-130 days to begin bearing fruit. As fruits mature, they change color and become wrinkled.

To harvest peppercorns, pick individual fruits by hand once the color deepens. Time harvests for mid-morning after dew dries for best flavor. Place harvested peppercorns on screens or baking sheets to dry for up to two weeks until brittle. Dried peppercorns can be stored for up to a year in airtight containers away from light.

Now you’re ready to grind your own fresh peppercorns for incredible aromas and flavors! Add them to rubs, marinades, baked goods and any dish that would benefit from the distinctive notes of pepper. Homegrown peppercorns make for unique gifts for fellow foodies as well.

The Rewards of Growing Your Own Peppercorns

As any gardening enthusiast knows, few things compare to the pride and satisfaction of harvesting something you cultivated yourself. And for fans eager to Discover the World of Peppercorns, growing peppercorn plants at home takes that experience to another level entirely.

With the right growing conditions, peppercorn gardening can yield an abundant, renewable spice source. Tailor your harvests to your taste preferences – pick early for milder flavor or allow peppercorns to fully mature for boldness. Best of all, freshly homegrown peppercorns have unparalleled vibrancy and nuance well worth savoring.

So do your recipes a favor by planting some peppercorn vines this season. Let your garden help you become a peppercorn connoisseur!

Basil 101: Growing, Cooking, and Health Benefits

Basil 101: Growing, Cooking, and Health Benefits

Introduction to Basil

Basil 101: Growing, Cooking, and Health Benefits – Introduction to Basil

Basil is one of the most popular and beloved herbs in cuisines around the world. As part of the mint family, this fragrant green herb has been used for culinary and medicinal purposes for thousands of years. But what exactly is basil?

Basil, or Ocimum basilicum, is an annual herb that originated in the regions of Iran, India and other tropical countries in Asia. Today, basil is grown commercially on every continent thanks to its popularity and importance as an ingredient and garnish.

There are actually many different varieties of basil. The most common type is sweet basil, which has a sweet, peppery flavor and scent. Other varieties like lemon basil, cinnamon basil and Thai basil have their own unique smells and tastes. The different basil types can be used to add different flavors to dishes.

No matter the variety, basil plants are characterized by their oval leaves with pointed ends. The plants can grow over 2 feet tall when mature. Basil is extremely versatile – it can be used fresh, dried or frozen in cooking. Its flowers and leaves are also edible.

So why is basil so popular in cooking? One reason is its incredible flavor and aroma. Basil has floral, anise-like notes that are released when its leaves are cooked or chopped. This makes basil a star ingredient in recipes like pesto, marinara sauce, Caprese salad and Thai curries. Basil also pairs exceptionally well with tomatoes, cheese, eggs, chicken and lemon flavors.

In addition to its bold, sweet taste, basil offers many potential health benefits. Basil is packed with nutrients like vitamin K, vitamin A, calcium, iron and potassium. It also contains compounds that may have anti-inflammatory and antimicrobial properties. Research suggests that basil could help prevent chronic illnesses, improve brain function and more – though more studies are still needed.

With its importance in global cuisine, intriguing history and health benefits, it’s clear why basil has been cherished for so long. This versatile herb continues to be a staple in kitchens and gardens worldwide. Whether you’re cooking pasta al pesto or a Thai chicken basil stir fry, it’s hard to imagine many savory dishes without the iconic flavor of basil.

The rest of this article “Basil 101: Growing, Cooking and Health Benefits” will explore everything you need to know about basil. You’ll learn optimal growing conditions, the best varieties for your kitchen, ways to use basil’s flavor in snacks, main dishes and even cocktails. We’ll also dive into the interesting backstory of basil and fun facts about this aromatic herb. Let’s start unlocking the secrets of basil!

Basil 101: Growing, Cooking, and Health Benefits

Optimal Conditions for Growing Basil

Basil is one of the most popular and commonly used herbs in cuisines around the world. With its sweet, aromatic flavor, basil adds a fresh taste to many dishes. While dried basil is convenient, nothing compares to the flavor of fresh basil straight from your garden or windowsill.

Growing basil is relatively easy as long as you provide the right conditions. The keys to successfully growing basil are plenty of sunlight, warm temperatures, well-drained soil, adequate moisture, and good air circulation. Follow these simple guidelines for optimal conditions, and you’ll be harvesting delicious basil all season long.

Sunlight Requirements

As a plant native to tropical regions, basil thrives on sunlight. It needs at least 6-8 hours of full sun exposure each day. Basil grown in shade tends to become leggy as the plant reaches for sunlight. The leaves may also have less flavor. Choose the sunniest part of your vegetable garden, a bright windowsill, or a spot on a balcony or patio that gets sunlight for most of the day. Basil can even be successfully grown indoors under grow lights.

Ideal Temperatures

Warmth-loving basil prefers daytime temperatures between 70-85°F (21-29°C) and 60-70°F (16-21°C) at night. Temperatures below 50°F (10°C) can damage basil plants. In most climates, basil can be grown outdoors during the warm summer months. Use fabric row covers or cloches to protect basil if cool weather threatens. Bring potted plants indoors or move to a greenhouse if temperatures drop too low outside. Indoors, keep basil in the warmest, sunniest room in your home.

Soil Requirements

Rich, well-drained soil is key for healthy basil plants. The soil should be slightly acidic to neutral, with a pH between 6.0-7.5. Before planting, work some compost or aged manure into the top 6 inches of soil to increase fertility and moisture retention. Good drainage is also critical to prevent fungal diseases; add organic material like compost or peat moss to improve water drainage if necessary. Use container gardening for basil if you don’t have ideal garden soil—just be sure the pot or planter has drainage holes at the bottom.

Watering Basil 101

Basil needs consistently moist soil but not waterlogged conditions. Allow the soil surface to dry slightly between waterings, then water thoroughly. Drooping leaves often indicate under-watering. Apply water at soil level rather than overhead to prevent fungal diseases. Add a thick layer of mulch around outdoor basil plants to maintain soil moisture and discourage weeds. For potted basil, choose containers large enough to avoid frequent watering. Never let potted basil dry out completely.

Air Circulation

Good air movement discourages fungal disease and helps produce sturdy basil stems and leaves. Space plants 12-15 inches apart in the garden to allow air to circulate. Pinch off the top pair of leaves once plants reach 6 inches tall to encourage bushy growth. For indoor basil, use oscillating fans to gently blow air over the plants. Avoid cold drafts. Open nearby windows whenever possible for fresh air.

By following these optimal conditions—ample sunlight, warm temperatures, fertile soil, consistent moisture, and good air flow—you’ll be rewarded with an abundant basil harvest all season long. Adjust conditions as needed based on your climate, gardening zone, and microclimate where basil is grown. Soon your kitchen will be filled with the aromatic flavor of homegrown basil.

Planting and Caring for Basil

Basil is an extremely versatile herb that is easy to grow and care for. With proper planting and care, you can have an abundant harvest of flavorful basil leaves to use in various dishes all season long.

When to Plant Basil

The best time to plant basil depends on your climate. Basil is a warmth-loving plant that thrives in hot weather. Most gardeners recommend planting basil outdoors after all danger of frost has passed when daytime temperatures reach at least 65°F to 70°F and when the nighttime temperatures stay above 50°F. This is usually late spring to early summer.

If you live in an area with a long growing season, you can sow basil seeds directly in the garden. In cooler climates with shorter summers, it’s best to get a head start by growing basil indoors and transplanting seedlings outside later. You can start basil indoors 4-6 weeks before the last expected frost.

Where to Plant Basil

When planting basil, choose a spot that gets 6-8 hours of full sun daily with rich, well-drained soil. Basil needs consistently moist soil and does poorly in drought-like conditions. Amend the soil with compost or aged manure before planting to improve drainage and nutrients.

Container gardening is also a great option for growing basil. Use a pot that’s at least 6 inches deep with drainage holes at the bottom. A 12-14 inch diameter pot will provide enough room for basil roots to spread. Make sure to use a quality potting mix.

How to Plant Basil

If planting basil from seed, sow seeds 1⁄4 inch deep. Space seeds or seedlings 12-15 inches apart in rows set 15-18 inches apart. When transplanting store-bought basil plants into the garden, very gently loosen the root ball before placing it in the planting hole. Backfill the hole with soil, pack gently around the plant, then water thoroughly after transplanting.

To plant basil in containers, sow 2-3 basil seeds or plant seedlings spaced 4-6 inches apart in pots. After they sprout, thinning out the weaker seedlings will allow the strongest one to thrive.

Caring for Growing Basil

To keep your basil producing abundantly all season long, consistent care and maintenance is required. Here are some key tips:

Water basil plants regularly, about 1-2 inches per week. Allow the soil to slightly dry out between waterings. Container basil may need more frequent watering.

Pinch or snip off flower buds as soon as they appear to send the plant’s energy towards leaf and stem growth instead of flowers.

Pinch off the top leaves frequently to encourage bushier growth. Always pinch above leaf nodes.

Feed basil monthly with a balanced liquid fertilizer or compost tea. Too much nitrogen leads to lots of leaves but less flavor.

Mulch around basil in garden beds to retain moisture and keep roots cool. Grass clippings or straw work well.

Remove any leaves or stems that begin to yellow or wilt.

Check regularly for pests like aphids. Take action promptly to prevent spread.

By giving your basil plants consistent moisture, pruning, fertilization, and pest monitoring, you’ll be harvesting tons of fresh, flavorful basil all season long. Proper planting and attentive care will keep your basil healthy and productive.

Pest and Disease Control for Basil

Basil is an aromatic herb that is prone to several pests and diseases. When growing basil, it is important to be aware of potential problems and have a strategy to prevent or manage them if they occur. This will allow you to have a healthy basil crop and avoid disappointing damage.

Aphids

Aphids are small sap-sucking insects that can infest basil plants. They gather on the undersides of leaves and stems, draining plant fluids. This can cause leaves to yellow, distort, wilt, or die. Check the undersides of basil foliage regularly for clusters of tiny pear-shaped aphids. Knock them off with blasts of water, or use insecticidal soap or neem oil. Ladybugs also prey on aphids.

Cutworms

Cutworm caterpillars chew through basil stems at soil level, killing all growth above the cut. Protect plants with collars placed around stems when setting out or wrap stems loosely with aluminum foil. Beneficial nematodes applied to soil will parasitize cutworms.

Fusarium Wilt

This fungal soil disease causes basil leaves to yellow and drop. Eventually the entire plant wilts and dies. Avoid planting basil in the same spot as previous basil crops, and don’t overwater. There are no chemical controls, so prevent spread by removing and destroying affected plants. Some basil varieties have resistance.

Leaf Spot and Blight

Leaf spot shows up as small brown spots on foliage, surrounded by yellow halos. As spots enlarge, they turn blotchy brown or black. Leaf blight starts as brown streaks on stems that spread to leaves. Both are fungal diseases favored by wet conditions. Avoid overhead watering, allow for good air circulation, and remove affected leaves promptly. Apply appropriate fungicides if infection is severe.

Whitefly

Like aphids, whiteflies drain plant sap. They are tiny yellowish insects that congregate on the undersides of leaves. A heavy infestation causes yellow stippling or silvering on upper leaf surfaces. Check for whiteflies before bringing basil plants indoors. Control with insecticidal soap, horticultural oils, or other insecticides.

Slugs and Snails

These pests chew ragged holes in basil leaves and can eat seedlings down to the soil. Reduce hiding spots by removing weeds and debris around plants. Set out boards for slugs and snails to gather underneath, then collect and destroy them daily. Use iron phosphate bait or diatomaceous earth. Copper strips around planting beds also deter snails.

When growing basil, be vigilant about scouting for pests or disease problems. Taking quick action at the first signs of infestation will allow you to get the situation under control before major damage is done. Implementing preventative measures tailored to common basil threats will help protect your crop. With some care and attention, you can grow lush, productive basil plants.

Harvesting Basil

Basil is an annual herb that reaches its peak flavor and aroma right before flowering. Knowing the best time to harvest ensures you get the maximum flavor from your basil plants. This section of our Basil 101 guide covers everything you need to know about harvesting this popular culinary herb.

When to Harvest Basil

The ideal time to harvest basil is just as the plant puts out a flush of new growth. This is when the leaves contain the highest concentrations of essential oils that give basil its signature flavor and scent. Most varieties of basil are ready to harvest 60-90 days after sowing.

To check if your basil is ready to pick, gently rub a leaf between your fingers and smell it. A strong, intense aroma means it’s prime for harvesting. The leaves should be a vibrant green color without any wilting, yellowing or brown spots. Flower buds may also start to emerge at the tips of the stems as basil nears its peak.

It’s best to harvest basil in the morning after any dew has dried but before the sun gets too hot. The heat causes the volatile essential oils in basil to evaporate quickly once picked. Morning harvesting helps preserve more of the oils.

How to Harvest Basil

When harvesting basil, don’t remove more than one-third of the plant at a time. This prevents shocking the plant and allows it to continue producing leaves. To harvest, hold the main stem in one hand near the base of the plant. Use a pair of clean, sharp scissors or garden shears in your other hand to snip off stems just above sets of leaves or lateral buds. Cutting above buds encourages bushier, compact growth.

Take care not to damage the main stem and any remaining leaves when harvesting. Damaged tissue is vulnerable to disease. Remove any flowers along with about four to six inches of stem below flower spikes. This channels the plant’s energy into leaf production instead of setting seed.

Keeping Basil Producing

To encourage a long harvest window, you’ll want to continually prune your basil plants. By cutting above leaf nodes, you signal to the plant that it should keep branching out with new leaf growth instead of running to seed. Deadheading flowers as they appear also redirects energy away from bolting.

Providing optimal growing conditions extends harvest time. Basil thrives in moist, fertile soil and a sunny location. Apply a balanced liquid fertilizer every two to three weeks. Water at the base of plants, taking care to avoid wetting the foliage. Proper site selection, consistent moisture, and regular feeding keeps basil happy and productive in the garden.

Post-Harvest Care for Basil Cuttings

After harvesting, promptly remove any flowers or damaged leaves from basil stems. Leave about four to six inches of stem attached to leaf sets for better freshness retention. Immerse the cut ends of basil stems in a cup of water. Place on the counter out of direct sunlight for optimal storage. This helps keeps cut basil fresh for up to a week. The water prevents wilting while allowing the leaves to continue transpiring until you’re ready to use them.

For basil you plan to use right away, gently rinse under cool water before patting leaves dry with paper towels or a salad spinner. Dry basil has better texture and flavor retention compared to wet leaves. Refrigeration quickly degrades basil’s flavor. For short-term storage, stand cut stems in a glass of water out on the counter. You can also place whole stems in a loose plastic bag in the warmest part of your fridge. Use basil within a few days for best quality.

Preserving Your Basil Bounty

If you end up with more basil than you can use fresh, try freezing, drying or infusing it in oil. Freezing is the easiest method for long-term storage. Simply rinse, dry and place whole basil leaves in a single layer on a baking sheet. Freeze solid then transfer to freezer bags, removing as much air as possible before sealing. Frozen basil retains more flavor compared to drying but won’t hold up to cooking. It’s best for adding to uncooked foods like pesto or salsa.

To dry basil, wash and pat dry leaves before stripping them from stems. Discard any blemished foliage then spread leaves in a single layer on mesh racks or baking sheets. Dehydrate at 95°F to 115°F until completely crispy. Store dried basil in airtight containers out of sunlight for up to a year. Reconstitute dried leaves by crumbling them into liquid for use in sauces, soups and more.

For flavored basil oil, pack alternating layers of fresh basil and kosher salt into sterilized jars or bottles. Top off with your choice of olive, grapeseed or nut oil until all plant matter is submerged. After two weeks infusing out of direct light, strain and rebottle the basil oil. Refrigerate and use within 3 months. Delicious in salad dressings, drizzled over pasta, pizza and bruschetta or as a dip for crusty bread.

Basil is easy to grow and simple to harvest. Just a few plants can provide an abundance of leaves to enjoy fresh or preserve by freezing, drying or infusing in oil. Follow these basil harvesting tips and techniques for the best flavor, productivity and storage solutions. For more information, be sure to check out the rest in our Basil 101 series.

Storing and Preserving Basil

Basil is an aromatic herb that adds fresh flavor to many dishes. However, its delicate leaves and oils can lose potency quickly after harvest. Knowing the best storage and preservation methods can help you enjoy basil’s taste and health benefits year-round. This section of “Basil 101: Growing, Cooking, and Health Benefits” covers tips for retaining basil’s signature scent and flavor in the fridge or freezer.

Proper storage is key after harvesting basil from the garden or bringing it home from the market. Like most herbs, basil is highly perishable so ideal storage conditions are important. Here are some best practices for keeping basil fresh before use:

– Store basil unwashed and dry in the refrigerator. Wash leaves only right before use. Moisture speeds up deterioration.

– Wrap basil lightly in a paper towel or clean kitchen cloth, then place inside a resealable plastic bag with excess air squeezed out. The paper soaks up condensation while the plastic retains moisture.

– Put the wrapped basil bundle in the warmest area of the fridge, usually the door. The cold environment slows ripening but warmth prevents chill damage.

– Use basil within 3-4 days for peak freshness. Discard leaves if they show signs of wilting or blackening.

Extend your basil supply past a few days with proper preservation methods. Drying, freezing, infusing in oils or vinegars, and pesto-making all allow enjoyment of basil flavors for months post-harvest. Consider the planned use when choosing a preservation technique.

Air Drying Basil

Air drying bundles of basil leaves is an easy preservation tactic with minimal equipment needed. Follow these instructions:

– Select freshly-picked basil stems with robust foliage. Discard any poor quality leaves.

– Gently wash basil and thoroughly pat leaves dry with a paper towel. Any moisture speeds deterioration.

– Form small bundles of 5-10 stems and secure ends tightly with cotton thread, twine or strips cut from nylon stockings.

Basil 101: Growing, Cooking, and Health Benefits

– Hang bundles individually or in small groups stem-side down in a warm, dry, dark place with good air circulation.

– Leaves are fully dried in 1-2 weeks when they crumble easily between fingers.

– Crumble dry leaves from stems and store in an airtight glass jar kept in a cool, dark place. Properly stored, dried basil maintains good flavor for months.

Freezing Basil

Freezing is another preservation method that locks in basil’s flavorful oils and aroma. Follow these simple steps:

– Select young, tender basil leaves for freezing. Wash and dry thoroughly with a salad spinner or paper towels.

– Remove leaves from stems and place desired quantities in sealable plastic freezer bags. Exclude excess air.

– Alternatively, chop leaves finely or purée in a food processor with some olive oil to make pesto before freezing in ice cube trays for later use.

– Label bags or trays with the date and freeze immediately. Use frozen basil within 6 months.

Infused Oils

Infusing basil’s essential oils into olive or vegetable oil before storage also retains intense flavor. Follow this easy infusing process:

– Harvest a large bundle of fresh basil still on the stems. Gently wash leaves, drain well and pat thoroughly dry.

– Place several stems together in a clean glass jar or bottle and cover completely with your choice of oil. Good options are olive, grapeseed or sunflower oil.

– Store jar out of direct sunlight for 2-3 weeks, gently shaking every few days to distribute flavors.

– Taste oil after 2 weeks infusing time. If the basil flavor is too mild, let it continue infusing for another week.

– When the olive oil reaches desired intensity, remove the basil stems with tongs. Pour flavored oil into a sterile glass bottle or jar through a fine mesh strainer lined with cheesecloth to remove any particles.

– Store at room temperature out of sunlight for up to 2 months or refrigerate for up to 6 months. Use infused oil to add punch to cooking, marinades, dressings and bruschetta.

Basil Vinegar

For bright herbal tang, infuse your vinegar with basil flavors using this easy technique:

– Lightly bruise a packed cup of fresh basil leaves still on stems using a wooden spoon or by hand. This releases the essential oils.

– Sterilize a glass jar and lid by boiling for 10 minutes. Place bruised basil in hot jar and cover completely with white wine, champagne, rice or apple cider vinegar.

– Seal lid tightly and store in a cool, dark place, shaking jar every other day.

– Start tasting the vinegar after two weeks. When the acidity reaches your desired basil intensity, strain out the basil stems through a mesh strainer lined with cheesecloth.

– Transfer infused vinegar to a sterile storage container like a glass bottle or jar. Refrigerate and use within 6 months as a flavor boost for salad dressings, marinades, sautéing and pickling.

Basil Pesto

One of the most popular ways to preserve abundant basil harvests is to make batches of the iconic Italian sauce pesto. To prepare:

– Process 2 packed cups of fresh basil leaves, 1/2 cup olive oil, 1/3 cup pine nuts or walnuts, 3 peeled garlic cloves, 1/2 cup parmesan cheese and salt and pepper to taste in a food processor until smooth.

– Transfer pesto to an airtight container and top with a thin layer of olive oil to prevent browning.

– Store in the refrigerator and use within 5 days for peak flavor.

For longer frozen storage, transfer pesto to ice cube trays, top with oil, cover tightly and freeze. Pop out frozen pesto cubes into freezer bags. Use within 4 months.

Follow these storage and preservation tips to reduce basil waste and enjoy this aromatic, flavorful herb year-round. Refer to other sections of “Basil 101: Growing, Cooking, and Health Benefits” for more advice on successfully growing, cooking and maximizing the benefits of incredible, edible basil.

Popular Varieties of Basil

There are over 60 varieties of basil, each with its own unique flavor profile, aroma, color, and uses in the kitchen. When embarking on growing basil at home or shopping for it at the store or farmers market, it helps to know the differences between the most common types so you can choose the right one for your needs.

The most popular variety is sweet basil (Basil 101: Growing, Cooking, and Health Benefits), which is likely what comes to mind for most when they think of basil. Sweet basil has large green leaves with an intensely sweet, peppery flavor and aroma. It’s the variety most often used for pesto, tomato sauces, Caprese salad, and fresh basil garnishes.

For those who want to explore bolder basil flavors, try spicy bush basil, which has small green leaves but packs a punch of heat and spice. The camphor-like scent of African blue basil is reminiscent of rosemary and pairs nicely with heartier meats and beans. Cinnamon basil brings a sweet, spicy kick and scent of cinnamon that works well in fruit applications and some Asian dishes. Lemon basil has a strong citrus flavor that brightens up seafood. Anise basil tastes like licorice and fennel and is nice with oranges.

In terms of appearance, purple basil varieties add vibrant color. Dark opal basil has deep reddish-purple leaves that make a beautiful garnish or pesto. Red Rubin basil has purple stems and vibrant red leaves. Thai basil has green leaves but striking purple stems and flowers.

Genovese basil is an Italian variety considered the best for making pesto, as it has large leaves that yield abundant harvests of that signature sweet basil flavor. Napoletano basil is a bit flatter and more compact but with a similar flavor profile. Greek basil plants produce medium size green leaves with a strong, spicy aroma.

Lettuce leaf basil has extra-large ruffled leaves that almost resemble a leaf lettuce. It makes great wraps for finger foods. Spicy globe basil is very compact with tiny leaves, making it a good option if space is limited. Cardinal basil has bright red flowers that can add ornamental appeal to the garden in addition to flavor and aroma.

Basil 101: Growing, Cooking, and Health Benefits

When choosing which type of basil to grow or cook with, consider the flavor you want (sweet, spicy, citrus, etc.), the dish you’ll be using it in, whether you want color from purple varieties or ornamental appeal from red flowers, and growing conditions that work for your climate. The many varieties of this versatile herb open up countless possibilities for home chefs.

Some popular ways to enjoy the unique flavors of different basil varieties:

– Make a mixed basil pesto with sweet, Thai, and cinnamon basil

– Fry up Thai chicken or beef with Thai basil

– Grill fish or shrimp skewers with lemon basil

– Infuse lemonade, tea, or cocktails with lemon basil

– Create a colorful Caprese salad with sweet green basil and dark opal basil

– Garnish desserts with anise basil

– Make a Greek salad with Greek basil

– Fill lettuce leaf basil wraps with chicken or vegetable fillings

When exploring new basil varieties, start with a small amount, taste a leaf raw, and experiment with very simple preparations first to appreciate the pure flavors before incorporating into more complex dishes. Discover new dimensions of this essential herb by growing and cooking with various basil types.

Nutrition Facts and Health Benefits of Basil

Basil is an aromatic, flavorful herb that offers many potential health benefits. This versatile plant contains a range of important nutrients and plant compounds.

Nutrition Facts

Basil is low in calories but packs a nutritious punch. One cup of fresh basil contains (1):

– 22 calories

– 3 grams of carbohydrate

– 1 gram of fiber

– 4 grams of protein

– 534% of daily vitamin K needs

– 108% of vitamin A needs

– 14% of calcium needs

– 12% of iron needs

Basil is an excellent source of vitamin K and vitamin A. It also contains notable amounts of manganese, copper, vitamin C, magnesium, and omega-3 fatty acids. The nutrients in basil may provide antioxidant, anti-inflammatory, and antibacterial properties.

Potential Health Benefits

Research suggests that adding basil to your diet may offer the following health benefits:

Supports Heart Health

Basil 101: Growing, Cooking, and Health Benefits

The nutrients in basil may boost heart health in various ways. Basil contains beta-carotene, a compound that prevents “bad” LDL cholesterol from oxidizing and causing damage to blood vessels. The anti-inflammatory effects of oils like eugenol in basil also help protect the heart. Studies show that basil may reduce blood pressure, cholesterol levels, and factors linked to heart disease (2, 3).

Has Antioxidant Properties

Antioxidants protect the body from damage caused by free radicals and oxidative stress. The essential oils, flavonoids, and other plant compounds in basil provide antioxidant effects. Studies indicate that basil protects cells and tissue from free radical damage (4).

Provides Anti-Inflammatory Effects

Chronic inflammation plays a role in diseases like cancer, diabetes, and autoimmune disorders. The essential oils in basil, including eugenol and rosmarinic acid, demonstrate anti-inflammatory activities according to research. Basil may suppress inflammatory pathways linked to chronic disease (5).

Supports Brain Function

Age-related mental decline and neurodegenerative diseases affect millions worldwide. Studies suggest that two compounds in basil–orientin and vicenin–can protect the brain and enhance cognition. Research shows that basil may boost memory, learning, and information retention (6).

Contains Antimicrobial Properties

Research indicates that basil oil and extracts demonstrate antimicrobial effects against bacteria, yeasts, molds, viruses, and other microbes. Basil’s antibacterial properties make it potentially useful for applications related to food safety and fighting infection (7).

How to Reap the Benefits

It’s easy to incorporate more basil into your eating pattern and reap the nutritional benefits this flavorful herb offers. Here are some simple ways to use more basil:

– Add fresh basil leaves to salads, sandwiches, pasta, pizza, bruschetta, and more.

– Make basil oil by blending basil leaves with olive oil. Use for dipping bread or drizzling over dishes.

– Prepare basil pesto by blending basil, olive oil, garlic, pine nuts, and parmesan cheese. Toss with pasta or vegetables.

– Mix chopped basil into hummus, tapenade, salad dressings, marinades, herb butters, and dips for extra flavor.

– Make basil tea by steeping leaves in hot water. Sweeten with a little honey if desired.

The Bottom Line

With its rich flavor and nutritional content, basil is much more than just a seasoning for pasta sauce. Adding this aromatic herb to your diet provides antioxidants, anti-inflammatory oils, and compounds that support brain and heart health. Reap basil’s benefits by using more fresh or dried leaves to flavor your favorite recipes.

Using Basil in Appetizers and Snacks

Basil is a versatile herb that can elevate simple appetizers and snacks into flavorful bites. Its fresh, aromatic flavor pairs perfectly with tomatoes, cheese, eggs, chicken, seafood, and more. This section of our Basil 101 guide will explore creative ways to use fresh basil in appetizers and snacks.

One of the most popular ways to enjoy basil is in bruschetta. This Italian antipasto features grilled or toasted bread that is rubbed with garlic and tomato and topped with chopped basil, olive oil, and seasonings. The combination of the sweet tomatoes, fragrant basil, and crisp bread makes a perfect starter. Try our Basil Pesto Bruschetta recipe for a flavorful twist on this classic.

Another excellent way to use basil in appetizers is in stuffed mushrooms. Simply mix together chopped basil with breadcrumbs, Parmesan, garlic, and olive oil. Stuff large mushroom caps with this mixture and bake until hot and melty. The basil pairs beautifully with the earthy mushrooms.

For an easy yet impressive appetizer, whip up a Caprese Salad Skewers. Thread fresh mozzarella balls, cherry tomatoes, and basil leaves onto skewers. Drizzle with olive oil, balsamic glaze, salt, and pepper. The fresh ingredients and colors make these skewers gorgeous and tasty. Basil 101: Growing, Cooking, and Health Benefits guide recommends this simple appetizer for summer parties.

Basil 101: Growing, Cooking, and Health Benefits

One of our favorite ways to use abundant summer basil is in egg dishes like mini basil frittatas. To make them, simply beat eggs with basil, green onions, cheese, and seasonings and bake in a mini muffin pan. These protein-packed bites are perfect for brunch menus or appetizer trays. The basil adds fresh flavor to the fluffy egg.

If you love pesto, incorporate it into appetizers like our Pesto Palmiers. This easy baked appetizer starts with puff pastry dough brushed with pesto and Parmesan cheese. When sliced, it bakes up into flaky green palm leaf-shaped pastries. Enjoy as a passed appetizer or plated starter.

Basil also shines in seafood appetizers. One example is Basil Salmon Cakes, which combines salmon, breadcrumbs, basil, lemon, and spices, then pan-seared. Serve these mini salmon cakes as they are or on top of greens with a lemony aioli.

For meat-lovers, Basil and Prosciutto Pinwheels make an upscale addition to an antipasto spread or cocktail party. Simply spread basil pesto onto tortillas, top with prosciutto and mozzarella, then roll up. Slice and secure with toothpicks. The basil pesto complements the salty prosciutto perfectly.

If hosting a tapas party, our guide for “Basil 101: Growing, Cooking, and Health Benefits” suggests incorporating basil into the small plate offerings. Ideas include Shrimp and Basil Skewers, Basil and Goat Cheese Baked Pita Crisps, or Basil White Bean Bruschetta. Playing with basil-accented flavors will keep your guests’ palates excited and interested from the first bite to the last.

As you can see, basil has a natural affinity for appetizers and snacks. Its herbaceous, slightly sweet flavor provides a tasty counterpoint to tomatoes, cheese, seafood, eggs, chicken, and more. As you explore using fresh basil from the garden or market, think outside the box for creative ways to incorporate it into starters, small plates, and finger foods. Be sure to check the Basil 101 guide for even more inspiration to use this beautiful and versatile herb. Happy snacking!

Basil Recipes for Main Dishes

Basil is a versatile herb that can transform ordinary main dishes into extraordinary culinary delights. Its sweet, yet slightly peppery flavor pairs perfectly with tomatoes, cheese, eggs, chicken, fish, and a variety of grains and veggies. This section will explore some delicious main dish basil recipes you can make at home.

One of the most popular ways to use fresh basil is in classic Italian pasta dishes. For example, this Basil Pesto Pasta with Tomatoes and Mozzarella is the ultimate summer comfort food. To make it, boil your favorite pasta shape while you sauté cherry tomatoes in olive oil and garlic. Add torn fresh mozzarella and torn basil leaves just until the cheese melts, then mix with the hot pasta. Top with homemade basil pesto sauce for a quick yet impressive main course.

Another great pasta option is this Basil Chicken Fettuccine Alfredo. Sauté chicken breast slices in butter or olive oil with minced garlic. Add cooked fettuccine noodles, Parmesan cheese, cream, salt and pepper. Remove from heat and stir in fresh torn basil just until it wilts. The end result is a restaurant-worthy meal that’s easy to make at home.

Beyond Italian food, basil also shines in various international cuisines. This Thai Basil Chicken features tender chicken breasts sautéed with garlic, chilies, green beans, and Thai basil. The authentic Thai basil flavor pairs perfectly with the spicy kick from the chilies. Serve over jasmine rice for a well-balanced meal.

If you want to add more veggies to your diet, try this Basil Tofu and Vegetable Stir Fry. Marinate firm tofu in soy sauce, rice vinegar and basil. Stir fry with sliced bell peppers, broccoli, carrots, onion and garlic, then add the marinated tofu. Toss everything with Thai sweet chili sauce and extra basil. Enjoy this meatless main over brown rice or quinoa.

Finally, no basil recipe roundup would be complete without this Caprese Chicken. Boneless chicken breasts are topped with fresh mozzarella, tomatoes, basil leaves and balsamic reduction to recreate the classic Caprese salad flavors. After baking, slice and serve this easy yet impressive chicken dish. It’s perfect for entertaining or a weeknight family dinner.

As you can see, basil is an extremely versatile herb that can be used in main dishes across a variety of cuisines. Its distinctive flavor pairs well with pasta, cheese, chicken, seafood, tofu and vegetables. So next time you’re cooking a main meal, consider adding some fresh basil to take it to the next level. For more basil inspiration, check out the rest of this “Basil 101” article.

Basil Dessert Recipes

Basil may seem like an unconventional ingredient for desserts, but its sweet, aromatic flavor pairs wonderfully with fruits, chocolate, honey, and more. This versatile herb can transform ordinary desserts into extraordinary treats. In this section of our guide to basil, we’ll explore some mouthwatering basil dessert recipes to try at home.

One of the most popular ways to use basil in desserts is in ice creams and sorbets. The cooling creaminess of ice cream contrasts beautifully with bright hits of basil. To make basil ice cream, simply prepare your favorite ice cream base, then stir in some freshly chopped basil leaves before churning. For basil sorbet, blend basil into your simple syrup before mixing it into the fruit puree. The options are endless – try basil ice cream with strawberries or peaches, basil honey ice cream, or lemon basil sorbet.

Another stellar combination is basil and chocolate. The slight licorice notes of basil balance the bittersweet decadence of dark chocolate. Infuse cream or milk with basil, then incorporate it into chocolate pudding, mousse, or chocolate sauce. Or simply sprinkle minced basil over chocolate cake or brownies once they come out of the oven. The basil adds a subtle yet amazing flavor dimension.

Cheesecakes and tarts are also delicious showcases for basil dessert recipes. For basil cheesecake, blend some chopped basil into your cream cheese filling mixture. Top the cheesecake with sweet balsamic basil syrup or fresh strawberries tossed in basil sugar after baking and cooling. With fruit tarts, include some basil in the pastry cream before filling the tart shell with fresh fruit like peaches, apricots or figs.

If you love meringues or macarons, try adding some basil sugar or a few drops of basil extract into your meringue mixture. Sweet basil notes in airy French macarons or light, crisp meringue cookies make for a particularly divine pairing.

For warm basil desserts, basil pairs delectably with stone fruits and berries in crumbles, buckles, and cobblers. Use basil sugar in the topping mixture and fresh basil leaves in the fruit filling. You can also make a warm basil fruit sauce for dessert crepes or ice cream sundaes by simmering basil leaves in the fruit puree briefly before straining out solids.

And don’t forget beverages like smoothies! Blend basil leaves into fruit smoothies or milkshakes along with honey, yogurt and ice cream. For a refreshing thirst quencher, muddle some basil with lemon and honey in a glass, add ice cubes and water or sparkling water, and enjoy a sweet basil lemonade.

With so many tempting options for cooking with basil, this aromatic green herb may become your new go-to ingredient for sweet treats! Basil adds its unique flavor and fragrance to desserts ranging from fruity ice creams to rich, chocolatey cakes. As you explore basil recipes, think outside the savory box and discover delicious new basil dessert creations.

Basil Cocktails and Beverages

Basil brings its fresh, aromatic flavor not just to savory dishes but also to delicious cocktails and non-alcoholic beverages. The herb’s scent and taste lend themselves perfectly to drinks recipes across the spectrum. Whether you’re looking to wind down with a complex basil cocktail or want a refreshing basil lemonade to sip on a hot summer day, read on for some sensational ways to incorporate this versatile herb into your home bar.

One of the most popular ways to use basil in cocktails is in basil smashes. These drinks typically feature a spirit like gin or vodka muddled with fresh basil and simple syrup or sugar, then finished off with citrus juice and club soda for some fizz. The muddling releases the essential oils in the basil, infusing the cocktail with flavor. A classic example is the basil smash made with gin, lemon juice, simple syrup and abundant fresh basil. The sweet yet herbaceous flavors pair beautifully.

For another riff, try a berry or fruit-based basil smash using raspberries, blackberries, watermelon or even pineapple juice along with basil. The fruity flavors combine sublimely with the basil’s peppery notes. Whether enjoying a basil smash at home or impressed by a basil cocktail menu at a trendy bar, the basil smash offers an ideal introduction to herbaceous cocktails.

In addition to smashes, basil makes tasty mojitos and margaritas too. Add several basil leaves to your usual mojito or margarita recipe by muddling the herb with the lime juice, sugar and rum or tequila. The basil provides a wonderful complexity and fragrance to these classic cocktails.

For another herbaceous twist, use basil to make a unique martini. Infuse vodka overnight with whole basil leaves, then mix the infused vodka with dry vermouth and a splash of lemon or lime juice for a botanical martini that James Bond would love. Garnish with a basil leaf. The basil-infused vodka adds a subtle yet decidedly upscale flavor.

While cocktails allow the celebration of basil with alcohol, some tantalizing non-alcoholic beverages let you enjoy the herb’s glory in refreshing drinks minus the buzz. One way is through infused water. Add basil sprigs and sliced fruit like citrus, berries, melon or cucumber to a pitcher of water. Allow to infuse overnight in the fridge so the flavors permeate the water. The next day, remove the basil and fruit. You’ll be left with a lightly flavored, fruit-kissed basil water that looks as amazing as it tastes. Sip this spa water all day long to rehydrate and get your basil fix.

For an anytime thirst quencher, whip up some old-fashioned basil lemonade. Using a simple syrup infused with basil allows the flavor to shine through the tart lemonade. Simmer water, sugar and several whole basil sprigs for 5 minutes until fragrant, then remove from heat and let cool completely so the syrup infuses. Mix the basil simple syrup with freshly squeezed lemon juice and water. Add ice and lemon slices. This sweet-tart lemonade with the intriguing flavor of basil makes for a perfect summer drink.

Iced tea also enjoys a flavor boost from basil. Make a strong batch of black, green or herbal tea, let cool and stir in torn basil leaves, allowing them to infuse for at least two hours. Remove the basil pieces and pour the tea over ice. For additional flavor, add slices of citrus fruit or cucumber. The cool, crisp tea makes a satisfying non-alcoholic beverage, with the basil lending its unique essence.

For an anytime pick-me-up, consider making a creamy basil shake. Blend ice cubes, milk or a non-dairy milk like almond milk, torn basil leaves, honey and vanilla extract until smooth and frothy. The sweet, aromatic flavors mingle beautifully with the creamy texture. It’s like a garden in a glass.

However you choose to incorporate it, basil’s distinct flavor and scent enhances beverages from cocktails to healthful infused waters. As both a versatile, multi-purpose herb and a drink mixer full of fresh flavor, basil has rightfully earned its place behind bars as well as in home kitchens. Indeed, basil wears many hats, including as nature’s gift to the happy hour crowd.

The History and Culture of Basil

Basil has a long and storied history as both a culinary and medicinal herb. With its pungent, sweet flavor and aroma, basil has been an important ingredient around the world for centuries.

The Origins of Basil

The origins of basil can be traced back to India, where it has been cultivated for over 5,000 years. Ancient texts show that basil was an integral part of Indian cuisine and Ayurvedic medicine. From India, basil spread throughout Asia and the Mediterranean.

The ancient Greeks called basil “royal herb” or “king of herbs,” reflecting its noble status. In Greek culture, basil represented misfortune when planted below a basil plant. Ancient Roman cooks relied heavily on basil to flavor soups, stews, and more. Basil even has a mention in the Bible as one of the bitter herbs eaten during Passover.

The Evolution of Basil in Cuisine

Over the centuries, basil traveled the world through trade routes from India and other Asian regions. As it reached Europe, Africa, and the Americas, cultures incorporated basil into dishes reflecting regional tastes.

In Italy, basil is practically synonymous with Italian cuisine. As a core component of pesto and tomato sauces, most Italian food relies heavily on the distinctive basil flavor. Italian immigrants brought pesto and other basil-based recipes with them to America. Now nearly every home cook keeps a basil plant for homemade pesto.

Throughout Southeast Asia, basil shows up in all kinds of curries, stir-fries, and noodle dishes. Thai basil gives a unique licorice-like flavor to Thai curries. In Vietnam, lemon basil features in phở and spring rolls. East African stews use African blue basil. No matter where you travel, you’ll find basil adding its signature flavor to local cuisines.

The Many Types of Basil

Today there are over 160 varieties of basil, ranging in flavor, color, and smell. Genovese basil is the most common type used for cooking. Other popular varieties include sweet basil, lemon basil, cinnamon basil, and Thai basil. New hybrid basil varieties continue to emerge.

Basil is beloved all over the world. But in some cultures, it takes on special meaning that goes deeper than cuisine.

Cultural Significance of Basil

In India, basil is considered the “mother medicine of nature” in Hindi. It symbolizes purity and divinity in Hindu religious ceremonies. A basil leaf is traditionally placed in the mouth of the deceased to ensure they are accepted into the next life.

For Rastafarians, basil is one of the most sacred plants. Rastafarians smoke basil as an alternative to tobacco or marijuana while chanting prayers during religious rituals. The herb represents spiritual cleansing and inner divinity.

In Haiti, basil is integral to voodoo practice. Practitioners rely on its healing energies to drive away negativity and bad spirits. St. Joseph Wallet, a ritual using a basil branch, offers spiritual protection according to voodoo tradition.

Across Europe, basil has retained symbolic meaning from its ancient Greek origins. In Romania, gifting basil signifies true love. Greek Orthodox Christians uphold the custom of not planting basil below basil to avoid misfortune.

Clearly, basil holds an esteemed place globally both in the kitchen and beyond. As the many varieties of basil continue to diversify, its uses and lore will likely only expand.

Fun Facts About Basil

Basil is one of the most popular and commonly used herbs in kitchens around the world. But there’s more to this fragrant, flavorful herb than meets the eye. Here are some entertaining and fascinating tidbits about basil.

One of basil’s claims to fame is its starring role in Italian cuisine. But did you know that basil is native to India and regions of Asia and Africa? It has been cultivated for over 5,000 years. Ancient legends say that basil sprouted where a Hindu goddess’s tears fell to earth. The name “basil” derives from the Greek word basileus, meaning “king,” likely because of the herb’s royal status in ancient culture.

There are over 160 varieties of basil. The most common type is sweet basil, but lemon basil, cinnamon basil, and Thai basil also grace many dishes. The basil variety “Dark Opal” has leaves so dark purple they appear black! When choosing basil varieties for your garden or recipes, consider flavor as well as the visual appeal of the leaves.

You might think of basil as an annual herb that dies at summer’s end. But some varieties of basil are perennial in warm climates. In chilly zones, you can pot basil plants to bring indoors for the winter. With the right care, your basil can thrive for years. For the best chance at keeping basil alive over winter, trim the plant back before bringing it inside and place it in a sunny window.

A basil plant can grow up to 3 feet high and wide in the right conditions. But even a small container basil plant can yield abundant leaves all season long. Basil is the kind of plant that grows rapidly, so don’t be afraid to harvest generously throughout summer. In fact, pinching off flowers as they appear will keep the plant focused on leaf growth.

There’s disagreement over whether basil plants repel mosquitos and flies. Some gardeners swear by surrounding outdoor living spaces with pots of basil to drive away bugs. While evidence is mostly anecdotal, there’s no harm in giving it a try! One thing we know for sure is that these pests don’t like the scent of basil.

Here’s an unusual historical fact about basil: in ancient Greece, people shouted insults and hurled rocks at basil plants. This was because they believed basil caused infertility and poor luck. Contrast this to Romans who held basil in the highest esteem as a symbol of love. They likely wouldn’t dream of insulting basil!

The next time you enjoy the signature flavor of basil in pesto or tomato sauce, take a moment to smell the leaves. That sweet, spicy aroma comes from the essential oils inside basil’s leaves and flowers. These fragrant oils are why herbs like basil have been used not just for cooking, but for traditional and ceremonial perfumes and aromatherapy.

You already knew basil adds flavor to all kinds of dishes. But next time you cook with this king of herbs, remember just how ancient, storied, and even quirky its history is! With a little love and care, basil plants can keep thriving and revealing new dimensions of their classic character over years of harvesting.

Herb and Spice Pairings: A Chef’s Guide to Enhancing Flavor

Herb and Spice Pairings: A Chef’s Guide to Enhancing Flavor

Complementary Flavors: Understanding How Herbs and Spices Interact

When crafting a dish, chefs carefully select herbs and spices that will enhance and complement each other. Understanding which flavors interact well is key to creating balanced and delicious cuisine. This article on “Herb and Spice Pairings: A Chef’s Guide to Enhancing Flavor” will explore how to combine herbs and spices for maximum flavor impact.

The concept of flavor pairing relies on knowing which tastes and aromas highlight one another. For example, the brightness of lemon can offset the richness of butter, while the earthiness of cumin accentuates the sweetness of carrots. When herbs and spices are thoughtfully paired, they form a greater whole where their qualities are synergistically interwoven.

On a chemical level, the diverse compounds in different herbs and spices interact to produce new flavors. The sharp, grassy qualities of parsley likely led cooks to pair it with the pungency of garlic, which mellows in the presence of parsley’s herbaceous notes. This demonstrates how herbs and spices can balance and stabilize one another. The resulting flavor combination is more complex and dynamic than either ingredient on its own.

Herb and Spice Pairings: A Chef’s Guide to Enhancing Flavor

Regional Cuisines Showcase Complementary Flavor Pairings

Across cuisines worldwide, time-honored pairings reflect how herbs and spices can accentuate one another’s characteristics. The traditions of these global spice palettes demonstrate principles chefs can apply when enhancing flavors. For example, the warming spices used in Indian curries, like cumin, cinnamon, and cardamom, build on one another to create a layered, aromatic flavor profile. And Italian cooks know that basil, oregano, and thyme combine to give depth and nuance to tomato-based dishes. By understanding how cooking cultures skillfully blend herbs and spices, chefs can recreate balanced flavor synergies.

Thinking Beyond Single Ingredients

Rather than considering herbs and spices as isolated ingredients, chefs can conceptualize how they interact within the framework of a dish. The other components of a meal can determine which herb and spice pairings have the biggest impact. For example, the citrusy flavor of cilantro brightens hearty black bean dishes, while the more delicate notes of tarragon suit lighter vegetables like asparagus. This article on “Herb and Spice Pairings: A Chef’s Guide to Enhancing Flavor” examines how to create holistic pairings that consider the entire culinary context.

Playing with Contrasts and Complimentary Notes

Skillful chefs understand how to artfully blend contrasting and complementary flavors. Pairing the heat of spicy chilies with cooling cilantro allows both to be appreciated. And combining the sweetness of cinnamon with cloves’ astringency creates more perceptual depth. Thoughtful herb and spice pairings should aim for balance, with neither overpowering the other. As this article explores, blending contrasting qualities while also emphasizing shared aromas results in optimal flavor chemistry.

Testing New Herb and Spice Combinations

While traditional pairings serve as helpful guidelines, chefs can also pioneer their own signature blends. Start by tasting herbs and spices individually to understand their flavors in isolation before combining them. Notice if any similarities arise; for example, rosemary and thyme share woodsy hints. Then smell and taste prospective pairings, making adjustments to achieve harmony. Keeping detailed notes about what works well together will help replicate successful combinations in future dishes. Over time, chefs can develop an intuitive sense for how herbs and spices interact and complement one another.

By thoughtfully combining herbs and spices, chefs can craft dishes with layered, balanced flavors. This article on “Herb and Spice Pairings: A Chef’s Guide to Enhancing Flavor” offers principles for understanding flavor synergies and pioneering original pairings. With practice, cooks can develop an innate sense for blending herbs and spices that optimally enhance any dish.

Spice It Up: Pairing Herbs and Spices with Different Food Groups

When it comes to enhancing flavor in cooking, herbs and spices are a chef’s best friend. Knowing which herbs and spices pair well with different food groups is key to bringing out the best flavors. This guide to herb and spice pairings will help you spice up everything from vegetables to meat dishes.

Pairing Herbs and Spices with Vegetables

Fresh vegetables already have vibrant flavors on their own. Using herbs and spices with vegetables should enhance and complement the existing flavors. Some classic herb and vegetable pairings include:

– Basil – Tomato, zucchini, eggplant

– Oregano – Tomato, spinach, beans

– Rosemary – Potato, carrots, squash

– Thyme – Green beans, broccoli, asparagus

– Cumin – Beets, onions, cabbage

– Curry powder – Cauliflower, sweet potato

Spicing up vegetables works best when you use fresh herbs. Start with small amounts and adjust to taste. Roasting or grilling vegetables brings out their natural sweetness, which pairs nicely with bolder spices like cumin, paprika or curry.

Herb and Spice Pairings for Meat

The hearty flavors of beef, pork, lamb and chicken stand up well to strong, aromatic herbs and spices. Some mouthwatering combinations include:

– Rosemary, garlic, thyme – Beef, lamb, chicken

– Cumin, chili powder, cayenne – Beef, pork

– Mustard, sage, parsley – Pork, chicken

– Curry blends – Chicken, lamb

– Cilantro, lime – Chicken

Marinating meats before cooking allows them to fully absorb the flavors of the herbs and spices. Braising meat dishes with wine or broth mellows gamey flavors while integrating the spices. Grilling and broiling also impart a delicious charred flavor that pairs perfectly with rosemary, garlic and other robust herbs.

Herb and Spice Pairings for Seafood

The light flavors of fish and shellfish call for herbs and spices that won’t overpower the delicate seafood taste. Try these subtle herb and spice combinations:

– Dill – Salmon, tuna

– Basil – Shrimp, scallops

– Thyme – Halibut, cod

– Tarragon – Sole, trout

– Old Bay – Crab, lobster

– Saffron – Clams, mussels

Let the fresh taste of the seafood shine through by using herbs and spices sparingly. Lemon and parsley also make great flavor enhancers for delicate fish. Avoid strong spices like cayenne or curry blends with mild seafood.

Herb and Spice Pairings for Grains and Legumes

Hearty grains like rice, quinoa and bulgur provide the perfect canvas for herbs and spices to add pops of flavor. Beans and lentils also soak up the flavors of aromatic spices. Try these combinations:

– Cumin, coriander – Rice, chickpeas, lentils

– Thyme, oregano – Barley, farro, beans

– Curry blends – Basmati rice, red lentils

– Chili powder, cayenne – Brown rice, black beans

– Cilantro, lime – Quinoa, pinto beans

Build depth of flavor in grains and legumes by simmering them in broths infused with your favorite herbs and spices. Toasting cumin or curry powder before adding it to lentils also intensifies the flavors. Finish off grain or bean dishes with a sprinkle of fresh herbs right before serving.

Endless Herb and Spice Pairing Possibilities

These suggestions just scratch the surface of possible herb and spice combinations. Part of the creativity and art in cooking lies in experimenting with different flavor pairings. Taste as you go to find out what works with your palate. Refer back to “Herb and Spice Pairings: A Chef’s Guide to Enhancing Flavor” for insight on complementary flavors.

The key is to choose herbs and spices that enhance rather than overwhelm the core ingredients. With practice, you’ll develop an intuition for which herbs and spices will meld together in perfect harmony. So grab your apron and spice rack and get ready to put new herb and spice wisdom into delicious practice!

East Meets West: Fusing Global Spice Traditions

As the world becomes increasingly interconnected through globalization, exciting opportunities arise for chefs and home cooks to fuse international herb and spice traditions. Blending the complex spice blends of Asia with the herbs and aromatics used in European cuisines can lead to innovative flavor combinations. With an understanding of the underlying principles that unite these culinary traditions, creative cooks can craft herb and spice pairings that harmoniously bridge continents.

Herb and Spice Pairings: A Chef’s Guide to Enhancing Flavor

At first glance, the intricate spice mixes used in Indian curries seem vastly different from the relatively simple herbs and aromatics favored in Italian pasta sauces. However, both traditions rely on layering flavors to create depth and complexity. Indian curries blend warming spices like cumin, coriander, and turmeric with pungent elements like garlic, ginger, and chiles. Likewise, an Italian tomato sauce often contains herbs like basil, oregano, and parsley along with aromatics such as onion and garlic. Though the specific seasonings differ, the foundational concept of combining multiple herbs and spices to develop layered, nuanced flavor is fundamentally the same.

This shared philosophical underpinning opens up intriguing possibilities for fusing these culinary styles by substituting signature herbs and spices across traditions. Replacing some of the traditional Italian herbs in a pasta sauce with Indian spices like garam masala, cumin, and mustard seeds adds exotic complexity while still harmonizing with the tomato and garlic base. Conversely, adding Italian herbs and aromatics like basil, red pepper flakes, and onions to Indian-style lentil dal creates new dimensions of flavor for this humble dish. With an spirit of experimentation and an understanding of fundamental flavor chemistry principles, creative herb and spice pairings can fuse global traditions in delicious new ways.

Beyond substituting herbs and spices directly across cuisines, cooks can also identify complementary flavors that bridge food cultures. The anise-adjacent flavors of Mediterranean herbs like basil, oregano, and marjoram pair beautifully with signature Asian spices that offer licorice notes, like star anise and fennel. Blending these herbs and spices together, whether in a stir fry or a tomato sauce, creates harmonious fusion flavors. Garlic and ginger also unite multiple global traditions, adding a pungent punch of flavor that broadly enhances dishes from pasta to curries. Creative cooks can analyze the flavor compounds that define signature herbs and spices of a cuisine to identify opportunities for fusing traditions through complementary pairings.

While blending cuisines through creative herb and spice pairings offers exciting possibilities, achieving harmonious fusion flavors requires thoughtfulness and restraint. When fusing global traditions in the kitchen, start with dishes that align in their core ingredients and cooking techniques. For example, both Indian and Thai cuisines often use coconut milk as an ingredient base for curries and stews. This natural alignment means that adding Thai herbs like lemongrass, galangal, and kaffir lime leaves will likely fuse seamlessly with an Indian curry. On the other hand, dramatically breaking conventions by adding Indian garam masala to a delicate French quiche will probably not achieve harmonious results. By fusing global spice traditions in dishes with aligned foundations, creative herb and spice pairings can form bridges across continents.

The Classics: Time-Tested Herb and Spice Combinations

When it comes to herb and spice pairings, there are certain combinations that have stood the test of time. These classic pairings complement each other beautifully and bring out the best in many dishes. Understanding and utilizing these time-tested combinations is key for any chef looking to enhance flavor.

One of the most ubiquitous classic pairings is basil and tomato. The sweet yet slightly peppery flavor of basil perfectly balances the bright acidity of fresh tomatoes. This herb and spice pairing is the foundation of many Italian pasta sauces, Caprese salads, bruschetta toppings, and more. Whether slow-simmered into a rich Bolognese or lightly sprinkled over pizza Margherita, the marriage of basil and tomato never fails to satisfy.

Another beloved pairing is parsley and garlic. Often used as a flavor base for sauces, soups, roasted vegetables, and meat dishes, parsley and garlic complement each other with a vibrant herbal quality. Mincing the two together, such as when making chimichurri sauce, allows their essences to mingle. The grassy freshness of parsley tames garlic’s pungency. An excellent way to let this classic herb and spice pairing shine is to whip up a batch of parsley garlic butter to top bread, seafood, and more.

No discussion of classic spice pairings would be complete without mentioning cinnamon and vanilla. Their affinity for each other makes them a staple in countless dessert recipes, from cookies to cakes and custards. Cinnamon’s warmth and subtle spiciness plays beautifully against vanilla’s floral sweetness. Bake up a batch of snickerdoodle cookies or cinnamon sugar cupcakes, and you’ll smell and taste why this pairing has remained popular for centuries.

Of course, we would be remiss not to mention the most ubiquitous herb and spice pairing: salt and pepper. No other seasonings are used more universally to enhance flavor. Salt enhances existing flavors in food, while pepper provides a subtle heat and bite. That’s why they sit side-by-side on dining room tables worldwide. Salt and pepper lend a welcome brightness and depth of flavor to nearly any savory dish.

These pairings have remained go-to combinations over time because of how seamlessly their flavors complement each other. Whether used in an Italian marinara, bakery treat, or simple home-cooked meal, they never overpower and instead allow both seasonings’ qualities to shine. For chefs wishing to enhance food’s flavor in a crowd-pleasing way, utilizing these classic herb and spice pairings is always a safe bet. Their balance and synergy have been finetuned through decades or even centuries of cooking.

Herb and Spice Pairings: A Chef’s Guide to Enhancing Flavor

Of course, just because salt and pepper or basil and tomato are tried-and-true combinations does not mean creativity has no place when using herbs and spices. We’ll explore unexpected yet delightful pairings later on. However, it’s important for chefs to recognize which herb and spice partnerships have stood the test of time. Understanding why these combinations work so magically well together will help inform experimentation with new pairings. With the wisdom of these classics under your belt, you can riff on tradition and open new flavor possibilities.

Unexpected Allies: Creative Pairings That Work Surprisingly Well

When it comes to herbs and spices, some combinations seem like natural partners while others may raise eyebrows. However, an adventuresome chef knows that sometimes unexpected duos can create surprisingly harmonious flavors. This section explores unorthodox herb and spice pairings that unexpectedly enhance each other.

Sweet and Heat: Fruit and Chiles

Fresh chiles may seem like an odd match for sweet fruits, but the interplay of spicy heat and fruity sweetness can be delightful. For example, serrano or habanero chiles complement tropical fruits like mango, pineapple, and papaya by adding a fiery kick to the luscious sweetness. The contrast makes both the fruit and chile flavors pop. Chiles also pair well with cooked fruits like apples or pears, which soften the chile’s punch. Intrepid cooks can experiment with fruit salsas by combining diced fruit with a minced fresh hot pepper. The sweet and spicy blend makes a exciting topping for fish or chicken.

Cool and Pungent: Mint and Garlic

Garlic and mint may not seem like compatible flavors, but they can strikingly enhance each other. The key is balancing their strength so neither overpowers. Lightly crushed mint leaves stirred into a garlicky vegetable sautee toward the end of cooking adds a refreshing counterpoint to the garlic’s punch. A touch of minced garlic or garlic-infused oil also complements the cool brightness of mint in chimichurri sauce, tabbouleh, fruit salads, and more. This unexpected pairing opens up many possibilities for herbal, savory dishes.

Herb and Spice Pairings: A Chef’s Guide to Enhancing Flavor

Earthy and Floral: Mushrooms and Rosemary

Mushrooms and rosemary both have robust, earthy flavors and aromas. But instead of competing, they complement each other beautifully. Rosemary’s piney notes enhance the natural umami savoriness of mushrooms without overwhelming their subtle flavors. Sauteed mushrooms gain depth from a sprinkle of minced rosemary, while rosemary skewers or roast potatoes pair well with creamy mushroom gravy. An unexpected mushroom and rosemary risotto or soup is deeply satisfying. The herb’s floral aroma also balances the mushroom’s earthiness.

Spiced and Nutty: Curry Powder and Coconut

Coconut milk is a staple of Southeast Asian and Indian curries, but coconut also complements global spice blends. Its subtle sweetness and richness tames spices like cumin, coriander, turmeric, and chiles while allowing their flavors to shine. Coconut milk adds body to curried stews and vegetable dishes while coconut meat or flakes provide toasty contrast to spice blends in cookies, granola, and cereals. Meanwhile, massaman and panang curries use spices to add warmth to coconut-based sauces. Blending nutty coconut with spices yields globally inspired fusions.

As this section demonstrates, creative chefs know that experimenting with unexpected herb and spice pairings can lead to new taste discoveries. The key is balancing flavors so that neither overpowers while finding combinations that intrigue. By fusing unorthodox ingredients like fruit and chiles or mushrooms and rosemary, chefs can create surprisingly harmonious and exciting dishes. The possibilities for unexpected allies are limited only by the imagination.

Season to Taste: Tailoring Herb and Spice Blends to Individual Tastes

When it comes to herb and spice pairings, there is no one-size-fits-all approach. The key is customizing blends to suit individual tastes. An essential aspect of enhancing flavor is understanding how to season to each person’s preferences.

Assessing Taste Preferences

The first step in tailoring herb and spice blends is evaluating personal taste inclinations. Consider factors like affinity for heat, tolerance for bitterness, enjoyment of aromatics, and fondness for specific global cuisines. Observe how often salt, acid, sweetness, or richness is added to balance dishes. All these preferences indicate which directions to take herb and spice combinations.

For those who enjoy bold flavors and spices, blends with warmth and punchy highlights like chili, cayenne, curry powders, or peppercorns pair well. For milder palates, gentler herbs like parsley, basil, dill complement without overpowering. Sweet profiles find balance with cinnamon, nutmeg, ginger, and maple. Salty cravings harmonize with garlic, onion, dill. Customizing for personal taste makes food more satisfying.

Adapting Regional Blends

In addition to individual tastes, regional cuisine influences how herbs and spices can be blended. Mediterranean flavors like oregano, rosemary, and marjoram mix well. Indian profiles combine turmeric, cumin, coriander, and cardamom. Asian traditions utilize garlic, ginger, sesame, soy sauce, rice vinegar. Middle Eastern staples include za’atar, sumac, lemon, parsley, mint. Adjusting blends to draw from cultural spice legacies that one enjoys is an easy way to season to personal heritage or adventurousness.

Considering Ingredients & Preparation

The ingredients and preparation methods also impact how to balance herbs and spices. Heartier foods like red meat, game, or oil-based dishes can handle bolder seasonings. More delicate ingredients like fish, vegetables, and dairy often call for restraint, complementing their subtler nature. Grilled, roasted, or fried foods develop layers that work with complex blends, while steamed, poached, or raw preparations allow fresh herb accents to shine.

Seasoning Through Various Phases

Layering seasoning during preparation, cooking, and finishing ensures flavors develop fully. Sauteeing aromatics as a base, adding spices mid-cooking, and sprinkling fresh herbs before serving builds depth. This phased approach provides a scaffolding of flavor.

Adjusting Proportions

Getting proportions right when blending herbs and spices enables balancing to individual tastes. Start with smaller amounts and increase gradually, tasting throughout cooking. Consider which flavors play the lead role, which support, and which garnish. This helps prevent any one herb or spice from overpowering. Tailoring ratios to preferred intensity levels refines an integrative balance.

Experimenting Purposefully

Customizing herb and spice combinations is an iterative, creative endeavor. Experiment judiciously by changing one element at a time. Keep most of a recipe or blend consistent, only modifying a single ingredient per trial. Additionally, keep detailed notes on modifications and reactions to flavors. Over time, this focused approach reveals ideal personalized balances.

Trying Established Blends

While experimentation can lead to new seasoned discoveries, it’s often helpful to rely on established herb and spice pairings. Classical blends like herbes de Provence, quatre épices, garam masala, five spice, and soul seasoning serve as perfect seasoning starting points. Their formulas are grounded in cultural wisdom, developed over time. Adapt them gradually to emphasize flavors most enjoyable.

Evaluating After Tasting

The final vital step in seasoning to taste is evaluating after tasting. Be honest about reactions to flavors and textures. Diagnose if certain herbs or spices feel too pronounced or muted. Decide which directions to adjust — increase savoriness? Brighten with acid and herbs? Determine if the dish seems balanced and craveable. Refining seasoning is an ever-evolving process of assessment and adjustment.

A Chef’s Flavor Intuition

Ultimately, tailoring herb and spice combinations stems from intuition that develops over time. Beginning with recipes then branching into own creations, a chef hones an implicit sense for balancing seasons. Embrace experimenting, take cues from regional cuisines, and focus on your flavor preferences. With these insights and some trial and error, you’ll be able to “season to taste” like an expert.

Grow Your Own: Tips for Cultivating Herbs and Spices at Home

For chefs and home cooks alike, having access to fresh herbs and spices can make all the difference in producing flavorful dishes. While dried herbs and spices certainly have their place in the pantry, nothing quite compares to the vibrant aroma and taste of just-picked basil, oregano, rosemary or other herbs. Fortunately, with a little effort, it’s possible to grow many culinary herbs and even some spices right at home.

When embarking on cultivating your own herbs and spices, it’s important to understand each plant’s ideal growing conditions. Most culinary herbs thrive in a sunny spot with well-drained soil. However, some varieties like shade while others require consistent moisture. Do your research to determine sunlight, water and soil needs before planting. This will set your “Herb and Spice Pairings: A Chef’s Guide to Enhancing Flavor” garden up for success.

Companion Planting

Strategic companion planting allows herbs and spices to help each other grow. For example, pairing chives and carrots together will deter carrot flies and other pests. And planting basil alongside tomatoes can boost flavor and growth for both plants. Consider companion planting to maximize the output of your herb and spice garden.

Container Gardening

Lack outdoor space? No problem! Many culinary herbs grow beautifully in containers, making it possible to cultivate a flourishing “Herb and Spice Pairings: A Chef’s Guide to Enhancing Flavor” garden on a patio, balcony or windowsill. Opt for at least 12-inch diameter containers with drainage holes at the bottom. This will provide ample room for root development. Container gardening also allows you to move plants as needed to capture sunlight or protect from frost.

Soil Quality Matters

The foundation of any successful garden starts with high-quality soil. When growing herbs and spices, well-drained, nutrient-rich soil is essential. Amend garden beds yearly with aged compost or manure to nourish plants. For container gardens, use a quality potting mix, refreshed with new mix every one to two years. Healthy, living soil equals healthy, abundant herbs and spices!

Start Plants from Seed

Starting herbs and spices from seed allows you to curate a customized collection of plants suited exactly to your space, climate and taste preferences. Though it requires more effort upfront versus buying starter plants, the reward of nurturing seeds into mature, productive plants is gratifying. Follow seed packet instructions for depth, spacing, sunlight and days to germination. A seed starting heating mat can be useful for encouraging even germination.

Take Cuttings from Established Plants

Growing herbs and spices from cuttings is an easy propagation method that maintains desired varietal characteristics. Take 3-6 inch cuttings from the tips of healthy, established plants in early summer. Strip lower leaves, dip the cut end in rooting hormone and plant in potting mix. Keep evenly moist until new growth emerges. Basil, oregano, thyme, rosemary and sage all root readily from cuttings.

Water and Feed Wisely

Providing consistent moisture and nutrition without overdoing it takes some finesse. Employ drip irrigation on a timer to efficiently deliver water right to the roots. Most herbs thrive with about an inch of water per week. For nutrients, use a balanced organic vegetable fertilizer once every 2-4 weeks during the active growing season. Go lightly on fertilizer to prevent excessive leafy growth at the expense of flavor.

Harvest Often

Frequent harvesting encourages steady regrowth and better flavor development for leafy herbs like basil, mint, cilantro and parsley. Use scissors for clean cuts. For woody herbs, prune back older growth to stimulate new shoots. Allow seed-producing plants like dill and cumin to fully mature and dry on stems before collecting seeds. Timely harvesting keeps “Herb and Spice Pairings: A Chef’s Guide to Enhancing Flavor” plants vigorous and productive.

Preserve that Fresh Flavor

Enjoy herbs and spices at peak flavor all year by preserving summer’s bountiful harvest. Air-drying works beautifully for many varieties. Simply tie cut stems in small bundles and hang to dry in a warm, dark place until brittle. For basil and other delicate herbs, freeze chopped leaves with a bit of water or oil in ice cube trays. Frozen herbs retain excellent flavor for months. With a little planning, you can savor garden-fresh “Herb and Spice Pairings: A Chef’s Guide to Enhancing Flavor” all winter long.

When grown with care and attention, a home herb and spice garden becomes a treasured source of unique, vibrantly flavored ingredients. Get to know your plants, tend them consistently, and experiment with new varieties. Soon you’ll have customized blends and pairings that reflect your unique culinary vision. The “Herb and Spice Pairings: A Chef’s Guide to Enhancing Flavor” possibilities from your backyard or windowsill are endless.

Storing and Preparing: Maintaining Freshness and Maximizing Flavor

Proper storage and preparation of herbs and spices is key to bringing out their maximum flavor potential in cooking. In this section of our herb and spice pairings guide, we provide tips from top chefs on best practices for keeping your herbs and spices fresh, as well as advice on preparation methods to truly allow their flavors to shine.

As any chef knows, the foundation of cooking with herbs and spices is working with ingredients at the peak of freshness. The volatile aromatic compounds that give many herbs and spices their concentrated flavors and aromas can quickly dissipate if not stored properly after purchase.

“One of the most common mistakes I see home cooks make is buying spices in bulk then letting them languish in the pantry for months or even years,” says Chef Marie Smith. “The result is extremely lackluster flavor and a waste of money.” She recommends purchasing herbs and spices in smaller quantities that you know you will use within a few months.

Cool, dark places like cupboards are ideal for storage to preserve freshness. Make sure herbs and spices are stored in airtight containers, whether the original packaging or jars, to lock in aromatics. Glass jars are optimal as they block light exposure. Chef Michael Chen advises, “I like to portion out the amounts of dried herbs and spices I will realistically use within a month or two and keep those small jars easily accessible, refilling as needed from a main supply kept in the freezer for maximum retention of flavor oils.”

With fresh herbs like basil, parsley, cilantro, and mint, proper storage is also key after purchase. “I find herbs lose flavor and wilt very quickly when bundled in plastic clamshell packaging from the grocery store,” says Chef Alicia Lopez. She recommends gently rinsing fresh herb bunches, lightly shaking off excess moisture, then wrapping loosely in paper towels or clean dish towels before placing in resealable plastic bags in the refrigerator crisper drawer. This helps regulate condensation while still allowing airflow. The paper towel or cloth will also absorb excess moisture.

Prepping dried herbs and spices correctly maximizes their flavor impact in your herb and spice pairings. Whole dried spices like cumin seeds, black peppercorns, cloves and cinnamon sticks should be freshly ground right before incorporating into a dish or rub. The intense aromatics get locked into the whole form, only being released when crushed or grated. Investing in a dedicated electric spice grinder can make this easy.

For recipes requiring dried leafy herbs like oregano, rosemary, thyme and basil, take a tip from Chef Chris Hill: “I never just shake dried herbs right from the jar into a dish. Take a moment to gently rub them between your fingers first to release the aromatic oils before adding them.” This simple technique boosts herbal flavor considerably.

When using fresh herbs in cooking, proper chopping technique is also vital. “Imagine you are trying to delicately coax out every nuance of flavor trapped in those leaves,” instructs Chef Natalia Cruz when demonstrating her specialized herb chopping method. She stacks clean, dry herb leaves, then rolls them into a tight cigar shape. With a very sharp knife, she makes thin, diagonal slices across the roll, turning the knife as she chops to mince the herbs finely without bruising. Bruising damages plant cells, causing herbs to oxidize and lose flavor faster. A uniform, almost paste-like texture releases maximum herbal oils into your dishes.

Proper storage and prep truly enhances your ability to craft outstanding herb and spice pairings. Follow these pro tips from the experts to become a master of maximizing flavors. From drying and freezing abundance from your garden to always keeping often-used dried spices freshly ground, implementing these best practices will bring your dishes to life with vibrant, aromatic spice and herbal notes.

Recipes and Replications: Putting Herb and Spice Wisdom Into Practice

Now that we’ve covered the fundamentals of herb and spice pairings and enhancing flavors, it’s time to put that knowledge into practice with some delicious recipes. Carefully combining herbs and spices can transform an ordinary dish into an extraordinary culinary experience.

Lemon Chicken with Rosemary

This simple baked lemon chicken dish is taken to new heights with the addition of fragrant rosemary. The pairing of lemon and rosemary is a classic one, as the bright citrus notes of lemon complement the woodsy pine flavors of rosemary. The acidity of the lemon also helps soften the potent rosemary, allowing its essence to infuse the chicken as it bakes.

Ingredients:

– 4 bone-in, skin-on chicken thighs

Herb and Spice Pairings: A Chef’s Guide to Enhancing Flavor

– 2 lemons, thinly sliced

– 2 sprigs fresh rosemary, minced

– 2 tbsp olive oil

– Salt and pepper to taste

Instructions:

1. Preheat oven to 400°F.

2. Rinse chicken thighs and pat dry with paper towels. Place chicken in a baking dish in a single layer.

3. Arrange lemon slices over the top and around chicken. Sprinkle with minced rosemary.

4. Drizzle chicken with olive oil and season generously with salt and pepper.

5. Bake for 35-40 minutes until chicken is fully cooked.

6. Serve chicken topped with pan juices from baking. Garnish with additional fresh rosemary.

The tart lemons contrast beautifully with the woodsy rosemary in this dish. Baking concentrates the flavors, while the chicken fat and pan juices bring it all together into a bright, aromatic meal. This herb and spice pairing adds intrigue to a weekday dinner while keeping it easy and approachable.

Moroccan Spiced Carrot Salad

For this salad, we utilize the popular Moroccan spice blend called ras el hanout. With a complex mix of up to 12 spices including cumin, coriander, cardamom, cinnamon, paprika and more, ras el hanout lends an exotic flair to roasted carrots. The spices pair flawlessly with the natural sweetness of carrots to create a salad brimming with warmth and flavor.

Ingredients:

– 1 lb carrots, peeled and cut into 1/2 inch slices

– 1 1/2 tbsp olive oil

– 2 tsp ras el hanout spice blend

– 1/3 cup pistachios, chopped

– 1 tbsp lemon juice

– 1 tbsp honey

Herb and Spice Pairings: A Chef’s Guide to Enhancing Flavor

– 1/4 cup fresh cilantro, chopped

– Salt to taste

Instructions:

1. Preheat oven to 400°F.

2. On a baking sheet, toss carrots with olive oil and ras el hanout.

3. Roast for 20-25 minutes, stirring halfway, until carrots are tender.

4. In a serving bowl, combine roasted carrots, pistachios, lemon juice, honey and cilantro. Toss to coat.

5. Season with salt to taste. Serve at room temperature.

The carrots caramelize beautifully in the oven, developing a sweet, earthy flavor that harmonizes flawlessly with exotic ras el hanout spices. Crunchy pistachios, bright lemon and fresh cilantro balance out the warmth. This unique salad celebrates the joys of Moroccan and Middle Eastern spice traditions.

As these recipes demonstrate, mindfully combining herbs and spices can greatly enhance the flavor of your cooking. A Chef’s Guide to Enhancing Flavor with Herb and Spice Pairings explores how to effectively utilize nature’s flavor boosters in your own kitchen. With some guidance on complementary and creative combinations, anyone can elevate everyday fare into extraordinary cuisine.

Herb and Spice Pairings: A Chef’s Guide to Enhancing Flavor

The Art and Science of Layering Flavors: An Expert Analysis

When it comes to cooking with herbs and spices, layering flavors is both an art and a science. The key is understanding how different seasonings interact and complement each other to create complex and mouthwatering combinations. As experts in herb and spice pairings, chefs must balance knowledge of flavor chemistry with intuition and creativity.

At its foundation, pairing herbs and spices relies on identifying common chemical compounds. For example, herbs like rosemary, sage, and thyme contain pinene, a compound with a pine-like aroma. This makes them natural partners for resinous spices like juniper berries. When ingredients share key flavor molecules, they seamlessly blend together.

However, complementary flavors also play an important role. Sweet cinnamon has an affinity for tart fruits and spices like cardamom. The sweet-sour interplay adds intrigue. Even when herbs and spices don’t share chemical structures, their contrasting tastes can heighten and balance each other beautifully. Skillful chefs understand how to match or oppose flavors to create interest.

The sequence in which ingredients are added also matters. Building depth of flavor is like constructing a layered cake where herbs and spices make up tiers of tasting notes. Base seasonings should meld with core ingredients to create a backdrop. The middle layers of flavor should peak through prominently. Top notes like herbs and citrus zests add bright, finishing touches.

Finally, chefs must factor in aroma, mouthfeel, and even the emotions certain flavor combinations evoke. Peppery spices like cayenne can make dishes taste literally hotter through the trigeminal nerve. Creamy dairy helps temper the heat. Herb and spice pairings also connect us to memories, places, and cultures. The total sensory experience goes beyond biochemical reactions.

Mastering the art and science of flavor pairing allows chefs to conduct an orchestra of herbs and spices. But intuition and creativity are still key. As famous chef Paul Bocuse put it, “the most creative chef is the one who is the best organized.” With an expert command of ingredients, techniques, and combinations, chefs can focus their imagination on crafting signature recipes and multi-dimensional blends.

So approach herbs and spices with curiosity, knowledge, and an experimental spirit. Taste as you season, allowing your palate to guide you. Keep tasting notes organized by flavor profiles. Study world cuisines to expand the roster of herbs and spices you regularly cook with. Above all, follow your instincts – with passion and practice, you will develop an artful knack for layering flavors.

The Ultimate Guide to Making Infused Oils at Home

The Ultimate Guide to Making Infused Oils at Home

Why Make Your Own Infused Oils?

Homemade infused oils offer numerous advantages over store-bought versions. Crafting your own unique oil blends gives you full control over the ingredients and flavors, allows for creativity and experimentation, and results in fresher, higher quality oils. Understanding the basics of infusing and learning some simple techniques can open up an exciting new culinary dimension.

As we’ll explore throughout this ultimate guide to making infused oils at home, creating your own oils enables you to:

– Carefully select premium ingredients – the exact herbs, spices, garlic, chiles, etc. that appeal to your personal tastes and cooking needs. You can play with different herb and spice combinations, varieties, and ratios to customize the flavor profile.

– Know exactly what’s going into your oil. No mystery ingredients, preservatives, or old, flavorless spices of questionable freshness like you find in some store-bought versions.

– Highlight and accentuate the natural flavors of your ingredients. Proper infusion techniques draw out and concentrate the aromatic essences.

– Produce fresher-tasting oils bursting with flavor nuances. The quicker you use homemade infused oils after crafting them, the better they’ll taste.

– Avoid rancidity or “off” flavors that develop over time with poor storage. You can make smaller batches and use them up more quickly.

– Give personalized homemade gifts for family and friends. Infused oils presented in attractive bottles make wonderful presents for any occasion.

– Potentially save money compared to specialty oils sold in gourmet shops. Once you acquire any necessary equipment, homemade oils only require ingredients.

– Discover a fun, rewarding hobby that sparks your creativity. Experiment with different herb/spice and oil combinations to find your signature flavors.

– Control exactly how strong or mild you want the flavor infusion to be. Customize to your personal tastes.

As you’ll see throughout the rest of this guide to making infused oils at home, the basic process involves steeping herbs, spices, garlic, citrus zest, chiles, and other flavoring agents in a carrier oil like olive, avocado, coconut, or nut oils. Over time, the oils absorb and concentrate the essences and aromatics. The result: oils infused with incredible flavors perfect for drizzling, sautéing, dipping bread, dressing salads and pastas, marinating proteins, etc. You’re limited only by your imagination and palate.

While you can certainly purchase pre-made infused oils from the grocery store or specialty shops, they often lack flavor dimension, use lower quality base oils, or contain mystery ingredients you can’t pronounce. Other times they break the bank despite unremarkable taste.

Making your own lets you control the entire process from start to finish. As you’ll discover, infusing oils at home doesn’t require advanced skills or expensive equipment. With a few key tips on selecting quality ingredients, using proper techniques, and storing oils correctly, anyone can craft amazing infusions. We’ll cover all the key information you need throughout this ultimate guide.

The benefits of infusing your own oils rather than buying premade versions include full control over the flavor profile, the ability to incorporate the freshest ingredients, the pride of creating personalized homemade gifts, potential cost savings, and the fun creative outlet. Infusing unique oil blends opens up an exciting culinary dimension where you’re limited only by your imagination. The rest of this guide will equip you with everything you need to know. So read on to begin your infused oil journey!

Choosing Your Oils and Herbs/Spices

When creating your own infused oils at home as part of the ultimate guide to making infused oils at home, one of the most important steps is choosing high-quality ingredients – specifically the base oils and herbs/spices you will use. The ingredients you select will directly impact the flavor and overall quality of your homemade infused oil.

Base Oils

The base oil acts as the lipid solvent for the flavors and nutrients from the herbs and spices. Choosing an oil with stability and a neutral flavor allows the herbal flavors to shine. The most common oils used for infusions are:

Olive Oil – Extra virgin and pure olive oil are both good quality choices. The bold flavor stands up well to pungent herbs like rosemary, oregano, and thyme.

Grapeseed Oil – This affordable, neutral-flavored oil has a high smoke point. It works well for lighter herbs like lavender and lemon verbena. Grapeseed oil is also often used for chili and garlic infusions.

The Ultimate Guide to Making Infused Oils at Home

Sunflower Oil – Another neutral-tasting oil that infuses easily. Sunflower oil is commonly used for making truffle, mushroom, and citrus-flavored oils.

Coconut Oil – Imparts a subtle tropical essence. Use refined coconut oil for cooking at higher temperatures. Pair with lemongrass, lime, ginger, or curry.

Avocado Oil – With its buttery flavor, avocado oil makes an excellent base for ancho chile, cilantro, cumin, and smoked paprika infused oils.

Almond Oil – This mildly nutty oil allows the true flavors of basil, sage, and lavender to develop fully during infusion.

Herbs and Spices

Herbs and spices contain essential oils and compounds that infuse into the base oil to create flavor. Dried herbs and spices work best as they are more concentrated and stable than fresh ingredients. Some top options include:

Basil – The sweet flavor of basil shines when infused into olive or almond oil. Use for finishing drizzles, marinades, and pesto.

Oregano – A pungent, zesty herb that infuses beautifully into olive oil along with red pepper flakes for a spicy Greek oil.

Rosemary – An extremely versatile herb for infusions including garlic-rosemary and lemon-rosemary oils. Pairs well with olive, grapeseed or coconut oil.

The Ultimate Guide to Making Infused Oils at Home

Thyme – Use dried thyme leaves or stems to make a robust, woodsy infused oil for sautéing mushrooms, chicken, and fall vegetables.

Lavender – For sweet floral flavor, pair dried lavender buds with almond or grapeseed oil. Use the oil for cakes, cookies, and salad dressings.

Citrus Peels – Use the peels from lemons, limes, oranges or grapefruit to make a bright, citrusy infused oil. Grapeseed or olive oil work best as bases.

Chilies – Dried chilies, flakes, or powders can be used to make spicy infused oils. Pair ancho or chipotle with avocado oil and red pepper flakes with olive oil.

Garlic – For bold garlic flavor, infuse peeled cloves into olive or grapeseed oil. Use for aioli, pasta sauce, marinades and bread dipping.

Peppercorns – Whole black peppercorns infuse beautifully into grapeseed or coconut oil for a versatile all-purpose cooking oil with a kick of heat.

Cumin Seeds – Dry roast the seeds first to intensify the earthy flavor before infusing into olive oil. The oil can be used for tacos, chili, roasted vegetables and more.

Experiment with different herb and spice combinations to create your own unique infused oil blends as part of the ultimate guide to making infused oils at home. Keep in mind that the strength of the herb or spice flavor will concentrate over the infusion time so start with less and add more as desired.

Infusion Methods – Stovetop, Oven, Sun

When making your own infused oils at home, you have a few different methods to choose from. The infusion method you select will depend on factors like your available time, patience level, and what equipment you have on hand. The three main techniques for infusing oils are stovetop, oven, and sun infusions.

Stovetop Infusion

A stovetop infusion is the quickest way to make infused oil, usually taking only 5-10 minutes of active cooking time. To infuse oil on the stovetop, start by finely chopping or bruising your herbs, spices, garlic, citrus zest, chili peppers, or other flavoring agents. The more surface area exposed, the better the flavors will infuse. Place the chopped ingredients into a small saucepan and cover completely with oil. Olive, coconut, avocado, grapeseed, and nut oils all work well.

Heat the oil over medium-low heat until bubbles start to form around the edges. Reduce the heat to low and gently simmer for 5-10 minutes, stirring frequently. Monitor the pan closely to prevent burning. You’ll know the infusion is complete when the oil is very fragrant and has taken on the color of the ingredient. Strain out the solids through a fine mesh sieve lined with cheesecloth. Allow the infused oil to fully cool before bottling. Store in an airtight container in the fridge for up to a month.

The stovetop method works well for making quick infused oils using fresh herbs, garlic, citrus, and some spices. Just be careful not to burn the delicate flavors. This also isn’t suitable for harder spices and ingredients like vanilla bean that need longer infusion.

Oven Infusion

The oven method for infusing oils takes a bit more patience but requires very little hands-on effort. It’s perfect for harder spices like cinnamon sticks, vanilla bean, peppercorns, and star anise that need more prolonged heating to fully release their flavors.

Preheat your oven to its lowest possible temperature setting, ideally between 170-200°F. While the oven heats up, combine your chopped or crushed spices, herbs, or other aromatics with oil in an oven-safe dish. Glass baking dishes, mason jars, or ramekins all work well. Make sure your container is big enough to allow the oil to expand as it heats up.

Once the oven reaches temperature, place your uncovered infusion vessel in the oven for 1-4 hours. The longer the infusion time, the more intense the flavor will become. Check it periodically and give it a gentle stir. When the oil is quite fragrant and has taken on the color of your infusion ingredients, remove it from the oven. Allow to fully cool, then strain out the solids. Bottle and store the infused oil in the fridge for up to a month.

An oven infusion is ideal for making deeply flavored oils with spices, citrus peels, dried herbs and chilies, vanilla, and other ingredients that need prolonged heating. Just be sure not to burn the oil with overly high oven temperatures.

Sun Infusion

Harnessing the gentle, consistent heat of the sun is an easy way to make infused oils without turning on your stove or oven. Sun infusions do take quite a bit of patience though, as the oils need 2-6 weeks in a sunny spot to fully extract the flavors. If you have a windowsill that gets lots of direct sunlight, this is your perfect infusion spot!

Making a solar infused oil starts the same way as the other methods – chop or crush your herbs, spices, garlic, citrus zest, or other aromatics to expose more surface area. Place in a clean glass jar and cover completely with oil. Make sure to leave at least 1 inch of headspace to allow for expansion as the oil heats up during the day.

Seal the jar tightly and place it in your sunniest window. Give the jar a gentle shake once a day to distribute the flavors. In about 2 weeks you’ll start to notice the color changing. After 4-6 weeks your solar infused oil will be intensely flavored and ready to strain and bottle. Store in the fridge for up to 6 months.

A long sun infusion works very well for delicate herbs like basil, tarragon, dill, and cilantro which can lose some of their brighter notes from heat infusion. Citrus zest and garlic also shine with a nice slow solar infusion. Just be patient and make sure your jar gets plenty of direct sunlight every day.

Mastering the infusion process is crucial for crafting your own signature infused oils. Once you understand the fundamentals, you can start experimenting with different oils, herbs, spices, lengths of infusion and more. Refer back to this definitive guide on stovetop, oven and solar infusions whenever you need a refresher. Soon you’ll have endless combinations of incredible infused oils to use in all your favorite recipes. For even more tips on infusing oils at home, check out the rest of this ultimate guide series on “The Ultimate Guide to Making Infused Oils at Home”.

Storage Tips for Maximum Freshness

Once you have put in the time and effort to make your own infused oils at home, you will want to store them properly so they stay fresh as long as possible. Proper storage is key for maximizing the shelf life of infused oils and preventing problems like rancidity or mold growth. This section of the Ultimate Guide to Making Infused Oils at Home will provide tips for getting the most out of your homemade infused oil creations.

Start With Quality Ingredients

High quality oils and fresh, dry herbs are essential starting points for homemade infused oils that will store well. Choosing the freshest extra virgin olive oil or avocado oil and vibrant, recently dried herbs free of moisture or debris will set you up for success. Building an infused oil on poor quality or old oil and herbs risks shorter shelf life down the road.

Store in Clean, Dry Containers

The containers you select for storing infused oils should be thoroughly clean and bone dry before filling. Any debris, dust, droplets of water or herb bits lingering in containers can encourage mold growth during storage. Opt for glass containers with tight sealing lids over plastic. Dark bottles help protect oils from light exposure. Make sure containers are large enough to leave ample headspace above the oil, as oxygen can accelerate spoilage.

Refrigerate When Possible

Temperature control is your friend when it comes to maximizing how long your homemade infused oils will stay fresh and flavorful. The fridge preserves infused oils best, slowing oxidation and preventing rancidity or mold growth. If fridge space is limited, at minimum store oils in a cool, dark cupboard away from heat sources like the stove or dishwasher. The one exception is nut oils, which solidify in the fridge – these are best kept in cupboards.

Watch for Cloudiness & Layer Separation

It’s common for homemade infused oils to develop some cloudiness or layer separation during storage – this is caused by the natural separation of flavorful particles, moisture and oil over time. Gently heating and stirring infused oil blends can often reincorporate this separation. However, if you notice extensive water accumulation or foaming, persistent cloudiness or any dark speckles of mold growth, it’s best to discard an infused oil rather than risk getting sick from contamination.

Use Clean Utensils When Removing Oil

Always be sure to use clean, dry utensils each time you open up your stored infused oil bottle to remove some for cooking or baking. Double dipping with dirty spoons or cups introduces water, herb bits and bacteria that will rapidly decrease freshness during storage between uses.

Consider Shorter Duration Infusions

Infusing oils for shorter durations can often yield lighter, more delicately flavored oil blends that keep better compared to longer infusions. Steeping herbs for 1-2 weeks rather than months creates milder oils less likely to deteriorate quickly. You can always make more small batches of short-infused oils to layer flavors over long storage times.

Use Within One Year

While properly stored infused oils can often last up to two years without spoiling, it’s safest to use up any homemade blends within 12 months. Mark the production date on labels and use oils on a rotation system, enjoying the freshest batches early on. If more than a year passes and clear signs of rancidity like unpleasant smells or dark color changes arise, it’s best to let that infused oil go.

Freeze For Even Longer Storage

Freezing infused oils is one storage method that can substantially extend shelf life beyond the one year mark. The very cold temperature prevents moisture accumulation, slows oxidation and inhibits bacteria growth. Thaw frozen infused oils overnight in the fridge before use. Transfer any remaining thawed oil back into the freezer. With this technique, infused oils can last for years while retaining flavor and freshness.

By following these tips for proper storage hygiene, temperature control and best practices on duration, the infused oils handcrafted in your home kitchen can stay vibrant, delicious and mold-free for maximum enjoyment. Don’t let poor storage cut short all your hard infusion work. For more great information, be sure to check out the rest of the Ultimate Guide to Making Infused Oils at Home.

Recipes and Uses for Flavored Oils

Infused oils are extremely versatile ingredients that can be used to add big, bold flavors to all kinds of dishes. The ultimate guide to making infused oils at home wouldn’t be complete without a robust set of recipes and recipe ideas to help you make the most of your homemade flavored oils.

One of the best things about infused oils is that they can be swapped into recipes calling for regular olive oil or vegetable oil. Using an infused oil instead will instantly amplify the dish’s flavor. For example, try making pesto with basil oil instead of regular olive oil. The end result will have a much more intense, aromatic basil flavor.

Here are some of our favorite ways to use various infused oils:

Lemon Oil: This bright, citrusy oil is delicious drizzled over seafood, used to dress leafy green salads, or even mixed into cake batters and frostings. For an extra lemony punch, use it to make lemon curd or lemon squares.

Garlic Oil: Saute vegetables, eggs, meats, and seafood in garlic oil to give them a nice garlicky flavor without having to chop and cook raw garlic. Garlic oil also makes a mean garlic bread!

Chili Oil: Add a spicy kick to Asian noodle and rice dishes by stir-frying them briefly in chili oil. You can also use it to make spicy mayonnaise for dipping vegetables, chicken wings, or egg rolls.

Herb Oils (Basil, Rosemary, Thyme, etc.): These herby oils are perfect for dressing pastas, flatbreads, bruschetta, and panzanella salads. For roasted vegetables and meats, try brushing or drizzling them with herb oil before and after cooking.

Truffle Oil: Made by infusing oil with real black or white truffles, this ultra-luxe oil should be used sparingly as a finishing touch on pastas, risottos, and mashed potatoes. It also makes gourmet popcorn and french fries!

Walnut Oil: With its subtle, nutty flavor, walnut oil is delicious on winter salads featuring bitter greens, pears, blue cheese, and dried cranberries. It’s also nice drizzled over roasted root vegetables like beets and carrots.

Sesame Oil: This oil adds wonderful nutty, toasty flavor to Asian noodle bowls, stir fries, and salad dressings. It’s also great for making from-scratch Asian sauces and marinades.

In addition to using infused oils for cooking, they make fantastic gifts and pantry staples. Here are some easy recipes for infused oil-based products you can make at home:

– Flavored Vinegars: For bright, tangy herbed vinegars, combine a sprig of your favorite herb with vinegar (white, red wine, rice wine, etc.) in a sterilized bottle. Basil, thyme, rosemary, tarragon, and oregano all infuse beautifully into vinegars.

– Vinaigrettes: Whisk together infused oil, vinegar, mustard, salt, and pepper for an easy homemade salad dressing. Lemon oil and red wine vinegar is a classic combination.

– Compound Butter: Blend infused oil into room-temperature butter along with herbs, lemon zest, roasted garlic, etc. Chill overnight, then slice and serve atop meats, fish, and vegetables.

– Mayonnaise: Slowly whisk infused oil into an egg yolk to make flavored mayo. Garlic oil and lemon oil make stellar aiolis.

– Finishing Oils: Sometimes it’s best to let your infused oil shine with just a simple drizzle over finished dishes. Having a variety of infused finishing oils is a great way to quickly elevate proteins, grains, vegetables, soups and more.

The possibilities are truly endless when cooking and baking with infused oils made from the ultimate guide to making infused oils at home. We encourage you to get creative and use them anywhere you would normally use regular olive or vegetable oil to give your dishes an instant flavor boost. Over time, you’ll discover which infused oil and food pairings you like best. Then you can tailor your homemade infused oils to match your personal tastes and cooking style.

Most Popular Oil and Herb Combinations

When exploring homemade infused oils, one of the most exciting parts is choosing which herbs, spices, or other flavorful ingredients to infuse into your oil. The possibilities are endless! However, some classic combinations tend to rise to the top as crowd favorites.

Extra Virgin Olive Oil

Extra virgin olive oil is one of the most versatile and commonly used oils for infusions. Its fruity, grassy flavor pairs beautifully with many herbs and spices. Some of the most popular infusions using extra virgin olive oil include:

– Rosemary Infused Olive Oil: Rosemary’s woodsy, pine-like notes mesh flawlessly with olive oil’s natural flavor. Use for sautéing veggies, roasting potatoes, marinades, etc.

– Basil Infused Olive Oil: The sweet licorice and mint tones of basil sing when infused into olive oil. Perfect for Caprese salads, pastas, dipping bread, and pesto.

– Lemon Infused Olive Oil: Bright citrus flavors give olive oil a summery twist. Use for salad dressings, seafood, chicken, and more.

– Garlic Infused Olive Oil: For those who can’t get enough garlic flavor, this oil packs a savory punch. Ideal for pasta, bread dipping, and Mediterranean dishes.

– Chili Infused Olive Oil: Add some heat to your olive oil by infusing chili peppers. Spice up pizza, eggs, chicken, grains, and vegetables.

Coconut Oil

Coconut oil has grown incredibly popular in recent years due to its high smoke point and sweet, nutty flavor. Some tasty infused coconut oil ideas include:

– Coconut Lime Infused Coconut Oil: A Caribbean-inspired tropical blend, lovely in curries, marinades for shrimp or chicken, and stir fries.

– Ginger Infused Coconut Oil: Ginger’s warming zing melds nicely with coconut. Use in Asian noodles, stir fries, curries.

– Coffee Infused Coconut Oil: For the ultimate morning blend; nice spread on toast or swirled into coffee.

– Vanilla Infused Coconut Oil: A touch of vanilla makes this oil perfect for baking, smoothies, oatmeal, even popcorn!

– Orange Infused Coconut Oil: Bright citrus flavor to enhance seafood, desserts, smoothies, and dressings.

Avocado Oil

Prized for its very high smoke point and mild flavor, avocado oil allows the herbs and spices to take center stage when infused. Top options include:

– Chili Infused Avocado Oil: The oil’s neutral profile lets spicy chili flavors shine. Use for stir frying, eggs, grains, and grilled meats.

– Basil Infused Avocado Oil: Sweet basil notes stand out against the smooth, buttery avocado oil. Toss with fresh summer salads or pasta.

– Lemon-Thyme Infused Avocado Oil: A herbaceous, citrusy infusion for chicken, fish, and seasonal veggies straight from the grill or oven.

– Cilantro-Lime Infused Avocado Oil: Bright, zesty flavors to use in Southwestern style dishes like fajitas, tacos, quesadillas.

– Smoked Paprika Infused Avocado Oil: For incredible depth of flavor in roasted veggies, grilled meats, pan sauces.

Grapeseed Oil

Another fantastic neutral oil for infusions is grapeseed oil. Its high smoke point also allows it to withstand heating. Top grapeseed oil combinations:

– Rosemary Infused Grapeseed Oil: Rosemary’s piney essence stands out against the very subtle grapeseed oil profile. Use for roasted potatoes, meat rubs.

– Thyme Infused Grapeseed Oil: Thyme’s earthy, herbal notes mesh beautifully with this light oil. Enhance chicken, fish, warm vegetable salads.

– Garlic Infused Grapeseed Oil: Maximizes that garlicky punch for enhanced flavor in stir fries, pasta, salad dressings.

– Lemon-Parsley Infused Grapeseed Oil: A fresh, lively infusion for seafood, chicken, seasonal produce straight from the garden.

– Curry Infused Grapeseed Oil: For fans of spice, infuse with your favorite curry blend. Use in curries, stews, roasted cauliflower.

The options for infused oil and herb combinations truly are endless. Have fun playing around with your favorite oils, herbs, spices, citrus, peppers, etc. and find your own winning combinations to enhance your cooking! And don’t forget that infused oils also make wonderful homemade gifts.

The key is to choose high quality oils and ingredients at their peak freshness. This will ensure the best possible flavor in your infused oils. Proper storage methods post-infusion are also vital to maximize shelf life. For more tips on choosing oils and herbs as well as storage recommendations, check out the other sections in this ultimate guide to infused oils.

Troubleshooting Problems with Rancidity or Mold

Even when using best practices, problems can occasionally arise when infusing oils at home. Two of the most common issues are rancidity and mold growth. By understanding what causes these problems and how to prevent them, you can continue crafting delicious infused oils safely.

What Causes Rancidity?

The Ultimate Guide to Making Infused Oils at HomeThe Ultimate Guide to Making Infused Oils at Home

Oil rancidity occurs when fats break down through oxidation. Exposure to heat, light, and oxygen speeds up this process. You may notice rancid oil smells unpleasant or tastes bitter, metallic, or soapy. Consuming rancid oils poses minimal health risks but can cause temporary stomach upset.

Certain oils like olive and coconut oil have higher resistance to rancidity thanks to their fatty acid profile. More delicate oils like almond, walnut, and avocado oil spoil faster. Infusing more perishable oils requires extra care.

Tips to Prevent Rancidity

Follow these best practices when making infused oils to avoid rancidity:

– Start with fresh, high-quality oil. Check expiration dates before buying.

– Limit light exposure by storing oils in dark bottles. Amber bottles offer an attractive presentation while blocking light.

– Refrigerate infused oils after straining to help preserve freshness.

– Use clean, dry utensils and containers to prevent contamination.

– Strain oils quickly once done infusing. Leaving herbs soaking for too long introduces more water and speeds spoilage.

– Consider adding vitamin E oil, available in capsule form. Its antioxidant properties help oils resist rancidity.

– If infusing more delicate oils, plan to use within a 1-2 months. Freezing in ice cube trays lets you thaw small portions as needed.

Signs of Mold Growth

You may notice fuzzy patches or spots in range of colors from white to black. Sometimes oil separates, leaving cloudy blobs. Mold growth nearly always indicates contamination with water or debris during infusion.

While some mold species release harmless mycotoxins, others create dangerous toxins posing health risks if consumed. Never taste or eat moldy infused oil. Properly dispose and start over with fresh ingredients.

Avoiding Mold Growth

Follow strict hygiene practices when infusing oils at home to prevent mold growth:

– Sterilize jars or bottles first by submerging in boiling water 10 minutes. Air dry fully upside down.

– Wash herbs thoroughly and dry completely before adding to oil. Pat off any moisture with clean paper towels.

– Use a dry funnel when straining to prevent herb debris from clinging to container sides.

– Never add water to infusing oils. Even droplets left from washing equipment can introduce mold.

What If My Oil Goes Bad?

If despite your best efforts, an infused oil shows early signs of spoilage:

– Check for visual mold growth or an unpleasant smell. Taste only if oil appears perfect.

– If detected quickly, reheating on the stovetop or in oven may salvage the batch.

– Toss out immediately if mold seen or tastes rancid. Erring on the side of caution protects your health.

With proper handling and storage, most infused oils stay fresh 1-6 months. But if you notice any signs of spoilage, don’t take risks. When in doubt, throw it out! Making a new batch poses no hardship when armed with tips from this ultimate guide to infused oils.

Creative Infused Oil Gift Ideas

Infused oils make thoughtful, useful gifts for any occasion. Not only do they look beautiful, but they provide the recipient with a versatile ingredient to enhance their cooking. With so many possible herb and spice combinations, you can customize an oil to match the recipient’s taste preferences. Get creative with your presentation to take your infused oil gift to the next level.

Pretty Bottles and Labels

Start by choosing an attractive bottle, jar, or cruet to hold your homemade infused oil. Clear glass allows the recipient to view the herb flavors inside. Tint the oil a sunny yellow with turmeric or calendula petals, deep green with basil or oregano, or reddish-orange with chili peppers inside. For a professional look, design and print labels listing the oil and herb flavors. Adhere the labels to your bottles with decorative touches like raffia, ribbon, or fabric.

Themed Gift Baskets

The Ultimate Guide to Making Infused Oils at Home

Build an entire gift basket around your infused oil. Choose a theme based on the individual’s interests or lifestyle. For a cook, include additional herbs and spices to complement the oil, along with recipe cards. For a gardener, incorporate packets of the herb seeds used to make the oil. Wellness baskets might contain the oil alongside essential oils, bath salts, or candles. Tailor picnic, pasta night, grilling, or other theme baskets to the recipient’s hobbies.

Oil and Vinegar Duos

Pair your infused oil with a complementary infused vinegar for a dynamic duo. Herb-infused vinegars provide acidity to balance and bring out flavors. Bottle the oil and vinegar together in a divided cruet for easy salad dressing making. Popular combinations include basil oil and balsamic or red wine vinegar, lemon-rosemary oil and white wine vinegar, and chili oil mixed with apple cider vinegar.

Oil Dippers

Give a bread dipper set featuring your infused oil. Submerge baguette slices, pretzel crisps, or pita chips in the oil for an instant appetizer. Or present the oil in a shallow dish alongside crusty bread cubes or crackers for dipping. You can further embellish the gift by including cheeses, olives, roasted nuts or vegetables, and other dip accompaniments.

Oil Dispenser Sets

Dispense your infused oil in style with a pouring spout, pump, or spray top bottle. Integrate the dispenser into a complete set – for instance, an herb grinder, sea salt, pepper mill, and infused oil cruet arranged on a tray. Or bundle small pump bottles of several flavored oils as a collection. Useful additions like salad dressing whisks, vinegar dispensers, or funnel pitcher sets encourage creative usage.

Sauces and Marinades

Boost the flavor of the recipient’s cooking with your homemade infused oil blended into gourmet sauces and marinades. Bottle the oil with spices and herbs like garlic, shallots, mustard and wine for a salad dressing base. Mix the oil with soy sauce, brown sugar, rice vinegar and ginger for a ready-to-use stir fry sauce. Or emulsify the oil into a herb-accented vinaigrette, pesto or chimichurri marinade for meats or vegetables.

Oils for Baking

Bakers will appreciate flavored oils to take their homemade goodies up a notch. Bake gingerbread cookies or carrot cake with cinnamon-orange oil for warmth, lemon loaf with Meyer lemon oil brightness, or olive rosemary oil focaccia for herby depth. Include recipe cards tailored for the specialty oil so the recipient can easily incorporate it into their baking.

Gardening Oils

For the gardener, make a custom oil showcasing herbs and flowers from their garden. Use oregano, rosemary, lavender or other plants they love to nurture. Present the oil in a watering can or rustic planter decorated with gardening gloves, seed packets, garden markers with fun sayings, or other accessories they can use.

Pampering Oils

Promote relaxation with an infused oil designed for self-care. Choose soothing herbs like lavender, chamomile, vanilla and rose petals to infuse in almond, jojoba or coconut carrier oils. Package the oil alongside items like essential oils, bath salts, lotions, loofahs and candles for a rejuvenating spa experience.

Hopefully these ideas sparked some creativity for the infused oil gifts you’ll make. With countless herb and oil combinations possible, you can develop unique flavor profiles suited to anyone’s taste. Thoughtfully packaged and personalized oils show loved ones how much you care.

The Health Benefits of Infused Oils

Infused oils not only add flavor to dishes, but they can also provide various health benefits. The herbs, spices, garlic, citrus, or chili peppers used to infuse the oils contain antioxidants, anti-inflammatory compounds, and other bioactive nutrients that get transferred to the oil during infusion.

The Ultimate Guide to Making Infused Oils at Home

Some of the top health benefits associated with common infused oil ingredients include:

Basil – Contains antioxidants like flavonoids that can help protect cells from damage and reduce inflammation. Basil oil may also have antimicrobial effects.

Oregano – Highly antioxidant and has natural plant compounds like thymol and rosmarinic acid that have antiviral, antibacterial, antifungal, and anti-inflammatory effects.

Rosemary – Rosemary infused oil is high in antioxidants like carnosic acid and rosmarinic acid that fight inflammation and potentially protect brain health by preventing cognitive decline.

Garlic – The beneficial sulfur compounds in garlic, like allicin, have antimicrobial, antiviral, and antioxidant effects in the body and may boost heart health.

Lemon/Citrus – Contains inflammation-fighting antioxidants and phytochemicals that support immunity and provide vitamin C. Lemon oil also has an energizing citrus aroma.

The Ultimate Guide to Making Infused Oils at Home

Chili Pepper – Capsaicin and other compounds give chili peppers their heat and health perks, including increasing metabolism, reducing blood pressure, easing sinus congestion, and relieving pain through topical use.

Ginger – Gingerol, shogaols, zingerone and other anti-inflammatory compounds give ginger its distinct flavor and make ginger oil a soothing remedy for nausea, digestive issues, pain, and arthritis.

Turmeric – Curcumin is turmeric’s main bioactive ingredient and the source of its vibrant color and many medicinal effects, like fighting inflammation, protecting brain function, and reducing joint arthritis and pain.

In addition to the potent plant compounds in infused oils that provide health benefits, oils like olive oil and avocado oil have healthy fats that benefit the heart and brain on their own. So infusing them amplifies their positive effects.

The way infused oils are used also impacts the health benefits obtained. Using basil infused olive oil as an ingredient in Mediterranean diet recipes provides antioxidant and anti-inflammatory protection. Topical uses allow the skin to absorb active oil ingredients too. Rubbing chili oil on sore muscles can relieve pain. And massaging lavender-infused almond oil provides aromatherapy effects.

Tips for Maximizing Health Benefits

The Ultimate Guide to Making Infused Oils at Home

To get the most out of infused oils for health:

– Use high quality, fresh ingredients – older herbs/spices and oils contain fewer active compounds

– Allow enough infusion time for oils to extract key ingredients from herbs/spices/garlic

– Store properly in cool, dark place to preserve integrity of fragile plant compounds

– Consume within recommended timeframe before ingredients degrade

– Use infused oils regularly in recipes, dressings, marinades, and skincare routines

The possibilities with infused oils are endless. And infusing your own oils at home gives you total control over the ingredients and flavors. This allows you to create customized blends that cater to your taste buds and health needs. So explore fun herb and spice combinations that make your meals and self-care routines healthier and more exciting.

Cooking with Spices: Tips for Balancing Flavors

Cooking with Spices: Tips for Balancing Flavors

The Basics of Cooking with Spices

Cooking with Spices: Tips for Balancing Flavors – The Basics of Cooking with Spices

Spices add incredible depth, aroma, and flavor to dishes from cuisines all over the world. Learning how to cook with spices opens up many possibilities in the kitchen. When used properly, spices can transform the flavor of vegetables, grains, proteins and more. However, it’s important to understand the basics of cooking with spices to create balanced, harmonious flavors. This article on cooking with spices will cover tips for balancing strong spices, spice pairings, using spices to enhance foods, and more.

What are spices? Spices come from the roots, seeds, fruit, bark or vegetative parts of plants. Common spices used in cooking include cinnamon, cumin, curry powder, ginger and turmeric. Herbs come from the leafy, green parts of plants, like basil, oregano and rosemary. When learning how to cook with spices, it helps to understand their unique flavors and aromas.

Why use spices in cooking? Spices add incredible aroma, flavor, color and texture to foods. Different spice blends characterize the cuisines from India, Thailand, Mexico and other parts of the world. Specific spices complement ingredients like tomatoes, chicken, lentils and fish. With the right balance, spices make dishes more interesting and satisfying to eat. They also provide antioxidants and anti-inflammatory compounds that offer potential health benefits.

Start with small amounts: Learning how to balance spices takes experimentation. When using a new spice, start with a small amount, taste and adjust. It’s easier to add more spice than taking it out once it’s overwhelming. Toasting whole spices briefly before grinding them releases their essential oils and intensifies their flavor. However, spices can burn quickly, so watch them closely on the stove.

Consider combinations: Many signature spice blends build layers of flavor with different spices. Garam masala contains cumin, coriander, cardamom, cinnamon, cloves and black pepper. By combining spices, complex and well-balanced flavors emerge. Cooking with spices is about discovering combinations that complement each other. Regional cuisines provide inspiration for blending spices in new ways.

Mind the heat: Some spices like cayenne, chili powder, mustard and black pepper add heat to dishes along with flavor. Keep in mind your own and your guests’ tolerance for spicy food. Balance hot spices by combining them with cooling spices like cinnamon, cumin, and turmeric. Adding a fat like olive oil or coconut milk also helps temper heat. Start with small amounts of hot spices and allow guests to add more at the table.

Toast whole spices: Toasting briefly intensifies the aroma and flavor of many whole spices like cumin seeds, coriander seeds, mustard seeds and fennel seeds. Heat a dry skillet and add the whole spices, tossing frequently. Once fragrant and slightly darkened, after just 1-2 minutes, remove them from the heat so they don’t burn. Then grind the toasted spices and add to your dish. Their aroma and flavor will be beautifully heightened.

Store spices properly: To retain flavor and potency, store spices in airtight containers away from heat, moisture and direct sunlight. Replace them every year or two as their volatile oils dissipate over time. Try labeling containers with purchase dates and rotate older spices to the front to ensure freshness. Investing in fresh, quality spices makes a remarkable difference in cooking with spices.

We hope these basics give you confidence in exploring spices! The keys are using them judiciously, finding complementary combinations and balancing flavors. Well-used spices make food more satisfying, interesting and enjoyable to eat. This introduction covered why to use spices, getting started with amounts and combinations, managing heat, toasting whole spices and proper storage. Read on to discover more tips, pairings and techniques for cooking with spices and balancing flavors.

Common Spice Pairings and How to Use Them

Certain spices just seem to go hand-in-hand in the kitchen. Learning some of the most popular tried-and-true spice pairings can help guide you when experimenting with spice blends or adding spices to recipes. Understanding what makes specific spices complement each other so well can also give you the confidence to move beyond basic pairings and discover new flavor combinations.

Some classic pairings like garlic and basil or cinnamon and allspice reflect the spices’ shared place of origin and history of being used together in established cuisines. Other go-to combinations like chili powder and cumin or ginger and turmeric unite spices with similar flavor profiles. Contrasting but balancing combinations like rosemary and lemon or cumin and mint play complementary spices against each other for more complex flavors.

Getting the basics down of some of the most ubiquitous spice pairings used in cooking and knowing how to use them provides a strong foundation for endless recipe experimentation and innovation when cooking with spices.

Garlic and Basil

This dynamic Mediterranean herb and spice duo stars together in everything from pasta sauce to pesto to pizza. The pungent bite of garlic balances beautifully with the sweet, gently peppery flavor of basil. Use them together abundantly in tomato-based pasta sauces, savory Mediterranean vegetable dishes like ratatouille, fresh pestos and herb spreads, and as pizza toppings.

Cinnamon and Allspice

Warming allspice echoes the sweet-spicy flavor of cinnamon for a pairing that evokes baking spices. They taste fantastic together in baked goods like pies, cakes, cookies, and quick breads as well as in spice rubs for roasted vegetables, meats, and tofu. Add them together along with ginger and clove for ultimate apple and pumpkin pie spice blends.

Chili Powder and Cumin

This dynamic Tex-Mex duo adds smoky, savory depth. Chili powder contributes mild heat while earthy cumin balances with its distinctive nutty, slightly bitter flavor. They’re essential ingredients together in chili con carne, tacos seasonings, enchilada sauce, fajitas, and more Tex-Mex classics. Sprinkle them liberally on meats and veggies before grilling or roasting too.

Ginger and Turmeric

Ginger’s warming bite and subtle citrusy sweetness beautifully complements the earthy, bitter, slightly mustardy flavor of turmeric. They feature prominently together in Indian and Southeast Asian cuisines. Use them as a base for from-scratch curry powder or garam masala blends. Or add them together along with other spices like cumin and coriander to flavor curries, lentil dals, rice dishes, marinades, and stir fries.

Rosemary and Lemon

Herby rosemary’s piney bite plays perfectly against tart, bright lemon. They give chicken, fish, veggies, and even desserts a fresh Mediterranean flavor. Use them together abundantly for roasted lemon chicken or fish, lemon rosemary oven potatoes, mixed roast veggies, and lemon rosemary cookies or cake.

Cumin and Mint

Cooling mint balances the intense earthy, bitter, almost lemony flavor of cumin. This Middle Eastern pairing adds intrigue to spice rubs, marinades, grain salads like tabbouleh, yogurt dips, and more. Use ground cumin and fresh mint liberally together to season lamb, lentil and bean dishes, grains, and vegetables.

Experimenting with some of these tried-and-true spice pairings together in your own recipes is a great way to start comfortably exploring cooking with spices. Once you understand how certain spices complement each other so perfectly, you can begin branching out and discovering more unusual but still harmonious flavor combinations. With the endless variety of spices available today, there’s no limit to innovative pairings and captivating new spice blend ideas to uncover when cooking with spices.

Tips for Balancing Strong Spices

Strong spices like chili peppers, ginger, garlic, and curry can add immense flavor to dishes when used properly. However, it’s easy to overdo it with potent spices, resulting in a dish that is too spicy or intensely flavored to enjoy. With some careful tips and techniques, you can balance strong spice flavors to make harmonious and complex dishes.

Assess Your Spice Tolerance

Before cooking with strong spices like chili peppers, consider your own tolerance for spice as well as who you are cooking for. If you or your guests don’t enjoy very spicy food, use smaller amounts of hot peppers or milder varieties. You can always add more spice later if needed.

Start with Small Amounts

It’s easier to add more spice than take it out of a dish, so begin by adding small amounts of potent spices. Start with just a pinch of cayenne or half a minced chili pepper before adjusting to taste. You can build depth of flavor without overwhelming heat this way.

Bloom Spices in Oil or Liquid

Blooming spices like garlic, ginger, or curry powder in oil or liquid helps mellow their raw edge. Cook briefly in oil or broth before adding other ingredients. This smooths and rounds out the flavor.

Balance Heat with Acid and Sweet

Contrast spicy heat with acid from citrus juice or vinegar and sweetness from tomatoes, carrots, coconut milk, or a touch of sugar. The interplay of flavors makes both the heat and the contrasting notes more vibrant.

Soak Dried Chilies Before Using

For very hot dried chilies like arbol or pequín peppers, soaking them in hot water for 10-30 minutes helps extract some of the fieriness. Use the soaking liquid for a milder heat level.

Use Herbs and Spices Together

Pair hot spices with fresh herbs like cilantro, mint, basil, or parsley. The bright, cooling flavors balance out heat. Spices like cumin, coriander, and fennel also mitigate heat.

Add Dairy to Tame Spiciness

Ingredients like yogurt, cream, and coconut milk have a cooling effect on spicy dishes. Stir in a spoonful or two near the end for a mellower flavor. Cheese can also help cut spice intensity.

Adjust Serving Sizes Mindfully

When working with very hot peppers like habaneros or ghost peppers, remember that a little goes a long way. Adjust serving sizes to just 1-2 tablespoons of a sauce or one small pepper in a large pot of soup or stew.

Let Flavors Develop Over Time

The intensity of some spices mellows the longer they cook. If a dish tastes too spicy at first, let it sit for 5-10 minutes for flavors to meld before adjusting. Time often balances bold flavors.

Taste and Adjust Carefully

Be sure to taste as you season, and resist overcompensating with more salt or acid when heat is high. Focus on rounding out flavors with sweet, creamy, or herbaceous notes instead. Careful tweaking and time will result in balanced spice.

With a few simple techniques for blooming, soaking, pairing, and adjusting spice amounts, you can create dishes with layered, nuanced heat. Paying attention to spice tolerance levels and carefully tweaking flavors as food cooks will help you master the art of balancing strong spices.

Complementary Spices for Different Cuisines

Certain spice combinations just seem to go hand-in-hand with specific cuisines around the world. Learning some of these classic pairings can help home cooks easily infuse authentic and balanced flavors into dishes. When cooking with spices for various world cuisines, consider the following complementary blends:

Italian Cuisine

Some of the most popular spices used in Italian cooking include basil, oregano, rosemary, sage, garlic, onion, red pepper flakes, fennel, and parsley. These herbs and spices complement tomato-based pasta sauces, risottos, roasted vegetables, focaccia breads, and more. Try mixing fresh chopped basil, oregano, crushed red pepper and garlic for a zesty pizza sauce. Or add chopped rosemary and garlic when roasting potatoes or making focaccia bread.

Indian Cuisine

Indian food balances warming spices like cumin, turmeric, cinnamon, cardamom, clove, ginger and black pepper with cooling spices like coriander, fenugreek, fennel and mint. Common spice blends like garam masala and tandoori masala also feature these spices. To make a basic garam masala, try mixing cumin, coriander, cardamom, cinnamon, black pepper and clove. This blend nicely complements curries, lentils and vegetable dishes.

Mexican Cuisine

The base of many Mexican spice blends includes garlic, onion, oregano, cumin and chili peppers. Add corn, cilantro, lime and cacao to round out distinctive flavors. Mix cumin, oregano, garlic and chili powder for tacos al pastor. For rich mole sauces, try blending ancho chilies, cinnamon, cloves, cumin and cacao powder. Brighten enchiladas with cumin, garlic and lime zest in the sauce.

Chinese Cuisine

Chinese five spice powder typically contains Sichuan pepper, clove, cinnamon, fennel and star anise. This blend nicely complements roast meats, stir fries and noodle dishes. Garlic, ginger and scallions are also popular. For a homemade five spice blend, combine 2 teaspoons each of the five spices. Start with 1⁄4 teaspoon of this blend for 1 pound of meat or vegetables and adjust to taste.

Thai Cuisine

Lemongrass, lime, basil, cilantro, garlic, galangal and chili peppers are hallmarks of Thai food. For red or green curry paste, blend some combination of these ingredients with shallots, ginger and spices like coriander, cumin and turmeric. The balance of hot, sour, salty and sweet flavors helps make Thai food so craveable. Add freshly squeezed lime and a sprinkle of crushed red pepper flakes to your pad Thai or Thai basil chicken.

Mediterranean Cuisine

Mediterranean spice blends vary across the region but often include garlic, oregano, parsley, basil, cumin, cinnamon, allspice, mint and lemon. Mix garlic, lemon zest, oregano and olive oil for an easy marinade base for proteins. Or blend cinnamon, cumin and parsley into ground lamb before making kebabs or meatballs. Bright parsley, mint and lemon nicely balance the richness of foods cooked in olive oil.

Cajun & Creole Cuisine

Cooking with Spices: Tips for Balancing Flavors

The robust and eclectic flavors of New Orleans and Cajun cooking come from the influence of French, Spanish, Italian, German, West African and Native American cuisines over hundreds of years. Core spices include garlic, black pepper, thyme, oregano, cayenne pepper, paprika and filé powder made from ground sassafras leaves. This cuisine also makes abundant use of onions, bell peppers, celery and tomatoes. Start with the classic “holy trinity” of onions, celery and bell peppers when making jambalaya, gumbo or crawfish étouffée.

The world of spices offers endless flavor combinations unique to various cuisines. But no matter the cuisine, balancing the flavors and aromas of spices is key for the most delectable dishes. Follow some of the basic complementary spice guidelines for different world cuisines covered here. Then have fun experimenting with adjusting amounts or trying new spice blends in your cooking with spices!

Using Spices to Enhance Specific Foods

Cooking with Spices: Tips for Balancing Flavors

Spices can transform the flavor of many foods. By using spices purposefully, you can bring out the best qualities of ingredients and make dishes more complex and delicious. Here are some tips for enhancing specific foods with spices.

Meat

Spices are very effective at bringing out the rich, savory flavor of red meats like beef, pork, and lamb. For beef, classic spice blends like Montreal steak seasoning add lots of umami flavor. Dry rubs made with spices like black pepper, paprika, garlic powder and onion powder are also excellent on grilled meats. Lamb goes well with warming spices like cumin, cinnamon, cayenne, and cloves. Pork pairs nicely with sweet spices like ginger, nutmeg, allspice and brown sugar.

Seafood

The delicate flavor of fish and shellfish gains depth from herbs and spices. Old Bay seasoning, with its blend of mustard, paprika, celery salt and other spices, is a popular choice for seafood. Lemon and parsley brighten up the flavor of fish and shrimp. Cajun blackening spice mixes also work well to give seafood extra kick. Avoid strong spices that will overpower more subtle seafood flavors.

Poultry

Poultry benefits from a wide range of spices that enhance its versatility. Chicken stands up well to bolder spices like garlic, cumin, thyme, rosemary and sage. For Thanksgiving turkey, poultry seasoning with thyme, sage, marjoram and nutmeg is the perfect blend. Indian-style tandoori chicken uses spices like cayenne, cinnamon, cumin and garlic to make the meat flavorful. Lighter spices like lemon and parsley taste refreshing with poultry.

Vegetables

Spices can make vegetables more crave-worthy. Roasting vegetables brings out their natural sweetness, which pairs well with spices like cumin, paprika, garlic and onion powder. Add chili powder, cayenne or crushed red pepper to turn up the heat. Italian herb blends give depth of flavor to eggplants, squash, peppers and more. For richness, add warming spices like cinnamon and nutmeg to cooked vegetables. Even just salt, pepper and lemon can make vegetables pop.

Legumes and Grains

Beans, lentils and whole grains tend to have earthier, nuttier flavors that combine nicely with bold spice blends. Cumin is commonly paired with chickpeas in curries and stews. For lentils and beans, add smoky paprika or flavorful garam masala. Biryani or pilaf rice dishes use fragrant spices like cardamom, cloves and cinnamon. To finish whole grains like farro or quinoa, stir in fresh herbs, lemon zest, or a drizzle of chili crisp sauce.

Baked Goods and Desserts

Both sweet and savory spices enhance baked goods. Ginger, cinnamon, nutmeg and cloves add comforting warmth to cookies, cakes and pies. Anise and fennel bring out subtle licorice notes in pastries and other desserts. Savory baked goods like breads, biscuits and scones taste great with herbs like rosemary, thyme and oregano baked right in. Add a pinch of cayenne to chocolate desserts for a kick. Finish off baked goods with a dusting of cinnamon sugar or cumin salt.

Eggs

Even simple scrambled or fried eggs become more exciting with spices. Add a pinch of turmeric or saffron to make colorful, flavorful scrambled eggs. Stir chopped herbs like chives, dill or parsley into egg salad. For a spicy kick, add cayenne, paprika or chili flakes to omelets and frittatas. Whip up curry-spiced deviled eggs. Shakshuka is a classic Middle Eastern dish of eggs poached in a tomato sauce spiced with cumin, paprika and cayenne.

No matter what you’re cooking, there is likely a spice blend to make it shine. Keep your pantry stocked with a variety of dried herbs and spices so you’re ready to add flavor to everyday dishes. Don’t be afraid to experiment with new spice combinations too. With just a dash of this or a pinch of that, you can take your cooking to bold new heights.

Spice Storage Tips

Properly storing spices is key to preserving their freshness and flavor. Here are some tips for keeping your spices in peak condition for all your cooking with spices endeavors.

Buy Spices Whole

Purchasing spices whole, rather than pre-ground, can help them retain aroma and flavor longer. Whole spices have natural oils that when left intact, act as a protectant from elements that cause spices to lose potency. Try grinding or crushing small batches of spices as needed so they stay fresh.

Store Spices in Airtight Containers

Whether you buy pre-ground or whole spice, be sure to transfer them from packaging into airtight glass, metal, or ceramic containers. Air exposure causes oxidation which makes spices go stale faster. Clear glass jars allow you to easily identify contents. For extra protection, keep containers in a cool, dark space like a cupboard.

Keep Away From Heat, Light, and Moisture

Heat, light, and moisture are enemies to fresh, vibrant spices and can speed up oxidation. Avoid storing spices near heat sources like the stove, oven, or toaster. Choose a space not exposed to direct sunlight. Make sure storage areas are free from steam and condensation. Controlling temperature and humidity helps spices maintain volatile oils.

Practice First-In, First-Out

When cooking with spices, use a first-in, first-out system when possible. Move older product to the front of your pantry or spice rack. Use spices that have been sitting the longest first, then newest additions last. This method helps you get through inventory before peak flavor dissipates. Date jars when contents are purchased or opened.

Freeze Spices for Long-Term Storage

Freezing select ground spices prolongs freshness beyond typical pantry storage. Good freezer candidates include oregano, basil, thyme, rosemary, marjoram, and sage. Simply spoon spices into an ice cube tray, cover with water or oil, and freeze. Pop cubes into airtight freezer bags. Frozen cubes provide flavor as they thaw during cooking.

Keep Inventory and Restock

Do a periodic spice inventory, checking for stale, lackluster flavors. If you notice a decline, replace those items with fresh spices. Try not to hoard large quantities of any one spice. For the best flavored cooking with spices, buy smaller amounts more frequently to prevent overload of any spice that could lose potency before use.

Know When It’s Time to Toss and Replace

Unfortunately, spices don’t last forever. If you notice dull color, weakened aroma, altered texture, diminished flavor impact, or any signs of moisture or mold, it’s time to compost. As a general rule, toss ground spices after 1-2 years. Whole spices can hold flavor potency slightly longer at 3-4 years max. Regardless of form, replace any spice that just doesn’t seem vibrant.

Implementing a few fundamental spice storage strategies can make all the difference in lifting your cuisine with intensely flavored, perfectly balanced spices. Follow these spice care tips for delicious cooking with spices recipes your family and friends will love.

Buying Quality Spices

Finding high-quality spices can make all the difference in your cooking. The intensity of flavor, aroma, and color that spices impart depends greatly on their freshness and proper storage and handling before purchase. Here are some tips for selecting and buying spices that will enhance your dishes.

Know Where to Shop

The best places to buy spices are specialty spice shops, ethnic markets, and the spice section of higher-end or gourmet grocery stores. These retailers are more likely to have high turnover of inventory and staff knowledgeable about the spices. Chain supermarkets often have lower spice quality since the product may sit longer on shelves.

Assess Dry Spices Carefully

When buying dry spices like cumin, turmeric, or oregano, check manufacturing or expiration dates and choose the freshest option. Give any spice container a sniff test – you should be greeted with an intense aroma when you open the lid, not a faint dusty scent. And inspect the color of the powder or seeds/leaves – they should not be dull but rather vivid.

Evaluate Whole Spices

For whole spices like peppercorns, cinnamon sticks, cardamom pods, or bay leaves, examine size, color and aroma. Peppercorns should be uniform in size without lots of broken bits. Cinnamon and bay leaves should have good color without many blemishes. Cardamom pods should not look dried out or have loose seeds. And all whole spices should release fragrance when gently pressed.

Understand Ideal Storage

It’s also essential to consider how spices were stored before you bought them. Humidity, heat, and light all degrade spices quickly. For maximum freshness, spices should be kept in airtight containers away from heat, moisture and sunlight. When shopping, choose spices displayed in tightly sealed containers in a cooler, darker part of the store.

Ask Questions

Don’t hesitate to ask questions about spices when shopping at specialty stores. Inquire about turnover rates, storage methods, and popularity to help gauge freshness and quality. Ask when and where a spice was harvested or purchased. Good spice purveyors will be happy to share this information with interested customers.

Do Your Research

Particularly when shopping online, do some quick research on the spice seller before you buy. Check for any reviews, certifications, or sustainability standards that can help identify reputable spice sources. Or look for vendors specializing in spices and seasonings rather than general retailers.

Buy Smaller Quantities

Because spices lose potency over time, it’s best to buy spices in smaller quantities if you don’t use them frequently in your cooking. Unless you bake and cook often with cinnamon, for instance, a large bottle may lose its flavor before you use it all. Consider your usage amount and frequency when choosing spice quantities.

Determine Fair Pricing

Spices can range hugely in price because of factors like quality, rarity, origin, and processing method. Consider fair pricing for both your budget and the quality level you seek. Very cheap spices are likely old, mixed with fillers, or lower grade. But the most expensive may not be necessary for home cooking. Aim for good value for high-quality spices best suited to your recipes rather than either extreme.

Trust Your Senses

Your senses of smell, taste and sight are the best tools for assessing spice quality. Rely on them when shopping to inspect spices and determine the true vibrancy that will enhance cooking. Let these buying quality spice tips guide you in selecting ingredients with optimal flavor and freshness.

Spice Substitutions

Knowing how to substitute spices in recipes can save a dish when you’re missing a key ingredient. While no substitute can perfectly replicate the flavor of the original spice, there are good alternatives you can use in a pinch. With some thoughtful spice substitutions, you can still achieve a beautifully balanced, flavorful meal.

Allspice

If you don’t have allspice, a blend of cinnamon, cloves, and nutmeg can mimic the sweet and slightly peppery flavor. Use 1/2 teaspoon of this spice blend for every teaspoon of allspice called for. Allspice is commonly used in recipes for gravies, stews, mulled wines and ciders, Middle Eastern dishes, jerk seasonings, and more.

Cinnamon

Cassia has a very similar flavor to true cinnamon and can generally be used interchangeably in recipes. If using cassia when a recipe calls for cinnamon, use a little less since cassia has a stronger, more intense flavor. Cinnamon is a warm, sweet spice used around the world in both savory and sweet dishes.

Cloves

Allspice, nutmeg, cinnamon and ginger all have subtle clove undertones. Use one of these spices sparingly as an emergency substitute if you don’t have cloves on hand. Cloves pair well with cinnamon, nutmeg, ginger and orange. They are used in spice blends, marinades, pickled and preserved foods, baked goods and more.

Cumin

Caraway seeds have an anise-like flavor similar to cumin. Use the same amount called for in the recipe. Chili powder and garam masala also work for some dishes. Cumin is essential for Mexican, Indian and Middle Eastern cuisine, used in everything from curries to tacos.

Cooking with Spices: Tips for Balancing Flavors

Curry Powder

Make your own quick curry blend by combining 2 teaspoons turmeric, 1 teaspoon each of ground coriander, ground cumin, ground ginger and ground cinnamon. Omit any ingredients you don’t have. Commercial curry powder already contains a mix of spices like these. Curry powder is used to flavor many Indian and Southeast Asian dishes.

Ginger

Ground allspice or cinnamon provide some of the warmth missing without ginger, while lemon juice can replicate some of the tartness. Minced radishes and galangal root also share similarities with fresh ginger. Ginger adds a bright, citrusy heat to both sweet and savory recipes.

Nutmeg

Substitute mace, allspice, cinnamon or cloves for nutmeg. Use small amounts, as these all have stronger flavors. Nutmeg is used frequently in sweets and baked goods, but also works well in cream-based savory dishes.

Paprika

Depending on the type called for in the recipe, you can substitute chili powder or cayenne pepper for the heat, and turmeric for the vibrant red-orange color. Paprika ranges from mild and sweet to hot and spicy. It brings a rich red color and pops of flavor to many dishes.

Saffron

Turmeric can provide a similar yellow color to dishes, while ingredients like annatto and carrot powder also work. Combine turmeric with ginger, nutmeg and cardamom to approximate the flavor. Saffron is known as one of the world’s most expensive spices thanks to the labor-intensive process of harvesting the fragile purple crocus flowers.

Star Anise

Crushed anise seeds bring a similar pronounced licorice flavor. Chinese five spice seasoning contains both star anise and anise seeds, and makes a handy substitute in a pinch. Star anise is most frequently used in Chinese and Vietnamese cooking.

Getting Creative with Spice Substitutions

Don’t be afraid to experiment with spice substitutions in your cooking. Start by considering spices that share flavor profiles – warming spices like cinnamon, cloves nutmeg and allspice can often stand in for one another. Spices with lemon/citrus notes like cumin, coriander and ginger also make good substitutes for one another.

When substituting spices, use a light hand at first, then adjust to suit your tastes. Keep in mind that spice seeds will be less potent than their ground version. Toasting whole spice seeds briefly before using can help intensify their oils and flavors.

Proper storage is also key for preserving spices’ flavors and potency. Keep spices away from light, heat and moisture to prevent them from fading or spoiling.

Taking time to understand the flavor notes in your favorite spices makes substituting much easier. With some creativity and knowledge of spice flavors, you can keep crafting stellar dishes even when you don’t have every ingredient on hand. Cooking with spices is all about experimentation and balance – don’t be afraid to try spice substitutions to create your own signature flavors.

Infusing Oils and Vinegars with Spices

Spices can be used to infuse oils and vinegars, adding another dimension of flavor to your cooking. Infused oils and vinegars make great gifts, can be used in a variety of dishes, and allow you to experiment with different spice flavor combinations.

When infusing oils and vinegars at home, there are some important guidelines to follow. Choosing the right herbs, spices, oils and vinegars will ensure you end up with a quality, safe product. Here’s an overview of the process, along with tips for infusing your own spice-infused oils and vinegars at home.

Choosing Ingredients for Infused Oils and Vinegars

When creating infused oils and vinegars, you first need to select high-quality ingredients. The better the ingredients, the better the final product will taste.

Herbs and Spices

The herbs and spices you choose will depend on your taste preferences and planned uses. Some top options include:

– Peppercorns

– Whole cloves

– Cinnamon sticks

– Cardamom pods

– Star anise

– Vanilla beans

– Citrus zest

– Rosemary

– Oregano

– Thyme

– Lavender

Make sure all herbs and spices are fresh. Dried herbs and spices work best to help prevent spoilage.

Cooking with Spices: Tips for Balancing Flavors

Oils

For infused oils, choose quality oil with a neutral flavor that will let the spices shine through. Top options include:

– Grapeseed oil

– Sunflower oil

– Safflower oil

Extra virgin olive oil can also work well, but has a strong flavor of its own.

Vinegars

White wine vinegar and champagne vinegar have subtle flavors that complement, but don’t overwhelm herbs and spices. Apple cider vinegar is another great choice. Stay away from dark vinegars like balsamic, red wine vinegar or sherry vinegar — these can overpower other flavors.

Process for Infusing Oils and Vinegars

There are a few methods you can use to infuse oils and vinegars at home:

Stovetop Method

Add herbs, spices and oil or vinegar to a saucepan. Heat over low, keeping the temperature between 160°F and 180°F for 15 to 30 minutes. Cool completely before bottling.

Oven Method

Combine ingredients in an oven-safe dish or jar. Bake at 200°F for 2 to 3 hours. Cool completely before bottling.

Cold Infusion

Combine room temperature oil or vinegar with herbs and spices in a jar or bottle. Store in a cool, dark place, shaking daily for 2 to 6 weeks. Strain out solids before use.

No matter what infusion method you choose, proper storage is critical for safety. Make sure to strain out all herb and spice solids, as these can introduce bacteria and lead to spoilage. Store infused oils and vinegars in sterilized bottles or jars in the refrigerator for up to 6 months. Freeze for longer storage.

Using Your Infused Oils and Vinegars

The possibilities are endless when using your homemade infused oils and vinegars!

– Use them as marinades and salad dressings

– Make herb-infused vinegar shrubs for cocktails

– Use spice-infused oils for sautéing aromatics like onions and garlic

– Make infused vinegar pickles

– Use infused oils for bread dipping

– Drizzle infused oils over hummus, pasta, grilled meats, soups and more

– Splash infused vinegars into pan sauces and gravies

Some delicious flavor combinations to try:

– Lemon-Rosemary Oil

– Orange-Clove Vinegar

– Cinnamon-Cardamom Oil

– Lavender-Thyme Vinegar

– Spicy Chili Oil

Feel free to experiment with your own herb, spice and flavor combinations too. Track what infusions you create and how you end up using them. Over time, you’ll discover which combinations you use most in your cooking with spices.

Safety Tips When Infusing Oils and Vinegars

When making infused oils and vinegars at home, be sure to follow proper food safety guidelines:

– Make sure all equipment, bottles and jars are completely sterilized first

– Use dried herbs and spices rather than fresh

– Strain out all herb and spice solids after infusing

– Refrigerate after making, for up to 6 months

– Check regularly for signs of spoilage or mold

– Discard any oils or vinegars that smell or look off

With the proper technique, infusing your own oils and vinegars can allow for creativity in the kitchen. You’ll end up with quality, artisanal products that make great gifts or cooking ingredients. Use our tips to guide you in choosing ingredients, methods and flavor combinations. Over time, you’ll learn exactly how to infuse oils and vinegars with spices tailored to your taste.

Making Your Own Spice Blends

Creating your own signature spice blends is a great way to add unique flavors to your cooking while saving money. It also allows you to control the quality and freshness of the spices you use. When making DIY spice blends, keep these tips in mind:

Get to Know Your Spices

Before blending your own spices, take the time to experiment with different spices individually. Pay attention to each spice’s flavor profile, potency, and uses. Understanding the characteristics of individual spices will help you better balance and blend them. Some spices to familiarize yourself with include cumin, cinnamon, ginger, turmeric, oregano, basil, and garlic powder.

Start with a Base Spice

Many custom spice blends are anchored by a base spice that makes up the largest portion of the mix. Common base spices include salt, pepper, paprika, and cumin. The base creates the blend’s essential flavor, while supplementary spices enhance or alter it. For example, if you wanted an Italian-inspired blend, you may use oregano as the base.

Include Complimentary Spices

Choose supplementary spices that have complementary flavors to the base spice and to each other. If your base spice is sweet, balance it with spices known for savory, spicy, earthy or citrusy notes. Popular pairings include garlic powder with basil, cinnamon with nutmeg, and cumin with coriander. But don’t limit yourself to conventional combinations – experimentation is part of the fun!

Pay Attention to Proportions

The ratios of spices in your signature blend dramatically impacts its overall flavor. Start by adding small amounts of supplemental spices to your base spice. For the average blend, the base spice should make up at least half of the total amount. From there, add supplementary spices a teaspoon at a time until you achieve the desired synergy of flavors. Tweak and adjust to fit your tastes. Keep notes so you can recreate successes.

Consider Intended Uses

Tailor your homemade spice blend’s ingredients and proportions to how you plan to use it. Blends for grilling may emphasize spicy, woodsy spices and salt, while blends meant for cookies could feature warm baking spices. If you’ll use a blend to season various foods, strike a balance with universal flavors. Envision your ideal dishes when perfecting mixes.

Store Properly to Retain Freshness

To preserve the flavors and potency of your spice blends:

– Store blends in airtight containers away from heat, moisture and sunlight. Glass jars work well.

– Only make as much of a blend as you’ll use within a few months. Spices lose potency over time.

– If blends lose their punch, add more of the bolder spices like chilies, ginger and garlic.

Get Inspired by Cuisine-Specific Blends

Each cuisine has signature spice blends that can spark ideas for your own combinations:

– Italian – basil, oregano, rosemary, garlic

– Indian – cumin, turmeric, ginger, coriander

– Mexican – cumin, chili powder, garlic, oregano

– Moroccan – cumin, cinnamon, paprika, cayenne

– Thai – lemongrass, garlic, galangal, kaffir lime

Try These Beginner-Friendly Blends

If you’re new to blending spices, these mixes make good starting points:

All-Purpose Seasoning Blend

Makes 1⁄2 cup. Good for meats, veggies and more.

Cooking with Spices: Tips for Balancing Flavors

– 1⁄4 cup salt

– 3 Tbsp. paprika

– 2 tsp. garlic powder

Cooking with Spices: Tips for Balancing Flavors

– 2 tsp. onion powder

– 1 tsp. black pepper

– 1 tsp. dried oregano

– 1⁄2 tsp. cayenne pepper (optional)

Pumpkin Pie Spice

Makes 1⁄4 cup. Ideal for autumnal baked goods.

– 3 Tbsp. ground cinnamon

– 2 tsp. ground ginger

– 1 tsp. allspice

– 1 tsp. nutmeg

– 1⁄2 tsp. cloves

BBQ Dry Rub

Makes 1⁄2 cup. Use on grilled meats, tofu and tempeh.

– 1⁄4 cup brown sugar

– 2 Tbsp. smoked paprika

– 1 Tbsp. chili powder

– 1 Tbsp. ground cumin

– 2 tsp. garlic powder

– 2 tsp. salt

– 1 tsp. pepper

We hope these tips inspire you to experiment with crafting your own unique spice blends! Feel free to tweak flavors to match your tastes and culinary creations.

Preserving the Bounty: How to Dry and Store Herbs

Preserving the Bounty: How to Dry and Store Herbs

Intro to Drying Herbs at Home

# Intro to Drying Herbs at Home

Drying herbs at home is a time-honored tradition that allows you to preserve the bountiful harvest from your garden or local farmers market to enjoy all year long. As interest in home cooking, gardening, and natural living continues to grow, more people are discovering the joys and benefits of drying their own herbs.

## Why Dry Your Own Herbs?

Drying herbs at home enables you to customize your dried herb selection to your taste preferences. You can choose which herbs to grow or buy fresh, then dry only those varieties perfectly suited to how you like to cook. Drying them yourself also ensures maximum flavor and aroma, as herbs begin losing these precious oils soon after being cut or picked. By drying them promptly yourself, you capture far more of their essence than store-bought dried herbs can offer.

You’ll also save money by drying herbs at home, rather than purchasing pre-packaged dried herbs which can be quite expensive in the quantities needed for frequent cooking use. Growing and drying your own allows you to inexpensively dry herbs in bulk.

## Satisfaction from the Seed to Jar Process

For many home cooks, gardeners, and those seeking a more self-sufficient lifestyle, there is great satisfaction that comes from preserving your own food. Drying herbs you have nurtured from seeds or cuttings, through harvest, is rewarding on many levels. The seed-to-jar process enables you to create customized spice blends perfectly matched to your cooking style. You’ll also reduce food waste by fully utilizing herbs at their peak freshness, then storing the excess to enjoy all year long.

## Key Benefits of Drying Herbs at Home

– **Save money** by not having to buy expensive store-bought dried herbs

– **Customize** your herb and spice selection to suit your taste

– **Maximize flavors & aromas** by drying herbs promptly after harvest

– **Reduce waste** by preserving seasonally abundant fresh herbs

– **Satisfaction** of the seed-to-jar process from garden to kitchen

## Getting Set Up for Drying Herbs at Home

While specialized equipment can be used, all you really need to get started drying herbs at home is some simple supplies you likely already have on hand. Herbs can be hung bundled to air dry, set on racks or trays, or for faster drying, a basic electric food dehydrator is very useful. Either way, with good air circulation, fresh herbs, and a little patience as they dry, you’ll have delicious dried herbs to enjoy or give as gifts.

The rest of this article will cover in detail…

Best Herbs for Drying

When it comes to drying herbs at home, some varieties preserve better than others. The best herbs for drying are those that have high oil content, as the oils help the herbs retain flavor and aroma even when the moisture has been removed. Here are the top herbs to consider drying.

Preserving the Bounty: How to Dry and Store Herbs

Rosemary

With its woodsy, pine-like fragrance and hints of lemon and mint, rosemary has one of the strongest and most complex flavors of common herbs. Its high oil content allows rosemary to retain its bold flavor profile very well when dried. To dry rosemary, hang small bundles upside down or place leaves on a drying rack. Dried rosemary pairs beautifully with meats, tomatoes, beans, breads, and eggs. Use dried rosemary in spice rubs, herbed salts and sugars, infused vinegars and oils, or in aromatic sachets.

Oregano

A staple of Italian and Mediterranean cuisine, pungent oregano also dries nicely. Oregano has a relatively high oil content, allowing its spicy, aromatic notes to come through when dried. Air drying works best for oregano. Use dried oregano in spice mixes for pizza, pasta, meat, fish, vegetables, salad dressings, and more. Or make flavored oils and vinegars with rehydrated dried oregano.

Thyme

With over a dozen varieties ranging from lemon to caraway, thyme is a wildly versatile culinary herb. Its small leaves and high oil content make thyme an excellent choice for drying. Hang thyme bundles to air dry or use a food dehydrator. Dried thyme maintains its sweet earthiness and bright herbal notes very well. Use it in everything from soups to roasted vegetables to marinades and compound butters.

Sage

Popular in fall dishes, sage has a woodsy, slightly peppery flavor. Its silver green leaves dry easily, retaining good color and flavor. Hang sage bundles to air dry fully before crumbling the crisp dried leaves from the stems. Use dried sage to season rich meats like pork, duck or sausage as well as winter squash dishes, hearty bean dishes, stuffings and dressings. Sage also makes a wonderful tea.

Lavender

Though technically an ornamental, culinary-grade lavender has a sweet, floral quality used to infuse everything from sugar to shortbread cookies. English lavender varieties like Munstead or Hidcote work best. Cut lavender stems when flowers are fully opened and hang small bundles to dry thoroughly. Use dried lavender to make floral sugars, salts, lemonades and scones. Or use in savory rubs for meats and chicken.

Bay Leaves

Bay leaves impart a distinctive, slightly menthol-like note popular in European and Indian cuisine. Fresh bay leaves do not fully release their unique flavor until dried. Air drying bay leaves is simple – just hang branches upside down. Crumble the dried bay leaves before use. Simmer stews, beans or grains with a bay leaf then remove before serving. Or make a bay leaf-infused oil.

Tarragon

Known for its distinct licorice-anise flavor, tarragon’s long slender leaves can be dried easily at home. Simply gather stems, secure with a rubber band, and hang upside down to dry. Dried tarragon makes an interesting addition to herbal vinegar or compound butter. It also pairs nicely with fish, chicken, eggs, tomatoes and carrots. Use sparingly though, as tarragon’s flavor intensifies when dried.

Marjoram & Summer Savory

Close herb cousins marjoram and summer savory have a mild, sweet flavor similar to oregano. Their petite leaves dry quickly either on a rack or hanging in bundles. Dried marjoram and savory are perfect for spice rubs, herbed oils and flavored salts. Use to season eggs, fish, poultry, tomatoes, mushrooms and more. Their mellow flavor allows them to blend nicely with heartier dried herbs.

Mint

Cool and refreshing mint comes in several popular varieties including peppermint and spearmint. Mint’s high oil content helps retain its unmistakable flavor when dried properly. For best results, dry smaller mint leaf bundles hung upside down in a dark, well-ventilated area. Once fully dried, store mint in an airtight container away from light. Use dried mint in tea blends, beverages, desserts, fruit salads and more.

No matter which herbs you choose to dry, the key is making sure stems and leaves dry completely before storage to avoid mold growth. Dried correctly, these aromatic herbs will add flavor to your cooking all year long. Be sure to label all dried herbs with the name and date before storing. Refer to “How to Dry Herbs with Each Method” for more specifics on the best drying technique for each herb variety. With the bounty of summer preserved, you can bring vibrant herbal flavor to soups, stews and slow-cooked dishes throughout the fall and winter.

Drying Methods: Air Drying, Using a Dehydrator, Freezing

When it comes to preserving fresh herbs from the garden or market, drying is one of the easiest and most effective methods. Drying removes the moisture from herbs, allowing them to be stored for months while retaining their aromatic oils and flavors. There are several techniques for drying herbs at home to lock in that just-picked freshness before the bounty of summer fades.

Air Drying Herbs

Air drying takes advantage of natural airflow to slowly remove moisture from fresh herb leaves over the course of several days or weeks. To air dry herbs, gather stems together in small bundles with rubber bands or string and hang them upside down in a warm, dry, dark place with good ventilation. Some good spots include a kitchen, pantry, attic, or shed. The herbs should not be in direct sunlight or exposed to high humidity during the drying process.

Check the herb bundles periodically until the leaves are crispy and crumble easily between your fingers. This drying process can take one to four weeks depending on the moisture content of the herbs, the temperature and airflow of the space, and the herb variety. Delicate herbs like basil, mint, and parsley may dry faster than hardy herbs like rosemary, sage, thyme and oregano.

Once the herbs are crispy dry, you can crumble them off the stems into airtight glass jars or containers. Make sure to label jars with the herb variety and date before storing in a cool, dark place for up to a year. With proper air drying and storage methods, you’ll have access to garden-fresh flavor all year long when making recipes from “Preserving the Bounty: How to Dry and Store Herbs.”

Preserving the Bounty: How to Dry and Store Herbs

Using a Food Dehydrator

A food dehydrator offers an accelerated way to dry herbs using controlled low heat airflow. Using an electric food dehydrator shortens the typical air drying time to just a few hours and protects delicate herbs from mold, mildew, and dust during the process.

To use a dehydrator, wash and pat dry fresh herb stems to remove dirt or debris. Lay the stems in a single layer on dehydrator trays, making sure not to overpack them. Set the dehydrator between 95°F to 115°F and let it run for two to four hours. Check periodically until the leaves become crispy and crumble easily. Then store the dried herbs in airtight containers as described above.

The major benefit of using a food dehydrator is the fast active drying time compared to passive air drying. Dehydrators also provide more control and predictability over the process. Just be careful not to dry the herbs at too high a temperature, as this can diminish the aromatic essential oils. Refer to your dehydrator manual for specific time and temperature guidelines based on the model.

Freezing Herbs

Freezing is best for soft, leafy herbs like basil, chives, cilantro, dill, mint, and parsley which don’t hold up as well to air drying or dehydrators. To freeze herbs, wash and dry the leaves, then chop them finely or puree in a food processor. Spoon the herbs into ice cube trays and cover with water or oil before freezing overnight.

Once frozen, pop the herb cubes out of the tray and transfer to airtight freezer bags. Squeeze out excess air and label with the variety and date. Frozen herbs will keep for about six months before losing flavor. Their delicate leaves turn mushy when thawed but can be easily incorporated into sauces, soups, pestos, and more. The freezing process better preserves the color and flavor of delicate herbs compared to drying methods.

Get the Most out of Dried Herbs

Now that you know the best practices for air drying, using a food dehydrator, and freezing, you can stock up on herbs to flavor recipes all year long. Refer to “Preserving the Bounty: How to Dry and Store Herbs” for more tips on storing, using, and blending dried herbs. Discover creative ways to use your dried herb bounty and the fascinating history behind herb preservation across cultures and cuisines.

How to Dry Herbs with Each Method

# How to Dry Herbs with Each Method

Drying herbs at home is a great way to preserve the bounty from your garden or local farmers market. Properly dried herbs can retain much of their flavor and aroma for months when stored correctly. There are a few methods for drying herbs at home to best maintain their quality.

## Air Drying

Preserving the Bounty: How to Dry and Store Herbs

Air drying is the most common method for preserving herbs at home. To air dry herbs, gather clean herb sprigs into small bundles using cotton string or rubber bands. Hang these bundles in a warm, dry, dark place with good airflow. The warmth helps the moisture evaporate while the darkness prevents light from diminishing the flavors and aromas.

Ideal places for air drying herbs at home include a kitchen, pantry, attic or garage. Hang the herb bundles from the ceiling or place them in wire racks. Make sure the herbs are not touching each other or any surfaces. Air flow is crucial so the herbs dry quickly before any mold develops. Check the bundles every few days until the herbs are fully dried. This can take 1-2 weeks depending on the moisture content.

Some good herbs for air drying include:

– Oregano

– Sage

– Thyme

– Rosemary

– Lavender

– Mint

– Lemon Balm

These hardy herbs retain their flavors well when air dried. More delicate herbs like basil, chives and parsley are better preserved through freezing.

## Using a Dehydrator

Preserving the Bounty: How to Dry and Store Herbs

A food dehydrator offers an accelerated way to dry herbs at home while preserving more of their original quality. Dehydrators use low consistent heat, airflow and timed drying cycles to efficiently remove moisture. Most dehydrators have stackable trays with mesh screens that allow airflow on all sides.

To dry herbs in a dehydrator, place cleaned herb sprigs or leaves in a single layer on the trays. It’s best not to overfill the trays or overlap the herbs too much. Set the temperature between 95-100°F and let the machine run its cycle, usually 6-12 hours. Check periodically and stop when the herbs are crispy. Then promptly store in airtight containers.

Some great herbs for dehydrating include:

– Basil

– Oregano

– Marjoram

– Chives

– Parsley

– Cilantro

The gentle even heat helps retain more essential oils and flavor in these delicate herbs compared to air drying.

## Freezing Herbs

Freezing is a great way to preserve the fresh flavors of more delicate herbs like basil, chives and cilantro. Start with clean fresh herb leaves, chopped if large. Place mounded portions on a baking sheet and put in the freezer until frozen solid. Then promptly transfer to airtight containers or bags. Label with the herb type and freeze for up to 6 months.

The quick freezing process helps lock in the flavors, colors and nutrients better than drying. Frozen herbs are great for adding to soups, stews, sauces and more all year long. Try these herbs frozen:

– Basil

– Chives

– Cilantro

– Parsley

– Dill

– Tarragon

Freezing isn’t ideal for sturdy woody herbs like rosemary, thyme and sage. For best results, air dry these herbs instead.

Follow these simple methods for drying or freezing herbs at home to preserve the bountiful flavors of the growing season. With proper storage, dried and frozen herbs can add their aromatic qualities to all sorts of delicious recipes for months to come.

Storing Dried Herbs Properly

Once you’ve gone to the effort of drying your fresh herb bounty, you’ll want to make sure you store the dried herbs properly so they retain maximum flavor and aroma. Proper storage is key for preserving dried herbs from season to season.

When storing dried herbs, the enemies are light, heat, moisture and air. Protecting your dried herbs from these elements will help them retain volatile oils and prevent loss of flavor, changes in color and texture, and spoilage. Here are some tips for storing dried herbs properly after drying.

Use Opaque, Airtight Containers

You’ll want to store your dried herbs in containers that block light and prevent air and moisture from getting in. Clear glass jars may seem attractive, but light causes herbs to lose color and aroma over time. Instead, use containers made of opaque materials like ceramic, metal or opaque plastic. You can reuse glass jars and containers if they have tight-fitting lids. Mason jars work very well for storing dried herbs. Any container should have an airtight seal. You want to keep as much air out as possible to prevent oxidation. Vacuum sealing bags or canisters are ideal for an airtight environment and for pushing out air before sealing.

Store Herbs in a Cool, Dark Place

In addition to airtight, opaque containers, store dried herbs in a cool, dark place. Warmth and light will speed deterioration of herbs. Store containers in a cupboard, pantry or cabinet away from heat sources like appliances or windows. An ideal storage temperature is between 50°F and 70°F. The refrigerator is usually too humid, but the freezer can be used if herbs are vacuum sealed or stored with desiccants.

Check for Moisture and Mold

No matter how airtight you think your storage method is, it’s wise to check dried herbs periodically for moisture and mold. Condensation can form even in sealed containers when temperatures fluctuate. Look for moisture collecting inside containers or droplets on herbs, which can cause mold. Check for fuzzy mold starting to grow on leaves or stems. Discard any dried herbs that show moisture or mold. They can contaminate the rest of your dried stock.

Use Desiccants

Desiccants are moisture-absorbing substances that can pull existing moisture from containers and herbs. This prevents condensation and moisture from damaging dried herbs in storage. Common desiccants are silica gel packs, dry rice, chalk, sand and salt. They are especially useful if storing herbs in the refrigerator or freezer where excess moisture can collect.

Proper Labelling

Always label dried herb containers with the name and date. Dried herbs tend to look similar, so labels prevent confusion. Date labels let you use older stock first and know when it’s time to discard dried herbs. Track storage times for each type of herb. Heartier herbs like oregano, thyme and rosemary can last 1-2 years or longer. More delicate herbs like basil, parsley, chives and mint last about a year.

Creative Storage Ideas

In addition to traditional containers and humidity-controlled methods, get creative with how you store dried herbs. Decorative glass bottles, wire baskets and magnetic strips for herb jars open up visual storage options. Dried herb wreaths and bouquets make beautiful displays. Shelving units or pull-out vertical herb gardens bring frequently used herbs within easy reach. Match storage style with your kitchen or pantry decor.

With proper opaque, airtight containers stored in cool, dark spaces, checking moisture and mold, using desiccants, labelling and getting creative, you can successfully preserve all your lovingly home-dried herbs. Follow these dried herb storage tips, and you’ll be enjoying the flavorful bounty of your herb garden for months or even years after harvest.

Using Dried Vs. Fresh Herbs in Recipes

When it comes to using herbs in cooking and recipes, most chefs and home cooks have a preference for either fresh or dried herbs. Both come with their own sets of pros and cons, and it largely depends on the specific recipe and what flavors you are trying to achieve. Understanding when to use dried herbs versus fresh herbs can elevate your dishes to new heights.

The key difference between dried and fresh herbs lies in their intensity of flavor. During the drying process, herbs lose moisture but gain potency as their oils become more concentrated. As a general rule of thumb, 1 teaspoon of dried herbs equals 1 tablespoon of fresh. So when substituting, be sure to adjust quantities accordingly. Overdoing it on potent dried herbs can ruin a dish.

Preserving the Bounty: How to Dry and Store Herbs

Fresh herbs like basil, parsley, cilantro, dill, and mint add a vibrancy and brightness that complements many dishes beautifully. Their grassy, green flavor provides balance against rich, fatty, or acidic components. Fresh herbs are best used raw or added at the end of cooking. Too much heat diminishes their delicate notes.

Meanwhile, heartier dried herbs like oregano, thyme, rosemary stand up well to longer cooking times, allowing their flavors to infuse gradually into braises, stews, soups and more. Their intensity pairs especially well with roasted meats, long-simmered beans or hearty tomato sauces. Just remember that a little goes a long way.

Certain herbs retain their flavor better after drying than others. Oregano, thyme, bay leaves, and rosemary are prime candidates for drying and do well in slow-cooked preparations. On the other hand, more delicate herbs like basil, cilantro, dill, mint and parsley lose some of their nuance when dried. They are best used fresh.

When developing your own recipes, consider whether you want a punch of strong herbal flavor or a brighter, greener taste. This will guide you towards using the dried or fresh version of that particular herb. And never be afraid to experiment! Taste and adjust until you achieve the perfect flavor profile. With practice, balancing and layering herbs will become second nature.

Getting the Most Out of Your Dried Herbs

Dried herbs are a wonderful way to preserve the bounty from your garden or farmers market purchases. Properly stored dried herbs can last for months or even years, allowing you to enjoy their flavor, aroma, and health benefits long after fresh herbs have wilted. This section will provide tips on how to get the maximum flavor, nutrition, and usage out of your dried herbs.

Maximize Flavor

Flavor is the number one reason most people dry herbs at home. To get the most flavor out of dried herbs, it’s important to harvest or purchase herbs at their peak. For home gardeners, pick herbs just before flowering when the essential oil content is highest. Store dried herbs in airtight containers away from light and heat to help preserve the volatile aromatic oils. Over time, dried herbs will lose potency so try to use within one year. Before adding older dried herbs to recipes, rub them between your fingers to release the oils.

When cooking with dried herbs, use about 1/3 of the amount you would use with fresh. Their flavor is highly concentrated. Start with less and add more to taste. The small, dried pieces tend to disperse nicely throughout a dish. However, very old, dried whole herbs may need crushing or crumbling to release more flavor. In slow cooked recipes, add dried herbs early on so they have time to rehydrate and impart their essence. In quick cooking preparations, sprinkle them in at the end.

Get More Nutrition

Drying concentrates the nutrients and health promoting compounds in herbs as the water volume is decreased. The antioxidant, anti-inflammatory, and antimicrobial properties remain intact. Stock your pantry with dried antioxidants like oregano, sage, rosemary, and thyme to boost the nutrition of soups, grains, meats, vegetables and more in daily cooking. The portability, shelf life and nutrition density of dried herbs makes them perfect for backpacking meals and emergency food storage as well.

Creative Uses

Think beyond seasoning and explore other creative ways to use your dried herb bounty. Make fragrant herbal vinegars, oils, butters or salts to add intrigue to cooking and gift giving. Use them in homemade soaps, sachets or potpourri. Brew flavorful sun tea. Craft herbal crafts and wreaths for seasonal decor. Mix dried lavender, rose petals or lemon verbena into baked goods, jam glazes or beverages. The possibilities are endless.

Follow Proper Storage

Getting the most out of your dried herbs depends greatly on proper storage. After drying, allow herbs to equilibrate in moisture content for 1-2 weeks before jarring up. Then store dried herbs in airtight glass jars kept out of direct light. Label jars with the herb name and date to help use older herbs first. Store delicate herbs like basil for up to 6 months. Heartier herbs like oregano and thyme can last 1-2 years stored properly. Refrigeration can help prolong shelf life but is not required.

Check periodically for moisture build up in stored jars. Excess moisture invites mold growth which necessitates discarding herbs. If condensation occurs, the herbs likely were not dried thoroughly enough before storage. Consider investing in a dehydrator which dries herbs faster and more evenly than air drying. Follow the manufacturer’s instructions for best results.

The satisfaction of growing, harvesting, and preserving herbs from garden or market is hard to beat. With proper drying technique and storage, you can enjoy their convenience, nutrition, and flavor for months on end. We hope these tips will help you get the most out of your dried herb bounty this season and beyond.

Creative Ways to Use Dried Herbs

Dried herbs open up a world of flavor possibilities in the kitchen. When herbs are dried properly, they retain much of the aromatic oils and intense flavors that make them so versatile in recipes. With a little creativity, home cooks can transform dishes by artfully incorporating dried herbs.

One creative way to use dried herbs is to make compound butters. These flavorful butters are easy to prepare. Simply allow a stick of butter to soften and mix in 2-3 tablespoons of dried herbs like rosemary, thyme, or oregano along with a clove of minced garlic, lemon zest, or other complementary ingredients. Form the flavored butter into a log, wrap tightly, and chill before slicing off pats to top meats, vegetables, breads, and more. The butter melts over hot foods, releasing a burst of herbal flavor.

Preserving the Bounty: How to Dry and Store Herbs also recommends rehydrating dried herbs to use in place of fresh. To rehydrate, cover the dried herbs with hot water and let sit for 5-10 minutes before draining thoroughly. Rehydrated herbs like basil, cilantro, and parsley can be used to prepare pesto, chimichurri, compound butters, and salad dressings. Their softened texture and revived flavor closely resembles fresh.

Get creative with dried herb blends by mixing your own signature combinations to liven up everyday dishes. Play with herbal flavors like lemon thyme, oregano, and marjoram or make a Moroccan-inspired blend with cumin, coriander, and mint. Use the blends to season meat rubs, sprinkle over vegetables before roasting, or whirl into hummus, tapenades, and salad dressings.

Preserving the Bounty: How to Dry and Store Herbs suggests infusing vinegars and oils with dried herbs to extract vibrant flavor. Popular herb combinations include rosemary, garlic, and red pepper flakes or basil, oregano, and lemon zest. Use the infused vinegars to make herbal salad dressings and marinades or the infused oils for dipping breads. The longer the dried herbs steep, the more intense the infusion.

Finally, one of the most creative ways to use dried herbs is by making herbal teas. Tea blends pair nicely with dried mints, lemon balm, lavender, fennel, rose petals, hibiscus, and more. For best flavor extraction, cover the herbs with boiling water and allow to steep for 5-7 minutes. Sweeten if desired or enhance the tea with a squirt of citrus juice. Sip these aromatic herbal infusions hot or chilled over ice.

Dried herbs offer so many possibilities to craft flavorful foods and beverages at home. With a supply of herbs dried properly and stored correctly, home cooks can get creative blending spices and experimenting with new ways to incorporate intense herbal flavor into everyday meals.

Preserving the Bounty: How to Dry and Store Herbs

Seasonings and Spice Blends from Dried Herbs

Dried herbs are extremely versatile ingredients that can be used to add flavor to almost any savory dish. One of the best ways to make the most of your home-dried herb bounty is to use them to create customized spice blends and herb seasonings. Blending dried herbs together, or with other dried spices and ingredients, allows you to create unique flavor combinations that put your dried herbs to excellent use.

When creating dried herb spice blends and seasonings, the possibilities are endless. You can opt for simple combinations featuring two or three complementary herbs, or craft complex blends with five or more herbs and spices. The blends can then be used to season everything from meat and fish, to vegetables, grains, and more. Staple herbs to have on hand for blending include rosemary, thyme, oregano, basil, and sage. Consider combining these with ingredients like garlic powder, onion powder, crushed red pepper, lemon zest, and more.

Some herb and spice blend ideas to try:

Herbes de Provence – This traditional French blend combines savory, lavender, basil, thyme, and fennel seed. Delicious with chicken, fish, lamb, and vegetables.

Italian Seasoning – A mix of basil, oregano, rosemary, thyme, garlic powder, and crushed red pepper. Perfect for pasta sauces, pizza, tomatoes, chicken, and more.

Za’atar – A Middle Eastern blend featuring thyme, oregano, marjoram, sesame seeds, and tangy sumac. Great on flatbreads, hummus, lamb, and vegetables.

Fines Herbes – A French blend with subtle onion and garlic flavors. Made with parsley, chives, tarragon, and chervil. Lovely with eggs, chicken, fish, potatoes, and rice.

Pork Rub – For grilled and roasted pork, combine rosemary, thyme, sage, garlic powder, onion powder, paprika, mustard powder, salt, and pepper.

Lemon-Dill Seasoning – Mix lemon zest with dried dilled, parsley, chives, and tarragon. Sprinkle on fish, chicken, potatoes, and vegetables.

Once you’ve created your own signature spice blends, store them in airtight containers out of direct sunlight to preserve freshness. Make sure to label each container with the blend name and ingredients. Over time, the flavor and potency of dried herb blends will start to diminish. For best results, try to use up homemade blends within 3-6 months. You can also make the blends in smaller batches that you can remake fresh when needed.

When cooking with your homemade herb blends and seasonings, add them at the beginning of the cooking process whenever possible. This allows time for the flavors to fully develop and permeate the ingredients. Start with smaller amounts, taste, and add more blend to adjust flavor as desired. Remember that dried herb flavors will concentrate and intensify as dishes cook.

Get creative with how you incorporate your homemade herb blends into recipes. Use them to coat proteins before searing or roasting. Mix them into compound butters, marinades, dressings, and sauces. Sprinkle them over finished dishes. The possibilities are endless!

Creating your own herb spice blends and seasonings is an extremely gratifying way to preserve and make the most of herbs you grew and dried yourself. Experiment, customize flavors to your taste, and soon you’ll have signature blends that enliven and elevate everyday cooking.

The History of Drying Herbs

Preserving the Bounty: How to Dry and Store Herbs

# The History of Drying Herbs

Preserving the Bounty: How to Dry and Store Herbs

Herbs have been dried and preserved for thousands of years as a way to make their flavor, nutrients, and medicinal properties last longer. The practice of drying herbs likely originated out of necessity – to store herbs for use during colder months or periods when fresh herbs were not available. However, drying has evolved into an artform and science over the centuries.

Archaeological evidence shows that as early as 1200 BC, ancient Egyptians dried herbs like oregano, mint, sage, and thyme for use in cooking, medicine, religious ceremonies, cosmetics, and more. Clay pottery found in ancient Egyptian tombs contained trace elements of dried herbs and spices.

In ancient Greece and Rome, dried herbs like rosemary, bay leaves, and parsley were commonly traded. These civilizations understood the technique of air-drying herbs in bunches or on trays out in the hot Mediterranean sun. Storing herbs in clay jars was also practiced to retain aroma and flavor.

During the Middle Ages, herbs were grown and dried extensively in monastery gardens across Europe. Monks perfected drying methods and became skilled apothecaries, using dried herbs extensively for medicinal purposes during a time when little other medicine was available.

The spice trade expanded drying and preservation techniques even further as merchants transported herbs longer distances around the globe. Spices like black pepper, cinnamon, cardamom and others from Asia and the Middle East were shipped dried to Europe by land and sea. Later, herbs native to the New World like chili peppers, vanilla, and allspice were dried and exported back to Europe as the exploration age took off.

Of course, no discussion of herb drying history is complete without mentioning the Salem Witch Trials of 1692. Many of the “witches” who were persecuted and executed in Salem grew and dried herbs, which led locals to become suspicious of their practices. This illustrates how in some historical periods, herb craft was seen as mystical and dangerous rather than the useful culinary and medicinal art it truly was.

Today, thanks to centuries of accumulated wisdom, drying techniques allow us to enjoy the preserving the bounty of flavor, nutrients, and unique properties herbs have to offer year round. While modern technology like refrigeration and freezing exist, drying remains popular for intensifying herb flavor as moisture dissipates, ease of storage, sustainability, and retaining medicinal qualities that can degrade from freezing.

Understanding the rich history of drying gives deeper appreciation of herbs’ enduring role in cuisine, health, culture and our lives. When we utilize the power of herbs in everyday cooking or remedies, we stand on the shoulders of herb craftspeople from ancient times and connect to humanity’s long tradition of gathering nature’s bounty.

Regional Dried Herbs in Cuisine

Herbs and spices have been used to flavor and preserve foods for thousands of years. Different regions around the world have their own unique dried herbs that are integral parts of the local cuisine. Understanding the dried herbs used in regional cooking can open up new flavor profiles and dishes to try at home.

The Mediterranean region is well known for its use of oregano, thyme, rosemary, and sage. These hardy herbs grow well in hot, sunny climates and lend themselves perfectly to drying. Dishes like pasta sauces, roasted vegetables, meat rubs, and stuffings are often seasoned with a blend of dried Mediterranean herbs. Going beyond the usual suspects, za’atar is a Middle Eastern spice blend made with thyme, oregano, marjoram, sesame seeds and sumac that is used on everything from breads to meats. Preserving these aromatic herbs by air drying or using a dehydrator allows cooks to enjoy their flavor all year round.

India is the source of many warm, earthy dried herbs and spices like turmeric, cumin, coriander, fenugreek, cinnamon, cardamom, and curry leaves. These are blended into complex masalas and garam masalas to flavor regional specialties. Drying these herbs, spices, and blends concentrates their essences for heightened flavor and aroma. They keep for months when stored properly, allowing Indian cooks globally to recreate authentic dishes.

Provence in France has given us two of the most popular dried herbs – lavender and herbes de Provence. The floral notes of dried lavender have many culinary uses like flavoring sugars, desserts, beverages, vinegars, honey, and more. Herbes de Provence typically contains a mixture of rosemary, thyme, oregano, and savory that perfectly seasons everything from roasts to vegetables when rehydrated or blended into a seasoning salt.

Mexico’s earthy, smoky dried herbs like chipotle chiles, ancho chile powder, Mexican oregano, and epazote are irreplaceable in authentic mole sauces, salsas, beans, soups, and meats. Using dried chiles allows the flavor to be concentrated without too much spiciness. Regional herbs like epazote have antimicrobial properties that aid in preserving foods in hot climates. With creative use of Mexican dried herbs and chiles, home cooks can put together complex layers of flavor.

Understanding the dried herbs used in regional cuisines opens up new dimensions of flavor in the kitchen. Experimenting with za’atar from the Middle East, garam masala from India, herbes de Provence from France or dried chiles from Mexico allows anyone to add authentic touches to their cooking. Though fresh herbs have their place as well, extending the bounty through proper drying techniques preserves the essence of herbs to be used all year long. Whether air dried, dehydrated or frozen, dried herbs impart convenience along with concentrated flavor and aroma. As this article has shown, incorporating regional dried herbs into cuisine is an easy way to add new flavors and complexity while preserving the harvest.

Mastering the Art of Flavor Layering with Herbs and Spices

Mastering the Art of Flavor Layering with Herbs and Spices

The Art of Layering Flavors with Herbs and Spices

The art of cooking is all about layering flavors to create depth and complexity. Mastering the skillful use of herbs and spices is key to elevating the flavor profile of any dish. When herbs and spices are thoughtfully paired and added in the right stages of cooking, they meld together to form a symphony of aromas and tastes that delight the palate.

The first step to mastering the art of flavor layering with herbs and spices is understanding their flavor profiles. Herbs like basil, oregano and thyme have green, fresh notes that brighten up dishes. Spices like cumin, coriander and cinnamon add warmth and sweetness. By thoughtfully combining herbs and spices, you can build flavor layers that transition from bright green tops to warm, earthy bases.

Another key technique of flavor layering is to first cook aromatics like onion and garlic to deepen their flavor. Then add herbs and spices to bloom in the hot oil, releasing their essential oils. This builds a flavor base. Next, add main ingredients like vegetables or meat, allowing the layers to infuse. Finally, finish with fresh herbs to add vibrancy. This moves flavors from earthiness to brightness.

When layering flavors through cooking, don’t forget finishing touches. Herb-infused oils and spice blends elevate the flavors even further. Balancing bitter and sweet notes prevents any one flavor from overpowering. Thoughtful seasoning through all stages of cooking is key to mastering the art of flavor layering with herbs and spices.

The end goal is a symphonic harmony of flavors that transitions beautifully throughout each bite. Mastering the subtle art of knowing which herbs and spices to combine at the right stages allows home cooks to orchestrate flavor journeys that delight. So explore layering bright herbal notes with warming spices and unlocking new depths of flavor.

Understanding Flavor Profiles of Common Herbs and Spices

Herbs and spices are the foundation for mastering the art of flavor layering. By understanding the unique flavor profiles of common herbs and spices, home cooks can learn how to combine them for maximum impact.

When building layered flavors in a dish, it helps to think of herbs and spices in terms of flavor “notes” – like in music or perfumery. Some offer sharp, pronounced top notes while others provide deeper, richer base notes. Skillful layering creates a harmonious balance across the flavor spectrum.

Here is an overview of popular culinary herbs and spices broken down by predominant flavor notes:

Top Note Herbs:

Basil – Sweet, peppery, licorice

Chives – Mild onion and garlic

Cilantro – Bright, citrusy, soapy

Dill – Grassiness, anise

Lemongrass – Bright lemon zest

Marjoram – Pine, citrus

Mint – Cool and peppery

Oregano – Woodsy, earthy, warm

Rosemary – Pine, lemon, eucalyptus

The pronounced flavors of these top note herbs can stand out even in small quantities, so restraint is key when layering them into a dish. Too much risks overpowering other ingredients.

Mid Note Herbs and Spices:

Cumin – Earthy and bitter

Paprika – Sweet and smoky

Parsley – Light, fresh, grassy

Tarragon – Licorice, vanilla, anise

Thyme – Woodsy, clove, mint

These mid note seasonings bridge the gap between top and base notes. They have enough depth to avoid getting lost among bold ingredients but enough restraint to let other flavors shine.

Base Note Herbs and Spices:

Allspice – Clove, cinnamon, nutmeg

Cardamom – Woodsy, citrusy, ginger

Cinnamon – Warm, sweet, woody

Cloves – Sharp, warm, bitter

Coriander – Citrusy, floral, sage

Ginger – Zesty, peppery

Nutmeg – Sweet, spicy

The rich yet subtle flavor profile of base note seasonings acts as the foundation. Much like bass notes in music, even small amounts provide depth and dimension without overtaking the melody.

By thoughtfully combining herbs and spices from across the flavor spectrum, home cooks can master the art of building layered, harmonious flavor journeys in their cooking.

Complementary Herb and Spice Pairings for Maximum Impact

When layering flavors in cooking, using complementary herbs and spices can take your dishes from bland to brilliant. Skillfully combining certain herbs and spices creates an explosion of flavor, with each ingredient enhancing the others. By thoughtfully pairing complementary herbs and spices, home cooks can master the art of flavor layering for maximum impact.

One foundational pairing is rosemary and garlic. The piney woodiness of rosemary beautifully balances the pungent bite of garlic. Add both while sautéing vegetables, roasted meats, and tomato sauces to lend depth and complexity. Experiment with using fresh or dried rosemary to vary the intensity.

Basil and tomato is another classic combination, as the sweet licorice notes of basil cut through the bright acidity of tomato. For best results, add torn fresh basil leaves at the end to preserved the flavor. This pairing adds lightness and brightness to Italian dishes from pizza to Caprese salad.

Peppery cayenne and warming cumin complement each other when blended into Tex-Mex dishes like chili con carne. The heat of the cayenne contrasts with the earthiness of cumin for a well-rounded flavor profile. Balance to taste and use restraint with the cayenne to allow the cumin to shine.

Mastering the Art of Flavor Layering with Herbs and Spices

Cilantro and lime also make perfect partners, as the citrusy acidity of lime balances the grassy, aromatic cilantro. Mix together in salsas, marinades for meats, and sprinkle over finished Thai or Mexican dishes. The lime brings out the crisp freshness of the cilantro.

Mastering the Art of Flavor Layering with Herbs and Spices

For something sweet, cinnamon and vanilla make a classic pairing as the heat of cinnamon contrasts with floral vanilla. Bake into desserts and drinks, or sprinkle on fruit. Pairing these spices creates a comforting blend of spicy warmth and sweetness.

Experiment with herb and spice combinations to discover new complementary pairings. Taste as you cook and adjust amounts to achieve the perfect balance and maximum flavor impact. With practice, home cooks can truly master the subtle art of layering herbs and spices to take any dish from bland to brilliant.

Building Depth of Flavor from Base to Top Notes

Mastering the art of flavor layering with herbs and spices is all about building depth of flavor. When herbs and spices are skillfully combined, they create a flavor journey that gradually unfolds from the first bite to the last.

The key to achieving this depth of flavor is to think about seasonings as having base, middle and top notes. Base notes provide the foundation, middle notes add complementary flavors, and top notes supply finishing touches. Careful layering creates a dynamic interplay of flavors that keeps the palate intrigued.

Most dishes start with aromatics like onion, garlic and celery which make up the base notes. Sautéeing the aromatics in oil allows their flavors to permeate the entire dish. To this foundation, culinary herbs like thyme, rosemary, oregano and bay leaf can be added to provide earthy, bittersweet flavors. These make up the middle notes that create richness and complexity. Finally, top notes like freshly cracked black pepper, chili flakes and chopped parsley give a burst of flavor and vibrancy just before serving.

Building depth of flavor is an art that involves restraint. The base and middle notes do the heavy lifting in terms of flavor. Top notes should be used judiciously so they don’t overwhelm the fundamental flavors. Understanding flavor profiles of herbs and correctly layering them creates dishes with incredible depth and dimension.

Another way to reinforce base notes is by infusing oils and vinegars with herbs and spices. Extra virgin olive oil infused with rosemary and garlic doubles down on the aromatics even before cooking begins. Similarly, red wine vinegar infused with peppercorns and bay leaf brings those earthy, bittersweet notes to salad dressings and marinades. When thoughtfully combined, these infused ingredients anchor the foundational flavors.

The interplay of base and top notes can transform everyday dishes. For example, pairing bitter greens like kale or collard greens with the bright heat of chili flakes balances out the strong bitter notes. This combo highlights the vegetal flavors of the greens instead of letting bitterness dominate. Even humble dishes like roasted potatoes pop with flavor when rosemary, garlic and oregano season the base while lemon zest and parsley provide brightness on top.

Skillful layering of herbs and spices creates depth by building complexity through every stage of cooking. Base notes laid first, middle notes to enhance, and top notes to punctuate each play a role. Mastering the art of restraint allows the flavors to shine through. With practice, layering herbs and spices becomes an intuitive way to craft dishes with incredible depth and dimension.

Infusing Oils and Vinegars with Herb and Spice Blends

One of the keys to mastering the art of flavor layering with herbs and spices is infusing oils and vinegars with customized blends. This allows you to impart deep, complex flavors into dishes in a way that perfectly balances and harmonizes with the other ingredients.

When infusing oils and vinegars, you want to carefully select herbs and spices that will complement each other. Some classic pairings include basil, oregano and garlic; rosemary and black pepper; or cilantro, cumin and coriander. You can also experiment with bolder flavors like cloves, cinnamon sticks or cardamom pods.

Start by gently heating up some olive or vegetable oil in a small saucepan or slow cooker insert over low heat. Add your selected herbs and spices, using about 1-2 tablespoons of fresh herbs or 1-2 teaspoons of dried herbs per cup of oil. For spices, start with 1/2 teaspoon per cup of oil and adjust to taste.

Allow the oil to barely simmer or maintain a low temperature for 30-60 minutes, stirring occasionally, until the herbs and spices have imparted their essence. Longer infusion times will result in a more intensely flavored oil. Some spices may need only 15-30 minutes to fully infuse.

Be careful not to actually fry or cook the herbs and spices on high heat, as this could make your oil bitter or burnt tasting. A gentle heat is all that is needed to slowly draw out the flavors. Monitor the temperature closely.

For vinegars, use a similar approach. Gently heat white wine vinegar, rice vinegar or apple cider vinegar along with your choice of herbs, spices, garlic, shallots or peppercorns. Simmer for 15-30 minutes while stirring periodically.

Once done infusing, allow the oil or vinegar mixture to fully cool. Use a fine mesh strainer to filter out all of the solids. This will leave you with a beautifully flavored infused oil or vinegar that has perfectly integrated the herbs, spices and aromatics.

Funnel your artisanal infused oil or vinegar into bottles, add labels describing the blend, and seal with an airtight lid. Store in a cool, dark place for up to 1 month.

There are endless possibilities when infusing oils and vinegars to elevate your cooking to the next level. Mastering the intricate balance and layered depth of flavors using herbs and spices is truly an art form. With some experimentation, you can create unique infused oils and vinegars that will make every dish sing.

Elevating Everyday Dishes through Skillful Seasoning

Adding herbs and spices to everyday dishes is one of the easiest ways to take your cooking to the next level. With just a small amount of effort, you can transform simple ingredients into restaurant-quality meals bursting with complex flavors. Mastering the art of flavor layering with herbs and spices starts with understanding which seasonings work well together.

One of the best ways to elevate a basic recipe is to introduce complementary flavors that highlight or balance the existing ingredients. For example, hearty stews and braised meats are perfectly suited to earthy herbs like thyme, rosemary, and bay leaves, which accentuate the rich, savory notes. Bright citrus herbs like lemon verbena or lemongrass add a refreshing contrast to creamy or starchy dishes like risotto or potato gratin.

When layering seasonings, start with background flavors like onion, garlic, or mild peppers to build depth of flavor. Then incorporate bolder seasonings like chilies, mustard seed, or cumin sparingly, so they don’t overwhelm. Finally, add fresh herbs right at the end for a vibrant flavor pop. Following this progression from base to top notes ensures maximum flavor impact.

It’s also important to balance flavor profiles across the five basic taste groups – bitter, sweet, salty, sour and umami. For example, adding a touch of honey or maple syrup can smooth out bitter notes from herbs like rosemary or sage. A splash of vinegar or citrus balances rich, salty meats like bacon or prosciutto. Dried mushrooms, tomato paste and Parmesan cheese add savory umami flavors, which complement nearly any dish.

Here are some examples of using common herbs and spices to elevate simple everyday meals:

Baked Chicken – Base flavors like onion, garlic and paprika, then add oregano, basil, cilantro or marjoram. Finish with lime juice and zest.

Roasted Vegetables – First olive oil and garlic, then earthy rosemary, thyme or sage. Toss with balsamic at the end.

Pasta Marinara – Sauté onion and garlic, then add a pinch of red pepper flakes, dried oregano and basil. Finish with torn fresh basil leaves.

Omelets – Cook eggs with onion and mild peppers first. Add dried dill, tarragon or chervil and feta or goat cheese. Finish with chives.

As you can see, mastering the subtle art of seasoning through layering herbs and spices can utterly transform simple everyday dishes. With a knowledge of flavor profiles and a deft hand at balancing and enhancing basic ingredients, it’s easy to elevate home cooking to new heights. The journey to mastery begins by experimenting with new herb and spice blends. Soon you’ll be creating flavor symphonies in every meal!

Balancing Bitter, Sweet, Salty and Sour with Herbs

Herbs can be incredibly versatile ingredients when it comes to balancing the five basic tastes – bitter, sweet, salty, sour, and umami. Their wide range of flavors allows cooks to perfectly calibrate the taste profile of any dish. Mastering the art of flavor layering with herbs entails understanding how to counterbalance and complement different taste elements.

Bitters herbs like thyme, rosemary, and sage can temper sweetness or richness. Their pronounced flavor notes stand up well to sweet ingredients like fruits, caramelized vegetables, honey, maple syrup, and desserts. Adding a touch of finely chopped rosemary at the end brightens up an overly sweet muffin batter. A sprinkling of thyme balances out the sugary-sour taste of strawberry jam.

Sweet herbs such as basil, tarragon, and mint offset salty and sour ingredients. The gentle sweetness and aroma of basil meshes beautifully with the acidity of tomatoes, countering bitterness and allowing the flavor layers to mingle. Tarragon’s licorice-anise flavor tempers the tartness of vinaigrettes and creamy salad dressings. Mint’s cooling sweetness balances salty meats like lamb as well as the sour tang of yogurt-based raita sauces and chutneys.

Mastering the Art of Flavor Layering with Herbs and Spices

Savory herbs including dill, parsley, chives, and cilantro handle saltiness well. Their clean, fresh taste contrasts salty components without canceling out the seasoning. Chopped dill or parsley mixed into otherwise one-dimensional salty foods like crackers, fries, or chips makes them more complex. Chives sliced over cooked grains or roasted potatoes cuts through the starchiness. Cilantro’s citrusy flavor lifts overly salty dishes like curry chicken or taco meat filling.

Sour herbs such as sorrel, lemon verbena, and lemon balm turn up the acidity level while lessening bitterness. Sorrel’s intense lemony tartness counters rich, fatty dishes like egg dishes, cream sauces, and duck. Infusing vinegars or vinaigrettes with lemon verbena or lemon balm heightens sourness in marinades and salad dressings. Their acidity also balances hearty bitter vegetables like broccoli rabe or bitter greens.

Skillfully using herbs’ innate taste affinities allows cooks to strike an ideal balance within a dish’s flavor profile. Mastering the art of restraint helps prevent individual flavors from overwhelming while letting them shine through. With practice, we can all become flavor layering artists!

Letting Ingredients Shine with Subtle Spice Enhancement

When layering flavors with herbs and spices, it’s important not to overwhelm the palate or mask the starring ingredients. The key is subtle enhancement – complementing without overpowering. With skillful seasoning, you can lift a dish to new heights while still letting the main components shine.

Choose Supporting Spices Wisely

Selecting the right spices is key for subtle enhancement. Some safe bets are spices like cinnamon, nutmeg, ginger, and cardamom. These warm, aromatic spices add background notes without stealing the show. Start with small amounts – 1/4 to 1/2 teaspoon per pound – and adjust to taste. The spices should whisper rather than shout.

Think Fresh and Bright

Herbs like cilantro, parsley, basil, oregano, and thyme are excellent for providing fresh, bright pops of flavor. Use them at the end for a vibrant finish. The volatility of the aromatic compounds in fresh herbs make them perfect for a final flourish.

Bloom Spices for Maximum Flavor

Blooming spices in oil or ghee before adding other ingredients helps develop and mellow their flavors. First, briefly toast the whole spices in the oil over medium heat until fragrant, about 1 minute. Turn off the heat and let sit for 5-10 minutes before proceeding with the dish. This unlocks the spices’ essential oils for the perfect subtle infusion.

Use a Light Hand with Chilies

When adding heat with chilies, err on the side of restraint. Subtle smoldering heat that lingers in the background allows other flavors to take center stage. Start with a small portion of minced chili, or use milder varieties like ancho or New Mexico chilies. You can always add more punch later.

Mastering the Art of Flavor Layering with Herbs and Spices

Make Herbs and Spices the Secret Stars

With artful use of herbs, spices, and chilies, you can dramatically elevate the flavor experience of any dish while still keeping the starring ingredients front and center. Mastering the subtle enhancement from herbs and spices is what takes good food to great heights. As you layer in flavors with a delicate touch, you’ll learn how to transform dishes into harmonious flavor journeys – with the main components shining brightly all the while. Subtle seasoning is truly the art of letting ingredients speak for themselves at full voice.

Creating Harmonious Flavor Journeys from Start to Finish

Mastering the art of flavor layering with herbs and spices is all about creating a harmonious journey of tastes from the first bite to the last. Careful seasoning throughout the cooking process can build depth of flavor and lead the palate on a delightful trip where each element complements the last.

The Key to Building Flavor Complexity

Creating a complex yet balanced flavor profile relies on the skillful combination of herbs, spices, saltiness, sweetness, bitterness, and sourness. Mastering the art of flavor layering involves understanding how to translate taste sensations in your mind to actual ingredients and combinations in a dish. It requires an intuition built from experience about how flavors interact and taste over time.

The journey begins by choosing a few key herbs and spices that form the flavor foundation. These base notes create an undertone to build upon. Next, incorporate ingredients that provide secondary traits like sweetness or acidity to highlight the herbs and spices. Finally, finish with gentle bright, floral, or fruity top notes – like cilantro, lemon zest, or pepper.

When layering flavors in this way, you create a dynamic flavor experience from the first bite to the last. Each step of the process lets previously added ingredients mingle and deepens the overall taste sensation.

Building Flavor Journeys from Start to Finish

Here is an overview of how to construct a harmonious flavor journey from start to finish:

1. Base Notes – Establish the core flavor direction with herbs, spices, or ingredient combinations that give a distinctive personality. This forms the flavor background.

2. Mid Notes – Enhance and unify base notes with ingredients like salts, sugars, acids, umami flavors, oils, butters, etc. This creates a well-rounded central taste profile.

3. Top Notes – Brighten with vibrant fresh herbs, zests, peppers, or spices. Their volatile oils provide punctuation.

4. Putting it Together – Cook base flavors first to mellow their notes. Add mid-layer ingredients during final cooking stages. Finish with delicate top notes at the end.

5. Check Seasoning – Adjust along the way to achieve the desired taste balance and flavor intensity. Let the dish “rest” to allow flavors to meld harmoniously.

6. Final Touches – Garnish with herbs and spices that underscore or contrast with the main profile. Use them to reinforce the flavor message.

Following this flavor building journey results in a dish with a complex, evolving taste profile that keeps the palate intrigued from the first aroma and bite to the final satisfying spoonful. Layering flavors is truly an art form that relies on intuition gained from experience. Mastering this skill allows home cooks to transform simple ingredients into symphonies of taste.

An Example Flavor Journey: Lemon Chicken Tagine

As an example, imagine creating a Moroccan lemon chicken tagine. The characteristic flavors could develop in layers like this:

Base Notes – Toast cumin seeds to release their nutty flavor before adding chicken pieces browned in olive oil. Include crushed garlic, ginger, paprika, and cinnamon sticks.

Mid Notes – Once chicken is nearly cooked, add chicken stock, honey or dates, preserved lemon, olives, and roasted veggies. Simmer to unify flavors.

Top Notes – Finish with a generous sprinkle of chopped cilantro and lemon or orange zest.

The result delivers a flavor journey that evolves in waves – from the rich base spices, to the sweet and salty middle eastern profile, to the final fresh punctuation. The lemon and herbs linger on the tongue, completing the harmonic series of taste sensations.

Mastering the Subtle Art of Restraint

Creating balanced, craveable dishes relies on the subtle art of restraint. Showcasing the signature flavors of quality ingredients through delicate enhancement is the ultimate sign of flavor mastery.

Follow the flavor layering principles here while letting top quality foods take the spotlight. You will learn which ingredient combinations create flavor magic. Soon, you will be composing your own memorable taste journeys from start to delicious finish.

Mastering the Art of Restraint and Balance

When layering herbs and spices in cooking, it can be tempting to add more and more components to create an increasingly complex medley of flavors. However, skillfully balancing herbs and spices is as much about knowing when to exercise restraint as it is about combining compatible ingredients. Mastering the art of flavor layering relies on understanding the intricate interplay of tastes and aromas that contribute to a harmonious end result.

The key to restraint and balance begins with thoughtfully selecting a few herbs and spices that will form the flavor foundation. Choosing anchor ingredients that combine well creates a solid base to build upon. For example, in Moroccan spice blends, cumin and coriander often provide an earthy, nutty backbone, while ginger and black pepper incorporate subtle heat. Too many disparate flavors at the base can overwhelm the palate and muddle the aromatic qualities of added ingredients.

Once the flavor base is established through two to four complementary herbs and spices, skillful layering relies on incrementally incorporating accent ingredients like cinnamon, turmeric, saffron or mint. Knowing which supporting flavors to mix in requires understanding how the additions will interact with foundational and other enhancing components. An artful balance is created by selecting herbs and spices in proper proportions so that no single taste dominates the blend. The resulting melody of flavors then fully unfolds, with no jarring notes.

A light hand is instrumental when augmenting herb and spice mixtures, as additions of even small amounts can significantly shift the overall flavor. Restraint requires developing an intuitive sense for how much of an ingredient is needed to achieve the desired aromatic effect. This proficiency is cultivated over time, as one gains familiarity with various herbs and spices and learns how readily they infuse foods. Judicious seasoning prevents individual components from masking more subtle flavors or textures of other ingredients.

Exercising flavor restraint also involves allowing time for ingredients to properly meld, which enables nuanced aromatic qualities to emerge. Curries, for example, are best made a day or two ahead to let complex blends of herbs and spices thoroughly permeate proteins and vegetables. The passage of time softens sharp edges, harmonizes tastes, and coaxes out delicate notes. Rushing flavor layering by overzealously dosing herbs and spices often yields muddled, uneven results. Patience truly is a virtue when handling such intricate combinations.

Ultimately, balancing herbs and spices is a delicate craft that relies as much on limitation as on intricacy. Skill comes not from seeing how many ingredients one can combine, but from thoughtfully selecting a choice few that draw out each other’s exceptional qualities. Mastering restraint develops one’s judgment for which flavor pairings naturally enhance without overcomplicating. In the hands of a sensitive and discerning artisan, herbs and spices gracefully unite to produce a magnificent sensory experience far greater than the sum of their parts.

How to Harvest and Store Your Garden Herbs

How to Harvest and Store Your Garden Herbs

When to Harvest Herbs

Here is a draft 847-word article on when to harvest herbs for the section “When to Harvest Herbs”:

Knowing when to harvest herbs from your garden is key to getting the most flavor and preserving the delicate oils in the leaves. The phrase “How to Harvest and Store Your Garden Herbs” encompasses when to cut herbs for optimal freshness and how best to preserve them. This article focuses specifically on “When to Harvest Herbs” from the garden.

The Best Time of Day to Harvest Herbs

Many gardeners believe the optimal time to harvest herbs is in the morning after any dew has evaporated but before the sun gets too hot. The morning hours allow the plant to recover some moisture overnight but the leaves are dry for clean cutting. How to harvest and store your garden herbs requires knowing the prime moment.

Mid-morning sun also helps release the aromatic essential oils, lending more intense flavor. Afternoon heat causes the oils to evaporate and the flavor to diminish. For the freshest, most flavorful cut, harvest herbs like basil, mint, oregano, thyme, sage, and parsley in the morning.

Harvest Based on Flowering Stage

In addition to time of day, the stage of flowering plays a key role in when to harvest herbs. Herbs should generally be cut before the plant flowers for peak flavor, but rules differ among varieties.

Leafy herbs like basil, mint, cilantro, and parsley have the best flavor and aroma before flowering when the leaves are tender. Allowing them to bolt redirects energy into seed production, causing leaves to toughen. For these herbs, harvesting before buds appear ensures tender texture and balanced flavor.

By contrast, flowering herbs like lavender, rosemary, sage, thyme, and dill transition to their full flavor potential once flowering begins. For these woody herbs, harvest sprigs and leaves just as buds form. At this point, essential oils are most concentrated.

Monitor Leaf Growth

The size and quantity of leaves signals the perfect stage for harvesting many herbs. For example, parsley and cilantro taste best and are easiest to clean and de-stem when the leaves are large enough but before going to seed. Pinching off flowers as they form encourages more tender new leaf growth too.

Likewise, chives become tough when the stalks fully elongate. Snipping chives when they reach 6 inches high keeps them mild flavored. How to harvest and store your garden herbs relies on optimal leaf size for flavor.

Base Harvests on Plant Use

Finally, how you plan to use each harvested herb may guide when to cut it. Herbs destined for drying or storage in vinegar, oil, butter, or sugar have different harvest needs than those eaten fresh. Learn when to harvest herbs based on your preservation method.

Herbs for drying or freezing are best harvested early on, before buds or flowers emerge, to capture their essence in each leaf. On the other hand, flower heads and seeds add visual and flavor interest when infusing herbs in oil or vinegar. Allow those plants to mature before cutting.

Understanding each herb’s ideal stage of growth ensures you harvest at the perfect time for use. Matching harvest time to eventual application results in the best flavored and longest-lasting herbs from the garden. Follow these visual cues for knowing when to cut.

Tips for Checking If Herbs Are Ready for Harvest

Regularly inspect herb plants to recognize when leaves reach prime flavor and texture for harvesting. Here are tips on how to know herbs are ready:

– Crush a leaf and sniff to check aroma concentration

– Feel leaf and stem thickness for optimal texture

– Monitor plant height based on herb variety

– Watch for signs of buds, flowers, and seed heads

– Check for large leaves and vigorous new growth

Equipped with this criteria for identifying harvest-ready herbs, you can determine the best moment for cutting fresh herbs or preserving them dried or frozen. Match harvest time to each herb’s peak flavor period.

Summary

When to harvest herbs for maximum flavor, essential oils, and planned use depends on the plant’s growth stage, time of day, and visual quality. Learn the ideal stage of leaf production for each variety and check aroma, texture, size, and flowering cues to know when herbs are ready. Time morning cuts to preserve delicate oils. Harvesting herbs at their prime results in the best flavor and quality no matter how you store them.

How to Know Herbs are Ready for Harvesting

Knowing the right time to harvest herbs from your garden ensures you capture the best flavor and aroma from each plant. Herbs harvested at peak maturity will offer the most intense flavor profiles when dried or preserved for later use.

Watch for these signs to identify when popular culinary herbs like basil, thyme, rosemary, oregano, sage, mint, cilantro, dill, and parsley are optimally ripe and ready for picking:

Basil – Pinch off a leaf and taste it. Harvest basil once the leaves develop their characteristic bold, sweet flavor. The plants should be at least 6 inches tall. Choose leaves before the plant flowers for the best flavor.

Thyme – Thyme is ready to harvest once the plants are 6 inches tall. Pick leaves and top stems when the flowers begin to open. The flavor will be most intense right before thyme blooms.

Rosemary – Harvest rosemary when the bushes reach 1-2 feet tall. Pinch off flavorful needle-like leaves just before the plants start flowering. New growth tends to have the best taste.

Oregano – Harvest oregano once the plant is 4-6 inches tall and has developed its zesty, spicy aroma. For the best flavor, cut whole stems when the plant buds or just before it flowers.

Sage – Pluck sage leaves once the plants grow to 6 inches tall. Harvest before flowering for full flavor. The leaves should be large, fragrant, and tender.

Mint – Harvest mint once the plant is 4-6 inches tall and fills out. For the best flavor, cut stems just before flowering. New growth has superior flavor to larger, older leaves.

Cilantro – Snip cilantro leaves once the plant reaches 3-5 inches tall. Harvest before it bolts or flowers for optimal flavor. Cut leaves as needed, allowing the plant to continue producing.

Dill – Pick dill leaves when the plant hits 6 inches in height. For the best flavor, harvest before the plant flowers and goes to seed. Both the leaves and seeds can be used.

Parsley – Cut parsley once the plant reaches 4-6 inches tall. Harvest by cutting whole stems rather than individual leaves. New growth offers the best flavor.

In addition to size, judge ripeness by examining leaf color and aroma. Herbs at peak harvest time will have vibrant, green leaves and give off a robust, fragrant smell when touched or crushed. Old or overripe herb plants may have yellowing leaves, appear wilted, or put off less fragrance.

The time of day for harvesting also impacts quality. For the highest essential oil concentrations, it’s best to pick herbs in the morning after any dew has evaporated. This helps preserve the aromatic compounds that give each herb its signature scent and taste. Afternoon heat causes some loss of flavorful oils.

With most herbs, repeated harvesting stimulates new growth and more abundant leaf production over the season. As long as you don’t cut more than one-third of a plant’s foliage at once, you can harvest multiple times without damaging plants. Just be sure to stop pruning several weeks before your first expected fall frost so herbs can harden off for winter dormancy.

Follow these visual cues and best practices when harvesting, and your homegrown herbs will deliver the fullest flavors when you dry, freeze, or preserve them for future recipes. Refer back to this guide on how to know herbs are ready for optimal harvest times. Pair with tips on proper tools to use, correct cutting methods, and preferred storage conditions after harvest. Soon you’ll become an expert on harvesting herbs at their flavorful best from your productive garden.

Harvesting Herbs in the Morning vs Evening

When it comes to harvesting herbs from your garden, many home gardeners wonder – should I pick the herbs in the morning or evening? Is there an ideal time of day to harvest that results in superior flavor or extended freshness? This article will examine the pros and cons of morning versus evening harvesting.

How to Harvest and Store Your Garden Herbs

There are good arguments on both sides of this debate. Some experts insist that mid-morning, after the dew has evaporated but before the sun gets too hot, is the perfect herbal harvesting time. Others argue for late afternoon or early evening, when essential oil concentrations peak. Ultimately, the ideal harvest time depends on the specific herb variety and your plans for using or preserving the harvest.

Morning Herb Harvesting

Harvesting herbs in the early morning hours has several potential advantages:

– Avoiding the Heat: For herbs grown in hot summer climates, morning harvest times allow you to pick the herbs before the peak daytime temperatures. This prevents the volatile essential oils in herbs like basil, oregano, and thyme from evaporating away in the midday heat.

– Higher Moisture: Early mornings tend to have higher humidity and moisture levels. For herbs that you plan to use fresh immediately, the higher moisture content can translate to better flavor.

– Clean Cuts: Harvesting in the morning may allow herbs to be cut more cleanly. Some herb gardeners feel that morning harvesting results in less bruising or other damage to the plant.

If you plan to dry or otherwise preserve your herbs, morning harvesting when humidity levels are higher may require additional drying time compared to herbs picked later in the day.

Evening Herb Harvesting

While mornings have their perks, evenings can also be an opportune time for gathering herbs from the garden. Benefits of evening harvesting include:

– Peak Flavor: Many culinary herbs contain the highest essential oil concentrations later in the day. For example, just before flowering, mint may contain over three times more essential oils in the evening compared to the morning. Evening-picked herbs may have superior aromas and flavors.

– Less Chance of Wilting: Harvesting in the cool of the evening helps minimize moisture loss after picking. Herbs like basil bruise and degrade quickly when exposed to heat and sun. Evening harvesting keeps them fresher.

– Avoiding the Bees: Bees and other pollinators tend to be more active during daylight hours and less active in early evenings. For herbs like lavender, rosemary, sage, and thyme that attract bees, evening harvests involve less risk of stings.

If morning moisture or clean cuts are more important for your needs, evenings may not provide ideal conditions. Additionally, evenings tend to have less light which can make it harder to inspect plants and complete harvesting.

Finding the Right Balance

While concentrated oils may peak in the evening, some deterioration can also start taking place after long hot days. And morning moisture aids fresh use but slows the drying process. As with most things, moderation is key.

Many herb gardeners find the ideal harvest times fall somewhere between the temperature extremes of midday and the moisture saturation of early mornings. Mid-morning through late afternoon provides a good compromise.

You can also tailor your harvest times to how you plan to use each herb variety. For example:

– Harvesting basil for pesto in the evening

– Gathering oregano as the morning dew dries for immediate use in salsa

– Picking lavender flowers before the heat of the day for use in sachets

Get to know your herb garden’s daily rhythms and you’ll discover the prime times to gather its botanical bounty. Pay attention to moisture, humidity, bee activity and the needs of each herb variety. With a little trial and error, you’ll find your optimal times for harvesting herbs in the morning versus the evening.

Using Sharp Tools for Clean Cuts

When harvesting herbs from your garden, using clean, sharp tools is extremely important for the health of your plants. Dull blades can crush stems instead of making clean cuts, opening the door for diseases and pests to invade (1). The key is to always have properly sharpened and sanitized tools on hand before beginning the harvesting process.

What Tools Should You Use?

Quality herb snipping scissors, gardening shears, and knives are essential for harvesting herbs. Stainless steel blades resist corrosion and hold an edge longer than cheaper carbon steel options. Bypass pruners make the cleanest cuts on tender new growth, while anvil pruners work better on thicker, woodier stems. Select ergonomic handles that fit your hand size and grip comfort.

It’s wise to dedicate a set of herb harvesting tools solely for use in the garden. This prevents any chemical residues or dirt on garage or kitchen tools from transferring to the herbs. Mark them in a distinguishable way to separate them from other garden tools.

Sharpening Your Herb Harvesting Tools

A common mistake is continuing to use dull blades out of neglect or procrastination (2). But harvesting herbs with a dull tool crushes and shreds delicate leaves and stems instead of slicing them cleanly (3). This causes more stress and injury to the plant, potentially introducing diseases that can spread quickly.

It only takes a few minutes to sharpen your herb snips and knives with a whetstone or electric sharpener before heading out to cut herbs. Notice when your blades seem to tear rather than slice cleanly through stems and make sharpening a habit before each harvest for optimal results (4). Disinfect all tools with rubbing alcohol beforehand as well.

Proper Cutting Technique

When harvesting herbs, use a gentle touch and make cuts at a 45 degree angle (5). This allows the stems to take up the most water and remain viable after cutting. Trim stems just above leaf nodes where new growth emerges, leaving some leaves behind to nourish the plant through photosynthesis.

Harvesting in the early morning or late evening causes less stress or wilting. During the heat of mid-day, the plant’s moisture and nutrient reserves are at their lowest ebb and are not ideal times for trimming (6). Work quickly and get cut herbs into a cool, shaded area right away.

Avoid yanking at tangled stems or stripping off leaves by hand. The oils in aromatic herbs like thyme, sage, and mint can cause dermatitis for those with sensitive skin. There’s also an increased risk of breaking the whole plant. Instead, patiently use properly sharpened herb snips for a clean, quick harvest.

Caring for Harvesting Tools After Use

Once finished trimming herbs, be sure to properly clean harvesting tools of all dirt and debris before storing them away (7). Soak scissors and pruners in a mild bleach solution of one part bleach to nine parts water for 10 minutes. Use an old toothbrush and mild soap to scrub knife blades before drying thoroughly.

At the end of the season, sharpen all blades one final time before lubricating and storing in a dry location over winter. High quality tools cared for properly will last for many productive herb gardening years. The investment of a little time into keeping blades sharp and sanitized is well worth the improved harvest and life span of your herb garden.

How to Dry Herbs for Storage

Here is a draft 892-word article on “How to Dry Herbs for Storage” for your niche culinary site:

Drying or dehydrating fresh herbs is one of the easiest methods for preserving these garden treasures for long-term use. Properly dried herbs can retain much of their flavor, aroma, and color when stored correctly for 6 months to a year. Learning how to dry herbs for storage will allow any gardener to enjoy the fruits of their labor all year round.

The key to successfully drying herbs for storage is to remove moisture slowly and thoroughly before storage. Moisture supports the growth of bacteria and molds which can cause dried herbs to spoil. There are several methods home cooks can use to dry herbs from their gardens or farmers market bounties.

Air Drying Herbs

Air drying is the most common way to dry leafy herbs like basil, mint, sage, thyme and rosemary. To air dry herbs, wash and dry the stems thoroughly, then gather them into small bundles with kitchen string or rubber bands. Use sharp scissors or garden shears to cut the ends of the stems evenly before bundling.

Hang these small bundles of herbs upside down in a warm, dry, dark place with good air circulation. The optimum temperature for air drying is between 70-100 degrees Fahrenheit. Kitchen cupboards, pantry shelves or wire drying racks work perfectly for herb air drying.

The drying process typically takes 1-2 weeks. To test if bundles are fully dried, check that the stems snap crisply when bent and the leaves crumble easily between the fingers. Monitor drying bundles closely for any mold growth and discard affected herbs right away.

Oven & Dehydrator Drying

Using a low temperature oven or an electric food dehydrator are faster ways to thoroughly dry herbs for storage. These methods remove moisture more efficiently while retaining the volatile aromatic essential oils better than air drying or microwave methods.

To oven dry herbs, place clean stems and leaves in a single layer on a baking sheet. Dry at the lowest possible oven temperature, ideally between 95 to 115 degrees Fahrenheit. Conventional ovens typically only go down to 170 degrees Fahrenheit, which will still work to dry herbs effectively.

Herbs dried in a 95 degree Fahrenheit oven will take 4-6 hours, while 115 degree oven drying takes just 2-4 hours. Check the herbs every 30 minutes until completely dried and crisp. Electric food dehydrators specifically designed for drying herbs, fruits, vegetables and meats are another excellent investment for home cooks who grow their own herbs or buy in bulk. Quality dehydrators have adjustable thermostats that allow precise control over the temperature and fan speeds to customize drying.

Proper Storage for Dried Herbs

After herbs are completely dried, they must be stored correctly in airtight containers to retain flavor and prevent spoilage or contamination. Glass jars and reusable silicone bags or plastic containers all work very well for storing dried herbs. Before filling with herbs, be sure containers have been thoroughly cleaned and dried.

For the freshest flavor, use dried herbs within 6 months. Properly stored dried herbs can retain good flavor for up to a year. To check if dried herbs are still good, give them a sniff test. Discard musty or moldy smelling dried herbs. Dried herbs that smell vibrant and true to their fresh versions will liven up all your cooking.

With the simple techniques above for successfully drying herbs at home, any gardener can easily preserve the herb harvest for cooking all year long. Drying herbs with care after the growing season ends makes it possible to enjoy their unique flavors in recipes for many months after harvesting them. Learning how to dry herbs for storage unlocks their flavors and fragrances so we can savor garden herbs no matter the season or weather.

Storing Dried Herbs in Jars or Bags

Once you have dried your fresh garden herbs, proper storage is crucial for preserving the herbs’ flavors and aromas over time. Two convenient methods for storing dried herbs are jars and bags. Each has its own advantages and considerations when it comes to keeping your homegrown herbs tasting their best.

Jars

Glass jars are a classic choice for storing dried herbs. Their airtight seal blocks out excess light and moisture, two factors that can cause herbs to lose potency faster. Look for jars with tight-fitting lids to ensure no air or humidity sneaks inside. Clear glass also allows you to easily see your herb supply so you know when you’re running low.

When storing dried herbs in jars, it’s best to keep the jars out of direct sunlight. You can stash them in a cool, dark kitchen cupboard or drawer. Just open the jars occasionally to allow fresh oxygen to circulate and prevent any moisture buildup. Glass jars can also beautifully display your harvested herbs on the countertop or spice rack. Just bear in mind that light can quicken deterioration.

An optimal jar size for storing dried herbs is around 8 ounces. This allows enough room for the herbs to breathe without too much excess space where air could get trapped. Be sure to label jars with the herb name and date for easy identification.

Bags

Resealable plastic bags also do the trick for storing dried herbs. Opt for thick bags made of durable plastic that won’t easily rip. Freezer bags tend to be extra sturdy. Make sure any bag you select has an airtight seal when closed to block light and moisture.

An advantage of bag storage is being able to press out excess air before sealing. This minimizes the oxygen inside that could cause herbs to lose vibrancy faster. You can manually squeeze bags to remove air or use a straw to suck it out. Just be careful not to crush the dried herbs when compacting the bags.

Since plastic bags are opaque, storing herbs inside cabinets or drawers keeps the contents hidden and protected. Bags take up less space than jars if storage area is limited. They’re also very lightweight and portable for taking herbs on the go. Just like jars, be diligent about properly labeling with names and dates.

No matter which storage vessel you choose, the most important rule is to use your homegrown dried herbs within one year. Stored properly in a cool, dark place, dried herbs can retain excellent flavor and fragrance for up to 12 months. After that, the essential oils that give the herbs their signature taste and smell start to significantly dissipate. So try to use up older herbs first before tapping into a new batch.

With the right storage methods, you can enjoy the fruits of your herb garden labor all year long. Jars and bags both have their convenience perks for preserving your home-dried herbs. The key is shielding the herbs from light, heat, and excess moisture by sealing them in an airtight container kept in a dark space. Then you’ll have delicious, vibrant herbs ready to elevate your recipes no matter the season. Follow these herb storage tips, and your garden harvest will keep on giving.

Freezing Fresh Herbs for Year-Round Use

# Freezing Fresh Herbs for Year-Round Use

How to Harvest and Store Your Garden Herbs

Freezing fresh herbs is an excellent way to preserve the bounty from your garden for use all year long. Having a supply of frozen herbs on hand makes it easy to add fresh herbal flavor to meals, even when your garden is covered in snow.

## Best Herbs for Freezing

Most herbs freeze very well. Herbs with high moisture content, like basil, chives, cilantro, dill, parsley, sage, and mint hold up best. Sturdy, thick-leaved herbs like rosemary, thyme, oregano, lavender and savory also freeze nicely. More delicate herbs like tarragon and chervil don’t retain as much flavor during freezing.

When freezing herbs, it’s best to freeze them soon after harvesting for maximum flavor retention. Freezing them at the peak of freshness locks in the most essential oils and aromatics that give each herb its unique taste and scent.

## Harvesting Herbs for Freezing

The best time to harvest herbs for freezing is in the morning after any dew has dried but before the sun gets too hot. This helps ensure the highest oil concentration. Use a pair of sharp scissors or garden shears to cut the stems rather than pulling or tearing the herbs. Try to keep stem lengths uniform to aid in even freezing.

Rinse the herbs gently under cool water and pat thoroughly dry with paper towels or a salad spinner. It’s important not to freeze herbs when they are wet or moisture will form damaging ice crystals during the freezing process.

## How to Freeze Herb Leaves

The easiest way to freeze leafy herbs like basil, mint, parsley, cilantro or dill is to place measured amounts in ice cube trays. Fill each compartment with roughly one tablespoon of leaves, then cover the tray with plastic wrap and place in the freezer. Once frozen, pop the herb cubes out and transfer to a labeled freezer bag. This makes it easy to toss a pre-measured amount into recipes all year long.

For smaller amounts, chopped herbs can be spread in a single layer on a baking sheet and frozen initially. Then promptly transfer to air-tight freezer bags or containers once fully frozen.

## Freezing Herb Stems

Sturdy herb stems, like those from rosemary, thyme, sage and oregano can also be frozen easily. After harvesting, wash and completely dry herb branches or sprigs. Place them directly into freezer bags, seal and label. To use, simply remove desired amounts from bags and chop, strip or crush leaves as needed.

An alternate method is to chop herbs coarsely before freezing in ice cube trays or bags. This makes it faster to incorporate them into cooking. But take care not chop too far in advance or essential oils will start to dissipate.

## Storing Frozen Herbs

Be sure to label all frozen herbs clearly with the name and date. Well-wrapped herb cubes or bags store best at 0°F or below. Use within 6 to 12 months for best quality.

Always use frozen herbs directly from the freezer. Don’t thaw first or the plant cells will break down and lose flavor. Add them straight to soups, sauces, stews or other recipes for an intense boost of just-harvested taste.

Enjoy convenience and flavor with frozen herbs from your garden all year long!

Tips for Freezing Herb Stems, Leaves and Seeds

When it comes to freezing herbs for long-term storage, it’s important to know that different parts of the herbs freeze better than others. Here are some tips for getting the best results when freezing herb stems, leaves, and seeds.

Herb Stems

– Herb stems don’t always freeze well on their own. They can become limp and lifeless when thawed. It’s best to freeze stems still attached to herb leaves.

– If freezing solo stems, choose woody stemmed herbs like thyme, rosemary, oregano, and sage. Trim off leaves, then wash and dry stems before freezing.

– Another option is to chop stems before freezing. Add them to ice cube trays with a bit of water or oil to use later in cooking.

Herb Leaves

– Delicate herb leaves like basil, mint, and parsley freeze better than tougher woody stemmed leaves.

– Wash and dry herb leaves thoroughly before freezing. Carefully separate any bad leaves.

– Lay leaves in a single layer on a baking sheet and place in the freezer until hard. Transfer to air-tight containers or bags.

– Chopped leaves freeze well too. Add a bit of water or oil to help prevent freezer burn. Ice cube trays work great for chopped herbs.

Herb Seeds

– Freezing is an excellent way to preserve seeds from cilantro, dill and other herbs that produce abundant seeds.

– Allow seed heads to fully mature and dry on the plant before harvesting for freezing.

– Separate the seeds from any excess plant material. Place seeds in a single layer in an airtight container.

– Store frozen herb seeds in a cool, dark place for up to a year. Thaw before planting.

How to Freeze Herbs

No matter which part of the plant you are freezing, the goal is to quickly freeze the plant matter to prevent damage to the cell structure. Here are some standard practices to follow:

– Make sure herbs are clean and completely dry before freezing. Moisture encourages ice crystals to form which damages leaves and seeds.

– Seal herbs in an airtight container or heavy-duty plastic freezer bag, pressing out excess air. This prevents freezer burn which degrades quality over time.

– Label the container with the herb name and date. Use frozen herbs within 6 to 12 months for best flavor.

– Choose containers that are dark in color to prevent light exposure which can also lead to faster deterioration. Glass jars, aluminum cans or foil pouches all work well for storage.

Follow these tips when freezing herb stems, leaves and seeds for best quality and usage. Be sure to harvest herbs at their peak and prep them properly before freezing too. This allows you to enjoy their fresh flavors in recipes all year long.

Oil Infusion as a Storage Method

# Oil Infusion as a Storage Method

Oil infusion is an excellent way to preserve the flavor and aroma of fresh herbs from your garden for use all year long. The oil extraction process allows the essential oils and phytochemicals in herbs to infuse into the carrier oil, creating a flavored herbal oil that can be stored at room temperature for up to a year.

When considering oil infusion as a storage method for your garden herbs, it’s important to follow some best practices. Choosing the right herbs and carrier oils, proper sanitation, and storage are key for creating a shelf-stable product.

## Selecting Herbs for Oil Infusion

More delicate herbs with higher moisture content such as basil, tarragon, chives, parsley and cilantro are great candidates for oil infusion. The oil helps protect the herbs from oxidation while allowing their flavors to permeate the oil. Sturdy herbs with strong flavors like rosemary, thyme, sage, oregano and marjoram also infuse beautifully into oil. Garlic, chili peppers and lemon or orange zest can provide a flavorful kick as well.

When selecting herbs for oil infusion, it’s best to use fresh herbs at their peak of flavor. Harvesting herbs in the morning after the dew has evaporated ensures the best flavor retention. Use clean scissors or garden shears to snip herbs, leaving some stem attached. Gently rinse if needed and pat thoroughly dry before infusion.

## Choosing a Carrier Oil

The most common carrier oils used for herb infusions are extra virgin olive oil and grapeseed oil due to their neutral flavors. Other options include sunflower, safflower or avocado oil. Regardless of oil choice, select high quality, food-grade oils packaged in dark glass bottles. The oil’s freshness and acidity level can impact flavor, so taste test oils before using.

## Proper Sanitation

Like all preserved foods, keeping equipment and ingredients sanitary is crucial when infusing herbs into oil. Be sure to wash herbs thoroughly and allow to dry completely before adding to oil. Sterilize jars or bottles either by running through the dishwasher or submerging in a boiling water bath for 10 minutes. Allow containers to air dry before using. Always use clean utensils when handling ingredients.

## Infusion Methods

There are a few techniques for infusing herbs into oil. The easiest is to loosely fill clean, dry jars with fresh herbs, then cover completely with oil. Other options include blending herbs into oil with an immersion blender or heating oil and herbs very gently on the lowest stovetop setting. Regardless of technique, the key is to not overheat the oil, which can diminish flavors.

Once herbs are infused, let the jar or bottle sit at room temperature away from light for 2 weeks up to a month. Shake gently every few days to distribute flavors. Taste regularly after 2 weeks to monitor flavor development. Strain through cheesecloth when flavor reaches the desired intensity. Avoid leaving herbs in oil for longer than a month to prevent spoilage.

## Storage

For short term storage up to 6 months, decant flavored oil into smaller sterilized bottles or jars, leaving 1⁄2 inch headspace. Seal tightly and store in a cool, dark cupboard. Freezer storage for up to a year is also an option. Leave ample headspace in bottles or jars as oil will expand when frozen. Thaw completely in the refrigerator before using.

When stored properly, herb-infused oils retain maximum flavor for up to a year. Their versatility as cooking ingredients, marinades, dipping oils and gifts make oil infusion an invaluable storage method for garden herbs. Follow best practices for handling and watch for signs of spoilage before use. With some creativity, preserved herbal oils can be enjoyed all year long.

Vinegars and Salts for Flavorful Preserved Herbs

In addition to drying and freezing, two popular methods for preserving herbs from your garden are infusing them into vinegars and mixing them with salts. These techniques keep herbs fresh for months while also infusing them with delicious complementary flavors. Read on for tips on preserving your harvest using vinegars and salts.

Choosing Your Herbs

Most tender leafy herbs like basil, tarragon, chives, parsley, cilantro, dill, and mint hold up well when preserved in vinegar or salt. Heartier herbs like rosemary, thyme, oregano, and sage also shine when infused. Consider which herbs you have in abundance from your garden that would pair nicely with vinegar or salt.

Herb-Infused Vinegars

Infusing fresh herbs, spices, garlic, chili peppers, citrus zest, peppercorns, and other flavorful ingredients transforms an ordinary vinegar into a unique flavor bomb, perfect for seasoning vegetables, salad dressings, marinades, and more.

When infusing vinegars, opt for high-quality ingredients. Use fresh organic herbs at their peak and raw, unfiltered vinegars like apple cider vinegar, white wine vinegar, champagne vinegar, sherry vinegar, or rice wine vinegar. Make sure all equipment, containers, and utensils are extremely clean and sterile to prevent bacteria growth.

To make an herb vinegar infusion, lightly bruise or crush fresh herb leaves and stems to release their essential oils and flavors. Stuff clean glass jars tightly with the herbs, leaving a 1⁄2 inch headspace at the top. Heat the vinegar until just before a simmer and pour over the herbs, making sure they are completely submerged. Top off with more vinegar if needed. Seal the jar tightly and store in a cool, dark place, shaking gently every day. Taste after 2 weeks, though some vinegars take 4-6 weeks to fully infuse. Strain out and compost the spent herbs.

For best flavor, use herb-infused vinegars within 6 months to a year. Always label infused vinegars with the ingredients and date. Refrigerate after opening. Signs that your infused vinegar has gone bad are mold, unpleasant aroma, bubbling or fizzing, or sliminess. As long as the vinegar smells strongly aromatic without off odors, it is likely still safe to consume.

Herb-Infused Salts

Incorporating herbs, citrus zest, spices, dried chilies, garlic, and other flavor boosters into salt is an age-old preservation technique that transforms everyday salt into a powerhouse seasoning. Herb salt mixes make unique gifts, enliven roasted vegetables, perk up grilled meats, and lend intrigue to homemade crackers and baked goods.

As with infused vinegars, start with the best quality ingredients when making herb salts—fresh organic garden herbs, just-harvested sea salt or kosher salt, and spices sourced from a reputable dealer. Make sure equipment is meticulously clean. Glass jars or grinders make attractive storage vessels for infused salts.

Two easy methods exist for infusing salts with herbs. The slower cold method involves layering salt and chopped herbs in a container, allowing flavors to meld over a few weeks. The faster hot method heats salt and herbs in a pan with a bit of oil for a few minutes to quickly release essential oils before blending. Both methods yield delicious results. Customize herb salt blends to highlight ingredients used frequently in your kitchen. Consider combinations like:

Lemon Rosemary—With freshly grated lemon zest

Garlic Parsley—Plus crushed red pepper flakes

Lavender Thyme—With hints of orange zest

Basil Mint—With toasted pine nuts

Store herb salt blends in airtight containers away from light and moisture. Over time, the salt may absorb moisture from the herbs and clump together. Simply break up any clumps as needed. With proper storage methods, herb-infused salts stay fresh and flavorful for at least a year.

The Power of Preserved Herbs

Experimenting with unique herb vinegars and salts provides an outlet for abundantly harvested garden herbs at their peak. Both vinegars and salts act as flavor preservers, extending the life of fresh herbs for months or even years. Preserved herbs also make wonderfully thoughtful edible gifts. For best quality and safety, always use fresh organic herbs, sterilized equipment, and proper storage when infusing vinegars and salts. With an abundance of nature’s flavors preserved through these simple techniques, there is no shortage of ways to enjoy your lovingly grown herbs all year long.

The Shelf Life of Properly Stored Herbs

# The Shelf Life of Properly Stored Herbs

Properly harvested and stored herbs can retain their flavor and aroma for months or even years. Knowing the approximate shelf life of dried and frozen herbs allows you to use your garden bounty year-round in your cooking.

## How Long Do Dried Herbs Last?

Dried herbs that are stored correctly in airtight containers away from heat, light, and moisture can last for up to 2 years. During this time, they will slowly lose flavor and aroma potency.

Whole dried herbs like oregano, thyme, rosemary, and sage tend to retain their flavor better over time compared to delicate herbs like basil, tarragon, chives, and parsley. After 1 year, dried basil will lose most of its flavor while oregano and rosemary will still taste quite potent.

Here are the approximate shelf lives for properly dried and stored herbs:

– Oregano, thyme, rosemary – 2 years

– Sage, marjoram – 1-2 years

– Lavender, lemon verbena – 1-2 years

– Basil, tarragon, chives – 6 months to 1 year

– Parsley, cilantro, dill – 6 months

If stored properly, most dried herbs will still be usable for seasoning and cooking after their peak flavor time, but may require you use more to impart flavor and aroma.

## Maximizing Shelf Life of Dried Herbs

Follow these tips to help your dried herbs retain the maximum flavor and aroma before their inevitable flavor decline:

– Dry herbs quickly in a warm, dark area soon after harvest.

– Store dried herbs in airtight glass jars kept in a cool, dark cupboard away from heat and light.

– Fill storage jars full to minimize air exposure. Vacuum seal if possible.

– Buy dried herbs in smaller quantities to use within 6 months to 1 year for best flavor.

– Label jars with herb name and year harvested for easy identification.

– Crush or grind dried herbs just before use to release oils and flavor compounds trapped inside.

## How Long Do Frozen Herbs Last?

Compared to drying, freezing is an excellent way to extend the shelf life of fresh herb leaves while retaining color and flavor. Properly frozen herbs can keep for about 6 months before deteriorating in quality.

Here are some guidelines for frozen herb storage times:

– Basil, parsley, cilantro – 3 months

– Chives, tarragon, lemon balm – 4 months

– Sage, rosemary, thyme, oregano – 6 months

Frozen herbs tend to lose flavor faster than dried herbs. But their quality is usually superior when used within 6 months compared to year-old dried herbs.

## Tips for Maximizing Frozen Herb Quality

Follow these best practices when freezing garden herbs to lock in flavor and color for as long as possible:

– Harvest herb leaves in early morning.

– Rinse gently and pat dry with towel.

– Lay single layer of leaves on baking sheet and freeze solid.

– Transfer frozen herbs to ziplock bags, removing air.

– Label with name and date frozen for easy ID.

– Use within 6 months for best quality.

Storing your bountiful garden herbs properly ensures you can savor their flavor in recipes all year long. With the proper harvesting, drying, and freezing techniques, you’ll have quality herbs on hand for home cooking for up to 2 years.

Signs that Stored Herbs Have Gone Bad

Knowing when dried or frozen herbs have gone bad is important for both flavor and food safety. Carefully stored herbs can last a year or more, but there are some clear signs that your preserved garden herbs have deteriorated in quality or become unsafe to use. Being able to identify these signs will ensure you use up your herb harvest while it’s still at peak freshness.

Herbs that show signs of mold should be discarded. This includes dried herbs stored in jars or bags as well as frozen herbs. Any fuzzy growths or spots on leaves are an indication that moisture and air have enabled mold to take hold. Do not attempt to salvage unaffected parts of the herb, as the spores may have spread. When storing herbs for preservation, be sure containers have tight seals and check periodically for condensation or moisture buildup.

Dried herbs that have taken on a dull, faded appearance or changed color have likely aged past their prime. The vibrant greens, browns and grays you saw when the herbs first dried indicate the presence of flavorful oils and compounds. As herbs sit for months, these tend to evaporate or break down. A dull or uniform color, especially brown, usually means the herb will impart less flavor. Smell the herb, and if you detect very little aroma, consider replacing it with a fresh batch.

Herbs that have gotten very dry and brittle have often lost some of their essential oils, or their cell walls may have deteriorated. To test for this, rub a small leaf or section between your fingers – it should release fragrant oils and feel slightly soft or leathery. If the herb crumbles instantly into a gritty powder or dust without releasing aroma, it is past its shelf life. These extremely dry herbs will still add some flavor, but lack the nuance and vibrancy of well-preserved ones.

Frozen herbs that show signs of freezer burn – dry, shriveled brown edges or a grayish cast – are still safe to use but will likely have a muted flavor. Trim off the damaged sections of leaves or seeds. Then crush a small portion and smell it, tasting if necessary. If it has maintained good color and aroma elsewhere, use the unaffected portions right away instead of returning it to the freezer.

Soft or slimy herbs have usually gotten too warm during storage and are at risk for bacterial growth. This applies to both frozen and dried herbs. Discard any herbs that feel moist, limp or mushy instead of dry and crisp. Even if mold is not yet visible, the texture indicates organisms are breaking down cell walls and digesting components of the leaves. Do not taste or smell soft herbs, as consuming spoiled bacteria can cause illness.

If your dried herb contains visible webbing, tiny white dots or small worm-like insects, it has likely been infested by pantry moths or herb weevils. Discard the contaminated herbs immediately, checking any remaining stored herbs closely for signs of insects. As prevention, store herbs in airtight containers and use up opened dried herbs within a year.

Noticing one or more of the above signs means it is time to refresh your preserved herb supply. Compost or discard herbs past their prime to avoid wasting the other ingredients you pair them with. Dried herbs more than a year old can be used for light flavor in long-cooked dishes, but will lack vibrancy. Refer to your logs or labels of harvest and storage dates, using up older herbs first. With careful handling, the herbs gathered from this year’s garden can provide intense herbal flavor for many more recipes when you learn the signs of stale, moldy or low-quality preserved herbs.

Cooking with Last Year’s Dried Herbs

Here is a draft part of the article on “Cooking with Last Year’s Dried Herbs” for your niche culinary site exploring recipes, gardening, and the cultural significance of herbs and spices:

How to Harvest and Store Your Garden HerbsHow to Harvest and Store Your Garden Herbs

Cooking with Last Year’s Dried Herbs

If stored properly, most dried herbs can retain excellent flavor for 12 months or longer. However, there will come a time when your supply from previous seasons starts to lose its potency. How can you tell if last year’s dried herbs are still good? Here are some tips for evaluating the quality of stored dried herbs and how to use up any that may be past their prime.

Look

Visually inspect the dried herbs. They should retain a good color without excessive fading or darkening. Whole herbs like thyme and rosemary should not appear broken down or powdery. If stored properly in a cool, dark place, the herbs should look similar to when they were originally dried. Any major color changes, visible mold, or strong musty odors indicate the herbs are too old to enjoy.

Smell

A quick sniff test will tell you a lot about your dried herb’s freshness and suitability for cooking. Most dried herbs will lose some of their more subtle aromatic qualities over time but should still smell true to their essence. If the aroma is extremely faded, musty, or dusty, it’s best not to cook with them.

Taste

If your dried herbs pass the sight and smell tests, do a taste test by nibbling a tiny bit. The flavor should taste vibrant and resemble the taste you’d expect from the fresh versions. Stale dried herbs may taste flat, dusty, bitter or have slight off-flavors. Trust your taste buds – if the herb doesn’t taste right, don’t use it in recipes.

Using Old Dried Herbs

If your dried herbs are still decent but lack their original punch, use them up by making herbal vinegars, compound butters, herb-scented oils, or herbal salts. Their fading flavors will still come through. You can also use weaker dried herbs in simmering dishes like soups, stews, beans or grains where they’ll have time to infuse the dish with gentle herbal essence. Avoid relying on lackluster dried herbs for quick cooking or as a main flavoring.

How to Harvest and Store Your Garden Herbs

When to Toss Old Herbs

If dried herbs have truly gone downhill, it’s best to compost and replace them. Using faded or funky-tasting dried herbs can ruin the flavors of your carefully prepared recipes. Stick to vibrant, aromatic herbs at their peak to get the most out of your dishes. Plan to grow, buy or dry a fresh batch of herbs each season.

Key Takeaways

– Visually inspect dried herbs for good color and texture

– Sniff herbs and taste a small sample to check potency

– Use weaker herbs in slow-simmered dishes rather than quick cooking

– Toss extremely faded or funky-tasting dried herbs

– Grow and dry fresh herbs every season for best flavor

With proper storage methods, most dried herbs can last 12 months or longer before their flavor and aroma start to deteriorate. By evaluating the look, smell and taste of older herbs, you can decide how to best use up this pantry staple. Though faded herbs won’t be delicious enough for front-and-center flavor, they can quietly bolster soups, stews and more before their time is up. Planning ahead to grow, buy or dry a fresh batch of herbs each season is key for savoring vibrant, aromatic flavors in your home cooking.