
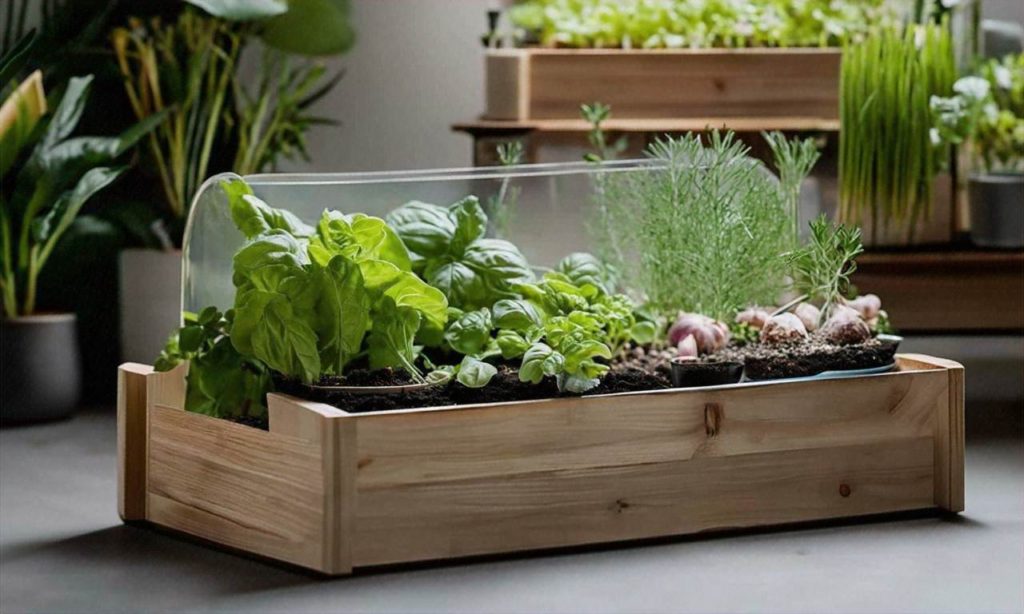
Choose the Right Herbs for Small Spaces
When gardening space is limited, it’s important to choose compact herb varieties that will thrive in small spaces. The key is selecting herbs that grow vertically rather than spreading out. Here are some of the best herbs for small-space gardening.
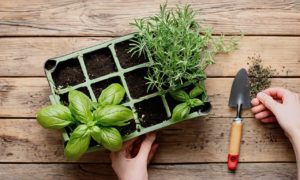
Basil is one of the most popular culinary herbs and many compact basil varieties are perfectly suited for container gardening. Try dwarf basil cultivars like ‘Spicy Globe’ or ‘Boxwood’ that grow in a neat, rounded shape. The tall columnar ‘Colossal’ basil is also a great vertical grower. When planting basil, use containers at least 6 inches wide and remember that basil likes full sun.
Chives are another excellent choice for urban herb gardens. Their grassy leaves provide great flavor for recipes while their vertical growth habit makes them a space-efficient option. Chives also give attractive purple flowers in late spring. Grow chives in containers at least 4 inches wide.
Oregano is a Mediterranean herb that thrives with minimal care. Dwarf oregano like ‘Compactum’ works beautifully in small spaces, while golden oregano offers pretty foliage for containers. Give oregano a pot at least 6-8 inches wide in a sunny spot.
Thyme is one of the most versatile cooking herbs. Its tiny leaves pack a punch and thyme does not need much space to grow. Upright varieties like ‘Hi-Ho Silver’ are particularly good for small gardens, growing up to 6 inches tall. Lemon thyme and creeping thyme are other thyme types suited for compact herb gardening.
Rosemary has a reputation for being difficult to grow indoors, but the right rosemary varieties can do quite well in pots. Choose miniature rosemary cultivars like ‘Blue Boy’ or ‘Blue Spire’ that max out under 2 feet tall. Give rosemary at least an 8-inch container and several hours of sun daily.
Sage is another herb that offers compact varieties for small gardens. Look for dwarf garden sage or the narrow ‘Berggarten’ sage. The colorful tricolor sage shows off variegated foliage in containers. Give sage an 8 to 10-inch pot and place in full sun.
When planning an urban herb garden, keep in mind that many popular culinary herbs naturally grow as small, contained plants even without dwarf cultivars. Options like mint, parsley, cilantro, dill, and marjoram can all thrive in modest spaces.
No matter which herbs you choose, the containers themselves also play an important role when gardening in compact areas. Prioritize vertical height over width to allow more plants in narrow spaces. Hang wall planters and rail planters to take advantage of vertical real estate without occupying floorspace. Stacked pots, multilevel pot stands, and tiered planters also efficiently utilize vertical growing space both indoors and out.
Urban herb gardening offers great rewards, even for gardeners short on square footage. By focusing on vertical growers and compact varieties suited to life in containers and small pots, you can enjoy a vibrant, productive indoor or outdoor herb garden no matter your space constraints.
Use Vertical Space with Wall-Mounted or Hanging Gardens
Using vertical space is key for urban herb gardening where horizontal space is limited. Wall-mounted and hanging herb gardens are great options to maximize your usable gardening area.
When choosing herbs for vertical gardens, opt for more compact varieties that will thrive in shallow pots and limited soil. Good choices include thyme, oregano, sage, rosemary, chives, parsley, basil, and mint. Consider the sun exposure the wall or hanging garden will receive and choose herbs accordingly.
Wall-mounted herb gardens can transform any blank vertical surface into a productive garden. Simple wooden frames filled with soil work well, or you can get creative and use repurposed household items like crates, ladders, plastic gutters, or even a bookcase turned on its side. Make sure structures are securely fastened and the containers have drainage holes before planting.
For inside mounting, self-watering felt planters are excellent choices requiring less maintenance. Outside, regular hand watering works fine. Feed wall-mounted herbs with liquid fertilizer or slow-release granules a few times per season. Prune woody herbs like rosemary to keep them from outgrowing their space.
Hanging gardens instantly add visual interest and greenery even in the smallest outdoor area. Use breathable fabric planters or plastic nursery pots with drainage holes inserted into decorative baskets. Hanging pots dry out quicker than in-ground plants, so check soil moisture daily and water when the top inch becomes dry.
Situate hanging herb gardens in locations with at least 6 hours of sunlight per day. Protection from wind helps prevent soil from drying out too rapidly. For convenience, mount hangers on pulley systems allowing you to lower pots for easy watering and maintenance.
Those with outdoor vertical space may consider building a freestanding A-frame herb garden. This involves securing two tall boards together at the top and mounting planted containers or shelves along the angled sides. Place the A-frame herb garden against a sunny wall or fence.
Follow basic herb gardening care like pruning, fertilizing, and pest management even when growing vertically. Changing weather can impact watering needs. Reduce watering in cool weather and increase in hot, dry periods. Transition indoor wall gardens outdoors after any danger of frost when weather warms up in spring.
Get creative with vertical space both inside and out when Maximizing Your Space for Urban Herb Gardening. Wall mounts and hanging gardens keep productive plants out of the way while making herbs easily accessible for harvest. Choosing compact herb varieties suited to container growing helps ensure success. With a little effort, any empty vertical surface can be turned into a thriving, beautiful herb garden.
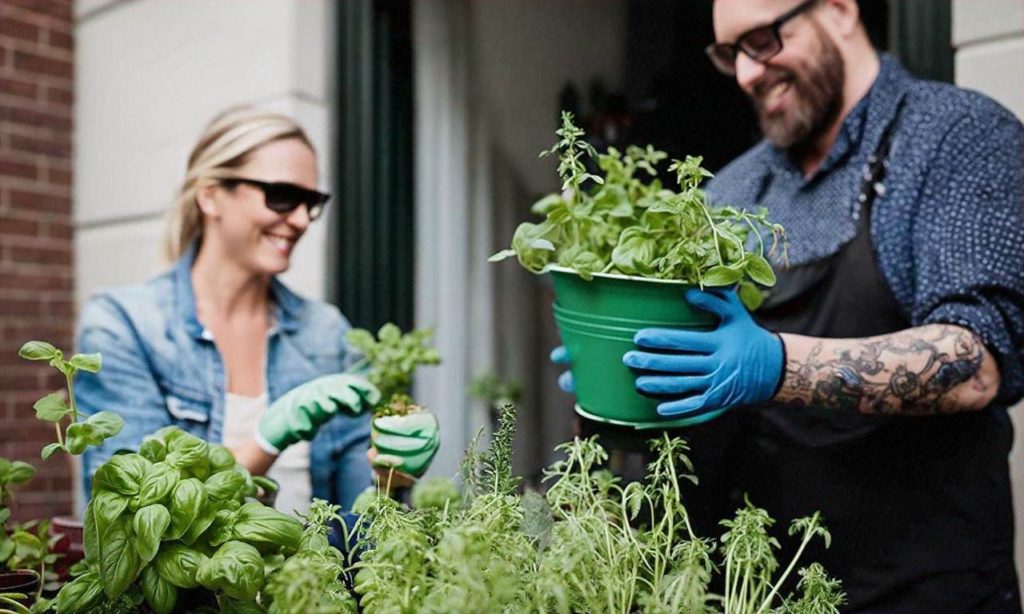
Container Gardening Tips for Herbs
Growing herbs in containers is a great way to maximize limited space when herb gardening. Carefully choosing the right containers and soil, along with proper watering and fertilization allows you to create a thriving urban herb garden. Follow these container gardening tips to get the most out of your small space herb garden.
Select Appropriate Planters
When selecting planters for an urban herb garden, consider material, drainage, and size. Terracotta, plastic, wood, and ceramic planters all work well for herbs. Ensure containers have drainage holes to prevent soggy soil. Match container size to the herb’s expected mature size, allowing at least 12 inches depth and diameter for roots to grow. Larger planters hold more soil and retain moisture better than small containers.
Use a Quality Potting Mix
A loose, nutrient-rich potting mix designed for container gardening allows herbs to thrive with proper drainage and aeration. Pre-mixed organic soil labeled for herbs or vegetables contains compost to retain moisture and release nutrients over time. You can create your own mix by combining potting soil with compost or vermiculite. Adding perlite creates air pockets for improved drainage.
Fertilize Herbs Properly
While herbs grow well in average soil, fertilizer gives an extra boost. Use a balanced liquid fertilizer diluted to half-strength every two weeks during the growing season. Slow-release pellet fertilizers provide a steady supply of nutrients by gradually breaking down over time. They can be added at planting time and will last 3-4 months. Be careful not to over-fertilize herbs, as excess nutrients can diminish their flavor.
Water Herbs Thoroughly and Consistently
Inconsistent watering causes problems for container herbs. Check soil moisture daily, watering when the top inch becomes dry. Water thoroughly until excess drips from the bottom, ensuring the whole root zone is hydrated. Drought-stressed plants are more prone to pests and diseases. Group containers together to simplify watering efforts. Add mulch on top of soil to retain moisture longer.
Maximize Sun Exposure
Most herbs need at least 6 hours of direct sunlight daily for robust growth. Turn containers periodically so all sides get evenly exposed. Moving planters around by day helps capture sunlight in different areas. Supplement with grow lights if natural light is inadequate. South-facing windowsills offer the most sunlight exposure for indoor herb gardens.
Protect Herbs from Temperature Extremes
While most herbs thrive during the warm growing season, temperature extremes can damage plants. Hot midday sun can scorch and wilt leaves. Move containers to a shady spot or add a shade cloth canopy during the hottest parts of the day. Cold snaps can also injure plants. Cover tender herbs or move containers into a covered area like a porch or garage if frost is expected.
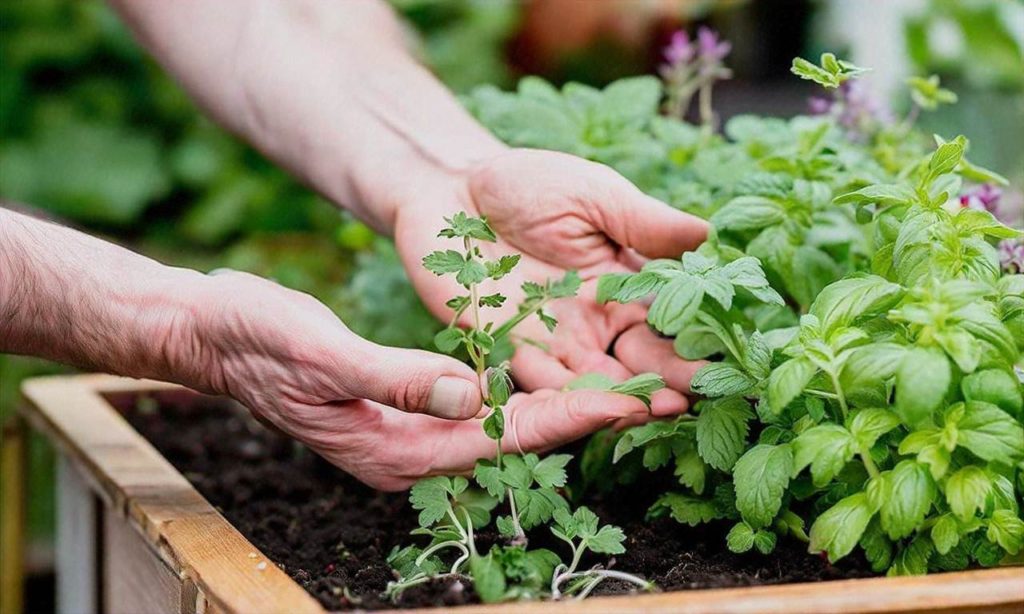
Prune Herbs to Promote Growth
Pruning herbs regularly prevents them from becoming leggy and encourages dense, bushy growth. Pinching off flower buds before they bloom also directs the plant’s energy towards leaf and stem production rather than seeds. Pruning also keeps plants tidy and shaped. Generally prune away dead or damaged growth at any time. For woody herbs like rosemary, prune annually in spring.
Maximize Space by Interplanting
Efficiently use container space by interplanting different herb species in the same planters. Select herbs with different forms and heights to occupy various zones. For example, plant dill in the center of a planter surrounded by low-growing thyme along the edges. Interplanting also allows you to reap the benefits of companion planting, where certain herbs grow better beside specific partners.
By following these key tips for container herb gardening, you can grow a productive indoor or outdoor herb garden even in a small space, maximizing flavor and enjoyment from your urban oasis.
Best Soil Mixes and Fertilizers for Container Herbs
When growing herbs in containers, using the right potting soil mix is key to getting the best flavor and highest yields from your plants. The ideal soil mix for container herbs should be loose, well-drained, and nutrient-rich. It’s best to avoid regular garden soil, as this can become compressed over time in pots and retain too much moisture. Here are some of the best potting mixes for container herb gardens:
Peat or Coconut Coir-Based Mixes
A good basic herb potting mix contains ingredients like peat moss or coconut coir to help retain some moisture, along with perlite or vermiculite to keep the soil loose and aerated. Many commercial organic potting soils contain these ingredients and work very well for a range of culinary herbs like thyme, rosemary, oregano, sage, and more. Look for mixes specially formulated for herbs and vegetables.
Soilless Potting Mixes
Soilless mixes contain no actual soil, just lightweight base ingredients like peat, coconut coir or bark fines blended with perlite or vermiculite. They provide an ultralight and fast-draining medium perfect for container herbs prone to rotting like lavender, oregano, and thyme. You’ll need to fertilize more with soilless mixes.
Custom Herb & Vegetable Mixes
Consider mixing your own custom soil blend for herbs in containers. An ideal do-it-yourself mix contains equal parts potting soil or compost, perlite or vermiculite, and coconut coir or peat moss. You can tweak mixes for better drainage or moisture retention depending on the needs of your specific herbs.
When choosing pre-made or custom soil blends, make sure they are organic and do not contain synthetic slow-release fertilizers. It’s best to use organic slow-release amendments or your own liquid feeding schedule.
Organic Slow-Release Amendments
Mixing some organic slow-release granular fertilizer into your potting soil provides a gentle, steady feeding over the course of a season. Excellent all-purpose organic amendments for container herbs include alfalfa meal, kelp meal, fish meal, and crushed eggshells. Espoma makes some great organic fertilizers for containers too.
Liquid Organic Fertilizers
In addition to slow-release amendments, you should supplement container herbs with regular doses of a gentle liquid organic fertilizer, like fish emulsion or seaweed extract. This will provide an added nutrient boost to plants in confined pots where nutrients can become depleted over time.
Container herbs tend to need more frequent feedings with smaller amounts of fertilizer compared to in-ground plants. Follow label instructions, but a good general rule is to feed container herbs with liquid fertilizer every 2-4 weeks during the active growing season.
The Right Soil pH
Most culinary herbs grow best in neutral to slightly alkaline soil with a pH around 6.5-7.0. Lavender, rosemary, thyme and oregano prefer their soil on the alkaline side, between pH 7-8. Test your potting mix and amend pH if needed with lime (to raise) or elemental sulfur (to lower).
Proper soil preparation is the first step to success when gardening herbs in containers. Follow these tips on choosing the best potting mixes and fertilizers, and your container herbs will thrive and fill your kitchen with flavor. Don’t forget to also use smart space-saving techniques like vertical gardens and companion planting to maximize harvests from your urban herb container garden.
Maximize Sunlight with Strategic Placement
When growing herbs in limited space, making the most of available sunlight is crucial for healthy, productive plants. Strategically placing your containers or vertical gardens can optimize light exposure.
South-Facing Placement
For outdoor gardens, a sunny south-facing spot is ideal. In the northern hemisphere, south-facing spaces receive the most direct sunlight throughout the day. Position herb planters along a southern wall or railing to maximize exposure. If space allows, leave sufficient room between the wall and planters to allow light to reach plants from multiple angles.
For indoor herb gardens, placing containers on a bright, south-facing windowsill is best. Supplement with artificial plant lights as needed. Consider installing a greenhouse window to allow more direct sunlight into urban apartments.
Light Requirements by Herb
When designing a compact herb garden, consider each herb’s specific light needs. Basil, oregano, parsley, rosemary, sage and thyme require at least 6 hours of full sun daily. Cilantro, dill and mint tolerate partial shade, needing only 4 hours of direct sunlight. Choosing shade-tolerant varieties will provide more flexibility when selecting garden placement.
Moveable Containers
One benefit of gardening in containers is the ability to move plants to “chase the sun.” Adjust container placement based on changing sunlight patterns, moving them to the brightest available location as day length shifts with the seasons. Adding wheels to planter boxes makes it easy to frequently reposition mobile gardens.
Supplemental Lighting
For urban gardeners truly limited on space, supplemental grow lights can boost productivity. LED plant lights that provide full-spectrum illumination are available in compact form factors that take up minimal room. Mount LED panels above wall-mounted herb gardens or vertical hydroponic systems to maximize light exposure. Use adjustable lights to customize intensity and direction.
Adequate Sunlight Prevents Issues
Insufficient sunlight leads to common problems for indoor herbs and urban gardens, like leggy, weak growth and susceptibility to fungus and molds. Maximizing natural light exposure through strategic placement wards off these issues. It also provides the light intensity herbs need for robust photosynthesis and the production of essential oils that give them their signature flavors and aromas.
In urban environments, it sometimes takes creativity and adaptive solutions to overcome challenges like limited space and lack of direct sunlight. But a well-designed compact herb garden tailored to natural light conditions can thrive with the right placement and supplemental lighting. Follow these sunlight maximization tips for your indoor, vertical or container herb planting efforts. Be sure to also provide adequate water, drainage and nutrients to allow your herbs to flourish within confined gardening spaces.
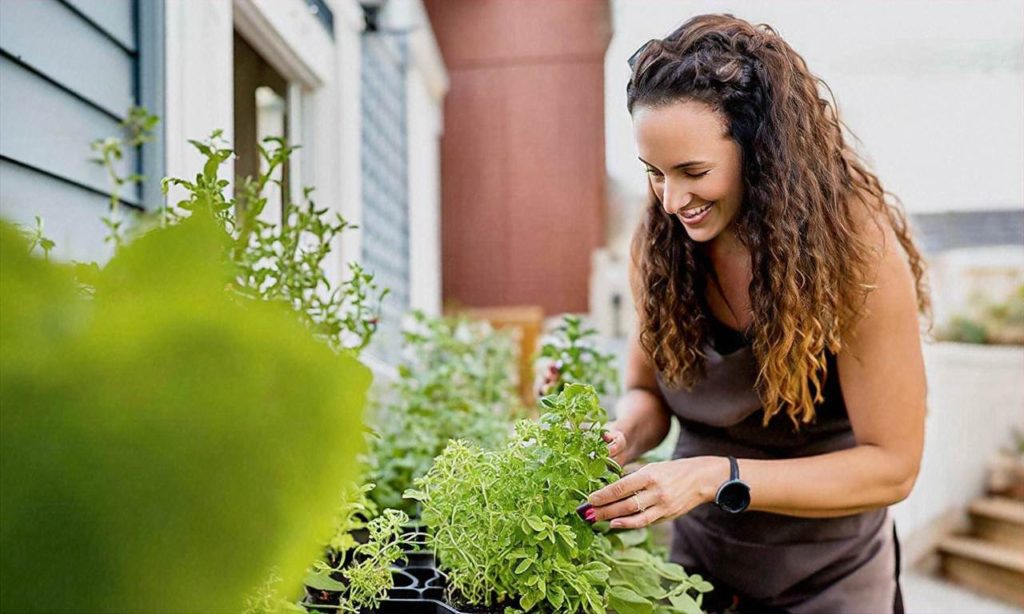
Watering and Maintenance Tips for Container Herbs
Proper watering and maintenance are crucial for keeping container herbs healthy in limited urban spaces. Here are some key tips to maximize your space by keeping herbs thriving in pots or window boxes.
Monitor Soil Moisture
Check the soil moisture of container herbs daily by touching the surface with your finger. The soil should be lightly moist but not soaked or dusty dry. Herbs in small containers will need more frequent watering than in larger pots. Mint, oregano, chives and parsley require consistent moisture, while rosemary, thyme and sage are more drought-tolerant. Adjust watering frequency and volume based on each herb’s needs.
Water Early, Water Deep
Water container herbs early in the day so the moisture has time to soak into the soil and foliage before hot sun causes excess evaporation. When watering, add enough liquid slowly until it drains from the container’s bottom drainage holes. This encourages roots to grow downwards searching for water. Shallow watering leads to short, inefficient root structures. Deep weekly soakings are better than frequent shallow waterings for container herbs.
Self-Watering Containers
Self-watering containers are excellent watering aids for urban gardeners who travel or forget to water routinely. Fill the water reservoir of self-watering pots once a week and the plant wicks up moisture as needed. Self-watering systems prevent drought stress if you can’t water one day. This is extremely useful for maximizing small spaces when you can’t check container plants daily.
Add Organic Matter
Mixing compost, worm castings or organic vegetable scraps into potting soil provides nutrients for herbs and retains moisture so you water less frequently. Amend soil with organic matter at least once per year, or whenever repotting. Worm castings in particular enhance container plant health and growth in limited spaces.
Mulch to Retain Moisture
Spread an even layer of shredded leaves, grass clippings, straw or other organic mulch material on the soil surface around container herbs. Mulching mimics the insulating effects of dense plantings in garden beds. The mulch prevents soil moisture loss through evaporation and regulates soil temperature. It gradually breaks down and adds beneficial humus too.
Group Together
Place container plants close together in a tight arrangement, clustering pots according to watering need. As plants grow, their leaves create a microclimate of higher humidity and cooler air temperatures within the grouping. This allows urban gardeners to maximize limited patio or balcony space while aiding the growth of healthy, productive herbs.
Trim Back Growth
Pinch off or cut back leggy growth on herb plants to encourage bushier habits, heavier leaf production and discourage flowering. Trimming forces plants to branch out rather than upward. This creates fuller, shorter plants that yield more herbs for cooking within restricted vertical real estate. Target basil, lemon balm, oregano and mints for regular tip pruning.
Clean Up Fallen Debris
Routinely remove faded flowers, dropped leaves and stems from container herb plantings to prevent disease issues in damp conditions. Keeping urban patio containers tidy also looks better and allows you to spot signs of pests or nutrient deficiencies faster. Sweeping up debris can reduce the need for pesticides too. Spot clean between plants with a small hand broom and dustpan.
Watch for Pests
Inspect container herbs often for common pests like aphids, spider mites, fungus gnats and mealybugs. These attack stressed plants in confined quarters. Avoid chemical pesticides which also kill beneficials. Wash insects off with a strong spray of water, or use insecticidal soap or horticultural oil. Remove badly infested leaves or whole plants to prevent spreading.
Rotate Container Position
Rotate pots and window boxes with herbs to a different space in the outdoor landscape or along a windowsill every 2-3 weeks. Moving them into and out of full sun/part shade exposure keeps growth even and prevents one side from getting disproportionate sunlight. Rotating containers also disrupts the lifecycle of any pests.
The restricted space of urban balconies, patios and living spaces requires some unique maintenance to keep container herbs growing their best. But don’t let small square footage deter your inner gardener. With these key watering, soil health and general care tips, you can maximize productivity from your container herbs this season.
Overwintering Herbs Indoors
If you’ve invested time and effort into an outdoor herb garden, you don’t have to say goodbye to your precious plants when the weather turns cold. Many culinary herbs can be overwintered indoors to provide a year-round harvest. Overwintering extends the productive life of herb plants and saves you from having to purchase new starters every spring. With some simple preparation and care tactics, you can continue maximizing your indoor space by keeping herbs thriving through the winter.

Getting a Jump Start with Cuttings
The key to successfully overwintering herbs is to act before the first frost hits. Ideally, you’ll want to take cuttings from established outdoor plants around late summer/early fall, before growth slows down. Mint, oregano, thyme, rosemary, sage, and lavender are particularly good herb varieties for overwintering via cuttings.
Here’s a quick step-by-step for the cutting method:
– Select a vigorous stem from the outdoor herb plant and cut off the top few inches. Be sure at least two sets of leaves remain.
– Remove the lower leaves and place the cutting in a glass of water.
– Change the water daily and watch for root development.
– Once roots are a few inches long, plant the cutting in a container filled with high-quality potting mix.
– Place in a sunny indoor location and water when the top inch of soil is dry.
This method essentially propagates new indoor herb plants well ahead of winter. Getting a head start on root development will help the transplants better withstand the stress of overwintering.
Potting Up Plants for Indoor Care
If herb plants are already growing in containers, the transplanting process is even easier. Follow these tips for getting potted outdoor herbs ready for overwintering:
– Water plants thoroughly a few days before bringing indoors. This will leach excess fertilizer salts from the soil.
– Prune back stems by one-third to one-half. This reduces water loss and encourages more compact growth.
– Check undersides of leaves and spray with horticultural oil or insecticidal soap if pests are detected.
– Repot in fresh potting mix, if needed. This gives roots room to grow through winter.
– Place transplants in a sunny indoor location near a window. South or west exposure is ideal.
– Introduce plants slowly to prevent shock from temperature extremes.
Providing Optimal Indoor Growing Conditions
Herbs grown outdoors get accustomed to seasonal fluctuations in sunlight, temperatures, humidity and other factors. For the healthiest overwintered herb garden possible, try to mimic outdoor growing conditions as much as possible. Here are some key elements to focus on:
Sunlight
Supplement natural light with 14-16 hours per day of artificial lighting. LED grow lights work beautifully for overwintering herbs.
Temperature & Humidity
Maintain daytime temperatures around 65-70° F and 45-55° F at night. Boost humidity levels around plants with pebble trays.

Water & Fertilizer

Let soil dry out slightly between waterings and feed monthly with balanced liquid fertilizer mixed at 1/4 strength.
Air Circulation & Pruning
Use small fans to prevent disease and prune any dead or damaged growth.
With the right growing conditions in place, overwintered herbs will continue growing indoors through the winter. Just be sure to monitor plants closely and make adjustments as needed.
Maximizing Space for Overwintering Herbs
Finding sufficient space for an indoor herb garden amid cramped winter quarters can definitely be a challenge. But herb plants are highly adaptable and several effective solutions exist for successfully overwintering herbs, even in tight indoor environments.
Here are some space-saving tips for keeping herbs thriving indoors through winter:
– Utilize a sunny, unused windowsill to display a few small herb pots.
– Install wire wall-mounted shelves in front of a bright window for supporting multiple pots.
– Create a mini greenhouse for herbs by enclosing a wire shelf unit with plastic sheeting.
– Use artificial lights to grow herbs in a basement or other room without windows.
– Grow microgreens and herbs hydroponically for maximum space efficiency.
Overwintering herbs definitely requires some strategic planning, extra effort and diligent care. But the payoff is homegrown herbs all winter long to take your culinary creations to the next flavor level.

Companion Planting for Efficient Use of Space
When space is limited, companion planting allows you to maximize yields and grow herbs that thrive together in close quarters. Careful planning of compatible neighboring plants helps deter pests, attract beneficial insects, and ensure your herbs have the nutrients and conditions they need to flourish.
What is Companion Planting?
Companion planting refers to the practice of strategically grouping complementary plants together in a garden bed or container. Certain herbs, when grown side-by-side, can benefit each other by deterring common pests, enhancing flavor, improving growth, or helping neighboring plants uptake nutrients more efficiently. Maximizing your urban herb garden means selecting herb companions that have symbiotic relationships.
Companion Planting Benefits
Smart companion planting provides many benefits for small-space herb gardens:
– Pest control – Grouping pest-deterring herbs near more vulnerable plants helps naturally protect against insects and diseases. For example, planting thyme near cabbage helps deter cabbage moths.
– Enhanced flavor – Some herbs impart subtle flavor changes in neighboring plants, like planting basil near tomatoes to amplify sweetness.
– Improved growth – Beneficial root excretions and nutrient availability from certain neighbor plants can bolster the growth of other herbs. For example, chamomile thrives when planted near slower-growing herbs like sage or oregano.
– Efficient use of space – Filling every bit of available space with symbiotic plant pairings results in higher yields. You can plant quick-growing herbs like cilantro in between slower-growing perennial herbs.
– Pollination – Grouping flowering herbs like borage together can help attract beneficial pollinators to your whole garden.
Best Herb Companion Plantings
Some classic herb companion pairings perfectly suited for small urban gardens include:
– Basil & tomatoes – Enhances flavor and growth in both plants. Deters pests like aphids and mosquitoes.
– Chives & carrots – Chives help deter carrot flies and boost carrot growth.
– Cilantro & lettuces – Cilantro bolsters lettuce growth while lettuces provide shade for lower-lying cilantro.
– Dill & cucumbers – Dill attracts predatory wasps that protect cucumber plants from pests. Both plants benefit from abundant pollination.
– Oregano & cabbage – Oregano deters cabbage moths, while cabbage provides ground cover retaining soil moisture for oregano.
– Thyme & broccoli – Thyme drives away cabbage worms, a common broccoli pest.
Mix and Match Herbs for Efficient Planting
When space is extremely limited, get creative by intermixing quick-growing annual herbs among slower-growing perennial herbs. For example, plant a thyme or rosemary bush alongside smaller pots of basil, cilantro and dill that can be rotated seasonally. You can refresh pots with new seedlings while mature herbs remain in place.
Consider height pairing tall vertical herbs like dill and fennel with low-spreading herbs like thyme to utilize both vertical and horizontal space. Just ensure taller plants don’t block sunlight from shorter herbs.
Also evaluate paired herbs based on their watering needs, sunlight requirements and ripening rates to avoid one herb’s growth inhibiting its neighbor. But don’t overthink it too much – most herbs are agreeable companions!
DIY Vertical Herb Tower
One fun way to maximize every inch is creating your own vertical “herb tower” using recycled materials. This allows you to grow different companion herbs in stacked pots with minimal horizontal space required.
See our “DIY Vertical Herb Garden Ideas” section for step-by-step instructions to build a 5-gallon bucket herb tower perfect for porches, patios or tiny yards. Mix and match companion herbs like parsley, basil and chives in each bucket opening. Place taller central towers beside lower satellite towers to utilize all available vertical space as your herbs grow.
Get Creative with Companions
When planning a small-space herb garden, mimic natural plant ecosystems by growing herbs in symbiotic partnerships. Clever companion planting allows you to boost flavors, deter pests, improve pollination and protect herbs naturally – while maximizing productivity from every square inch!
For more tips on great herb companions, essential gardening techniques for urban spaces, and creative DIY herb garden ideas, keep reading our series “Maximize Your Space: Tips for Urban Herb Gardening”.
Regrow Kitchen Scraps for Free Herbs
Rather than throwing away herb scraps and stems, you can actually regrow them to enjoy a continuous harvest of free herbs, right in your kitchen. Regrowing herbs from scraps is an easy way to maximize your space for urban herb gardening.
The best herb scraps to regrow include basil, mint, oregano, thyme, sage, rosemary, cilantro, and parsley. With just a small start from leftover stems or roots, you can grow these herbs for free.
Getting Started Regrowing Herb Scraps
Before you begin, make sure you select healthy herb stems or roots as your starter plants. Avoid any brown, mushy, or slimy pieces, as these likely will not regrow. The best pieces to select are stems with multiple leaf nodes or healthy roots attached.
You will also need containers, soil, and water. Small jars or pots work well for regrowing herb scraps. Be sure the containers have drainage holes. A good multipurpose potting mix will provide the nutrients your regrown herb scraps need. And of course, water is essential.
How to Regrow Basil from Cuttings
The easiest herb to regrow from scraps is basil. Simply place a basil stem with several leaf nodes into a jar of water. Leave the top leaves above water and change the water every few days. New roots will begin emerging in just a few days and you can transplant your regrown basil start into soil after about 2 weeks.
Alternatively, you can place basil cuttings directly into soil. The stems will begin generating new roots and grow into full basil plants you can continually harvest.
Regrowing Mint from Cuttings or Stems
Mint is a versatile herb perfect for regrowing, as it propagates easily. Place mint cuttings or stems in water or directly into potting mix and new roots will begin to grow quickly. To regrow mint in water, suspend stems so the lower half sits in water. Transfer your regrown mint plantlets into soil once a dense root system develops.
When regrowing mint in soil, bury stems just deep enough so the top leaves are exposed. As your mint grows, transplant regrown mint plants into separate containers to prevent mint from spreading where unwanted.
How to Regrow Oregano from Stem Cuttings
With its pungent, zesty flavor, homegrown oregano adds flavorful punch to many dishes. To regrow oregano from scraps, trim 3-4 inches off the bottom of a healthy oregano stem. Remove the lower leaves and plant the stem in sterile potting mix.
Keep the soil consistently moist and new roots and leaves will begin growing within 1-2 weeks. Once established, cut back your regrown oregano to encourage bushy growth. Use leaves as needed and this regrown oregano will continue producing more flavorful foliage you can enjoy harvesting.
Regrow Cilantro from Roots and Cuttings
Cilantro is another herb that regrows readily from scraps. To regrow cilantro from roots, place washed root ends in a shallow container of water. New leaves will begin to sprout within a week. When the regrown root cuttings have a well-developed set of new leaves, plant them in potting mix, water well and place in a sunny window.
You can also regrow cilantro from the cut off bottoms of bunches. Simply place the rooted end in a jar of water, changing the water every few days. Transplant into soil when new top growth is 4-6 inches tall. Your regrown cilantro is now ready for harvesting.
Regrow Thyme from Cuttings
The woody stems of thyme make it an ideal herb for regrowing. Take 2-4 inch cuttings from the tips of thyme stems that have new growth. Remove the lower leaves and place into sterile seed starting mix. Water lightly and cover with plastic to maintain humidity while they develop roots.
Within 2-3 weeks, you’ll have new regrown thyme starters to transplant. This method propagates new thyme plants efficiently while maximizing your existing thyme.
Regrow Sage from Seed
With its soft gray green foliage, garden sage imparts a distinctive flavor and aroma perfect for regrowing from scraps. To regrow sage, allow a few sage flowers to remain on the plant as they finish flowering. Seed pods will begin swelling as seeds develop inside.
Collect the dry seed pods when they turn brown, then break them open to gather the small black sage seeds. Sow seeds about 1⁄4 inch deep in sterile potting soil. Cover lightly with plastic until sprouts emerge. Transplant seedlings when they are few inches tall. Nurture your regrown sage plant through its first winter indoors. The following spring it will be ready for outdoor planting.
Regrow Ginger from Rhizomes
Ginger is a tropical plant, so regrowing it indoors from scraps allows you to enjoy fresh ginger year-round. Select plump ginger rhizomes from mature gingerroot, ideally with visible “eyes” or growth buds. Break ginger pieces off so each piece has 1-2 growth buds.
Soak pieces in water overnight before planting to hydrate them. Bury ginger rhizomes just beneath the soil with growth buds facing up. Keep soil evenly moist and provide plenty of light. New ginger shoots will emerge in just a few weeks.
DIY Kitchen Scraps Herb Garden
If you enjoy regrowing herbs from scraps, consider making your own DIY vertical kitchen scraps garden for an ongoing supply of homegrown herbs.
Simply mount a wooden pallet or wire panels on a sunny wall or fence. Use jars attached with zip ties or screws to create your vertical herb garden. Label your jars by herb type and fill partway with potting mix. Insert herb cuttings or roots, keep them watered, and watch your kitchen scraps transform into a living herb garden.
Regrowing herbs from kitchen scraps is an easy way to maximize space while enjoying an abundance of garden-fresh herbs. With a little time and effort, you can create your own indoor herb garden using clippings and cuttings that otherwise would have been discarded.
DIY Vertical Herb Garden Ideas
If you’re tight on space but want to grow herbs at home, consider creating a vertical herb garden! Vertical gardens allow you to maximize your precious little square footage by using the vertical dimension. With a bit of creativity and DIY spirit, you can craft customized vertical herb gardens to beautify your home and provide a bountiful harvest of herbs.
Wall-Mounted Herb Garden
One of the easiest vertical herb garden projects is a simple wall-mounted design. All it requires is a wooden pallet or a framed structure affixed to any vertical surface. Screw in galvanized steel hooks across the width of the pallet. Then, hang lightweight plastic or terracotta pots filled with potting mix and herbs plants of your choice from the hooks. For proper growth, place the wall-mounted herb garden in a spot that receives at least 6 hours of direct sunlight daily.
Repurposed Ladder Herb Garden
Give an old wooden ladder new life by transforming it into a vertical herb garden! Secure the ladder horizontally onto a sunny wall. Drill holes into each rung and insert galvanized steel hooks. Hang small to medium herb pots on the hooks, spacing them out evenly for proper airflow and light penetration to the plants. You can also affix wooden crates or mesh pockets onto the ladder rungs to hold potted herbs or to use as planting beds.
Hanging Shoe Organizer
Another clever vertical gardening idea for herbs is to use hanging shoe organizers. Canvas shoe organizers with multiple pockets are perfect for holding small herb pots. Hang one or more in a bright, sunny spot and simply tuck herb plants in pots into each pocket. The pockets support the pots and allow excellent drainage and airflow around the roots.
Rain Gutters Into Planters
Here’s an innovative way to recycle old rain gutters – transform them into vertical herb planters! Cut the rain gutters to desired lengths. Screw in galvanized steel hooks across the back for mounting. You can either hang small plastic herb pots from the hooks or create planting beds directly inside the gutters using drainage materials and potting soil. Mount your rain gutter herb planters on sunny walls or fences.
Plastic Bottles or Tubes
Reuse and recycle plastic bottles, tubes, and pipes by converting them into vertical herb gardens. Cut holes that are slightly smaller than the diameter of herb seedlings’ root balls along the bottles. Insert seedlings directly into the holes, spacing them out evenly to allow light and air circulation all around. Fill bottles with good potting mix. Water from the top opening of the bottles. Hang them along fences or balcony railings in optimal sun.
PVC Pipes
For another easy vertical garden, simply use PVC pipes! Cut varying lengths of 4-inch diameter PVC pipes. Drill drainage holes along the base. Cap off the bottom of the pipes and create plant holes along the sides. Fill pipes partway with potting mix and insert young herb plants into holes, packing soil around the roots. Mount pipes vertically on walls or fences and water adequately.
No matter which vertical herb garden design you ultimately choose, the key is maximizing sunlight exposure and providing the proper soil quality and drainage for your herbs to thrive. Get creative with vertical spaces to produce bountiful harvests of herbs – even in the smallest urban home. With a bit of DIY spirit and these tips for maximizing space, you’ll have fresh herbs growing in your kitchen in no time!


No comment yet, add your voice below!